
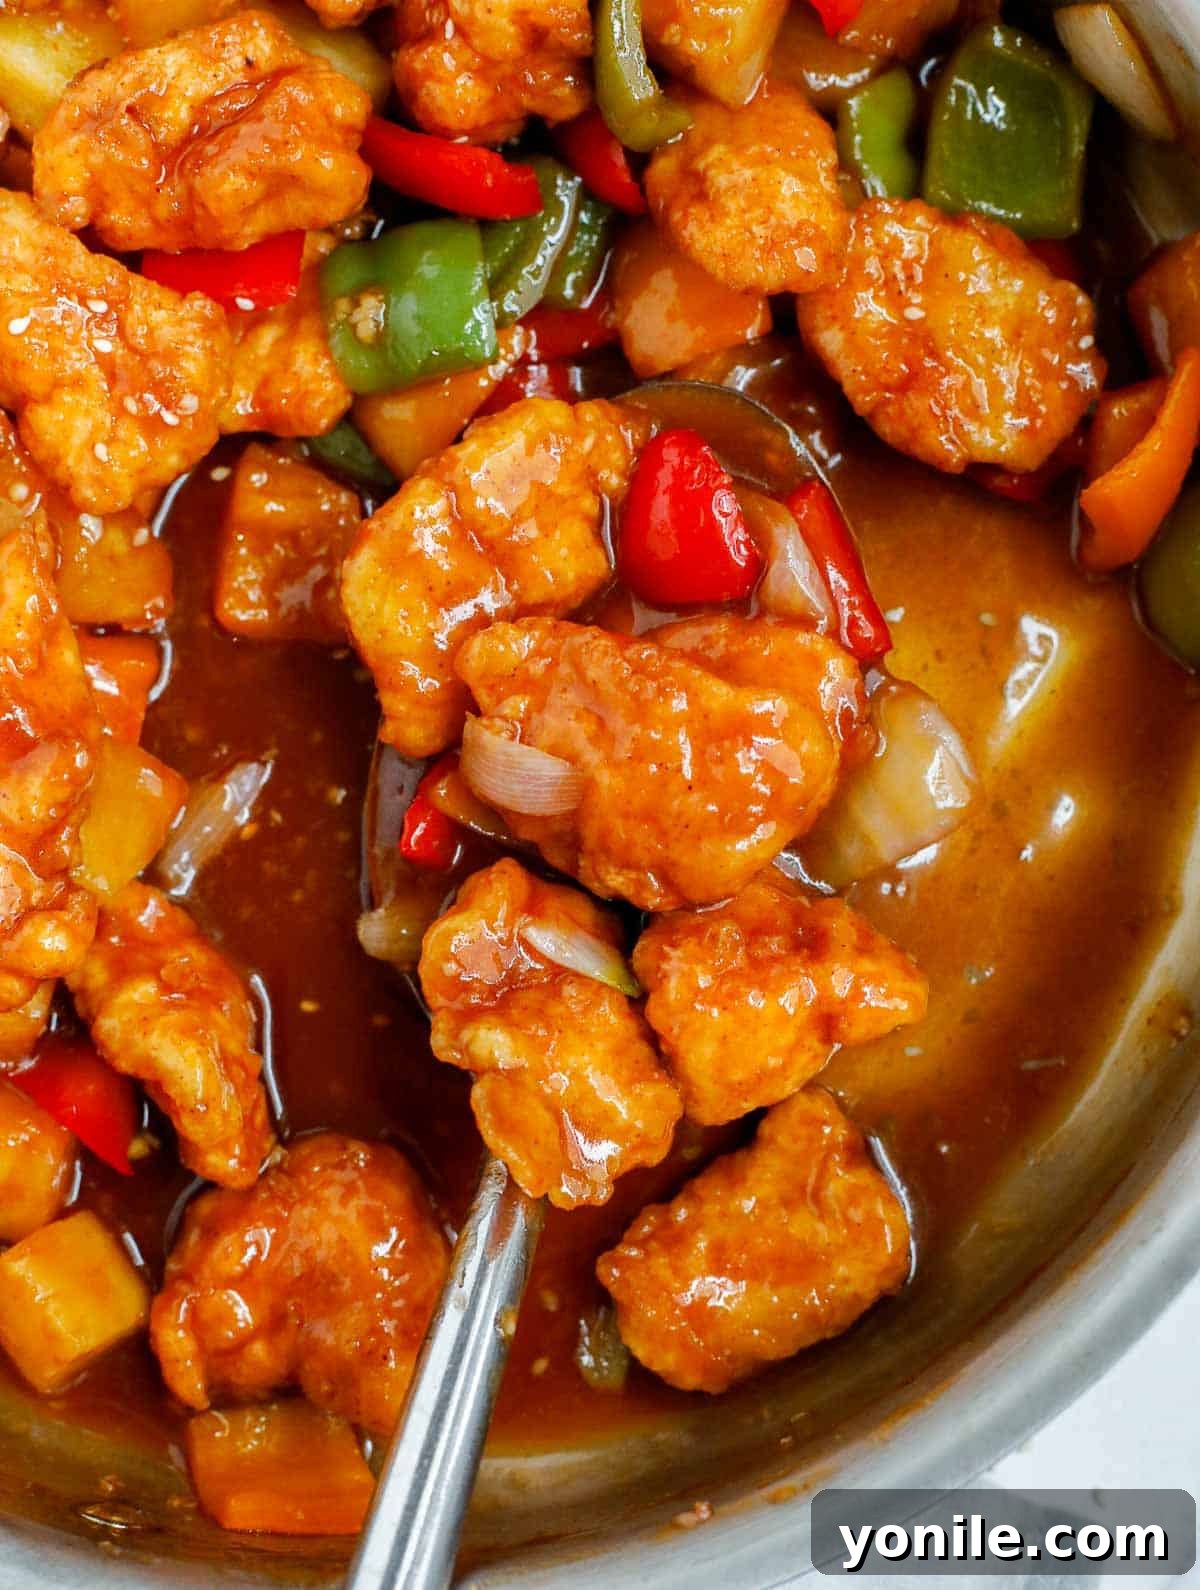
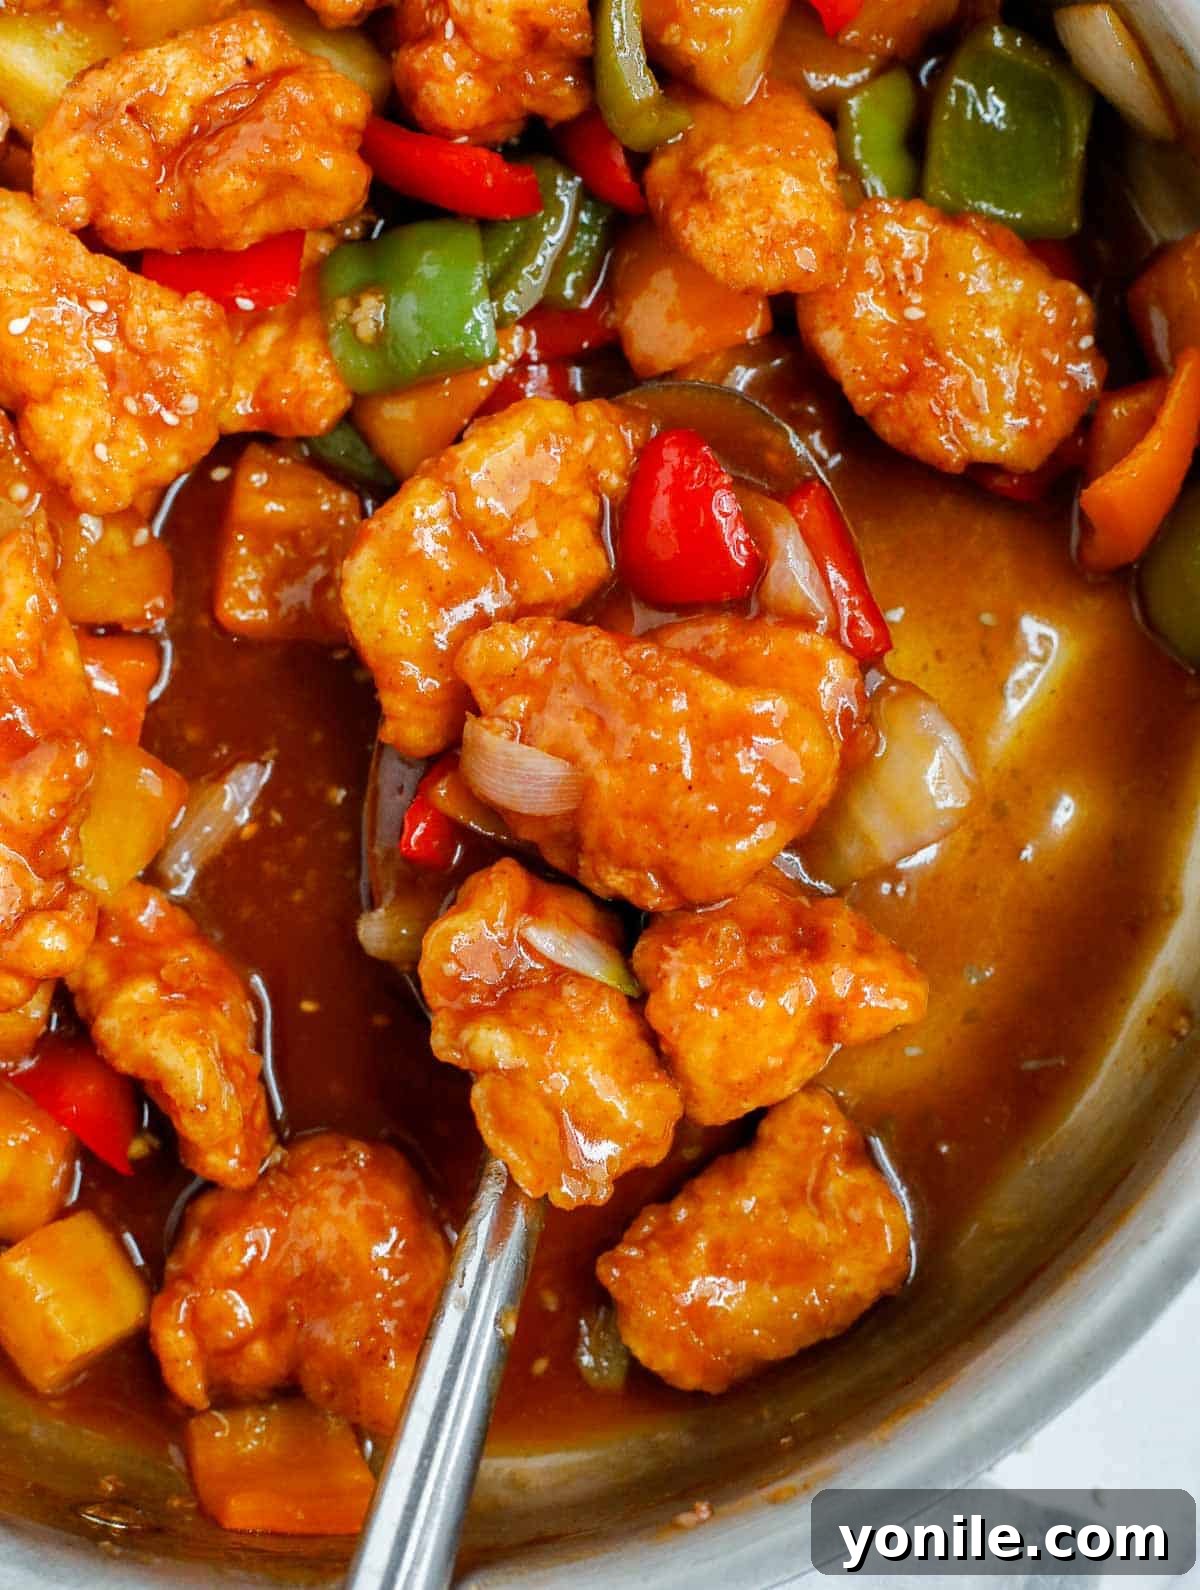
Unlock the secret to an irresistibly crispy, perfectly balanced Homemade Sweet and Sour Chicken right in your own kitchen! Forget the heavy, often artificially colored takeout versions and prepare to elevate your culinary skills with this incredibly flavorful and easy-to-follow recipe. This dish is a vibrant symphony of textures and tastes, featuring succulent chicken that’s delightfully crispy on the outside and wonderfully juicy within, all coated in a rich, authentic sweet and sour sauce. It’s generously loaded with colorful bell peppers, sweet onions, and tangy pineapple, promising a dining experience that truly rivals – and often surpasses – your favorite Chinese restaurant.
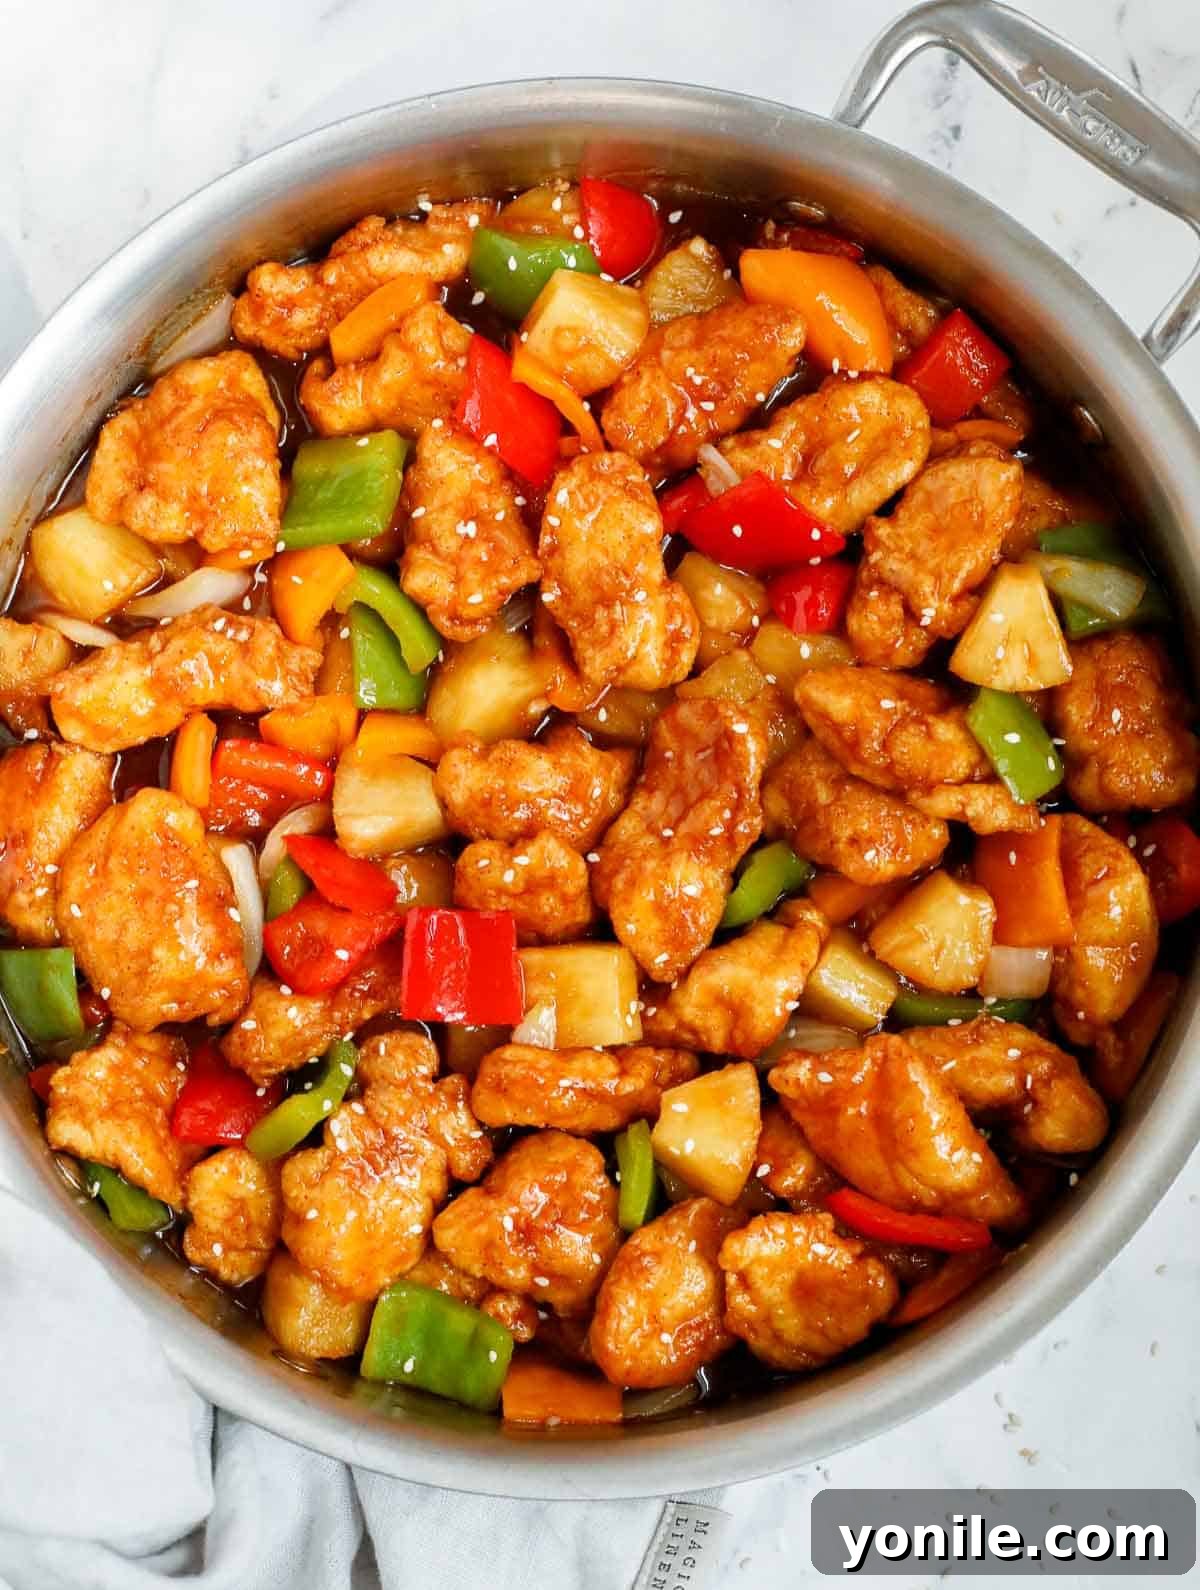
The magic of this recipe lies in its perfectly executed crispy chicken. Achieving that coveted crunch is key, and we’ll guide you through the simple steps to ensure your chicken is always golden brown and boasts an incredible texture. When paired with our homemade, flavor-packed sweet and sour sauce – devoid of any artificial dyes – and crisp, fresh vegetables, this dish transforms into a classic favorite you’ll be eager to add to your regular meal rotation. It’s not just a meal; it’s an experience that brings the joy of authentic Chinese cuisine directly to your dining table, making it an ideal choice for a weeknight dinner or a special family gathering.
If you’re a fan of crispy chicken, you’ll also adore my other creations like Baked Crispy Chicken Tenders, Korean Crispy Fried Chicken, or Crispy Chicken Bites. Each offers a unique spin on achieving that satisfying crunch!
Why This Homemade Sweet and Sour Chicken Will Become Your New Favorite
There are countless reasons to swap your takeout menu for this incredible homemade sweet and sour chicken recipe. It’s more than just a meal; it’s an opportunity to create culinary magic in your own kitchen with fresh ingredients and undeniable flavor. Here’s why you’ll absolutely fall in love with it:
- Authentic and Superior Flavor: This recipe delivers a sweet and sour sauce that genuinely tastes like it came from a high-end Chinese restaurant, but with an added advantage: no artificial red food dye. We focus on natural ingredients to create a vibrant, tangy, and sweet profile that is both complex and incredibly satisfying. You’ll taste the difference that fresh garlic, balanced vinegars, and quality ingredients make.
- Surprisingly Easy to Prepare: Don’t be intimidated by the idea of making a classic Chinese dish from scratch. While the ingredient list might seem a little extensive, each step is straightforward and quick. The process is broken down into manageable parts – preparing the chicken, mixing the sauce, and stir-frying the vegetables – making it a perfect project for home cooks of all skill levels. You’ll be amazed at how quickly this impressive dish comes together.
- Budget-Friendly and Customizable: Enjoying your favorite sweet and sour chicken shouldn’t break the bank. Making it at home significantly cuts down on costs compared to ordering takeout. Furthermore, this recipe offers incredible flexibility. You can easily adapt the vegetables to whatever you have on hand or what’s in season, making it an excellent way to use up produce and minimize food waste. Add carrots, snap peas, broccoli, or mushrooms for an even more diverse nutrient profile.
- Perfectly Crispy and Tender Chicken: The cornerstone of any great sweet and sour chicken is the texture of its chicken. Our method ensures each piece is coated in a light, crunchy breading that locks in moisture, resulting in chicken that’s wonderfully crisp on the outside and incredibly tender and juicy inside. This contrast in texture is what makes every bite so enjoyable.
- A Healthier Alternative: By preparing this dish at home, you gain complete control over the quality and quantity of ingredients. You can opt for low-sodium soy sauce, adjust sugar levels to your preference, and use fresh, high-quality cooking oils. This allows you to enjoy a beloved comfort food without the guilt often associated with restaurant versions.
Essential Sweet and Sour Chicken Ingredients
Crafting the perfect sweet and sour chicken requires a thoughtful selection of ingredients that balance flavor, texture, and visual appeal. Here’s a detailed look at what you’ll need to create this culinary masterpiece:
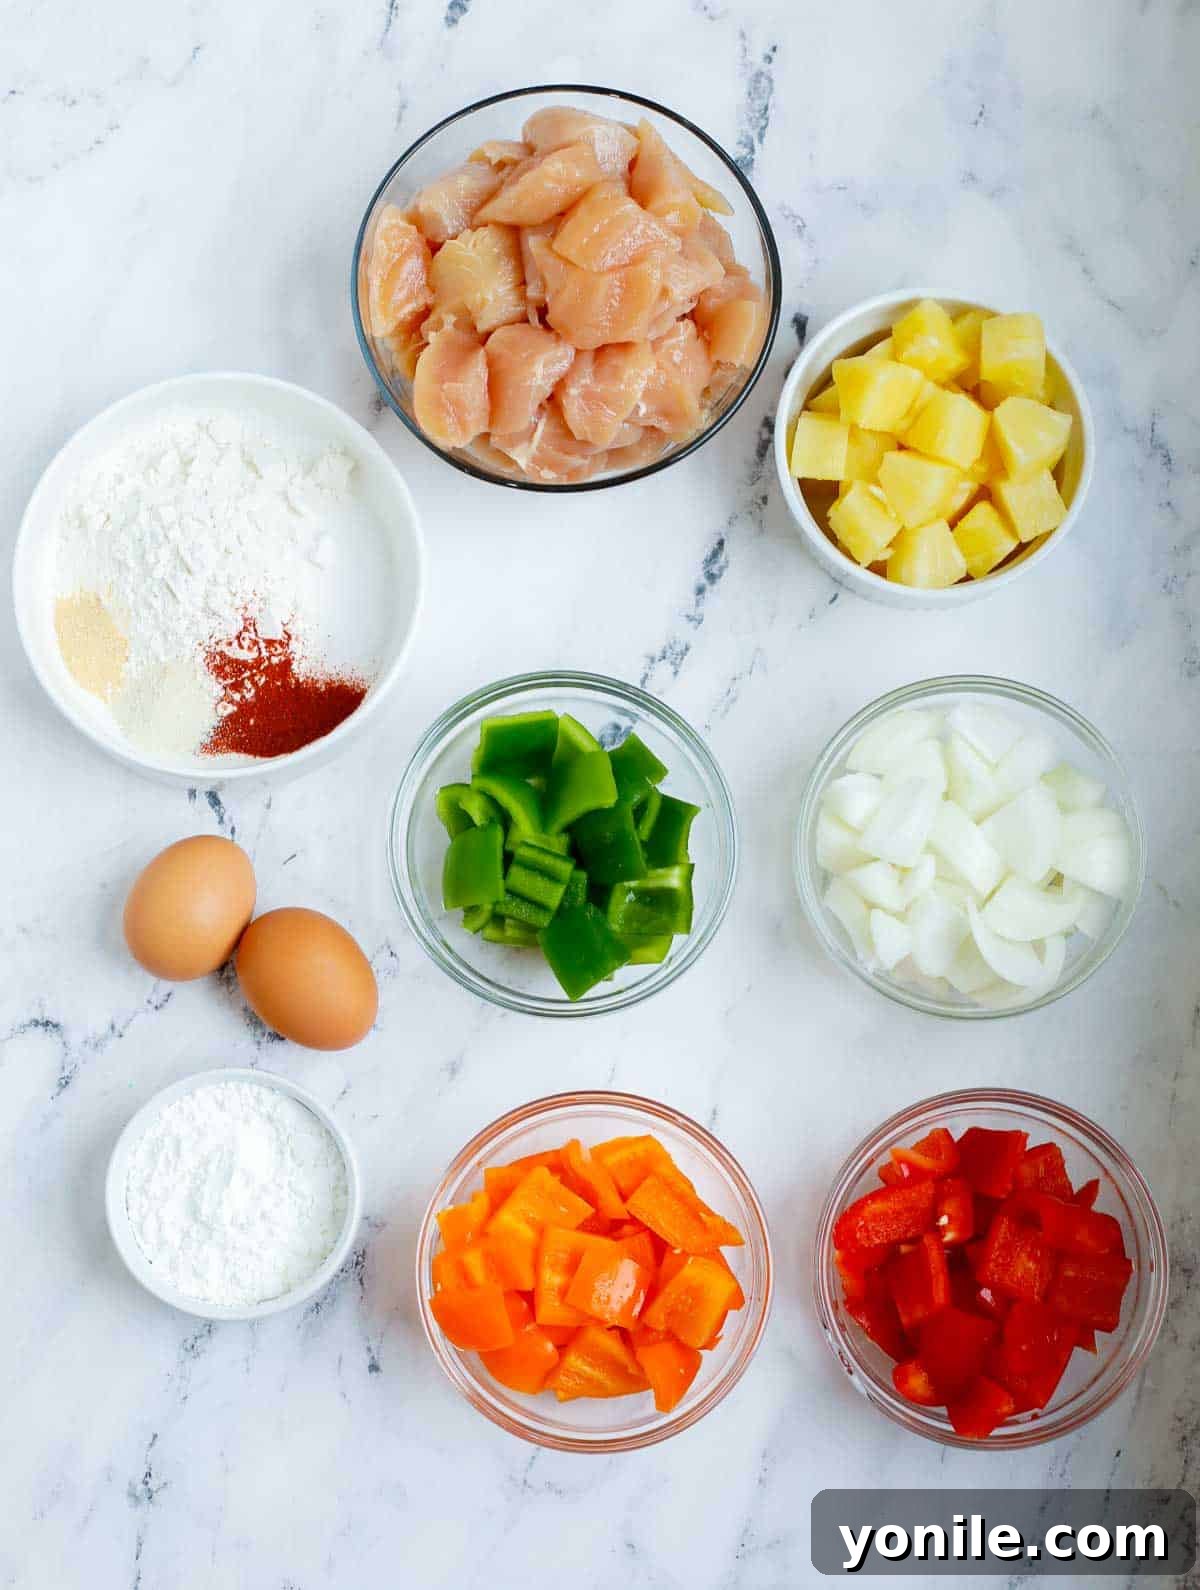
For the Crispy Chicken
- Chicken: Opt for 2 lbs of boneless, skinless chicken tenderloins or chicken breast. Cut them into uniform 1-inch cubes. Uniform pieces ensure even cooking and consistent texture.
- Corn Starch: Essential for the initial coating of the chicken. It helps create a thin, protective layer that will contribute to the ultimate crispiness and prevent the chicken from drying out during frying.
- Eggs: Two beaten room-temperature eggs form the “wet” component of our breading station. The egg wash helps the flour mixture adhere beautifully to the corn-starched chicken.
- All-Purpose Flour: About ½ cup, forming the bulk of the dry coating. For a gluten-free alternative, you can easily substitute with a good quality gluten-free all-purpose flour blend.
- Seasonings for Chicken Coating: A blend of 1 tsp onion powder, 1 tsp garlic powder, 1 tsp paprika, and ½ tsp salt will infuse the chicken with savory depth, complementing the sweet and sour sauce.
- Oil for Deep Frying: You’ll need a sufficient amount of neutral, high-smoke-point oil (like vegetable oil, canola oil, or peanut oil) for deep frying the chicken until golden and crispy.
For the Vibrant Vegetables & Pineapple
- Bell Pepper: A trio of 1 large red, 1 large orange, and 1 large green bell pepper, cubed, adds not only a beautiful spectrum of colors but also fresh, sweet, and slightly peppery notes, along with a satisfying crunch.
- Pineapple: 1 cup of canned pineapple chunks. Be sure to reserve ¼ cup of the juice from the can, as it’s a vital ingredient for our sweet and sour sauce! Canned pineapple offers consistent sweetness and convenience.
- Onion: 1 medium sweet onion, cut into chunks. It provides a foundational sweetness and aromatic depth to the stir-fry.
- Olive Oil (Light Tasting): 2 tablespoons of a light-tasting olive oil or another neutral oil (like canola or vegetable oil) are used for stir-frying the vegetables, allowing their natural flavors to shine.
- Sesame Seeds: A sprinkle of sesame seeds for garnishing adds a lovely nutty flavor and an elegant finishing touch to the dish.
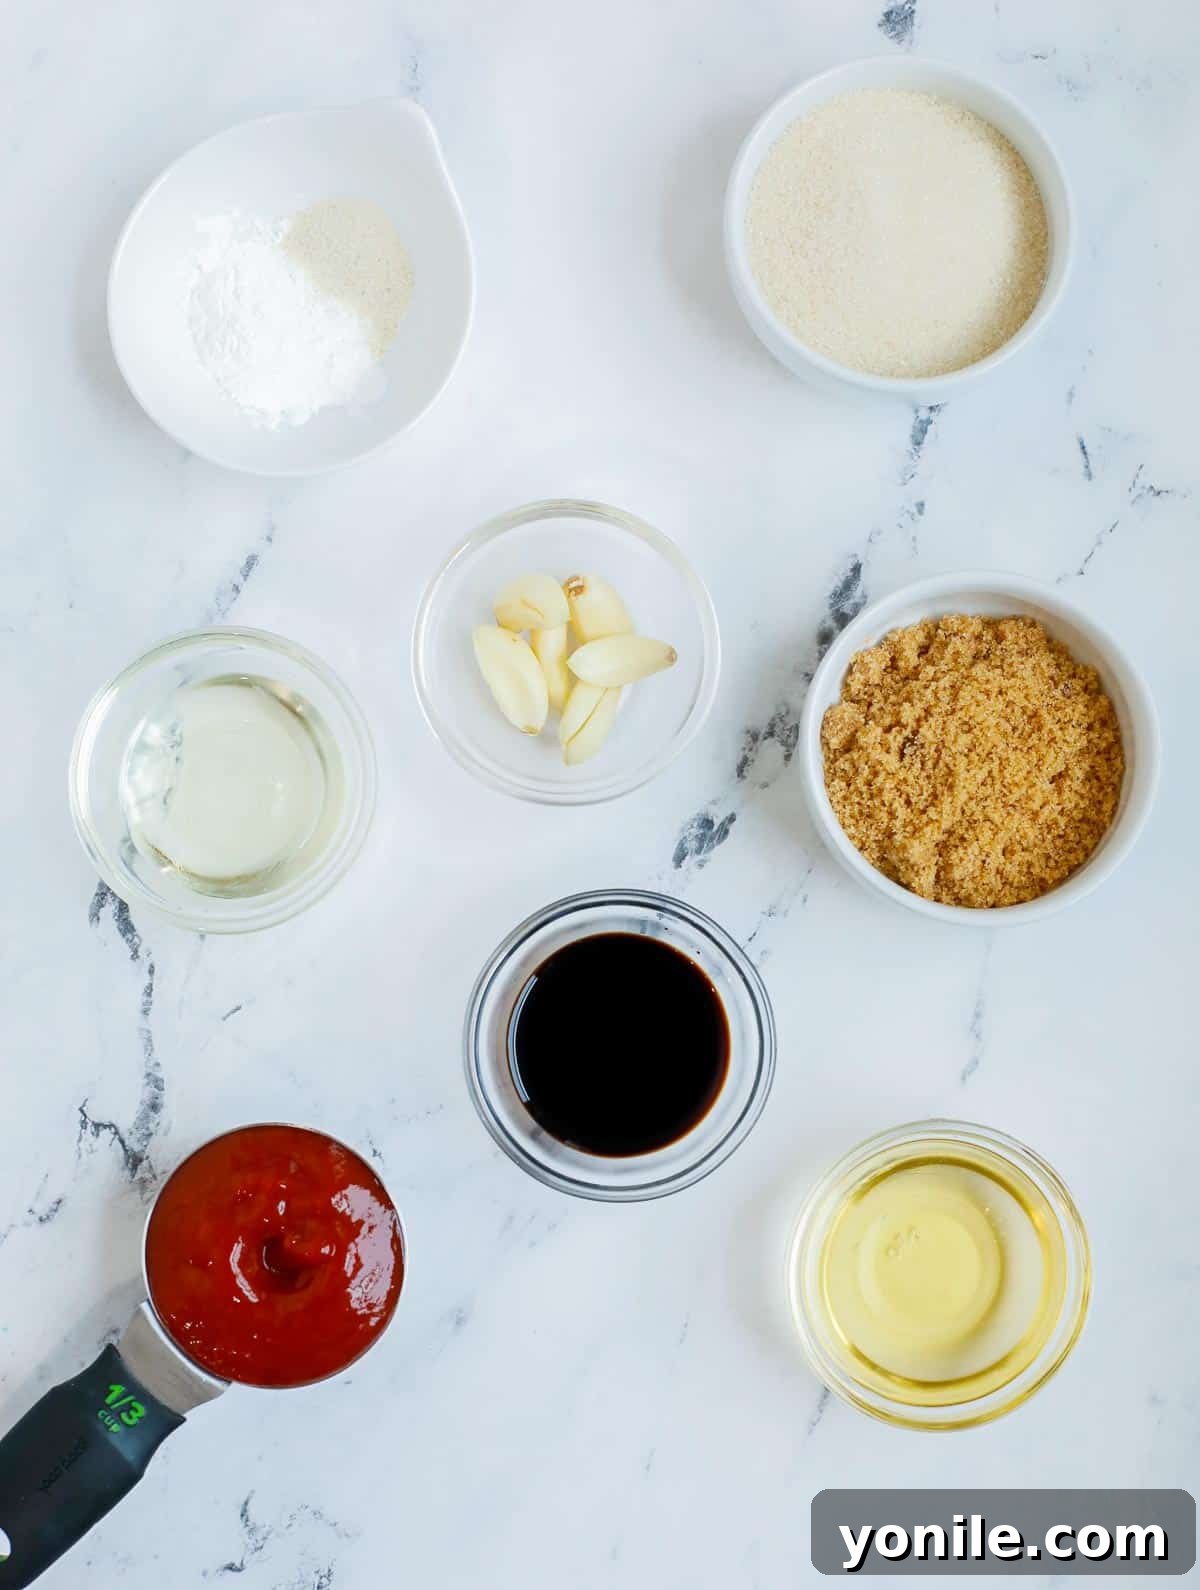
Crafting the Perfect Homemade Sweet and Sour Sauce
The sauce is the heart of this dish, bringing together all the elements with its signature tangy-sweet profile. This homemade version is vibrant and delicious, without any artificial colors.
- Ketchup: ⅓ cup forms the base, contributing a rich tomato flavor and a hint of sweetness. You can opt for low-sugar ketchup if you prefer to reduce the overall sugar content.
- Seasonings: 1 tsp onion powder and 3 large cloves of minced fresh garlic infuse the sauce with essential aromatic and savory notes, building a robust flavor foundation.
- Soy Sauce: 2 tablespoons of lite or low sodium soy sauce are crucial for umami and a savory depth. For dietary restrictions, gluten-free tamari or amino acids are excellent substitutes.
- Rice Vinegar: 3 tablespoons of rice vinegar offer that characteristic mild, sweet tang that defines sweet and sour cuisine. If rice vinegar is unavailable, white wine vinegar or apple cider vinegar can be used as alternatives, though they may slightly alter the flavor profile.
- Corn Starch: 1½ tablespoons of corn starch are the secret to achieving the perfect glossy, thickened consistency for the sauce, ensuring it beautifully coats every piece of chicken and vegetable.
- Sugar: A combination of 2 tablespoons of light brown sugar and ¼ cup of granulated sugar creates the ideal sweet balance, complementing the tanginess of the vinegar and pineapple.
- Pineapple Juice: ¼ cup, reserved from the canned pineapple chunks, adds a fruity sweetness and acidity, enhancing the overall tropical flavor of the sauce.
- Neutral Oil: 1 tablespoon of neutral oil (like vegetable or canola) to start the sauce, helping to bloom the aromatics.
Step-by-Step: How To Make Homemade Sweet and Sour Chicken
Follow these easy steps to bring this sensational sweet and sour chicken dish to life in your kitchen. Precision and proper preparation are key to achieving that perfect restaurant-quality taste and texture.
- Prepare Your Equipment and Oil: Begin by pouring your chosen neutral oil into a large, deep pan or Dutch oven, ensuring there’s enough oil for deep frying. Preheat the oil over medium heat. Aim for a temperature around 350-375°F (175-190°C) for optimal frying.
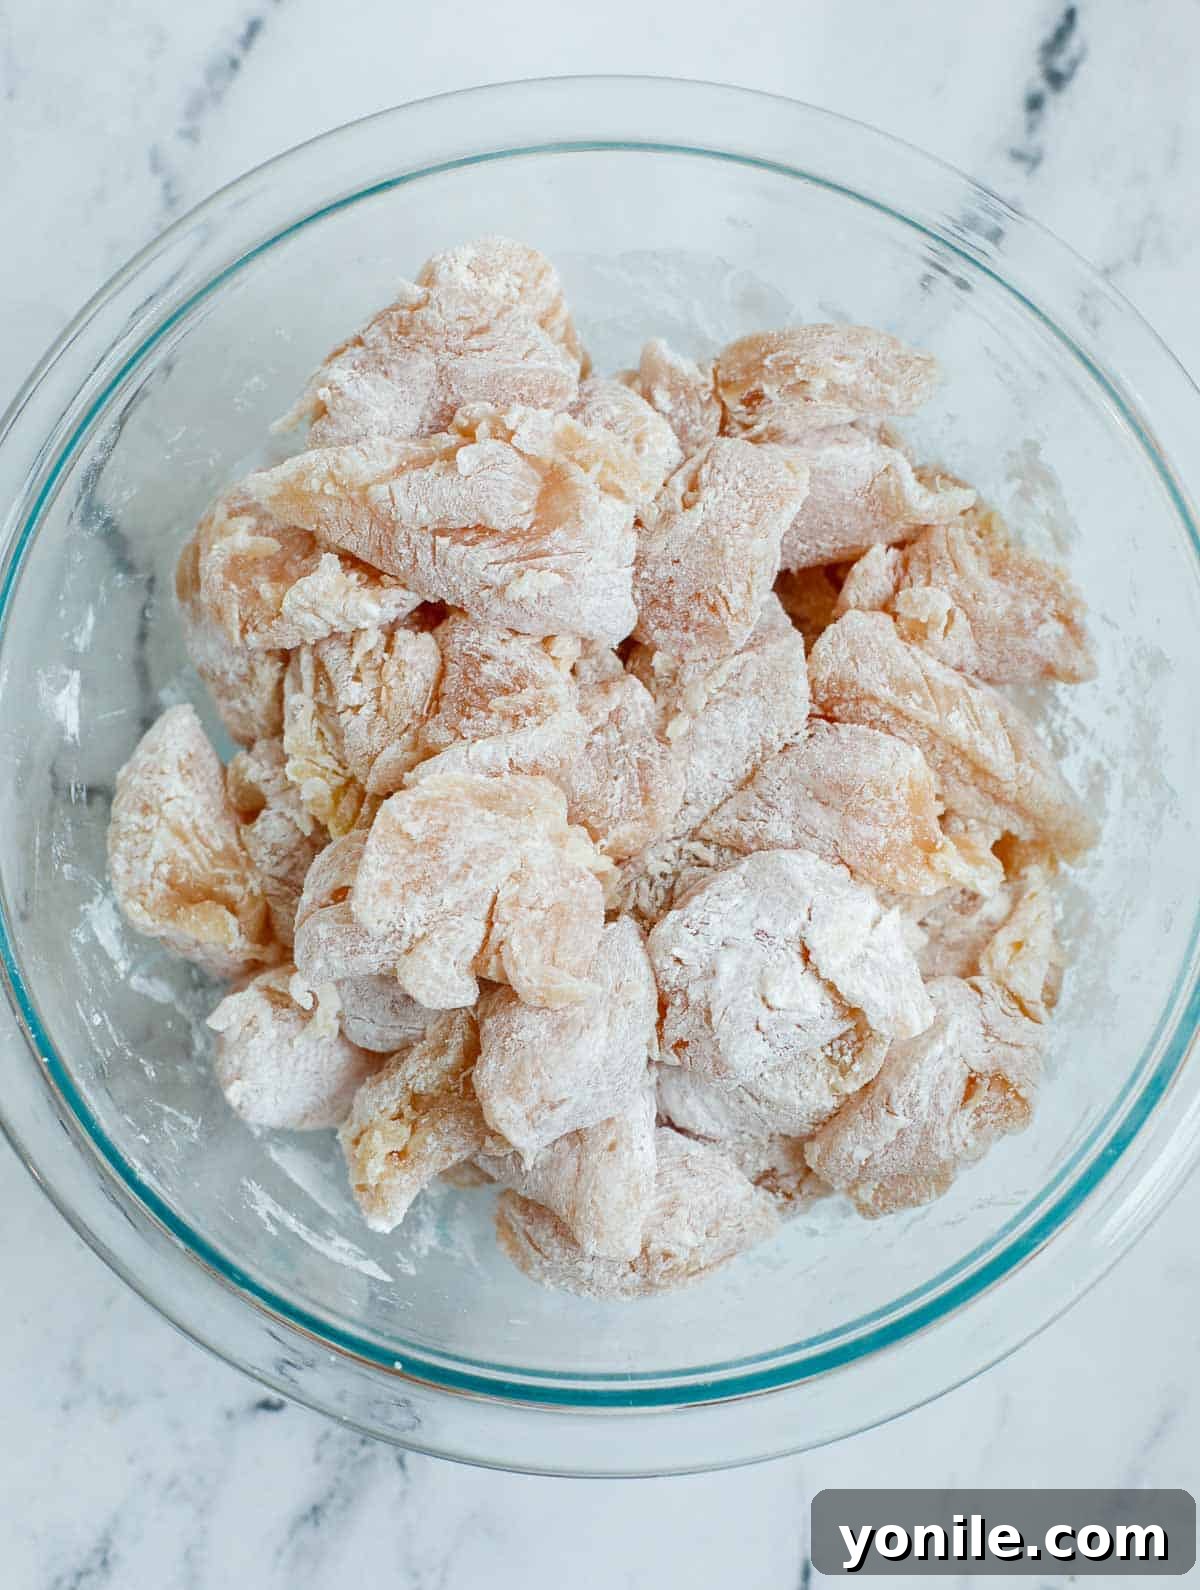
- Prepare the Chicken: Pat the chicken tenderloins thoroughly dry with paper towels to ensure a crispy coating. Cut them into uniform 1-inch cubes. Transfer the cubed chicken to a bowl, add ⅓ cup of corn starch, and toss well until each piece is lightly and evenly coated. Set this aside.
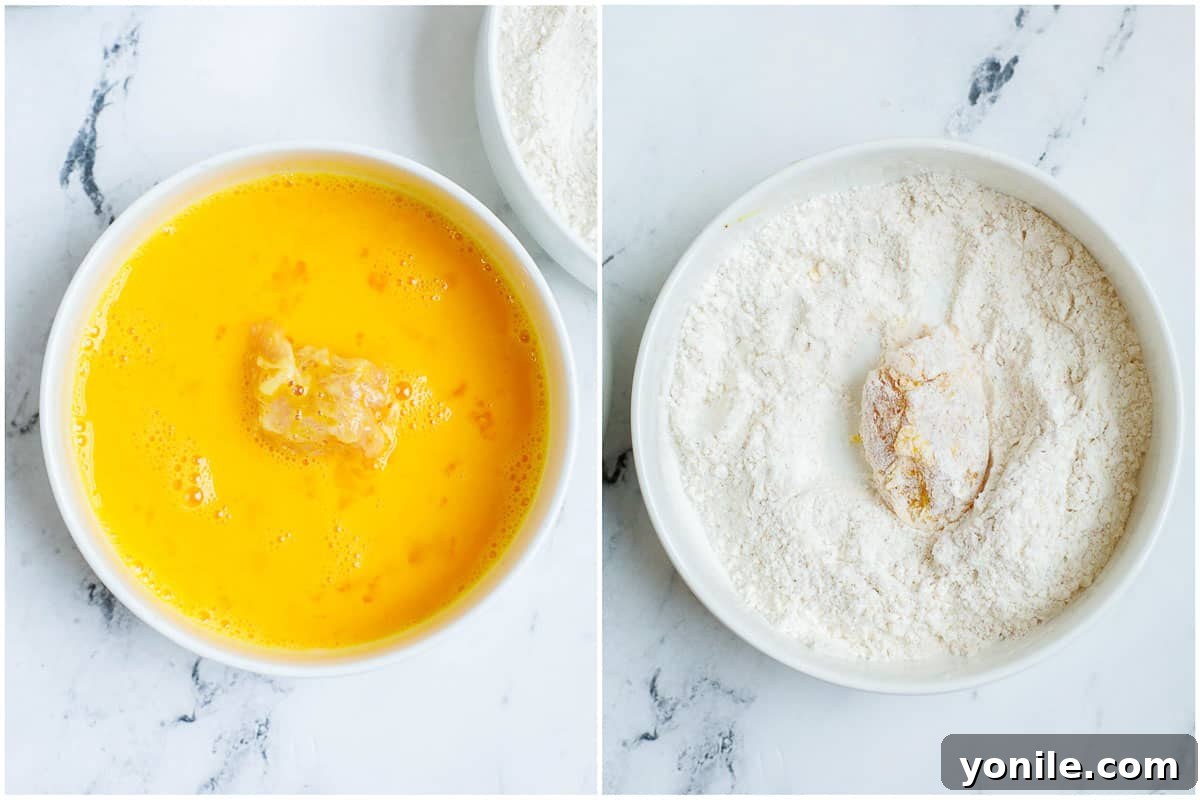
- Set Up Dredging Stations: Arrange two separate small bowls. In the first bowl, beat the 2 room-temperature eggs until smooth. In the second bowl, combine the ½ cup all-purpose flour with the chicken flour coating seasonings: 1 tsp onion powder, 1 tsp garlic powder, 1 tsp paprika, and ½ tsp salt. Mix these dry ingredients thoroughly.
- Coat the Chicken: Take one piece of corn-starched chicken, dip it completely into the beaten egg bath, allowing any excess to drip off. Then, transfer it to the dry flour coating mix, ensuring it’s fully covered. Gently press the flour mixture onto the chicken for a good adhesion. Place the coated piece on a wire cookie rack to rest while you repeat this process for all remaining chicken pieces. This resting time helps the coating set.
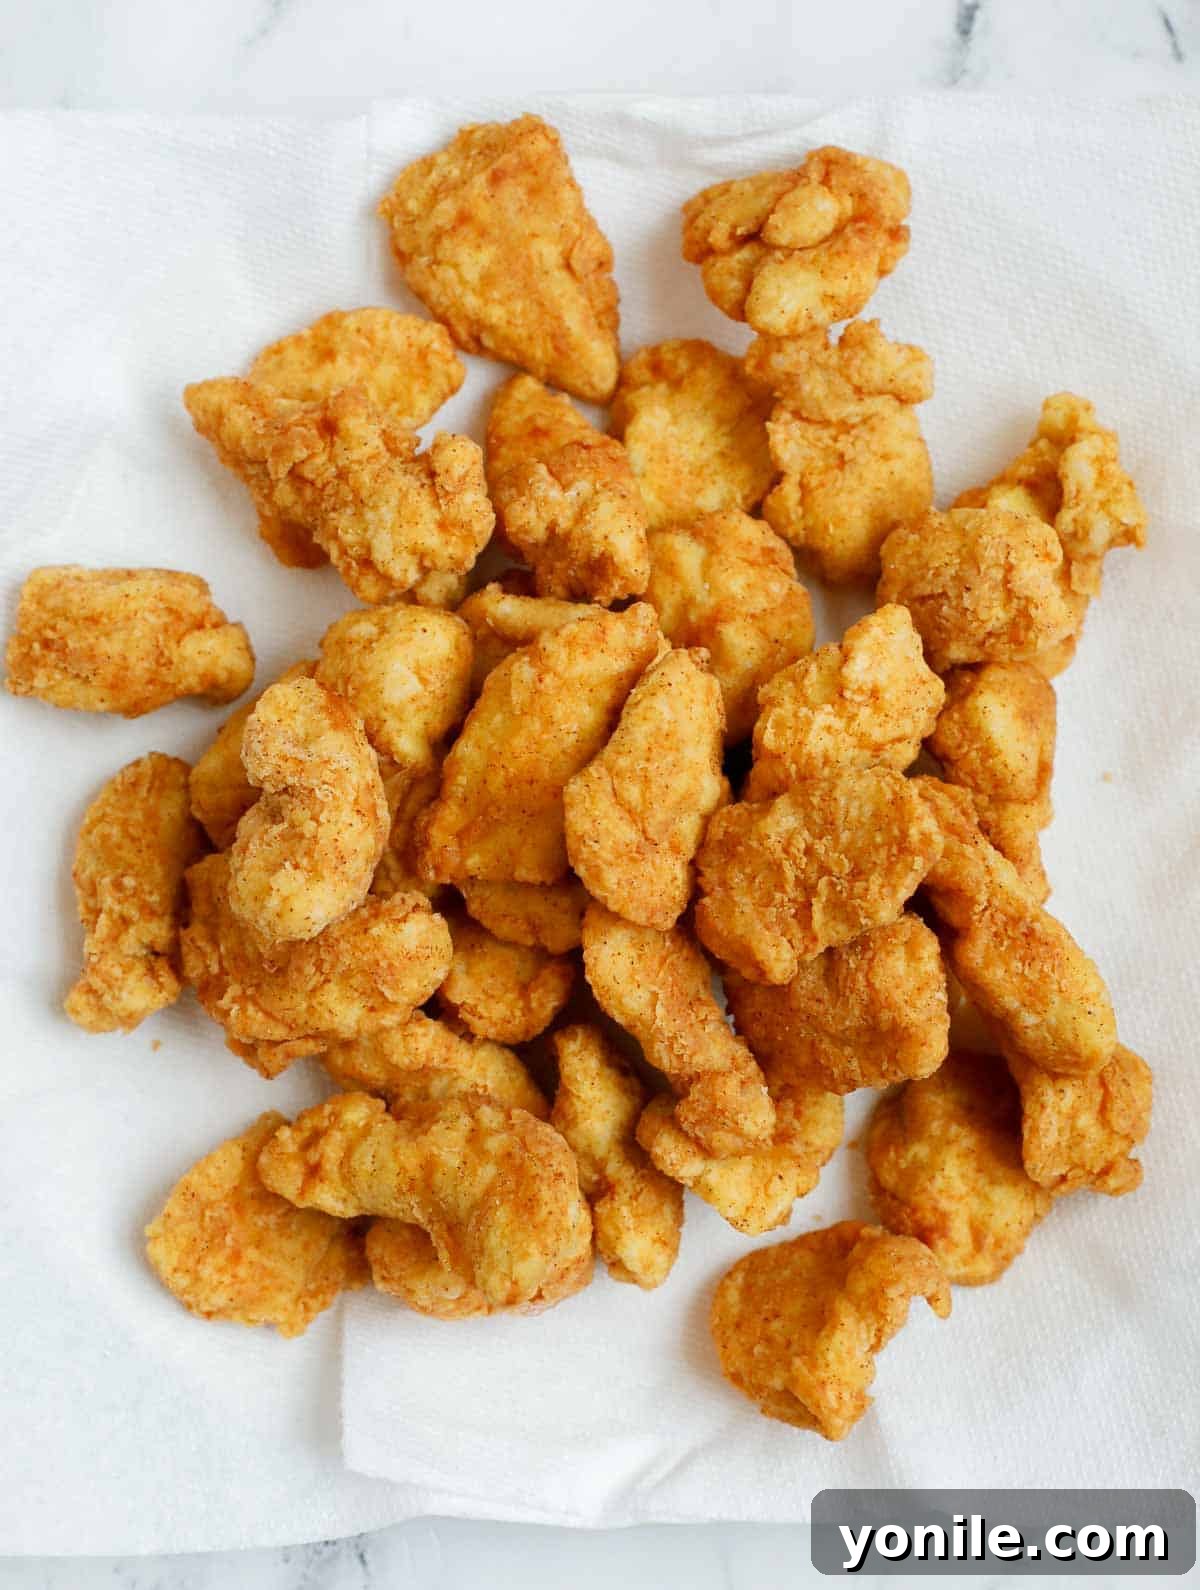
- Fry the Chicken: Carefully lower the breaded chicken pieces into the preheated oil. Fry for approximately 5-7 minutes, or until the chicken is beautifully golden brown and crispy, and cooked through. It’s crucial not to overcrowd the pan, as this can lower the oil temperature and result in soggy chicken. If necessary, fry the chicken in two or more batches. Once fried, remove the chicken with a slotted spoon or spider and place it on a plate lined with paper towels to drain excess oil. Set aside.
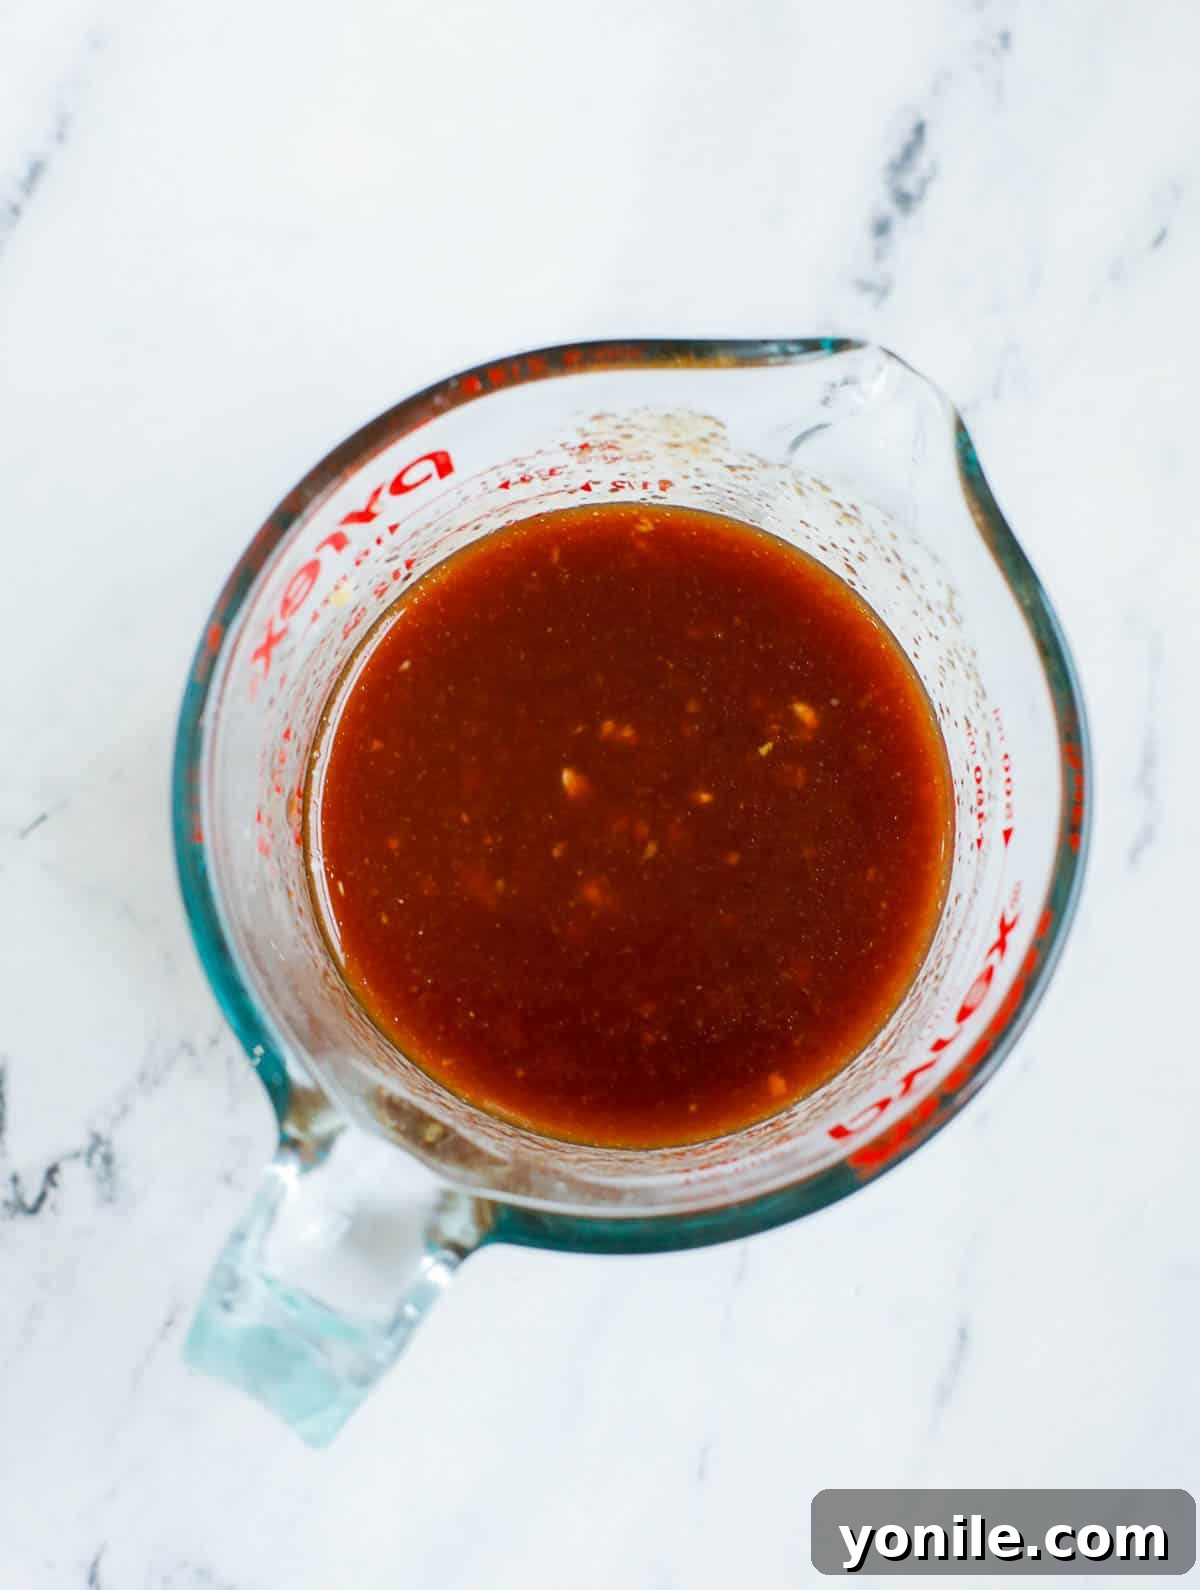
- Prepare the Sweet and Sour Sauce: In a medium bowl or large measuring cup, combine all the sweet and sour sauce ingredients: ⅓ cup ketchup, 1 tsp onion powder, 2 tbsps lite soy sauce, 3 tbsps rice vinegar, 3 minced garlic cloves, 1½ tbsp corn starch, 2 tbsps light brown sugar, ¼ cup granulated sugar, ¼ cup reserved pineapple juice, and 1 tbsp neutral oil. Whisk until all ingredients are well combined and the corn starch has dissolved, ensuring no lumps.
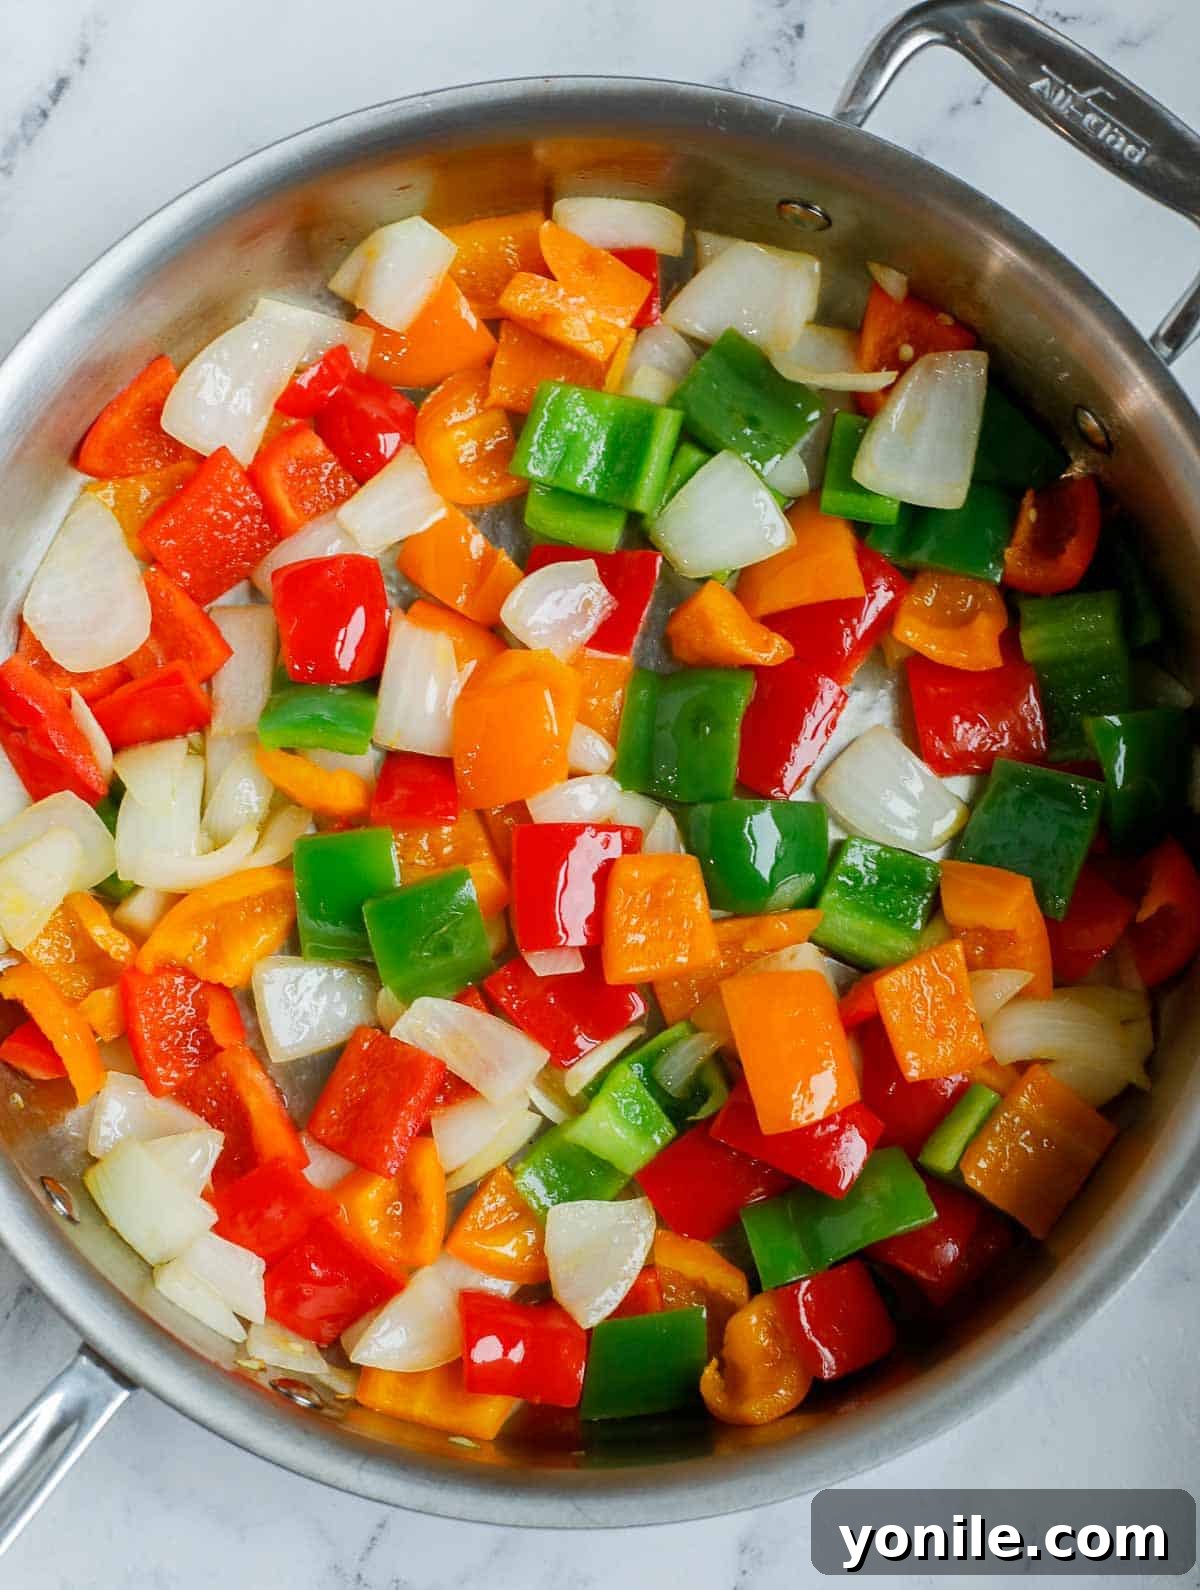
- Stir-Fry the Vegetables: Heat a separate large pan or wok over medium heat and add 2 tablespoons of light-tasting olive oil. Add the cubed bell peppers and sweet onion (but not the pineapple yet). Stir-fry for about 3-4 minutes, or until the vegetables are tender-crisp, retaining a slight bite. Remove the stir-fried veggies from the pan and set them aside.
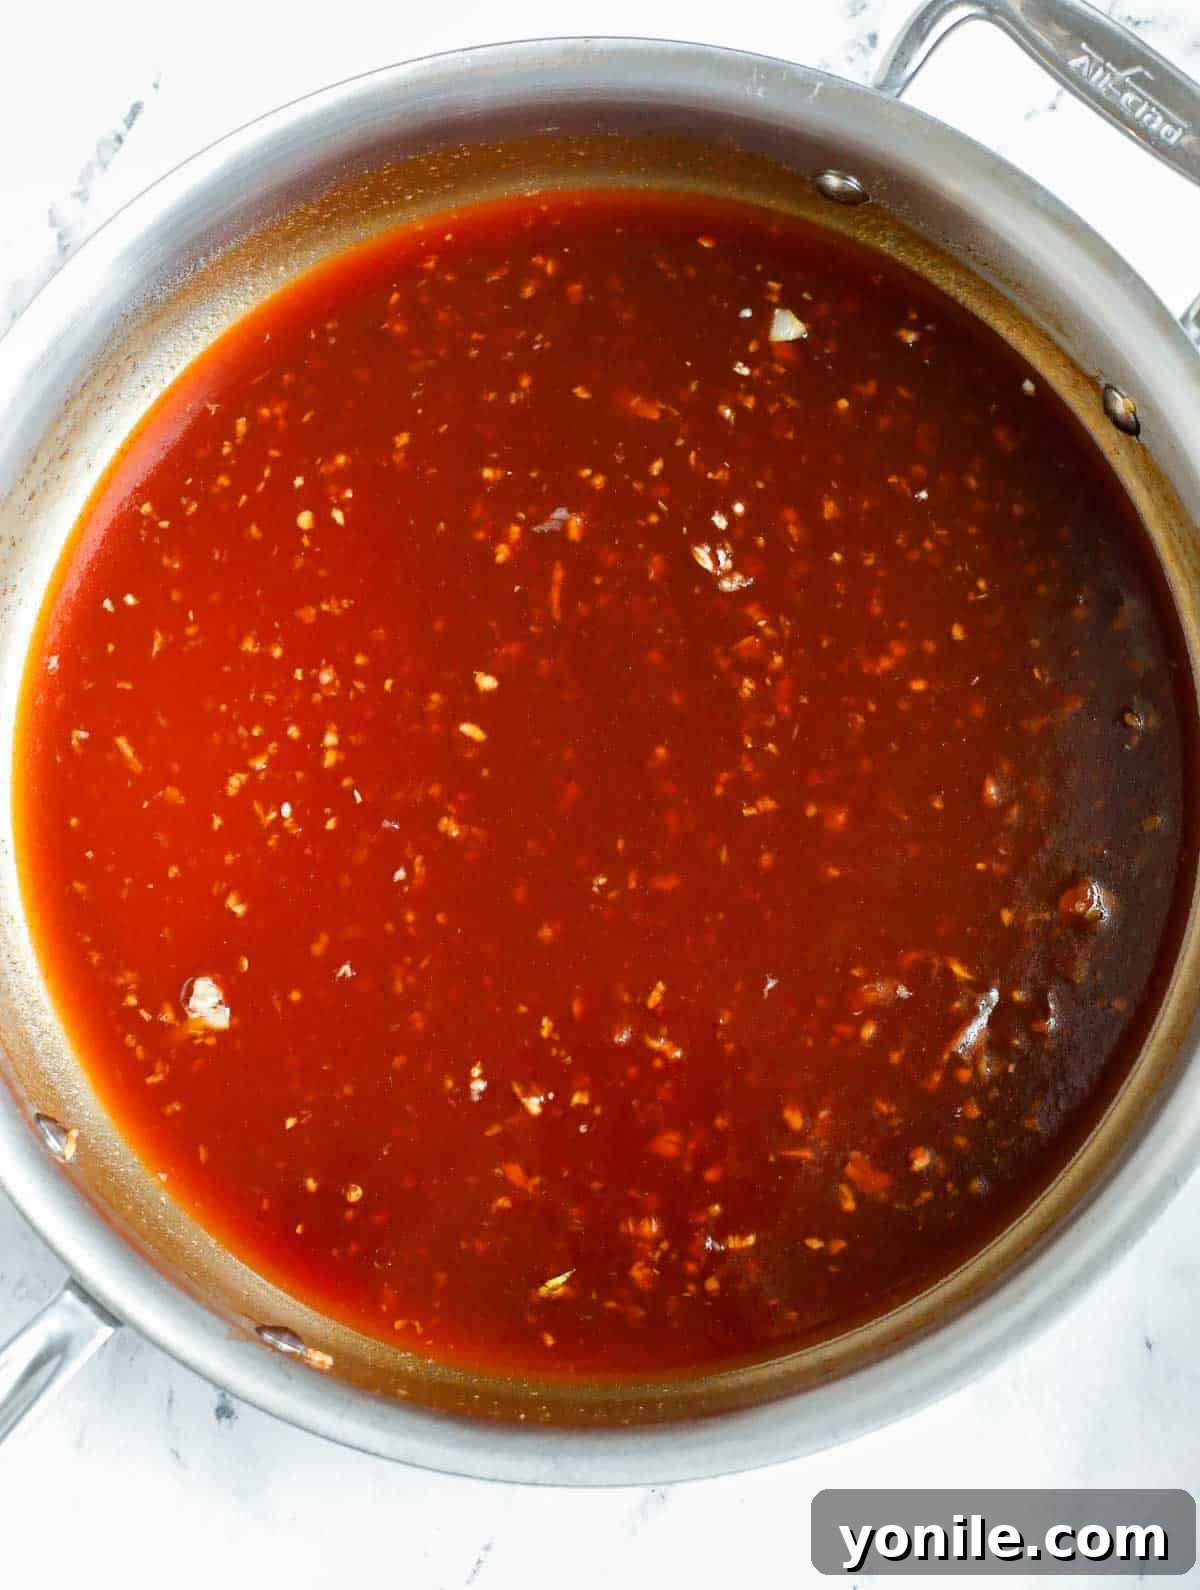
- Thicken the Sauce: Using the same pan where you stir-fried the vegetables, pour in the prepared sweet and sour sauce mixture. Simmer over medium-low heat, stirring constantly with a whisk. The sauce will gradually thicken and become glossy, usually within 2-3 minutes. Continue stirring until it reaches your desired consistency.
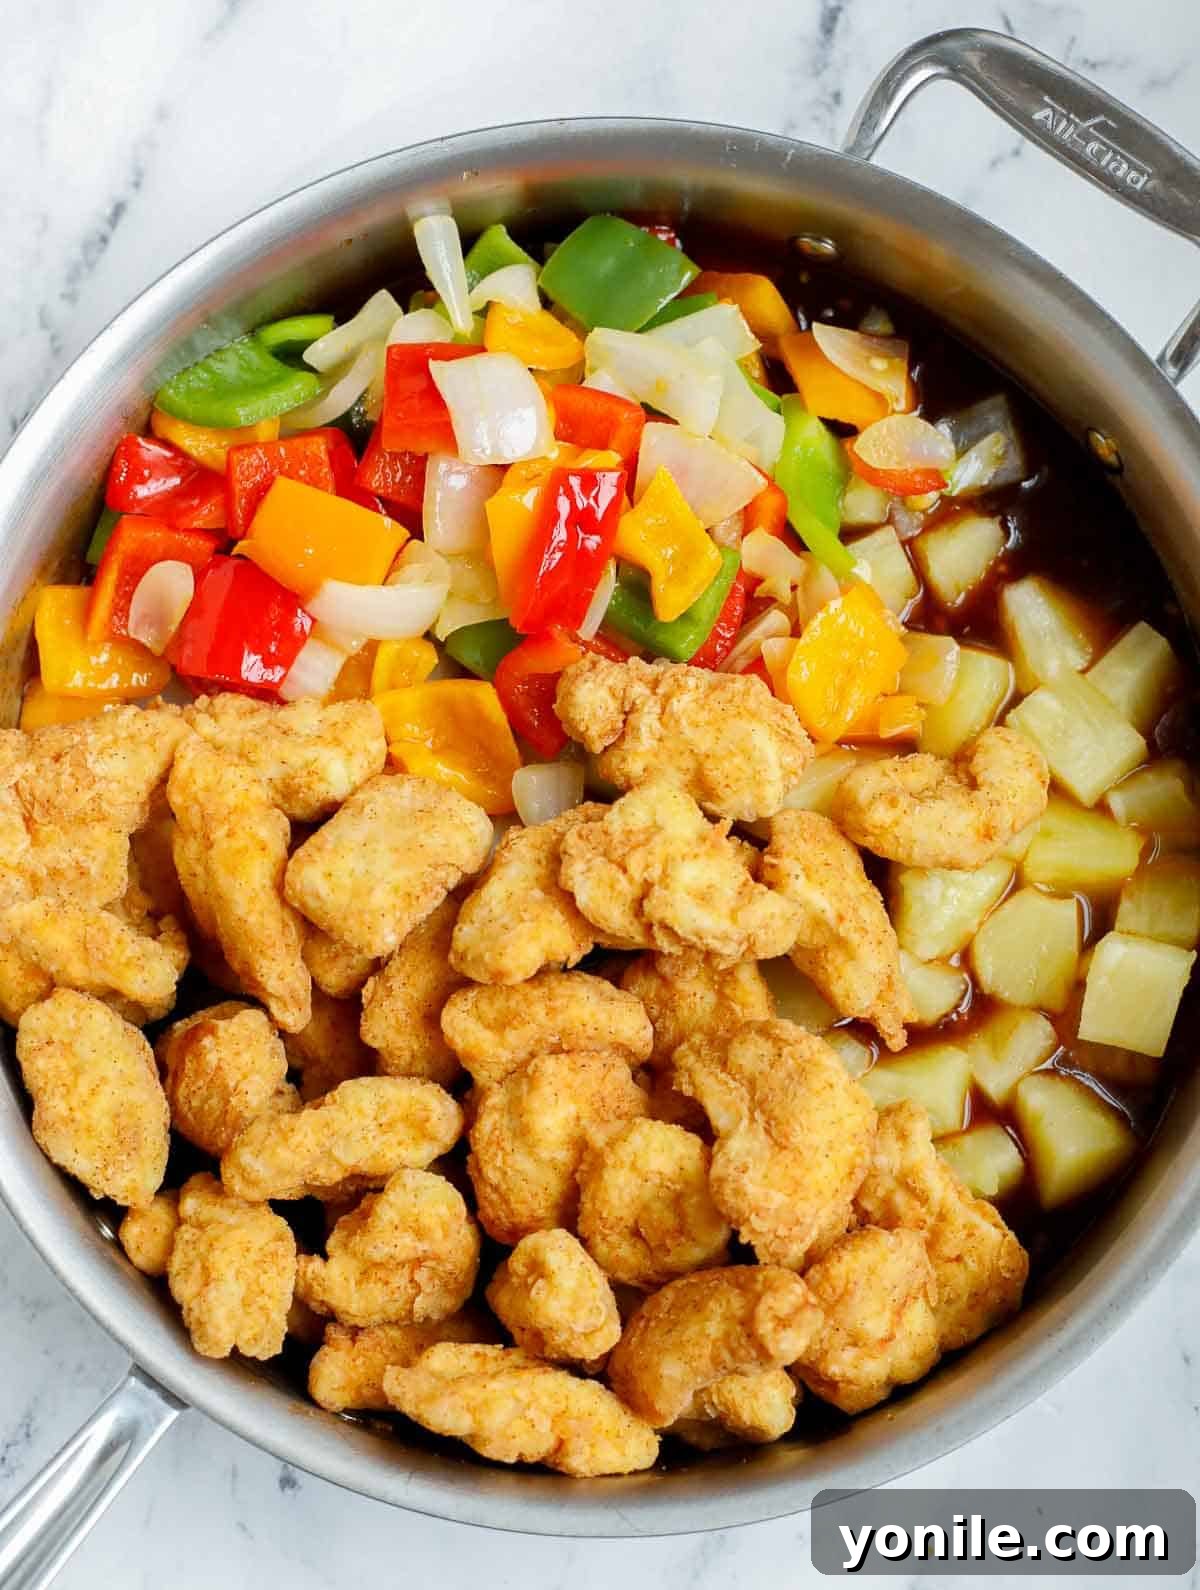
- Combine and Serve: Once the sauce has thickened beautifully, return the fried chicken, stir-fried vegetables, and the 1 cup of pineapple chunks to the pan. Toss everything gently to ensure the chicken and vegetables are thoroughly coated in the luscious sweet and sour sauce. Cook for another 2-3 minutes, allowing all the flavors to meld and the chicken to heat through. Remove from heat immediately.
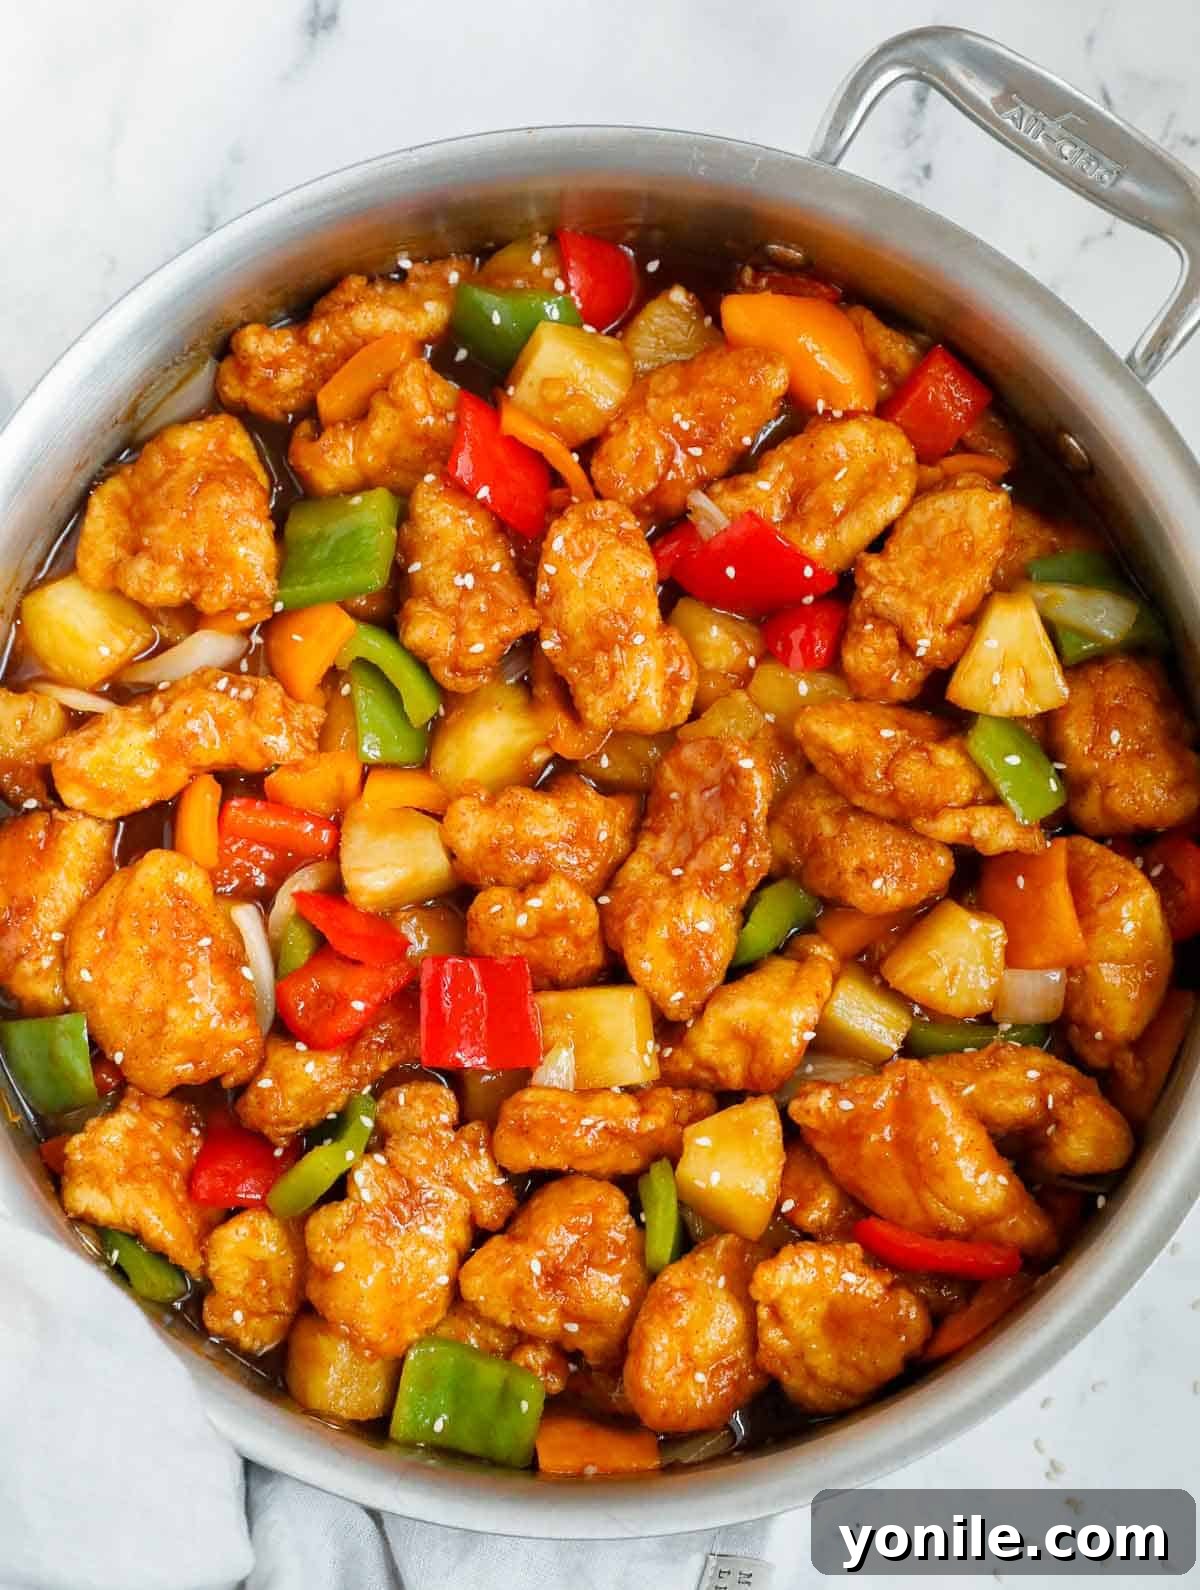
- Garnish and Enjoy: Transfer the homemade sweet and sour chicken to a serving platter. If desired, sprinkle generously with sesame seeds for an extra touch of flavor and visual appeal. Serve hot and enjoy your incredible homemade takeout experience!
Expert Tips for the Best Sweet and Sour Chicken
Achieving restaurant-quality results at home is easier than you think with these helpful tips and tricks:
- Chicken Choice Matters: While chicken breast is often used, boneless, skinless chicken thighs can offer an even juicier, more tender result due to their higher fat content. Feel free to use either based on your preference.
- Uniformity is Key: Always cut your chicken into evenly sized pieces. This ensures that every piece cooks at the same rate, preventing some from being overcooked and dry while others are still underdone.
- Oil Temperature is Critical: Proper oil temperature is crucial for crispy chicken. Heat the oil thoroughly before adding the chicken (ideally 350-375°F or 175-190°C). If the oil isn’t hot enough, the chicken will absorb too much oil and become greasy. If it’s too hot, the exterior will burn before the interior cooks.
- Spice it Up: For those who appreciate a little heat, consider adding a pinch of red pepper flakes to your sweet and sour sauce. Start with a small amount and adjust to your preferred level of spiciness.
- Customize Your Veggies: Don’t be limited to bell peppers and onions! This dish is highly adaptable. Feel free to incorporate other vegetables like sliced carrots, fresh broccoli florets, snow peas, mushrooms, or zucchini. Add tougher vegetables earlier in the stir-frying process to ensure they cook through.
- Don’t Overcook the Vegetables: For that desirable tender-crisp texture, stir-fry the vegetables just until they’ve softened slightly but still retain some bite. Overcooked vegetables become mushy and lose their vibrant color.
- Sauce Thickening: Remember that the sweet and sour sauce will continue to thicken slightly as it cools. Aim for a slightly thinner consistency than you ultimately desire when it’s hot in the pan. If it becomes too thick, you can thin it out with a splash of water or a bit more pineapple juice.
- Serve Immediately: For the best texture and flavor, sweet and sour chicken is truly at its peak when served fresh out of the pan. The chicken coating will be at its crispiest, and the vegetables will retain their perfect snap.
- Perfect Pairings: This dish is traditionally served with a side of fluffy white rice, brown rice, or even Cauliflower Rice for a low-carb option. Noodles are also a fantastic accompaniment.
Frequently Asked Questions About Sweet and Sour Chicken
Sweet and sour sauce, particularly homemade versions, can be enjoyed as part of a balanced diet. It does contain sugar, so it’s not considered a “health food” in itself. However, when you make it at home, you have control over the sugar content and other ingredients. You can opt for low-sugar ketchup, reduce the amount of added granulated sugar, and pack it with fresh vegetables and lean protein. Enjoyed in moderation and with sensible portion sizes, it can be a delicious and less unhealthy option compared to many restaurant preparations that often contain excessive sugar, sodium, and artificial ingredients.
Absolutely! While canned pineapple is convenient and ensures you have juice for the sauce, fresh pineapple can be used if preferred. If using fresh pineapple, you’ll need to purchase a small can of pineapple juice separately (or use orange juice) for the sauce component. Fresh pineapple offers a slightly different, often more vibrant, flavor profile and a firmer texture.
Leftovers of this delicious sweet and sour chicken can be stored in an airtight container in the refrigerator for up to 3-5 days. For reheating, while microwaving is quick and convenient, it often results in softer chicken. For best results that preserve some of the chicken’s crispiness, reheat in a skillet over medium heat with a tiny bit of oil until warmed through. You can also reheat it in an oven or air fryer at 350°F (175°C) for about 10-15 minutes until hot and slightly crisped.
Yes, you can! To freeze the components for future meals: After frying, flash freeze the crispy chicken pieces on a baking sheet until solid, then transfer them to an airtight freezer bag or container. This prevents them from sticking together. The prepared stir-fry vegetables (uncooked) and the sweet and sour sauce can also be frozen in separate airtight bags or containers. When ready to cook, thaw the chicken, veggies, and sauce overnight in the fridge, then combine and cook as directed in the recipe.
This takeout-style dish pairs wonderfully with a variety of sides. Classic choices include steamed white rice, brown rice, or fried rice. For a low-carb option, consider Cauliflower Rice. Noodles, such as lo mein or chow mein, also make an excellent accompaniment. To make it a full Asian-inspired feast, add an appetizer like Shrimp Sushi Stack, Shrimp Lettuce Salad, Easy Sushi Bake, or Spicy Salmon and Rice Egg Rolls.
Explore More Delicious Asian Recipes
- Chinese Honey Garlic Chicken
- Chicken Pakora
- Easy Grilled Chicken Satay
- Chinese Szechuan Chili Chicken
- Chinese Lemon Chicken
I genuinely hope you cherish every recipe I share with you, and this delightful Homemade Sweet and Sour Chicken is no exception. Give it a try, savor every bite, and share your experience by rating it and passing it along to your friends and family!
If you make this recipe and love it, please consider leaving a star rating and a comment below. Don’t forget to use my hashtag to share your delicious recreations with me on Instagram! You can also follow Cookin’ With Mima on FACEBOOK |INSTAGRAM |PINTEREST for all my latest culinary adventures and new recipes.
Homemade Sweet and Sour Chicken
By: Mariam Ezzeddine
Homemade Sweet and Sour Chicken brings your favorite Chinese takeout dish right to your kitchen without being intimidating. The easy sweet and sour sauce has an authentic taste and the dish is loaded with peppers, onions, pineapple and delicious chicken that is crispy on the outside and juicy on the inside.
Equipment
- Deep Pan or Dutch Oven
- Wire Cookie Rack
- Slotted Spoon or Spider
- Large Skillet or Wok
- Whisk
Ingredients
For the Crispy Chicken
- 2 lbs chicken tenderloin, cubed into 1-inch pieces
- ⅓ cup corn starch
- 2 whole eggs, beaten
- 1 large red bell pepper, cubed
- 1 large orange bell pepper, cubed
- 1 large green bell pepper, cubed
- 1 cup pineapple chunks (from a can)
- 1 medium sweet onion, cubed
- 2 tbsps light-tasting olive oil (for stir-frying)
- Neutral oil, for deep frying
- Sesame seeds, for garnishing
Chicken Flour Coating
- ½ cup all-purpose flour
- 1 tsp onion powder
- 1 tsp garlic powder
- 1 tsp paprika
- ½ tsp salt
Homemade Sweet and Sour Sauce
- ⅓ cup ketchup
- 1 tsp onion powder
- 2 tbsps lite soy sauce
- 3 tbsps rice vinegar
- 3 large cloves garlic, minced
- 1½ tbsp corn starch
- 2 tbsps light brown sugar
- ¼ cup granulated sugar
- ¼ cup pineapple juice, from chunk can
- 1 tbsp neutral oil (for sauce base)
Instructions
- In a large deep pan or Dutch oven, preheat the neutral oil over medium heat (approx. 350-375°F / 175-190°C).
- Pat dry the chicken tenderloins, cut into one-inch cubes, and transfer to a bowl. Add ⅓ cup of corn starch to the chicken and toss well to coat. Set aside.
- In two other small bowls, beat the 2 eggs in one. In the second bowl, mix together the ½ cup all-purpose flour, 1 tsp onion powder, 1 tsp garlic powder, 1 tsp paprika, and ½ tsp salt for the chicken flour coating.
- Dip one piece of chicken into the egg bath, then transfer it into the dry flour coating mix, pressing gently to ensure full coverage. Place the coated piece on a wire cookie rack and repeat for the remaining chicken.
- Carefully fry the chicken pieces in the heated oil for about 5-7 minutes, or until golden brown and crispy, and cooked through. Do not overcrowd the pan; cook in batches if necessary. Remove the chicken from the oil and place on a paper towel-lined plate to drain. Set aside.
- In a separate bowl or cup, whisk together all the sweet and sour sauce ingredients: ketchup, onion powder, lite soy sauce, rice vinegar, minced garlic, corn starch, light brown sugar, granulated sugar, pineapple juice, and neutral oil.
- Heat a large pan or wok over medium heat, add 2 tbsps of light-tasting olive oil. Pan-sear the cubed bell peppers and sweet onion (do not add pineapple yet) for 3-4 minutes, until tender-crisp. Remove and set aside.
- In the same pan, add the sweet and sour sauce mixture. Simmer on medium-low heat, mixing constantly with a whisk until the sauce thickens and becomes glossy, about 2-3 minutes.
- Once the sauce has thickened, add in the fried chicken, stir-fried vegetables, and pineapple chunks. Toss everything together gently to coat well and cook for another 2-3 minutes to heat through.
- Remove from heat and garnish with sesame seeds if desired. Serve immediately.
Notes
- Consider using boneless, skinless chicken thighs for an even juicier chicken.
- Cut chicken into even-sized pieces to ensure uniform cooking.
- Always ensure oil is well heated before frying the chicken to achieve maximum crispiness.
- Add a pinch of red pepper flakes to the sauce for a subtle kick of heat.
- Enhance the nutritional value and texture by adding more vegetables such as carrots, broccoli, mushrooms, or snap peas.
- Avoid overcooking the vegetables; they should remain tender-crisp with a slight bite.
- The sauce will continue to thicken slightly as it cools; adjust consistency with a little water or pineapple juice if needed.
- This dish is best enjoyed immediately after preparation for optimal crispiness and flavor.
- Serve alongside steamed rice, fried rice, or noodles for a complete meal.
Nutrition
Calories: 675 kcal | Carbohydrates: 82g | Protein: 54g | Fat: 15g | Saturated Fat: 3g | Polyunsaturated Fat: 2g | Monounsaturated Fat: 7g | Trans Fat: 0.03g | Cholesterol: 147mg | Sodium: 730mg | Potassium: 1453mg | Fiber: 6g | Sugar: 43g | Vitamin A: 3171IU | Vitamin C: 153mg | Calcium: 89mg | Iron: 3mg