
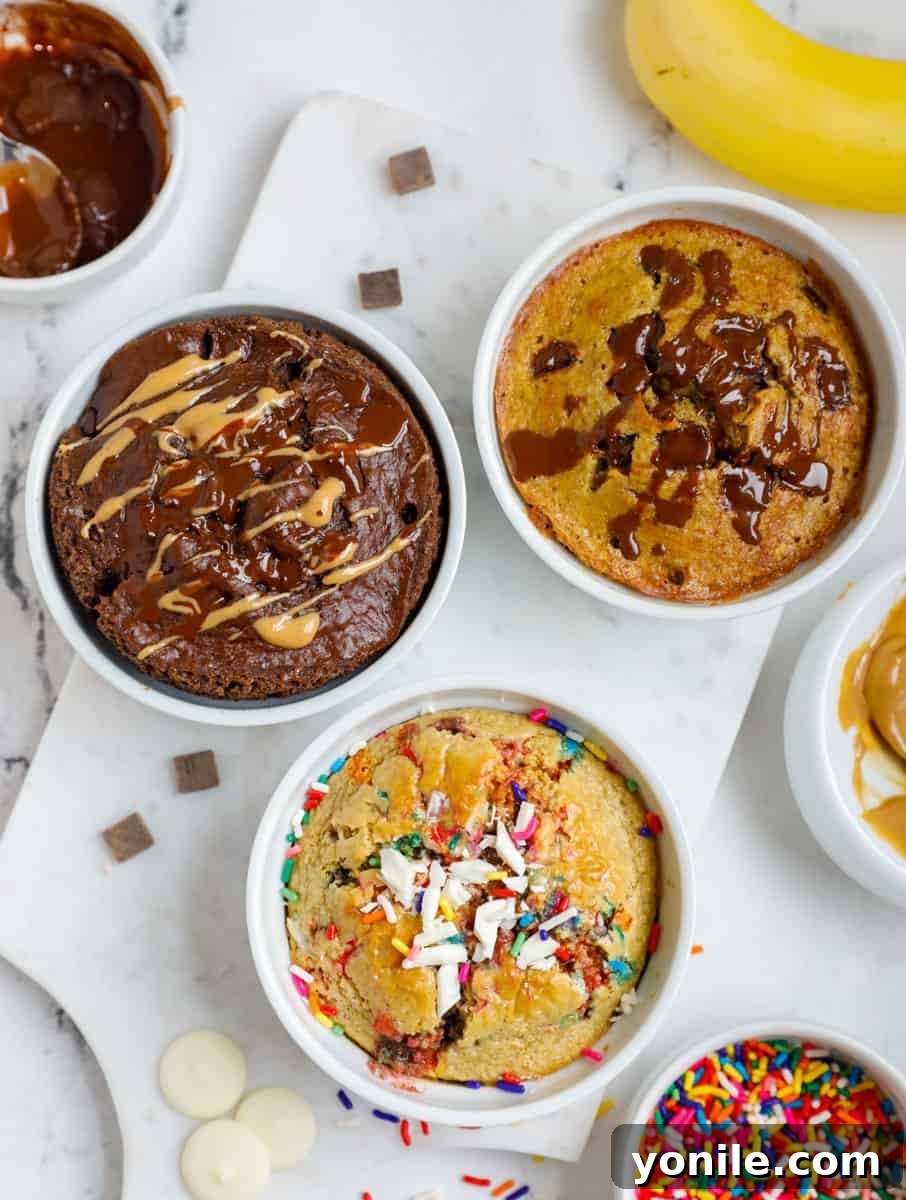
This incredibly versatile **Baked Oats 3 Ways** recipe is the quintessential
way to elevate your morning routine, offering a wholesome yet indulgent start
to your day! Imagine savoring a breakfast that tastes like a delightful cake
but is packed with nutritious ingredients. Crafted with just a handful of
everyday pantry staples and the convenience of a blender, this easy baked
oatmeal recipe promises a quick and satisfying meal. These baked oats are
effortless to prepare and deliver a comforting, dessert-like experience, all
while being remarkably healthy. It’s the ultimate guilt-free treat to kickstart
your day with joy and flavor.
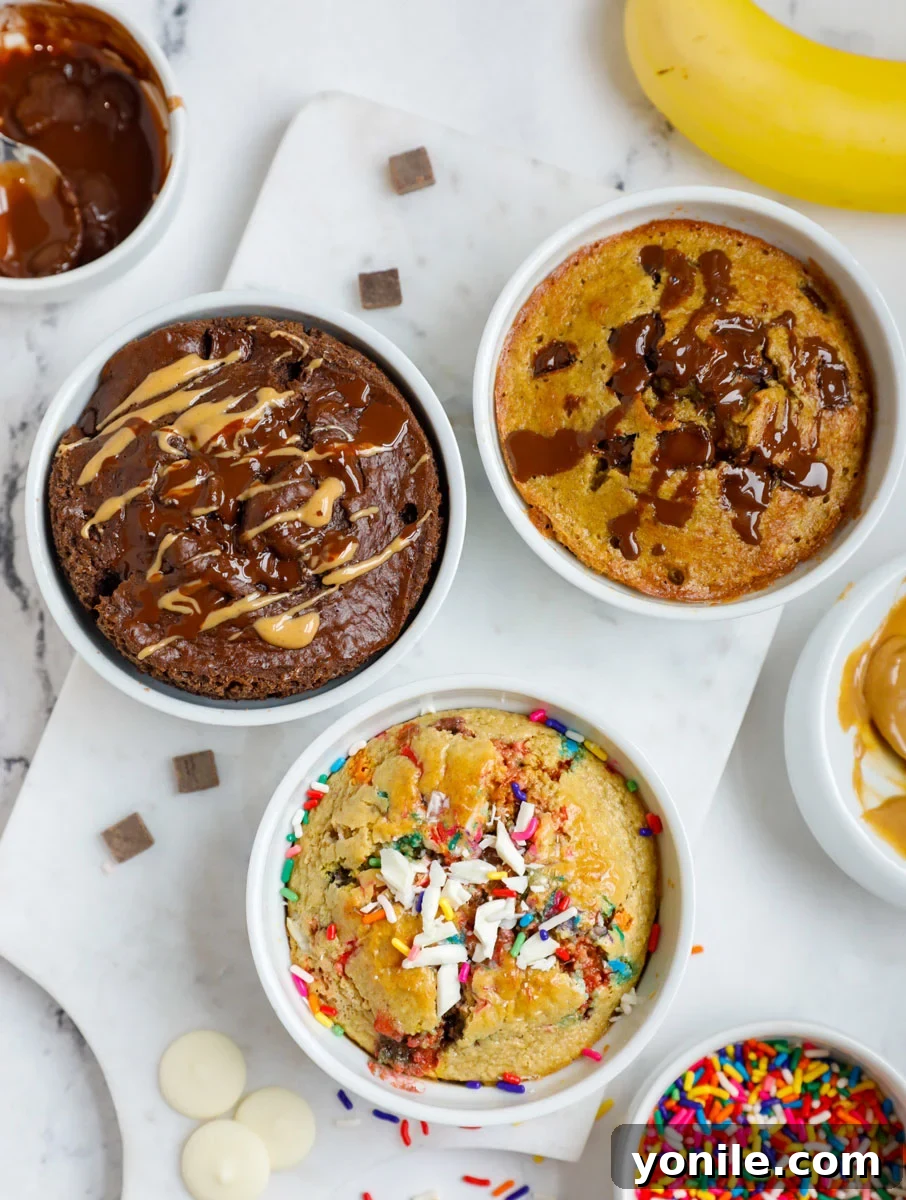
With three distinct and irresistibly easy variations to explore, your family
will undoubtedly fall in love with these fun and flavorful breakfast baked
oats! Designed for individual portions, they are typically made in charming
ramekins, offering a personalized touch. However, for larger gatherings or
meal prepping, the quantity can be effortlessly scaled up to create a more
substantial dish in a larger baking pan. These fluffy, moist baked oats
magically transform into a texture so akin to cake, you’ll genuinely feel
like you’re indulging in a luxurious dessert. Yet, in reality, you’re enjoying
a remarkably nutritious and energizing breakfast. This delightful combination
of taste and health is a sensation no one can truly resist.
For those eager to discover even more simple and delicious breakfast recipes,
you’ll find comprehensive individual posts with step-by-step instructions for
each of these incredible baked oat variations. Dive deeper into the specifics
of the vibrant
Funfetti Baked Oats Cake, the classic comfort of
Chocolate Chip Banana Baked Oats, and the rich decadence of
Chocolate Peanut Butter Banana Baked Oats. Additionally, expand your culinary skills by checking out my detailed
tutorial on
How to Cook Oatmeal
for perfect results every time.
Why You’ll Fall in Love with These Viral Baked Oats
Baked oats have captivated the culinary world, particularly gaining viral
fame across platforms like TikTok, and for compelling reasons! This innovative
recipe elevates everyday oats into a breakfast sensation that is both
exhilarating and deeply nourishing. Prepare to make these three-way baked oats
a cherished part of your morning routine, offering convenience, flavor, and
health benefits all in one delightful package:
-
Pure Enjoyment and Fun: Revolutionize your breakfast
experience! Why settle for a mundane morning meal when you can start your
day with sprinkles or rich chocolate? These baked oats infuse an element of
pure joy and excitement into your routine. They genuinely taste like cake,
making breakfast feel like a special treat, yet without any of the guilt.
This playful approach is fantastic for encouraging everyone, especially
children and picky eaters, to eagerly anticipate a healthy breakfast. -
Effortless Scaling for Any Occasion: Whether you’re
preparing a quick, satisfying breakfast for yourself or need to feed a large
family or host a brunch, this recipe boasts incredible versatility. You can
effortlessly double or even triple the ingredients, simply grab a few extra
ramekins or opt for a larger baking dish, and you’ll have ample amounts of
these delicious baked oats ready. This makes them perfect for meal
prepping, ensuring you always have a wholesome, flavorful, and convenient
breakfast on hand throughout the busy week. -
Unleash Your Creativity with Customization: The inherent
beauty of baked oats lies in their remarkable adaptability. This recipe
serves as a robust and delicious base, providing a blank canvas for your
culinary imagination. Feel empowered to easily customize it with an array
of your favorite fruits, crunchy nuts, aromatic spices, or alternative
sweeteners. Experiment freely with different flavor combinations to match
your current mood, seasonal produce, or specific dietary preferences,
transforming each batch into a unique and exciting culinary adventure. -
Surprisingly Nutritious and Satisfying: Despite their
irresistible dessert-like taste and wonderfully moist, cakey texture, these
baked oats are brimming with nutritional goodness. The primary ingredient,
rolled oats, is a powerhouse of dietary fiber, providing sustained energy
release and promoting healthy digestion. When thoughtfully combined with
other wholesome ingredients such as milk and eggs (or their vegan
alternatives), these baked oats deliver a balanced and deeply satisfying
meal that effectively keeps you feeling full, focused, and energized
throughout your entire morning. -
Quick & Easy Blender Preparation: Bid farewell to time-consuming
and complicated morning routines. The core of preparing this recipe is
incredibly simple and efficient: all the main ingredients are effortlessly
combined and blended together in a high-speed blender. This ingenious
method drastically minimizes both the preparation time and the subsequent
cleanup, making baked oats an absolutely ideal choice for those hectic
weekdays when you crave something substantial and nutritious, yet need it
ready in a flash.
Essential Ingredients for Your Perfect Baked Oats Base
To create the ideal, delectable base for your baked oats, a few fundamental
ingredients are required. These components work in perfect harmony to
achieve that coveted cake-like texture and a beautifully balanced flavor
profile. Here’s an in-depth look at each key ingredient you’ll need to
construct your delicious morning treat:
-
Old-Fashioned Rolled Oats: These hearty oats are undeniably
the star of our recipe, forming its wholesome and delicious foundation! Rolled
oats provide the ideal texture and robust nutritional benefits. When blended
into the batter, they transform into a fine oat flour, which is precisely
what imparts that unique, wonderfully dense yet moist cake-like consistency
to the baked oats. While
quick oats can be used as a convenient substitute if rolled oats
are not readily available, it is crucial to
avoid using steel-cut oats, as their firm structure will
not break down sufficiently even after blending, and they will not yield the
desired smooth, cake-like texture. For those with dietary restrictions,
ensure you opt for certified gluten-free rolled oats to make this a safe
and enjoyable option. -
Maple Syrup (or Honey for a twist): This natural sweetener
is key to infusing your baked oats with a delightful, warm, and rich flavor
that complements the wholesome oats beautifully. The beauty of using maple
syrup is that its quantity can be effortlessly adjusted to precisely match
your personal preference for sweetness, allowing you complete control. If
you find yourself without maple syrup,
high-quality honey makes an excellent and equally delicious
alternative, offering a slightly different but equally appealing
sweetness and aroma. -
Baking Powder: This ingredient is absolutely critical for
achieving the light, airy, and truly cake-like texture that makes these
baked oats so special. Baking powder functions as a powerful leavening
agent, reacting in the heat of the oven to help the oats rise beautifully
and develop that desirable fluffy crumb. It is vital to
measure it accurately – too little will result in a dense
and heavy texture, while too much can unfortunately impart an unpleasant,
slightly metallic aftertaste. Precision is key here. -
Whole Egg: The whole egg serves as a vital binding agent
in this recipe, expertly holding all the ingredients together. It contributes
significantly to the overall structure, moisture, and richness of the baked
oats. There is no need for any special preparation; a whole egg straight
from the refrigerator works perfectly well. For those adhering to a vegan
diet or with egg allergies, a reliable alternative is a
flax egg (simply mix 1 tablespoon of ground flaxseed with 3
tablespoons of water and allow it to sit for about 5 minutes until it
forms a gel-like consistency). -
Pure Vanilla Extract: A splash of pure vanilla extract is
far more than just an optional extra; it is a flavor enhancer that works
wonders. It subtly yet effectively boosts and harmonizes all the other
flavors in the batter, adding a layer of sophisticated warmth and depth
that elevates the overall taste profile. For the most authentic and
aromatic result, always make sure to
use only pure vanilla extract. -
Milk (Dairy or Non-Dairy): Milk is an essential component
that contributes crucial moisture to the batter, ensuring that your baked
oats are consistently tender, soft, and never dry. While whole milk imparts
a lovely richness, you have the flexibility to
use any type of milk you prefer. Feel free to opt for your favorite
dairy milk, or choose from excellent non-dairy alternatives such as almond
milk, oat milk, soy milk, or coconut milk to perfectly suit your dietary
needs or personal taste preferences. -
Pinch of Salt: Do not underestimate the power of this
tiny ingredient! A small dash of salt is absolutely essential to a well-rounded
flavor profile. It doesn’t make the oats taste salty; rather, it performs
the crucial role of balancing the sweetness from the maple syrup (or honey)
and acts as a flavor amplifier, making all the other ingredients “pop.” This
subtle addition is key to a perfectly harmonious and delicious baked oat.
Three Irresistibly Delicious Baked Oats Variations
Once you have mastered the foundational baked oats batter, the culinary adventure
truly begins with these three distinct and incredibly flavorful variations. Each
option offers a unique and enticing twist, guaranteeing a perfect choice for
every craving, mood, and palate. Get ready to personalize your breakfast!
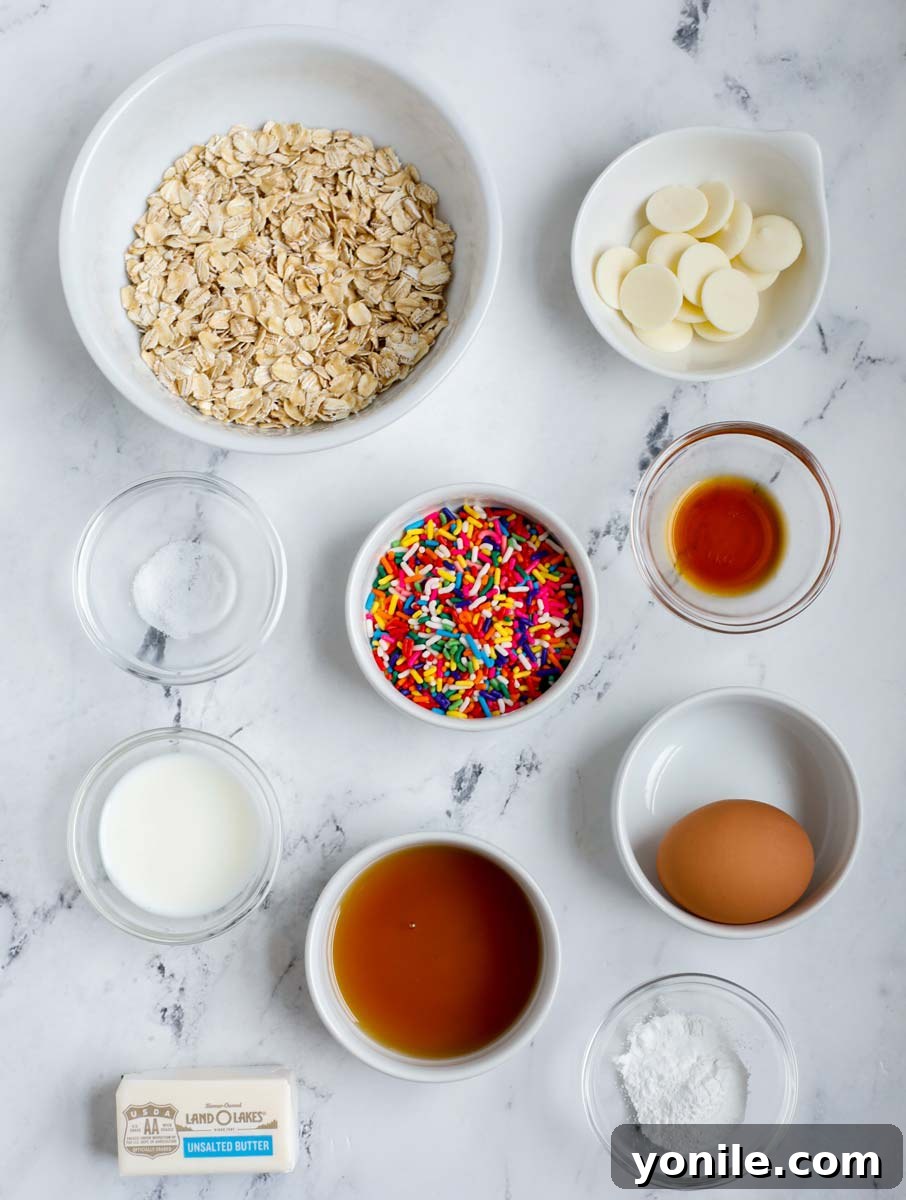
1. Funfetti Baked Oats: A Party in a Ramekin!
Inject a burst of joyous color and delightful sweetness into your morning with
our enchanting Funfetti Baked Oats. This wonderfully playful variation is
absolutely perfect for celebrating a special occasion, brightening up a birthday
breakfast, or simply adding a touch of whimsical cheer to an otherwise ordinary
day. The classic baked oats base batter is effortlessly transformed with a few
simple, vibrant additions that promise a truly delightful and festive culinary
experience.
-
Melted Unsalted Butter: This ingredient is a fundamental
component, significantly contributing to the overall richness and the incredibly
tender, moist crumb of the Funfetti oats, making them even more reminiscent of
a classic cake. By using unsalted butter, you gain precise control over the
overall salt content of your dish. For those seeking a dairy-free alternative,
high-quality vegan butter or a neutral-flavored oil such as melted coconut oil
can be perfectly substituted without compromising on flavor or texture. -
Vibrant Rainbow Sprinkles: These cheerful little morsels are
undoubtedly the very heart and soul of the entire Funfetti experience! Take
your pick from your favorite brand and preferred style of rainbow sprinkles,
mixing a generous amount directly into the batter and liberally scattering
more over the top before baking. They not only provide an incredibly festive
and appealing visual flair but also introduce a pleasant, subtle crunch and
a gentle burst of sweetness with every spoonful. -
Chopped White Chocolate Wafer Chips: When baked, these
finely chopped white chocolate wafer chips magically melt and blend into
the warm oats, creating luscious pockets of creamy, sweet indulgence. This
sweetness beautifully complements the playful nature of the sprinkles. If
white chocolate wafer chips are not easily accessible, fear not; regular
white chocolate chips or even finely chopped pieces from a white chocolate
bar will perform just as wonderfully, ensuring that delightful creamy
texture.
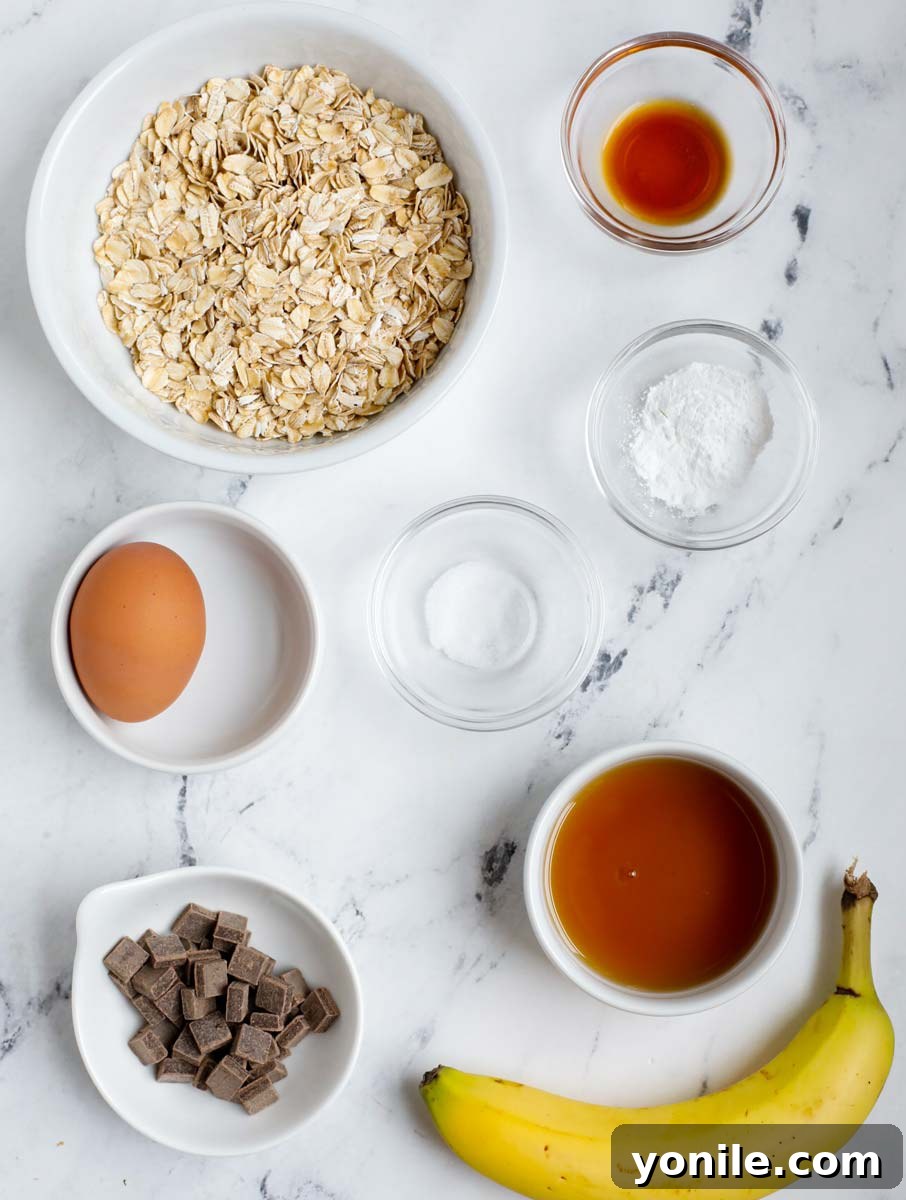
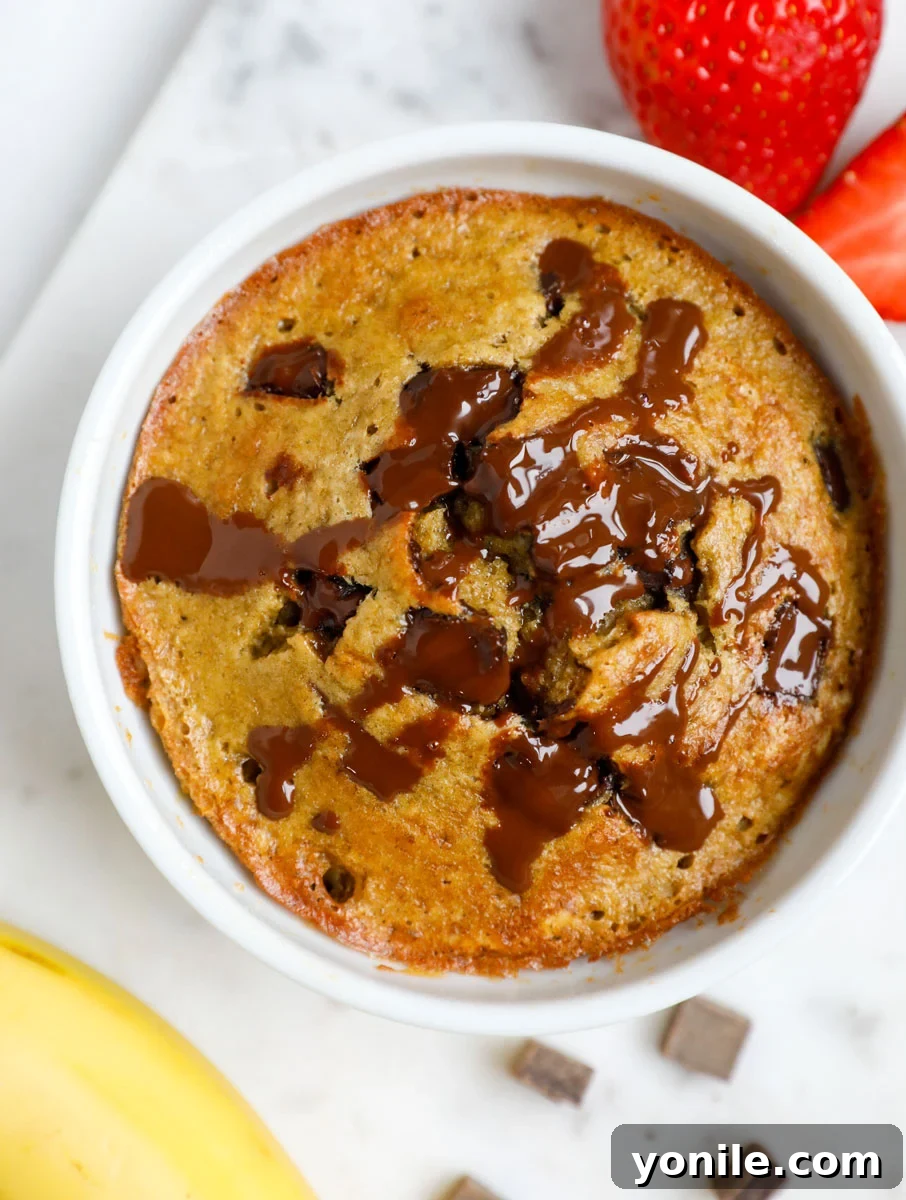
2. Chocolate Chip Banana Baked Oats: A Classic Comfort
Indulge in the timeless and universally adored combination of sweet banana
and rich chocolate with this comforting and naturally sweetened variation. It’s
a hearty and deeply satisfying breakfast that feels incredibly nostalgic and
like a warm, cozy hug, making it the perfect choice for starting any day on
the most comforting note possible. This blend offers both familiarity and
pure deliciousness.
-
Perfectly Ripe Banana: The key to maximizing both the
sweetness and the incredible depth of flavor in this variation is to use
a beautifully ripe banana! The riper the banana, the more natural sugars it
contains, which translates directly into a more intensely sweet, moist, and
aromatic baked oat. Ensure you mash it thoroughly before blending it into
the batter to guarantee a smooth, even consistency throughout your finished
dish. -
Semi-Sweet Chocolate Chips or Chunks: The quintessential
and beloved partner to banana, semi-sweet chocolate offers a rich, perfectly
balanced sweetness that melts into luscious, irresistible pockets
throughout the warm oats during baking. This creates delightful contrasts
in texture and bursts of flavor. You can opt for classic chocolate chips for
smaller, evenly distributed bursts of chocolate, or choose larger chocolate
chunks for a more intense and satisfying chocolate experience with every
bite. Dark chocolate or milk chocolate chips are also excellent choices,
depending on your personal preference.
3. Decadent Chocolate Peanut Butter Banana Baked Oats
For all the devoted enthusiasts who adore the dynamic and irresistible trio
of chocolate, peanut butter, and banana, this particular variation of baked
oats is nothing short of an absolute dream come true. It’s wonderfully rich,
luxuriously indulgent, and profoundly satisfying, delivering a truly gourmet
breakfast experience right in your own home. Prepare your taste buds for a
symphony of flavors!
-
Smooth, Creamy Peanut Butter: The addition of creamy
peanut butter introduces a delightful nutty undertone and an extra layer
of unparalleled richness and velvety creaminess to the baked oats. For the
most satisfying results, always use your favorite brand of smooth, creamy
peanut butter. If you’re looking to experiment or have specific dietary
needs, almond butter, cashew butter, or even sunflower seed butter make
excellent substitutions, each offering a unique and delicious flavor profile. -
Perfectly Ripe Banana: Just as in the pure chocolate chip
variation, a perfectly ripe banana is not merely an option but an essential
component here. Its natural sweetness and inherent moisture are crucial, as
they beautifully complement and balance the intense flavors of both the
chocolate and the peanut butter, enhancing the overall depth and enjoyment of
the dish. -
Dutch-Processed Cocoa Powder: This ingredient is the secret
weapon behind achieving a profoundly deep, fudgy chocolate flavor and a
stunningly rich, dark hue in your baked oats. Dutch-processed cocoa powder,
being alkalized, boasts a less acidic, smoother, and richer chocolate taste
compared to its natural counterpart. This characteristic makes your baked
oats taste truly luxurious and sophisticated. My personal and highly
recommended brand for consistently exceptional results is Ghirardelli,
known for its superior quality. -
Semi-Sweet Chocolate Chips or Chunks: For the ultimate
chocolate lover, this variation calls for a delightful double dose of
chocolate! These semi-sweet chocolate chips or chunks will melt beautifully
during baking, creating enchanting, gooey pockets of rich chocolate. This
addition provides another wonderful dimension of both texture and flavor,
making an already irresistible combination even more utterly divine and
unforgettable.
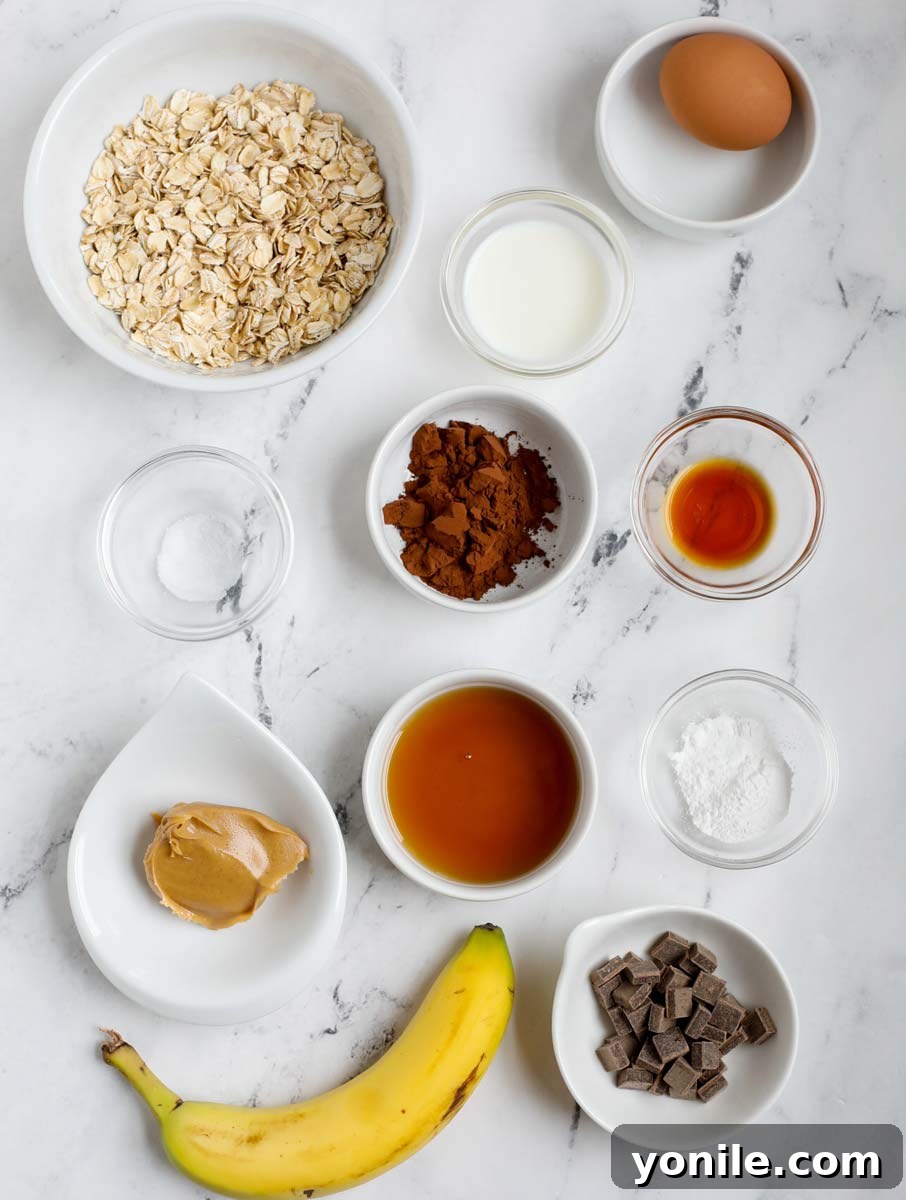
Step-by-Step Guide: How to Make Your Delicious Baked Oats
Crafting these delightful baked oats is an unexpectedly simple process,
requiring minimal effort for an incredibly flavorful and satisfying reward.
Follow these straightforward, easy-to-understand steps to prepare your
personalized “cake-for-breakfast” treat, ensuring perfect results every time:
-
1. Prepare Your Oven: Begin by preheating your oven to
350°F (175°C). It’s important to place an oven rack in the middle position
of your oven. This strategic placement ensures even baking and allows your
oats to rise optimally, which is a crucial first step for achieving that
perfectly cooked, fluffy, and tender texture. -
2. Blend Your Base Batter: In a powerful high-speed
blender, meticulously combine all the core ingredients specific to your
chosen baked oats variation. At this stage, it’s vital to
exclude any “add-ins” such as chocolate chunks, colorful
sprinkles, or delicate white chocolate wafer chips. Blend the mixture
thoroughly until it becomes completely smooth and creamy, with no visible
oat flakes remaining. The ultimate goal here is to create a uniform,
easily pourable, and lump-free batter. -
3. Fill and Top Your Ramekin: Take an 8 oz. ramekin and
lightly spray its interior with baking spray, or alternatively, grease it
with a small amount of butter or coconut oil. This critical step prevents
the baked oats from sticking, ensuring a clean release. Carefully pour the
smooth, blended batter into the prepared ramekin. Now, it’s time for the fun
part: generously add your chosen mix-ins and toppings! Scatter chocolate
chunks, sprinkles, or white chocolate wafer chips over the surface. For an
extra pleasant surprise and more integrated flavor, you can gently push some
of these delightful add-ins down into the batter before baking, so they are
distributed throughout the finished oat cake. -
4. Bake to Perfection: Gently place the filled ramekin(s)
into your preheated oven and bake for approximately 25 minutes. Keep in
mind that actual baking times can sometimes vary slightly based on the
individual characteristics of your specific oven and the precise size of
your ramekin. Therefore, it’s wise to begin checking for doneness around the
20-minute mark. The baked oats are perfectly ready when the top appears
nicely golden brown and a clean toothpick inserted into the center emerges
with only moist crumbs, indicating the dough is fully set and no longer
jiggly. Be vigilant not to overcook, as this can lead to a less desirable,
dry texture. -
5. Cool and Savor: Once your baked oats are golden and
cooked through, carefully remove the ramekin from the oven. Allow your
delicious creation to cool for just a couple of minutes before you eagerly
dig in. This brief cooling period is important as it helps the oats to set
further and makes them even more enjoyable to eat. For an extra touch of
pure indulgence and visual appeal, consider drizzling some melted chocolate,
a swirl of creamy peanut butter, or your favorite breakfast topping over the
warm oats. Enjoy this comforting treat while it’s still warm!
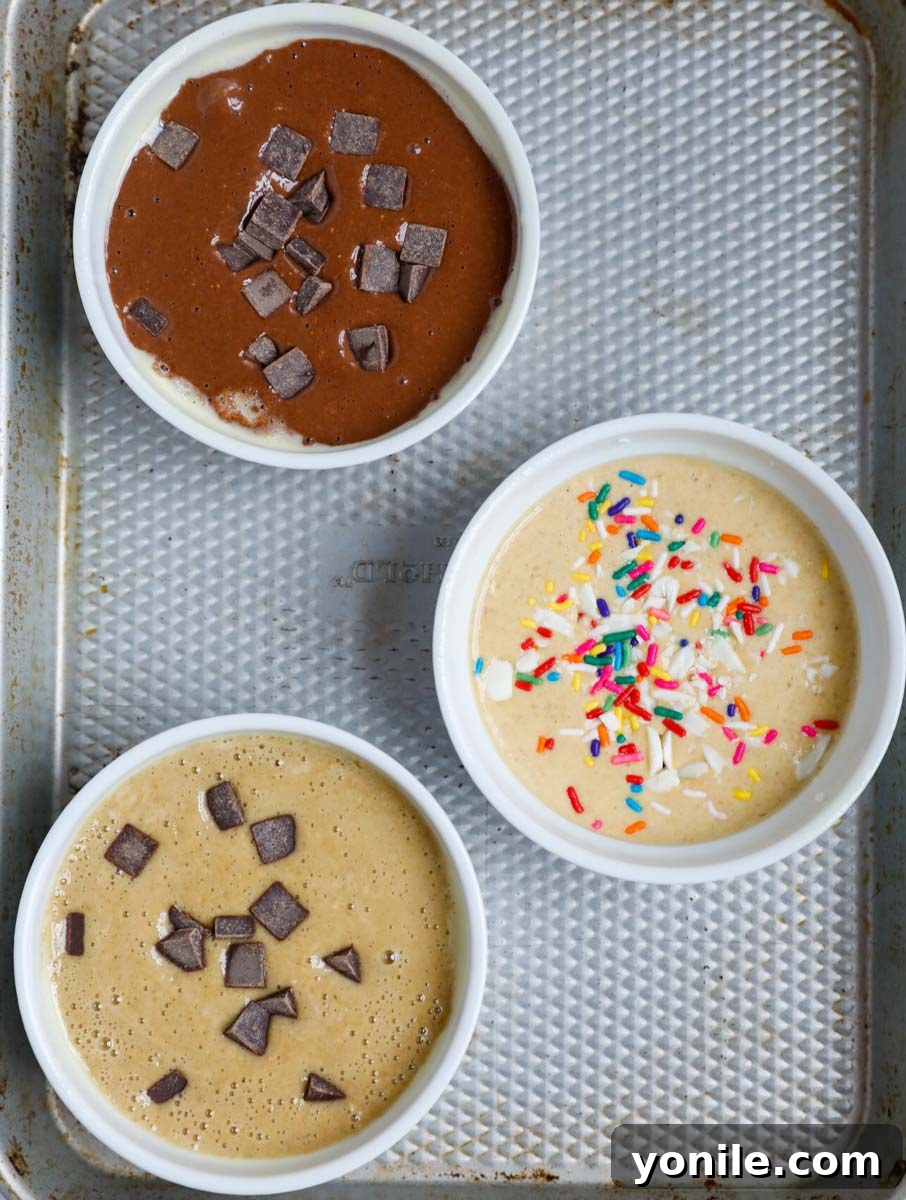
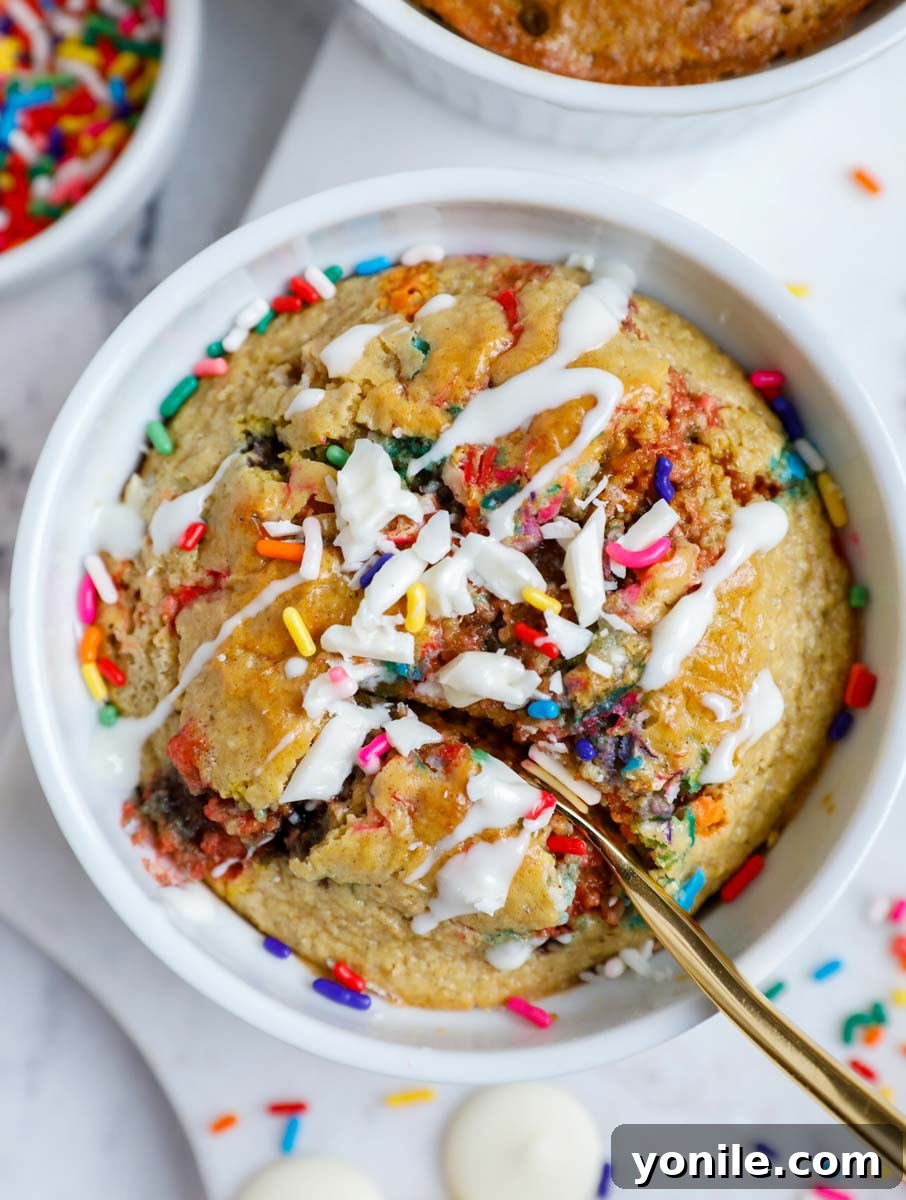
Expert Tips for Perfectly Easy Baked Oats Every Time
Achieving consistently delicious and perfectly textured baked oats is
surprisingly simple when armed with a few expert tips. These invaluable
pointers will empower you to master the technique and ensure that your
breakfast treats are always a resounding success, offering that ideal
cake-like consistency and rich flavor every single time:
-
Always Generously Grease Your Ramekins: This step is
absolutely non-negotiable! Before you even think about pouring in your
delicious batter, ensure you generously grease your ramekins with baking
spray, a pat of butter, or a touch of coconut oil. This crucial preparatory
action effectively prevents the baked oats from sticking to the sides and
bottom, guaranteeing they come out cleanly and beautifully. This not only
makes for effortlessly elegant serving but also simplifies the cleanup
process considerably. -
Precision with Baking Powder is Paramount: Baking powder
is your indispensable ally in achieving that coveted light, fluffy, and
truly cake-like texture that distinguishes exceptional baked oats. It is
imperative to measure this ingredient with utmost precision. Avoid the
temptation to eyeball it, as an insufficient amount will tragically result
in dense, heavy oats, while an excess can unfortunately impart an unpleasant,
slightly bitter taste that compromises the overall flavor. A level teaspoon
is typically the perfect measure for a single serving. -
Utilize a High-Speed Blender for Silkiness: For the most
luxuriously smooth and truly cake-like consistency imaginable, employing a
high-speed blender is absolutely essential. Its powerful blades will
thoroughly pulverize the robust rolled oats into an incredibly fine, flour-like
powder and perfectly combine all the other ingredients. This process
effectively eliminates any trace of grainy texture and ensures a uniformly
smooth, creamy batter, which is the foundation for an exquisite baked oat. -
Incorporate Mix-ins Thoughtfully: Due to the naturally thick
consistency of the baked oats batter, delightful mix-ins like chocolate
chips, vibrant sprinkles, or crunchy nuts might tend to settle at the
bottom if they are simply poured on top. If your desire is to have them
beautifully and evenly distributed throughout the entire baked oat, gently
stir them into the batter
after the blending process is complete, just before you pour the
mixture into your prepared ramekin. -
Smart Sweetener Swaps: While the rich, amber notes of maple
syrup offer a wonderfully deep and complex flavor profile, you have the
flexibility to
substitute it with honey if you prefer a slightly different type
of sweetness or simply have honey on hand. Furthermore, empower yourself to
adjust the precise amount of sweetener used to perfectly align with your
individual preferred level of sweetness, truly customizing these oats to
your palate. -
Optimal Storage and Reheating for Freshness: Baked oats,
when properly stored in an airtight container, maintain their quality and
flavor beautifully in the refrigerator for 2 to 3 days. While they are
certainly delicious enjoyed cold, I wholeheartedly recommend gently
reheating them briefly either in the microwave for a minute or two or in a
preheated oven for a few minutes. This simple step magically restores their
warm, comforting texture and fresh, vibrant flavor, making them taste as
though they’ve just come out of the oven. -
The Magic of Dutch-Processed Cocoa Powder: For any
chocolate-infused variation, I cannot stress enough the recommendation to
use Dutch-processed cocoa powder. Its unique alkalized nature not only
imparts a much darker, richer color but also delivers a smoother, less
bitter, and profoundly fudgier chocolate flavor that genuinely elevates the
taste experience to new heights. My personal and consistently reliable
go-to brand for exceptional results is Ghirardelli. -
Consider Gluten-Free Options: If you or any individuals you
are serving have a gluten sensitivity or a diagnosed gluten allergy, it is
imperative to ensure you use certified gluten-free rolled oats. Rest assured,
the preparation method remains precisely the same, providing an equally
delicious and entirely safe breakfast option for everyone to enjoy without
concern. -
Choosing the Perfect Ramekin Size: An 8 oz. ramekin is the
ideal size for crafting a single, perfectly portioned serving of baked oats,
resulting in a beautifully presented individual oat cake. If you happen to
only possess smaller ramekins, you can certainly use two of them to
accommodate a single batch. However, when using smaller vessels, be sure to
slightly reduce the baking time and commence checking for doneness a bit
sooner, as smaller portions will naturally cook more rapidly.
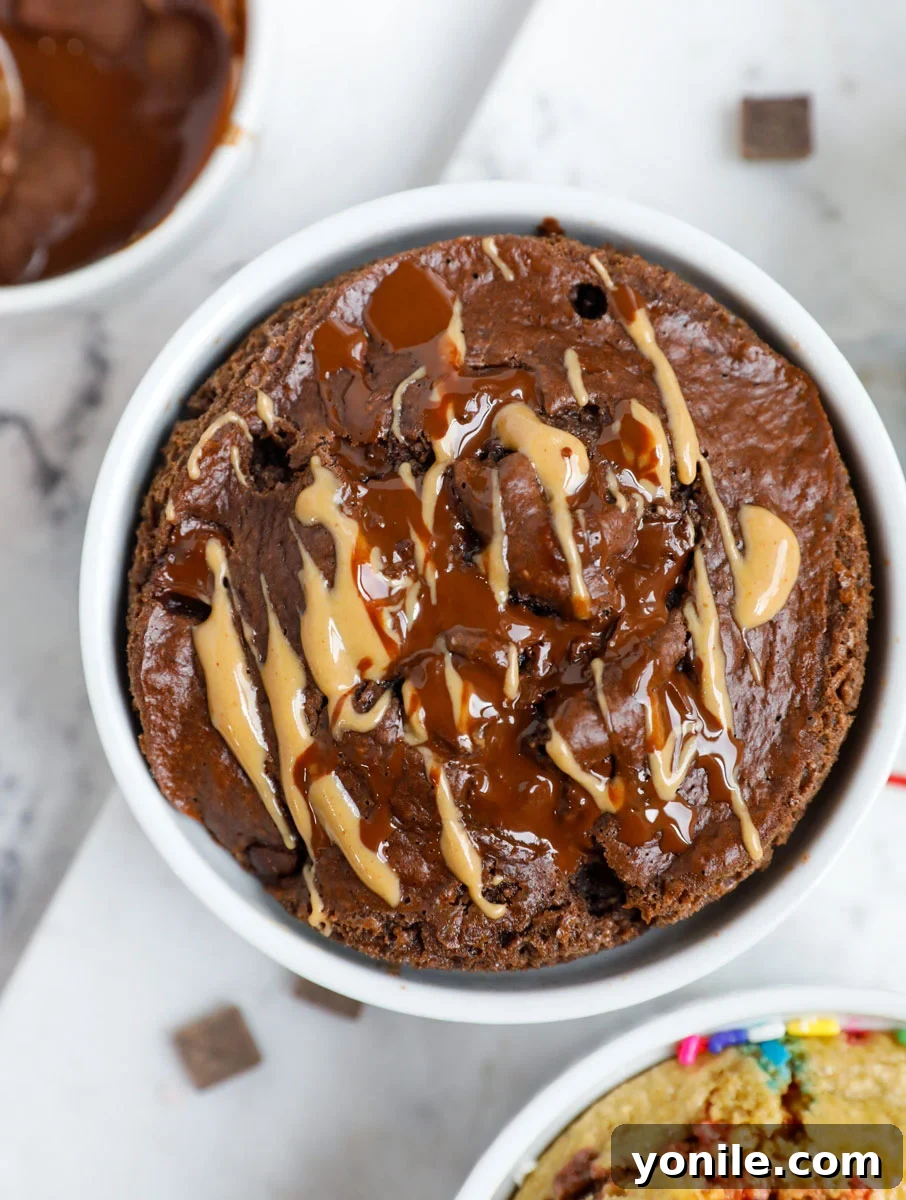
Frequently Asked Questions About Baked Oats
Here are detailed answers to some of the most common questions regarding the
preparation and enjoyment of baked oats. These insights will help you maximize
your experience with this incredibly versatile and delicious breakfast option:
Absolutely! Despite their delightful, indulgent cake-like texture and
the enticing option to enhance them with fun toppings like rich chocolate
and vibrant sprinkles, baked oats are fundamentally a highly nutritious
and wholesome meal. At its very core, it’s oatmeal—a robust whole grain
brimming with dietary fiber, essential vitamins, and vital minerals. This
composition provides a sustained release of energy throughout your
morning, actively aids in healthy digestion, and is incredibly effective
at keeping you feeling full, satisfied, and energized for hours. It truly
is a smart, delicious, and healthy way to kickstart your day with a boost.
I typically recommend using an 8 oz. (which is approximately a 1-cup
capacity) ramekin for crafting a perfectly portioned single serving of
baked oats. This size creates an ideal individual oat cake. If you don’t
happen to have an 8 oz. ramekin readily available, you can certainly use
two smaller ones to accommodate the batter. However, when utilizing
smaller dishes, it is crucial to closely monitor your baked oats as the
baking time will likely be notably reduced due to the smaller volume.
Adjusting the baking time accordingly is key to preventing any undesirable
overcooking.
No, for this specific baked oats recipe, it is crucial to use old-fashioned
rolled oats, or quick oats as a secondary, acceptable option. The success
of this recipe hinges on the rolled oats being thoroughly blended into a
fine, flour-like consistency, essentially acting as oat flour. This fine
consistency is what imparts the signature cake-like texture to the baked
oats. Steel-cut oats possess a significantly different and much harder
structure; they will not break down sufficiently in a blender to achieve
the same creamy, fluffy effect, resulting in a drastically different, and
likely undesirable, grainy texture in your final product.
Absolutely! Incorporating a tablespoon of your favorite protein powder
(vanilla or chocolate flavors typically integrate exceptionally well) is
an excellent and simple way to significantly boost the nutritional value
and satiety of your baked oats. However, it’s important to note that
protein powder tends to absorb moisture. Therefore, when you add it, be
sure to also include an additional tablespoon of milk (or your chosen
non-dairy alternative) to maintain the perfect batter consistency and
prevent the baked oats from becoming dry or dense.
Transforming these delicious baked oats into a vegan-friendly delight is
remarkably straightforward! You can easily swap the whole egg for a “flax
egg” (prepared by mixing 1 tablespoon of ground flaxseed with 3 tablespoons
of water and allowing it to sit for approximately 5 minutes until it forms
a gel-like consistency). Instead of traditional dairy milk, simply use
your preferred plant-based milk, such as almond milk, oat milk, soy milk,
or coconut milk. For the Funfetti variation, ensure you opt for vegan
butter or substitute the butter with a neutral-flavored coconut oil. As
always, double-check that your chocolate chips and sprinkles are also
certified vegan-friendly.
Yes, indeed you can! If you find yourself pressed for time and in need of
a quick breakfast solution, you can absolutely cook baked oats in the
microwave. Prepare the batter and carefully pour it into a microwave-safe
ramekin, following the same instructions as you would for oven baking.
Microwave on high power for approximately 90-120 seconds, or until the
oats are visibly set and thoroughly cooked through. It is advisable to
keep a very close eye on them during this process, as microwave cooking
times can vary quite significantly based on your specific appliance.
Explore More Easy & Delicious Breakfast Recipes
If you’ve thoroughly enjoyed the simplicity, incredible flavor, and comforting
warmth of these baked oats, then you’re truly in for a treat! Our extensive
collection proudly features a wide array of easy-to-make and profoundly
satisfying breakfast recipes, all thoughtfully designed to make your mornings
brighter, more convenient, and undeniably more delicious. Be sure to explore
these other fantastic options to diversify your breakfast menu:
- Blueberry Baked Oatmeal
- Almond Joy Energy Bites
- Baked Chocolate Oatmeal
- Keto Coffee Cake
- Homemade Chocolate Granola
- Keto Everything Bagel
Are you interested in taking your culinary skills a step further by making your
very own oat flour from scratch for even fresher baked goods? Then you absolutely
won’t want to miss my comprehensive and easy-to-follow
How To Make Oat Flour
guide, which provides detailed, step-by-step instructions.
I sincerely hope you find immense enjoyment in exploring all the wonderful and
diverse recipes I am delighted to share with you, including this truly delightful
and widely popular Tiktok Viral Baked Oats Recipe (3 Ways). I wholeheartedly
encourage you to give it a try, savor every single bite, and please consider
leaving a star rating and a thoughtful comment below to share your personal
experience and feedback with our growing community. Your valuable input is
always deeply appreciated!
For all my latest social posts, an array of mouth-watering new recipes, and
daily kitchen inspiration, be sure to follow me at
Cookin’ With Mima on
FACEBOOK,
INSTAGRAM, and
PINTEREST. Happy cooking and happy eating!
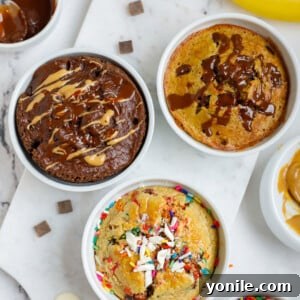
How to Make Baked Oats {3 Ways}
prepared in advance or assembled swiftly in just a few minutes. These
enjoyable and tasty breakfast baked oats will be a hit with your
family!
servings
Ingredients
Funfetti Baked Oats
-
½
cup
old-fashioned rolled oats -
1-2
tbsps.
maple syrup (more or less to taste) -
1
tsp.
baking powder -
1
whole
egg -
1
tsp.
vanilla extract -
2
tbsps.
milk -
2
tbsps.
melted butter -
2½
tsps.
rainbow sprinkles (2 tsps. for the batter), ½ for topping or less -
2
white chocolate wafer chips, chopped (for topping) - dash of salt
Chocolate Chip Banana Baked Oats
-
½
cup
old-fashioned rolled oats -
1-2
tbsps.
maple syrup (more or less to taste) -
1
small
ripe banana -
1
tsp.
baking powder -
1
whole
egg -
1
tsp.
vanilla extract -
2-3
tbsps.
semi-sweet chocolate chips or chunks
(more or less per preference) - dash of salt
Chocolate PB Banana Baked Oats
-
½
cup
old-fashioned rolled oats -
2
tbsps.
milk -
1
tbsp.
creamy peanut butter -
1
small
ripe banana -
1-2
tbsps.
maple syrup (more or less to taste) -
1
tsp.
baking powder -
1
whole
egg -
1
tsp.
vanilla extract -
1
tbsps.
Dutch cocoa powder (I used Ghirardelli) -
2-3
tbsps.
semi-sweet chocolate chips or chunks
(more or less per preference) - dash of salt
Optional Toppings
- Drizzle of melted chocolate
- Drizzle of creamy peanut butter
Instructions
-
Preheat the oven to 350°F (175°C). Place the rack in the middle
of your oven. -
In a blender, combine all the main ingredients for your chosen
baked oats variation,
except for the add-ins (such as chocolate
chunks, sprinkles, white chocolate wafer chips). Blend until the
mixture is nice and smooth, resembling a thick batter. -
Lightly spray an 8 oz. ramekin with baking spray to prevent
sticking. Pour the batter into the ramekin. Now, scatter your
chosen add-ins (chocolate chunks, sprinkles, white chocolate
wafer chips) on top. For a more integrated flavor, you can also
gently push some of these mix-ins into the batter. -
Bake in the preheated oven for approximately 25 minutes. Baking
time may vary slightly based on your oven, so start checking for
doneness around the 20-minute mark. The baked oats should be set
and not jiggly in the center, but avoid overcooking to keep them
moist. -
Remove from the oven and let it cool in the ramekin for a couple
of minutes before serving. Optionally, drizzle with some melted
chocolate, creamy peanut butter, or your favorite topping for an
extra treat.
Notes
- Grease ramekins with baking spray before filling.
-
Be sure to accurately measure the baking powder; don’t eyeball it.
This helps the baked oats rise and prevents them from being dense
and heavy. Too much can alter the taste. -
Use a high-speed blender to ensure all ingredients are well blended
and smooth. -
Due to the batter’s thickness, you may need to stir in chocolate
chips, sprinkles, or other mix-ins if you want them incorporated
throughout the dough, rather than just on top. - The maple syrup can be swapped for honey if preferred.
-
These baked oats can be stored in the fridge for 2 to 3 days, but
they are truly best when enjoyed warm and fresh. -
For a richer, fudgier chocolate flavor, I recommend using Dutch-processed
cocoa powder. My go-to brand is Ghirardelli.
Nutrition
Like this recipe? Rate and comment below!