

Prepare to delight your taste buds and impress your family with these incredibly crispy, golden-brown **Chicken Bites**! Forget the frozen aisle – making delicious, tender, and juicy chicken nuggets at home has never been easier or more satisfying. Crafted with just a handful of everyday ingredients, this recipe comes together quickly, making it the perfect solution for busy weeknights, fun family dinners, or even an irresistible snack for game day. Whether you’re serving them as a standalone treat with an array of dipping sauces or as the star of a complete meal, these homemade chicken bites are guaranteed to be a crowd-pleaser that will have everyone reaching for more.

Your kids, in particular, are going to absolutely adore these **homemade chicken bites**! Each piece is unbelievably tender and juicy on the inside, encased in a perfectly seasoned, super crispy exterior. They’re so flavorful and fun to eat that you’ll barely finish your own plate before hearing requests for seconds (or thirds!). This isn’t just a recipe; it’s a guaranteed winner in any household, transforming simple chicken into a culinary experience everyone will love. Plus, you have the peace of mind knowing exactly what goes into them.
Looking for some fantastic side dishes to complement these irresistible crispy chicken bites? We highly recommend pairing them with our Crispy Air Fryer French Fries for that classic fast-food experience done right, or elevate your meal with our savory Roasted Garlic Bread. Both options are incredibly easy to prepare and perfectly harmonize with the delightful crunch and robust flavor of your freshly made chicken nuggets, creating a meal that’s both comforting and exciting.
Why These Crispy Fried Chicken Bites Are an Absolute Must-Try
Once you experience the joy of making and tasting these homemade crispy chicken bites, you’ll wonder why you ever bought them from the store. Here are just a few compelling reasons why this recipe is about to become a staple in your kitchen:
- Minimal Ingredients, Maximum Flavor: You won’t need a lengthy shopping list for this recipe. With just five fundamental ingredients, plus your frying oil, you can whip up a batch of these delectable chicken bites. The beauty lies in their simplicity, allowing the natural goodness of the chicken and your chosen seasoning to shine through. This also means fewer trips to the grocery store and less hassle in the kitchen.
- Effortlessly Easy to Prepare: Don’t let the idea of frying intimidate you. The process for these chicken bites is incredibly straightforward. It involves a simple two-step coating process followed by a quick fry in a skillet. It’s a “set it and forget it” kind of simplicity once you get into the rhythm of dredging. This ease makes it a fantastic recipe for beginner cooks or anyone short on time but unwilling to compromise on taste.
- Unanimously Kid-Approved (and Adult-Friendly!): Say goodbye to mealtime battles! These chicken bites are a certified hit with children of all ages. Their bite-sized format, crispy texture, and savory flavor make them an irresistible choice for even the pickiest eaters. But don’t be fooled by their kid-friendly appeal; adults will find them equally satisfying, making them a perfect family-wide meal solution. Everyone gets to enjoy a delicious, comforting dish that feels like a treat.
- Customizable to Your Liking: While the basic recipe is fantastic on its own, it also serves as a perfect canvas for customization. You can experiment with various seasonings to match your family’s preferences, making each batch a unique culinary adventure. This adaptability ensures that these chicken bites never get boring and can be tailored for different occasions or cravings.
- Versatile for Any Occasion: Whether you need a quick protein for lunch, a fun appetizer for a party, or the main course for dinner, these chicken bites fit the bill. Their grab-and-go nature makes them excellent for meal prep, and they reheat beautifully, providing delicious leftovers. This versatility adds incredible value to your recipe repertoire.
Gather Your Ingredients: What You’ll Need for Perfect Chicken Bites
The magic of these crispy chicken bites begins with a few fresh, quality ingredients. Here’s a breakdown of what you’ll need and why each component is essential:

- Chicken Tenderloin: We recommend using chicken tenderloin, precisely cubed into 1-inch pieces. Tenderloins are naturally, as their name suggests, very tender and cook quickly and evenly. However, this recipe is highly adaptable. Feel free to substitute with boneless, skinless chicken thighs for a richer, juicier bite, or use chicken breasts, ensuring they are cut uniformly to prevent uneven cooking. Consistency in size is key for perfect results.
- All-Purpose Flour: This forms the base of our crispy coating. Regular all-purpose flour works wonderfully, creating a light yet sturdy crust. For those seeking a gluten-free option, a good quality gluten-free all-purpose flour blend can be used interchangeably, ensuring everyone can enjoy these delicious bites. The flour provides the initial dry layer for the egg wash to adhere to.
- Seasoning of Choice: This is where you can truly personalize your chicken bites! We achieved fantastic results using Pioneer Woman’s Anything Goes Seasoning, which offers a robust blend of herbs and spices. However, don’t limit yourself! Feel free to use your favorite poultry seasoning blend, or create your own with a mix of garlic powder, onion powder, paprika, black pepper, and a touch of cayenne for a subtle kick. A well-seasoned flour mixture is crucial for a flavorful crust.
- Large Egg: One large egg is essential for creating the “glue” that binds our seasoned flour to the chicken. When whisked into an egg wash, it helps produce a thicker, more stable, and ultimately crispier crust on your fried chicken. It’s a vital component for that perfect golden exterior.
- Heavy Cream: Added to the egg wash, heavy cream contributes to the richness and adhesion of the coating, promoting an even crispier finish. If heavy cream isn’t available or you prefer an alternative, buttermilk makes an excellent substitute. Buttermilk not only adds a lovely tang but also tenderizes the chicken slightly, enhancing its juicy texture.
- Canola Oil (for Frying): You’ll need a sufficient amount of canola oil for deep frying the chicken. Canola oil is a neutral-flavored oil with a high smoke point, making it ideal for frying. Other good options include vegetable oil or peanut oil. Ensure you have enough to submerge the chicken pieces adequately, typically 2-3 inches in your skillet. The right oil at the right temperature is critical for crispy, non-greasy chicken.
Mastering the Art: A Step-by-Step Guide to Making Crispy Chicken Bites
Creating these incredibly delicious crispy chicken bites is a straightforward process, designed for ease and maximum flavor. Follow these simple steps for perfect results every time:
- Step 1: Prepare Your Chicken. Begin by taking your chicken tenderloins and cutting them into uniform 1-inch cubes. Uniformity is important here, as it ensures all pieces cook at the same rate, preventing some from being undercooked while others are overcooked. Place the cubed chicken into a bowl and set it aside. You might also lightly pat the chicken dry with paper towels to help the coating adhere better.
- Step 2: Set Up Your Coating Stations. This recipe uses a classic dredging method. You’ll need two shallow bowls or plates. In the first bowl, combine your all-purpose flour with your chosen seasoning. Whisk these ingredients together thoroughly to ensure the seasoning is evenly distributed throughout the flour. In the second bowl, whisk together the large egg and heavy cream (or buttermilk) until well combined. These two stations are crucial for building that perfect crispy crust.

- Step 3: Dredge the Chicken for Maximum Crispness. This is the secret to a truly crispy exterior. Take one piece of cubed chicken and first dip it thoroughly into the seasoned flour mixture, ensuring it’s completely coated. Shake off any excess flour. Next, transfer that piece into the egg mixture, allowing it to be fully submerged and coated. Finally, return the chicken piece back into the flour mixture for a second coating. This double-dredging technique creates extra layers, leading to a much crispier and more satisfying crust. Gently pat the flour onto the chicken to help it adhere well.

- Step 4: Prepare for Frying. As you finish dredging each piece of chicken, place it on a clean sheet pan or a wire rack. Continue this process until all your chicken pieces are coated. Allow them to sit for a few minutes while you prepare your frying oil; this helps the coating adhere and prevents it from falling off during frying.
- Step 5: Heat the Oil and Fry. In a deep skillet or a Dutch oven, pour about 2-3 inches of canola oil. Heat the oil over medium heat until it reaches approximately 350°F (175°C). If you don’t have a thermometer, you can test the oil by dropping a small pinch of flour into it; it should sizzle immediately. Carefully add the dredged chicken cubes to the hot oil, ensuring not to overcrowd the pan. Frying in batches is crucial for maintaining the oil’s temperature and achieving optimal crispiness. Fry for about 5 minutes per batch, turning occasionally, until the chicken is beautifully golden brown on the outside and fully cooked through on the inside.
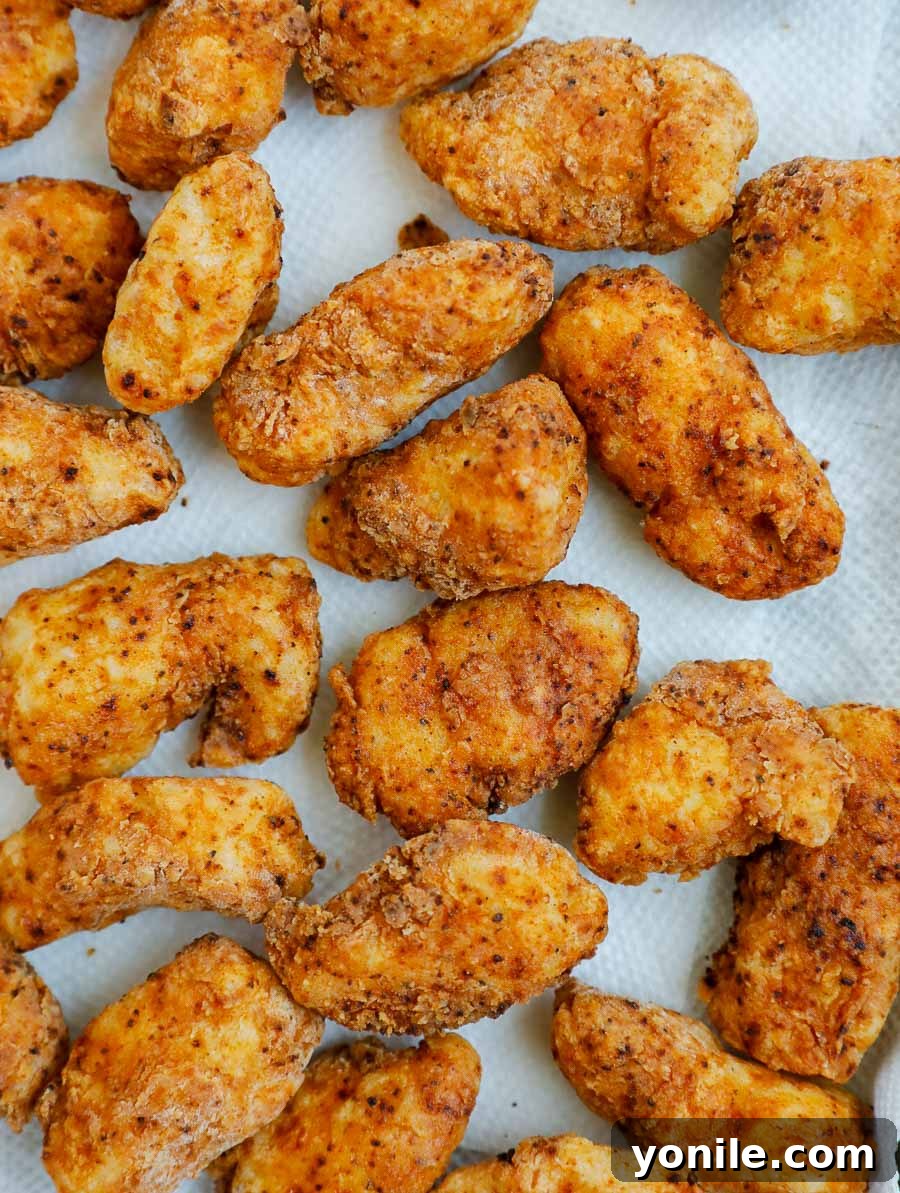
- Step 6: Drain Excess Oil. Once the chicken bites are cooked to perfection, carefully remove them from the oil using a slotted spoon or tongs. Transfer them to a sheet pan lined with paper towels or a wire rack set over a sheet pan. Allow them to rest for a couple of minutes; this step is important for draining any excess oil, ensuring your chicken bites remain wonderfully crispy and not greasy.
- Step 7: Serve and Enjoy! Transfer your hot, crispy chicken bites to a serving plate. They are best enjoyed immediately! Serve them with your family’s favorite dipping sauces, whether that’s classic ketchup, tangy honey mustard, creamy ranch, or smoky BBQ sauce. Prepare for smiles and satisfied tummies!

Expert Tips for the Tastiest Homemade Chicken Bites
Achieving perfectly crispy and flavorful chicken bites is easy with a few insider tips. These pointers will help elevate your homemade chicken nuggets from good to absolutely unforgettable:
- Elevate Flavor with Parmesan: For an extra layer of savory deliciousness, grate some fresh Parmesan cheese directly over your freshly fried chicken bites as soon as they come out of the oil. The residual heat from the chicken will gently melt the Parmesan, creating a beautiful, gooey, and incredibly tasty coating that adds a gourmet touch.
- Prioritize Food Safety: The most reliable way to ensure your chicken is fully cooked and safe to eat is by checking its internal temperature. The chicken is done when a meat thermometer inserted into the thickest part of a piece reads 165°F (74°C). This prevents both undercooked risks and overcooked dryness.
- Master Oil Temperature Control: This is perhaps the most critical tip for perfectly fried chicken bites. The oil temperature must be just right – not too hot, not too cold.
- **If the oil is too hot:** The chicken’s exterior crust will burn and darken too quickly before the inside has a chance to cook through, resulting in raw chicken beneath a crispy shell.
- **If the oil is not hot enough:** The chicken will absorb excessive amounts of oil, leading to greasy, heavy, and soggy nuggets instead of light and crispy ones. Use a kitchen thermometer if possible, aiming for 350°F (175°C).
- Utilize a Cast Iron Skillet: If you own a cast iron skillet, this is the ideal vessel for frying your chicken bites. Cast iron skillets are renowned for their exceptional heat retention and even heat distribution, which helps maintain a consistent oil temperature throughout the frying process, leading to consistently perfect results.
- Buttermilk as a Substitute: No heavy cream on hand for the egg wash? No problem! Buttermilk is an excellent substitute. It not only contributes to a great crust but also contains acids that can help tenderize the chicken slightly, adding another layer of juiciness and flavor.
- Explore Dipping Sauce Variety: The right dipping sauce can transform your chicken bites! While classic ketchup is always a hit, don’t stop there. We love dipping these crispy bites in a range of sauces, including tangy honey mustard, cool and creamy ranch, smoky BBQ sauce, or even a spicy sriracha mayo for an extra kick. Offer a selection for a fun dipping experience!
- Don’t Overcrowd the Pan: Frying in small batches is crucial. Overcrowding the pan will significantly drop the oil’s temperature, leading to greasy, soggy chicken rather than crispy perfection. Give each piece enough space to fry evenly and maintain that crucial high oil temperature.
- Consider a Double Fry for Extra Crispiness: For an extra-crispy, almost shatteringly crunchy crust, consider a double-fry method. Fry the chicken until it’s just lightly golden and cooked through. Remove, drain, and let it cool slightly. Then, increase the oil temperature slightly and fry again for 1-2 minutes until deeply golden brown and extra crispy.

Frequently Asked Questions About Crispy Chicken Bites
Here are some common questions about making, storing, and customizing your homemade crispy chicken bites:
Absolutely! Freezing chicken bites is a fantastic way to enjoy them later. To freeze them *before* frying, prepare the chicken bites according to the instructions (cubing, dredging in flour and egg wash) but do not fry them. Instead, arrange them in a single layer on a baking sheet and freeze until solid. Once frozen, transfer them to a freezer-safe bag or airtight container, and they can be stored for up to 3 months. When you’re ready to cook, fry them directly from frozen in 350°F (175°C) oil until golden brown and crispy, which may take a minute or two longer than fresh. You can also freeze the chicken bites *after* they’ve been fried. Allow them to cool completely, then freeze them in a single layer before transferring to a freezer bag. Reheat in an oven or air fryer for best results.
Cooked crispy chicken bites can be stored in an airtight container in the refrigerator for up to 3 days. To maintain their crispiness when reheating, we recommend using an oven or an air fryer at a low to medium temperature (around 325-350°F or 160-175°C) until they are warmed through and crispy again. Microwaving is generally not recommended as it can make them soggy.
The seasoning options are endless! Beyond a standard poultry blend, you can enhance the flavor profile with individual spices like garlic powder, onion powder, or a dash of cayenne pepper for a subtle heat. Dried herbs such as oregano, thyme, or rosemary can also add an aromatic touch. For a more unique twist, consider smoked paprika, a pinch of chili powder, or even a blend of Italian herbs. Don’t be afraid to experiment to find your perfect flavor combination!
Yes, you absolutely can! While deep-frying yields the crispiest results, both baking and air frying are excellent healthier alternatives. For **baking**, dredge the chicken as instructed, then place on a greased baking sheet or a wire rack set over a baking sheet. Lightly mist with cooking spray. Bake at 400°F (200°C) for 15-20 minutes, flipping halfway, until golden and cooked through. For **air frying**, preheat your air fryer to 375°F (190°C). Arrange the dredged chicken in a single layer, ensuring not to overcrowd the basket. Lightly mist with cooking spray. Air fry for 10-15 minutes, shaking the basket halfway, until golden and crispy.
Craving More Crispy Delights? Discover Our Other Irresistible Recipes!
If you loved the satisfying crunch of these chicken bites, you’re in for a treat! We have a collection of other fantastic crispy recipes that are sure to become new family favorites:
- Crunchy Baked Coconut Shrimp: A tropical escape with every bite, perfectly crisp and flavorful.
- Stuffed Jalapeno Popper Egg Rolls: All the zesty, creamy, spicy goodness of jalapeno poppers, wrapped in a crispy egg roll.
- Baked Parmesan Crusted Chicken: A healthier take on crispy chicken, infused with savory Parmesan.
- Crispy Baked Chicken Tenders: Tender on the inside, crispy on the outside, and baked to perfection.
We genuinely hope you enjoy all the recipes we share, especially this utterly delicious Crispy Chicken Bites recipe. We encourage you to give it a try, savor every bite, leave a star rating and comment below to let us know what you think, and share it with your friends and family!
If you make this recipe and love it, please take a moment to leave a star rating and a comment below. Your feedback helps other home cooks discover and enjoy these recipes! Don’t forget to use my hashtag to share your delicious recreations with me on INSTAGRAM – I absolutely love seeing what you cook up! Also, follow Cookin’ With Mima on FACEBOOK |INSTAGRAM |PINTEREST for all my latest culinary posts, tips, and new recipes. Happy cooking!

Print Recipe
Crispy Chicken Bites
Ingredients
- 1 lb. chicken tenderloin, cubed into 1″ bites
- ¾ cup all-purpose flour
- 1½ tbsp. seasoning of choice, such as Pioneer Woman’s Anything Goes Seasoning
- 1 large egg
- 2 tbsps. heavy cream (or buttermilk)
- canola oil, for deep frying
Instructions
-
Cube chicken into uniform 1-inch pieces. Place in a bowl and set aside.
-
In a shallow bowl or plate, thoroughly mix together the flour and your chosen seasoning. In a separate bowl, whisk the egg and heavy cream (or buttermilk) until well combined.
-
For each piece of chicken, first dip it into the flour mixture, shaking off excess. Then, dip into the egg mixture, ensuring full coverage. Finally, return it to the flour mixture for a second coating, patting the flour well into the chicken to create a thick crust.
-
Place the dredged chicken pieces on a sheet pan or wire rack. Repeat the dredging process for all remaining chicken pieces. Allow them to sit for a few minutes while the oil heats.
-
Fill a deep skillet with about 2-3 inches of canola oil and heat to medium-high, aiming for approximately 350°F (175°C).
-
Carefully deep fry the chicken cubes in batches for about 5 minutes per batch, turning occasionally, until they are crispy, golden brown, and fully cooked through (internal temperature of 165°F / 74°C). Avoid overcrowding the skillet to maintain oil temperature.
-
Remove the cooked chicken from the oil using a slotted spoon and transfer to a sheet pan lined with paper towels (or a wire rack) to drain any excess oil for a couple of minutes.
-
Transfer the crispy chicken bites to a serving plate and enjoy immediately with your favorite dipping sauces!
Notes
- For an extra savory boost, grate fresh Parmesan cheese over the hot, freshly fried chicken bites. The residual heat will perfectly melt the cheese.
- Always confirm doneness by checking the chicken’s internal temperature with a meat thermometer; it should reach 165°F (74°C).
- Maintaining the correct oil temperature (around 350°F / 175°C) is crucial. Too hot, and the crust burns before the chicken cooks; too cold, and the chicken becomes greasy.
- A cast iron skillet is highly recommended for frying due to its superior heat retention and even heat distribution.
- If heavy cream is unavailable, buttermilk is an excellent alternative for the egg wash, adding both richness and a subtle tang.
- Serve these delicious bites with a variety of dipping sauces like ketchup, honey mustard, ranch, or BBQ sauce to cater to all tastes.
Nutrition
Carbohydrates: 23g |
Protein: 27g |
Fat: 6g |
Saturated Fat: 3g |
Polyunsaturated Fat: 1g |
Monounsaturated Fat: 2g |
Trans Fat: 1g |
Cholesterol: 84mg |
Sodium: 137mg |
Potassium: 544mg |
Fiber: 4g |
Sugar: 1g |
Vitamin A: 270IU |
Vitamin C: 2mg |
Calcium: 132mg |
Iron: 4mg