

Embark on a culinary journey to the vibrant flavors of Southern Africa with this irresistible **Peri Peri Chicken Breast recipe**. This dish is a celebration of fiery heat, bright zest, and tangy depth, transforming ordinary chicken into an extraordinary meal. Perfect for grilling, baking, or air frying, our homemade Peri Peri chicken marinade ensures every bite is incredibly tender, juicy, and bursting with a complex profile that will tantalize your taste buds. Whether you’re a seasoned chef or a home cook looking to spice up your weeknight dinners, this recipe is designed for ease and maximum flavor impact. Get ready to fire up your grill and impress everyone with this mouthwatering, unforgettable Peri Peri chicken experience.

Inspired by the iconic flavors of Nando’s, this homemade Peri Peri Chicken recipe goes beyond a simple spicy dish. It’s a symphony of savory notes, citrusy brightness, and a controlled fiery kick that’s utterly addictive. It’s ideal for a memorable summer barbecue, a unique twist on a quick family dinner, or simply to satisfy your craving for something bold and exciting. The versatility of this grilled Peri Peri chicken breast allows it to be the star of any meal, promising an explosion of flavor that everyone, from spice lovers to those who appreciate a well-balanced dish, will undoubtedly adore. Prepare for rave reviews and empty plates!
If you’re eager to explore more delicious chicken recipes that pack a punch, be sure to try my Chicken Pakora for a crispy appetizer, my hearty Chicken Kofta, or the comforting Million Dollar Chicken Bake. Each offers a unique flavor profile to expand your culinary repertoire.
Why You’ll Adore This Homemade Peri Peri Chicken Recipe
This Peri Peri Chicken Breast recipe isn’t just another meal; it’s a flavorful adventure that promises to become a staple in your kitchen. Here’s why you’ll fall in love with it:
- Explosive Flavor Layers: The true magic of this Peri Peri chicken lies in its incredibly rich and complex marinade. Unlike many recipes that simply combine spices, ours starts with sautéed red bell peppers and red onion, creating a sweet and smoky base. This foundational layer is then elevated by pungent garlic, zesty fresh lemon juice, and the bright acidity of red wine vinegar. A carefully balanced blend of paprika, dried oregano, salt, and black pepper adds depth and a beautiful hue. The result is a marinade that deeply penetrates the chicken, infusing it with multiple dimensions of flavor – smoky, sweet, tangy, and irresistibly savory.
- Incredibly Versatile: One of the best aspects of Peri Peri Chicken is its adaptability. While delicious on its own as a main course, these succulent chicken tenders can be enjoyed in countless ways. Serve them sliced over a fresh, crisp salad for a light yet satisfying lunch, or pile them high on crusty bread with your favorite toppings for an epic Peri Peri chicken sandwich. They also make fantastic additions to wraps, tacos, or even pasta dishes, offering endless possibilities for creative meal planning.
- Surprisingly Easy to Master: Don’t let the gourmet taste fool you – this Peri Peri chicken recipe is remarkably straightforward, making it perfect for home cooks of all skill levels. With readily available ingredients and clear, step-by-step instructions, you can achieve restaurant-quality results in your own kitchen. The process involves simple techniques like sautéing vegetables and blending ingredients, ensuring a smooth and enjoyable cooking experience from start to finish.
Essential Peri Peri Chicken Ingredients
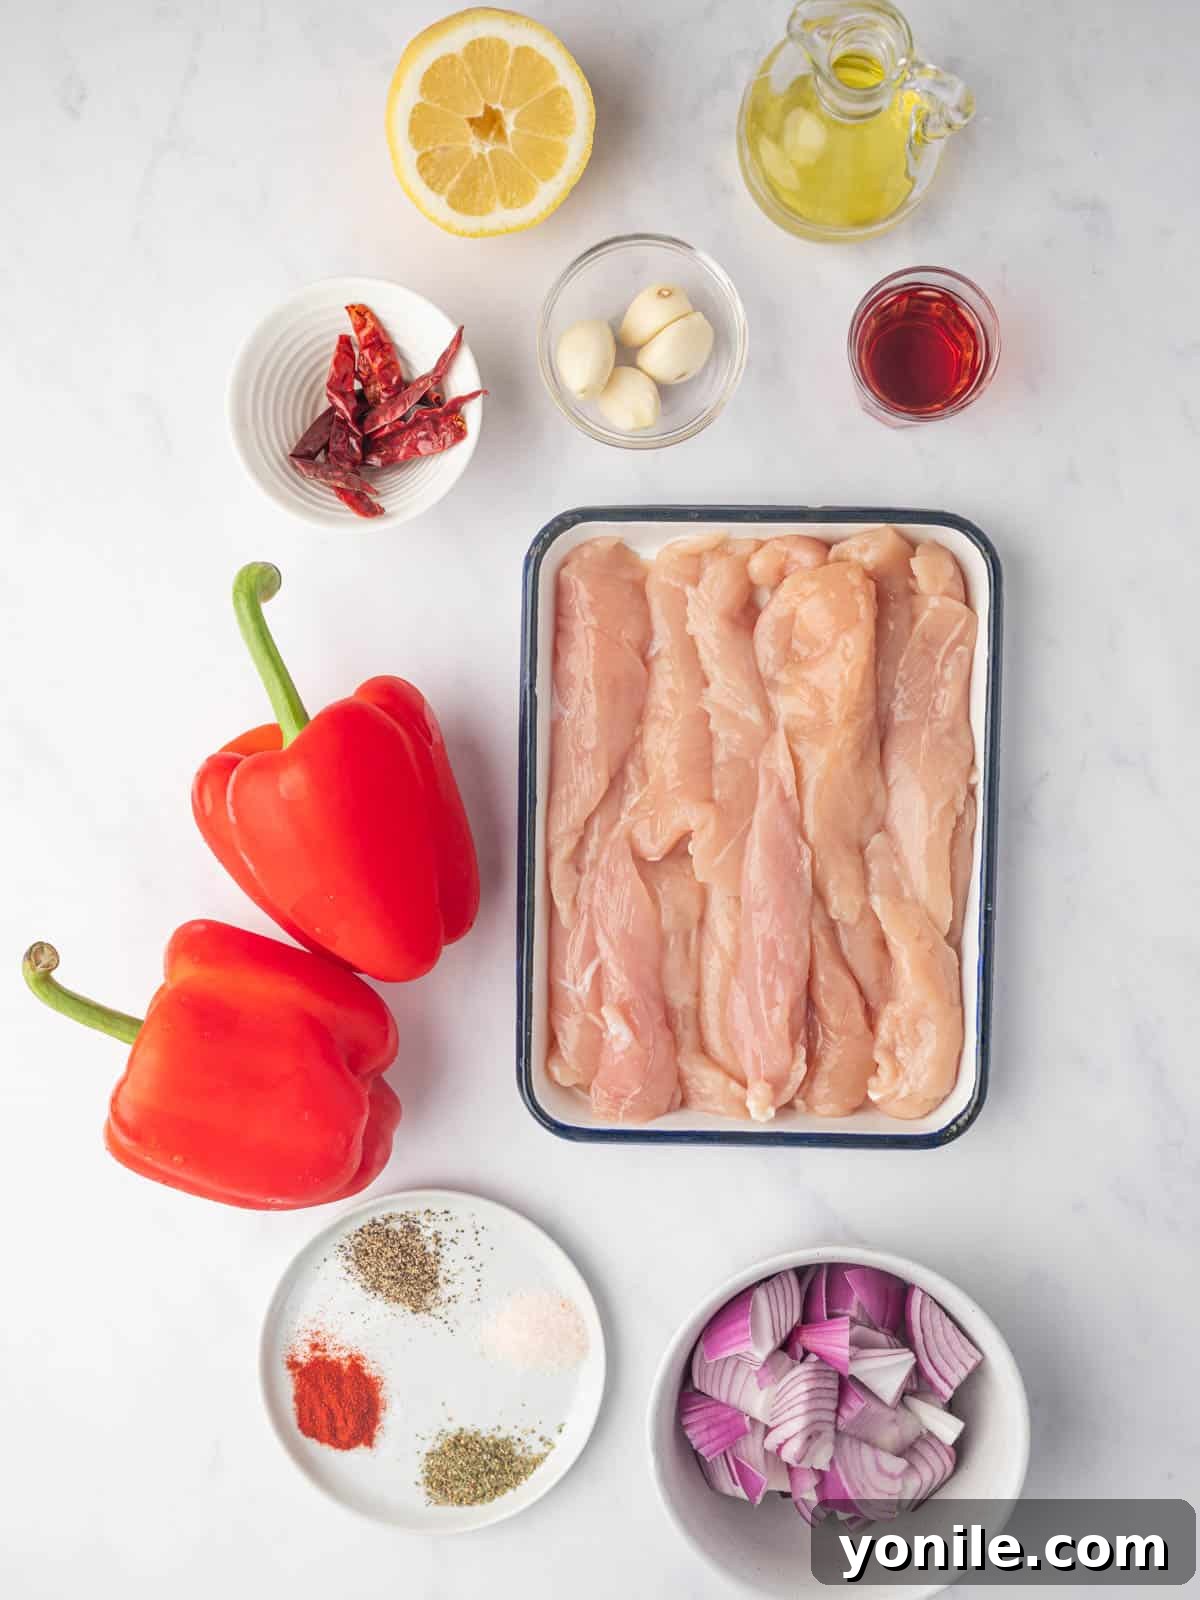
Crafting the perfect Peri Peri chicken starts with fresh, high-quality ingredients. Here’s what you’ll need to create our signature spicy and tangy marinade:
- Peppers and Onion: We use diced red bell peppers and red onion, which are sautéed to unlock their natural sweetness and add a beautiful depth of flavor to the sauce. This caramelization process is key to building a rich base. For a subtle variation, you could experiment with orange or yellow bell peppers for a slightly different sweet profile, or a milder white onion if you prefer.
- Thai Red Chilis: These small, potent chilis are the heart of the Peri Peri kick, offering both sweetness and intense heat. Their vibrant red color also contributes to the sauce’s appealing hue. If fresh Thai red chilis are difficult to find, a good substitute is serrano peppers for similar heat. Alternatively, for convenience, a ¼ cup of chili garlic sauce can provide a comparable flavor and spice level, though adjust to your heat preference.
- Flavorful Marinade Base: A high-quality oil, such as robust olive oil, forms the emulsifying base for our marinade, carrying the flavors deep into the chicken. Complementing this, fresh garlic cloves provide an aromatic foundation, while red wine vinegar adds a crucial tang and helps tenderize the meat. The bright, acidic notes of fresh lemon juice cut through the richness and elevate the overall zestiness of the sauce.
- Key Seasonings: Our carefully chosen blend of spices brings warmth, color, and additional layers of flavor. Paprika not only provides a lovely reddish-orange color but also a sweet, smoky undertone. Dried oregano contributes an earthy, herbaceous aroma. Essential salt and freshly ground black pepper balance all the flavors, ensuring a well-rounded and delicious marinade.
- Chicken Selection: For this recipe, we recommend boneless, skinless chicken tenders for their quick cooking time and consistent tenderness. If tenders aren’t available, simply cut boneless, skinless chicken breasts into uniform strips or bite-sized pieces. If you prefer the richer flavor and moisture of dark meat, boneless, skinless chicken thighs are an excellent alternative; just be sure to adjust the cooking time slightly as thighs often take a bit longer.
- Garnish for Freshness: To complete the dish, a sprinkle of freshly chopped parsley adds a burst of vibrant green color and a clean, herbaceous finish. Serving with fresh lemon wedges allows each diner to add an extra squeeze of bright, citrusy flavor, enhancing the overall zesty profile of the Peri Peri chicken.
Ingredient Substitutions and Creative Variations
This Peri Peri Chicken recipe is wonderfully flexible, allowing you to tailor it to your preferences and what you have on hand:
- Chicken Cut Options: While chicken breasts are specified, feel free to use other cuts. Boneless, skinless chicken thighs offer a juicier, richer flavor profile and are more forgiving if overcooked. For a bone-in option, chicken drumsticks or whole bone-in breasts can be used, though you’ll need to significantly adjust cooking times and ensure they cook through to a safe internal temperature.
- Peri Peri Sauce Shortcuts: If you’re short on time or prefer a ready-made option, a good quality store-bought Peri Peri sauce can be a convenient substitute for the homemade marinade. Look for brands with natural ingredients for the best flavor. While it won’t have the exact fresh nuances of our homemade version, it will still deliver a delicious, spicy kick.
- Adjusting the Heat Level: The beauty of homemade sauce is complete control over the spice. For more heat, add an extra Thai red chili or two, or even a pinch of cayenne pepper. If you prefer a milder flavor, reduce the number of chilis or remove their seeds and membranes. For a very gentle heat, you can even substitute some of the spicier chilis with additional bell peppers.
- Enhancing Tenderness and Tang: For an extra layer of tanginess and to further tenderize the chicken, consider adding a couple of tablespoons of plain Greek yogurt or buttermilk to the marinade. The lactic acid works wonders on the chicken fibers, resulting in an even more succulent texture.
- Citrus Swaps: While lemon juice provides a classic bright flavor, fresh lime juice can be used as a delicious alternative. It offers a slightly different, perhaps sharper, citrus note that pairs beautifully with the spicy chilis.
Crafting Your Homemade Peri Peri Chicken: A Step-by-Step Guide



Expert Tips to Perfect Your Peri Peri Chicken
Achieving restaurant-quality Peri Peri chicken at home is simple with these expert tips:
- Marinate for Maximum Flavor: While 1 hour of marination will yield tasty results, for truly exceptional flavor penetration and tender chicken, aim to marinate your chicken for a minimum of 2 hours. For the absolute best results, allow the chicken to marinate overnight (up to 24 hours) in the refrigerator. The longer it marinates, the deeper and more robust the flavors will become.
- Ensure Proper Grill Preheat: A perfectly preheated grill is paramount for achieving those desirable char marks and a beautifully seared exterior while keeping the inside juicy. Always preheat your grill (or grill pan) to medium-high heat before adding the chicken. This creates an initial burst of heat that locks in moisture and develops rich flavor.
- Utilize a Meat Thermometer: For food safety and perfectly cooked chicken, a reliable meat thermometer is your best friend. Insert the thermometer into the thickest part of the chicken (avoiding bone if applicable). The chicken is safely cooked and at its most tender when it reaches an internal temperature of 165°F (74°C). This prevents overcooking and ensures a juicy result.
- Frequent Basting for Moisture and Flavor: To keep your chicken moist and to intensify the Peri Peri flavor as it cooks, frequently baste it with extra marinade or reserved Peri Peri sauce during grilling. Be sure to stop basting a few minutes before the chicken is fully cooked to allow any raw marinade to cook off, ensuring safety.
- The Importance of Resting: Once cooked, resist the urge to cut into your Peri Peri chicken immediately. Transfer the grilled chicken to a cutting board and let it rest for at least 5-10 minutes. This crucial resting period allows the juices to redistribute throughout the meat, resulting in incredibly tender and succulent chicken.
Perfect Pairings: What to Serve with Peri Peri Chicken
Peri Peri chicken is a versatile main course that pairs beautifully with a variety of side dishes. Here are some fantastic options to complete your meal:
- Roasted Vegetables: Complement the smoky, spicy flavors of the chicken with a medley of vibrant roasted vegetables. Think bell peppers (any color), zucchini, red onion, and eggplant, tossed with olive oil, salt, and pepper, then roasted until tender and slightly caramelized. The natural sweetness of roasted vegetables provides a delightful contrast to the Peri Peri spice.
- Fluffy Rice: A classic pairing, a simple side of fluffy basmati rice or a fragrant pilaf helps to absorb the delicious Peri Peri sauce and balance the heat. You can also elevate your rice by adding a sprinkle of fresh herbs or a squeeze of lemon juice.
- Fresh and Crisp Salad: A light, refreshing green salad dressed with a simple vinaigrette provides a wonderful contrast to the rich and spicy chicken. The crispness and acidity cleanse the palate between bites. My House Salad, with its balanced flavors, would be a perfect complement.
- Hearty Side Salads: For a more substantial side that can stand up to the bold flavors, a grain-based salad like this Turkish Bulgur Salad is an excellent choice. It’s filling, packed with fresh ingredients, and offers a pleasant texture contrast.
Storing and Reheating Your Peri Peri Chicken
Planning ahead or managing leftovers is easy with this Peri Peri Chicken recipe. Here’s how to properly store and reheat your delicious dish:
Storing Leftovers: Any leftover cooked Peri Peri chicken should be stored in an airtight container in the refrigerator. It will maintain its best quality for up to 3 days. Ensure the chicken has cooled completely before transferring it to the container to prevent condensation and maintain freshness.
Reheating Instructions:
- Microwave: For a quick reheat, place chicken pieces on a microwave-safe plate and heat for 1-2 minutes, or until warmed through. Be careful not to overcook, as this can dry out the chicken.
- Oven: For best results, especially if reheating a larger quantity, preheat your oven to 350°F (175°C). Place the chicken in a baking dish, cover loosely with foil to prevent drying, and bake for 10-15 minutes, or until thoroughly heated.
Freezing Options:
- Raw, Marinated Chicken: You can freeze the raw, marinated chicken for future meals. Place the marinated chicken in a freezer-safe bag, ensuring as much air is removed as possible to prevent freezer burn. Store for up to 3 months. Thaw overnight in the refrigerator before grilling or cooking as directed.
- Cooked Chicken: To freeze cooked Peri Peri chicken, allow the chicken tenders to cool completely after cooking. Arrange them in a single layer on a sheet pan and freeze overnight until solid. Once frozen, transfer the individual pieces to a freezer-safe bag or container to prevent them from sticking together. Store for up to 3 months. Thaw in the refrigerator overnight before reheating using the oven or microwave methods.
Versatile Cooking Methods for Peri Peri Chicken
While grilling provides an authentic smoky flavor, this Peri Peri chicken is incredibly versatile and can be cooked using various methods:
- Air Fryer Method: For a crispy exterior and juicy interior with minimal oil, the air fryer is an excellent choice. Arrange the marinated chicken in a single layer in your air fryer basket, ensuring not to overcrowd it. Cook at 375°F (190°C) for 10-12 minutes, flipping halfway through, until the chicken is golden brown and cooked through to 165°F (74°C). Cooking time may vary slightly based on your air fryer model and chicken thickness.
- Stove Top (Griddle Pan) Method: If you don’t have an outdoor grill, a griddle pan on your stovetop can mimic the grill marks and flavor beautifully. Heat a griddle pan over medium-high heat. Add a touch of olive oil if needed, then place the marinated chicken in a single layer. Cook for 7-8 minutes total, turning halfway, until grill marks form and the chicken is fully cooked (165°F/74°C).
- Oven Baking Method: For a hands-off approach, baking is a great option. Preheat your oven to 400°F (200°C). Arrange the marinated chicken tenders in a single layer on a baking sheet lined with parchment paper. Bake for 20-25 minutes, or until the chicken reaches an internal temperature of 165°F (74°C) and the edges are slightly browned. For extra color, you can broil for the last 1-2 minutes, keeping a close eye to prevent burning.

Frequently Asked Questions About Peri Peri Chicken
Absolutely! The homemade Peri Peri sauce can be prepared up to 3 days ahead of time. Store it in an airtight container in the refrigerator, allowing the flavors to deepen even further. For marinating the chicken, it’s best to add the sauce up to 24 hours before cooking. This flexibility makes meal prep a breeze, especially for entertaining.
Yes, you certainly can! While red wine vinegar provides a classic tang, other vinegars can offer delightful variations. Great swaps include apple cider vinegar for a slightly fruitier and milder tang, or white wine vinegar for a crisper, more delicate acidity. Each will impart a slightly different, yet delicious, character to your Peri Peri sauce.
Cooking the Peri Peri sauce by simmering it for 10-12 minutes is highly recommended. This process allows all the vibrant flavors from the fresh ingredients (like peppers, onions, and garlic) to meld and deepen, eliminating any raw taste and creating a more cohesive, complex sauce. However, if you are truly pressed for time, you can skip the simmering step and marinate the chicken directly with the raw blended sauce. The flavor will still be good, but simmering undoubtedly enhances its richness and depth.

Explore More Spicy Chicken Recipes
If you love the bold flavors of Peri Peri chicken, you’re sure to enjoy these other fiery and flavorful chicken dishes:
- Manchurian Chicken
- Buffalo Chicken Thighs
- Creamy Spicy Chicken Pasta
- Sweet and Spicy Asian Chicken
- Mediterranean Roasted Chicken
Elevate your dinner routine with this incredible Grilled Peri Peri Chicken recipe. With its perfect balance of fiery heat, zesty citrus, and savory depth, this dish is destined to become a beloved favorite for any occasion. Whether you’re harnessing the smoky char of an outdoor grill or enjoying the convenience of a grill pan indoors, it’s wonderfully easy to prepare and absolutely bursting with vibrant flavor. Each tender, juicy piece of chicken promises a memorable meal that will transport your senses straight to the heart of spicy, tangy bliss.
If you prepare this recipe or any of my other culinary creations, I would be thrilled if you could leave a star rating and a comment in the section below. Your feedback helps others discover and enjoy these dishes! Additionally, make sure to follow Cookin’ With Mima on Facebook |Instagram |Pinterest for all my latest social posts, recipe updates, and culinary inspiration.

Pin
Peri Peri Chicken Breast
Ingredients
- 2 medium red bell peppers, diced
- 1 medium red onion, diced
- 8-10 Small Thai red chilis
- 4-5 garlic cloves
- ½ cup olive oil, divided
- ¼ cup red wine vinegar
- 2 tablespoons fresh lemon juice
- 1 teaspoon paprika
- 1 teaspoon dried oregano
- 1 teaspoon salt
- ½ teaspoon ground black pepper
- 2 lb chicken tenders
- Chopped parsley, to garnish
- Lemon wedges, to serve
Instructions
-
Heat a grill pan over medium heat and add a tablespoon of olive oil. Once the oil is heated, add the red bell peppers and onions. Cook until nice char marks are formed, about 4-5 minutes.
-
Allow the peppers and onions to cool down, then transfer them to a food processor.
-
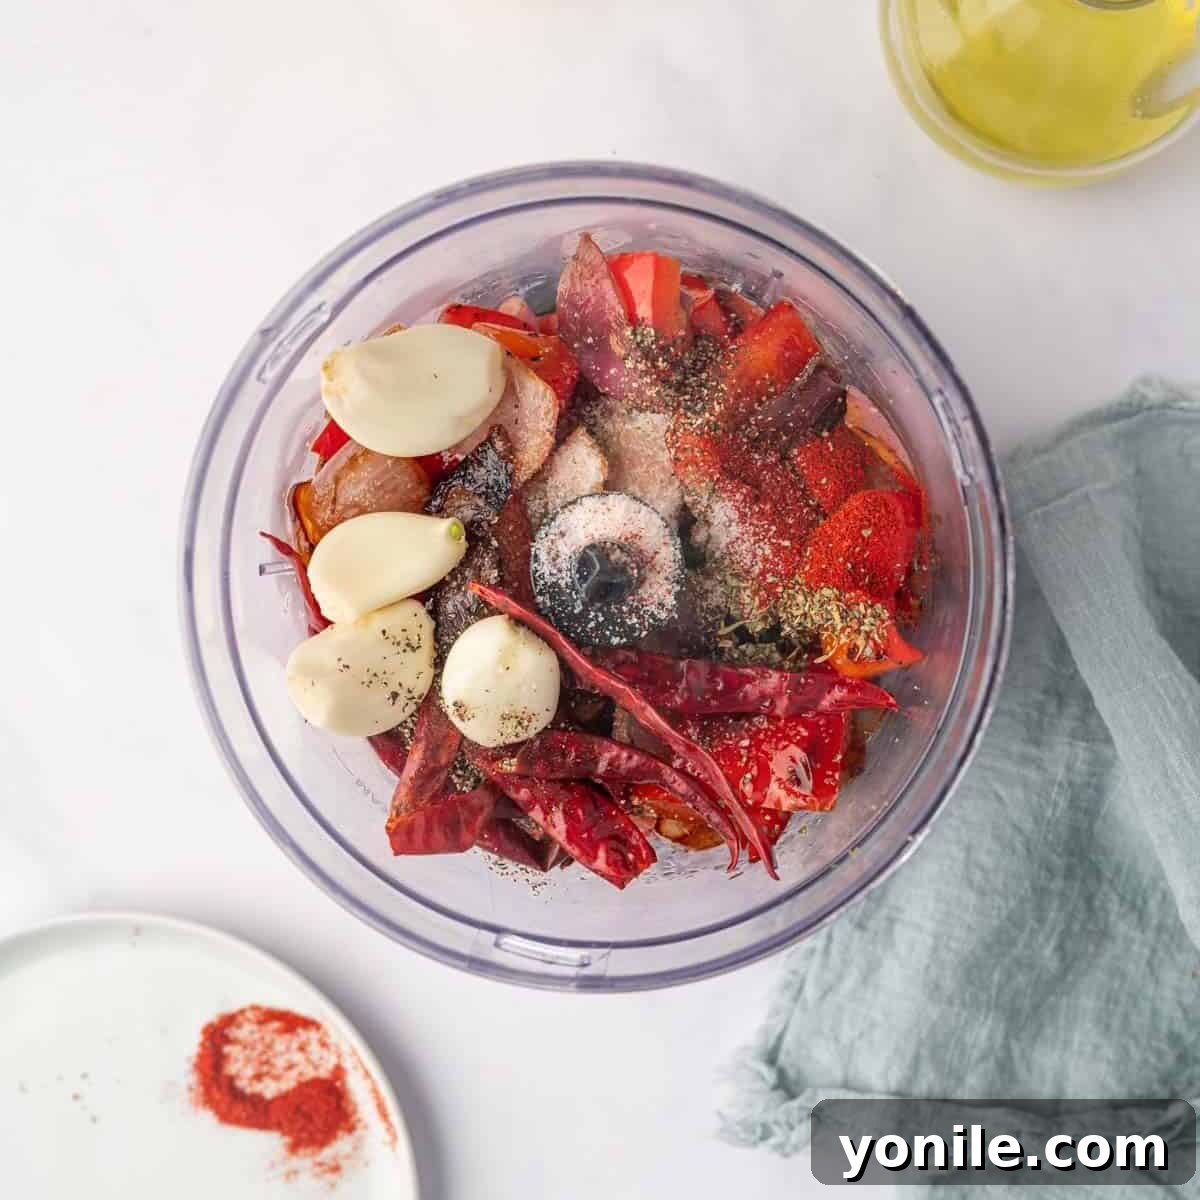
To the food processor, add thai chilis, garlic cloves, the remaining olive oil, vinegar, lemon juice, paprika, oregano, salt, and pepper. Blend until pureed and no chunks remain.
-
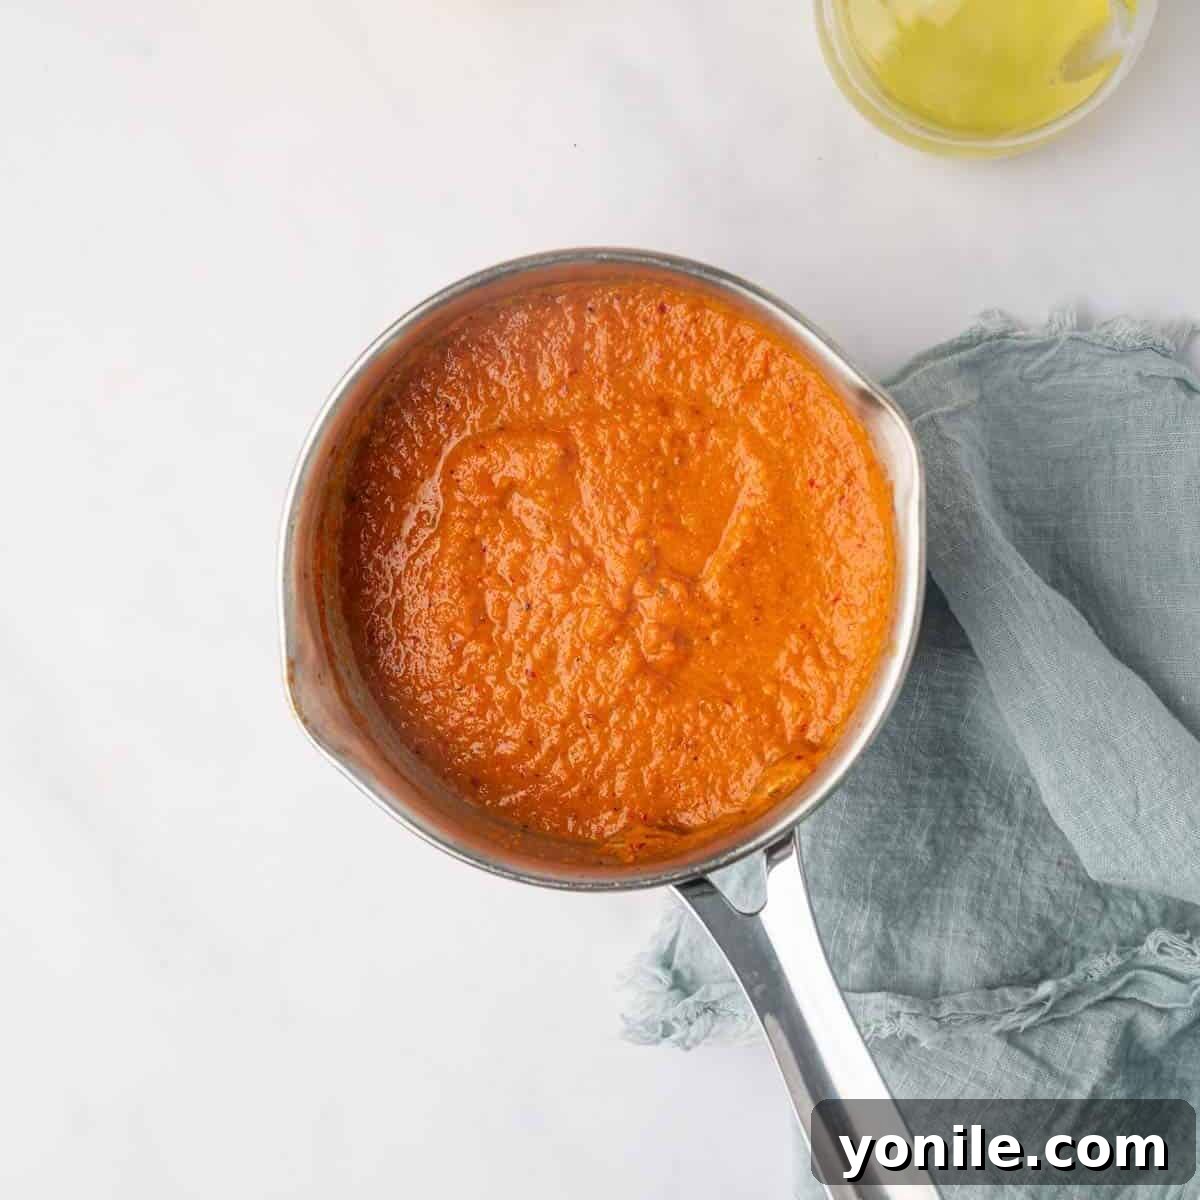
Transfer the pureed mixture to a saucepan and simmer the sauce for 10-12 minutes. Once done, allow the sauce to cool down.
-
Pour the prepared peri-peri sauce over the chicken and massage it in well. Allow the chicken to marinate for at least 1 hour.
-
Arrange the marinated chicken on the griddle, grill pan, or outdoor grill, and cook for 7-8 minutes, or until the chicken is cooked through and has grill marks.
-
Once done, transfer the chicken to a serving plate, garnish with parsley, and serve with a wedge of lemon on the side.
Notes
- Marinate Well: Let the chicken marinate for at least 2 hours, but for best results, marinate overnight to allow the flavors to fully penetrate the meat.
- Preheat the Grill: Ensure your grill is preheated to medium-high heat to achieve a perfect sear.
- Baste with Sauce: Frequently baste the chicken with the Peri Peri sauce while grilling to keep it moist and flavorful.
- Rest the Chicken: Let the chicken rest for a few minutes after grilling to retain its juices before serving.
Nutrition
Like this recipe? Rate and comment below!