
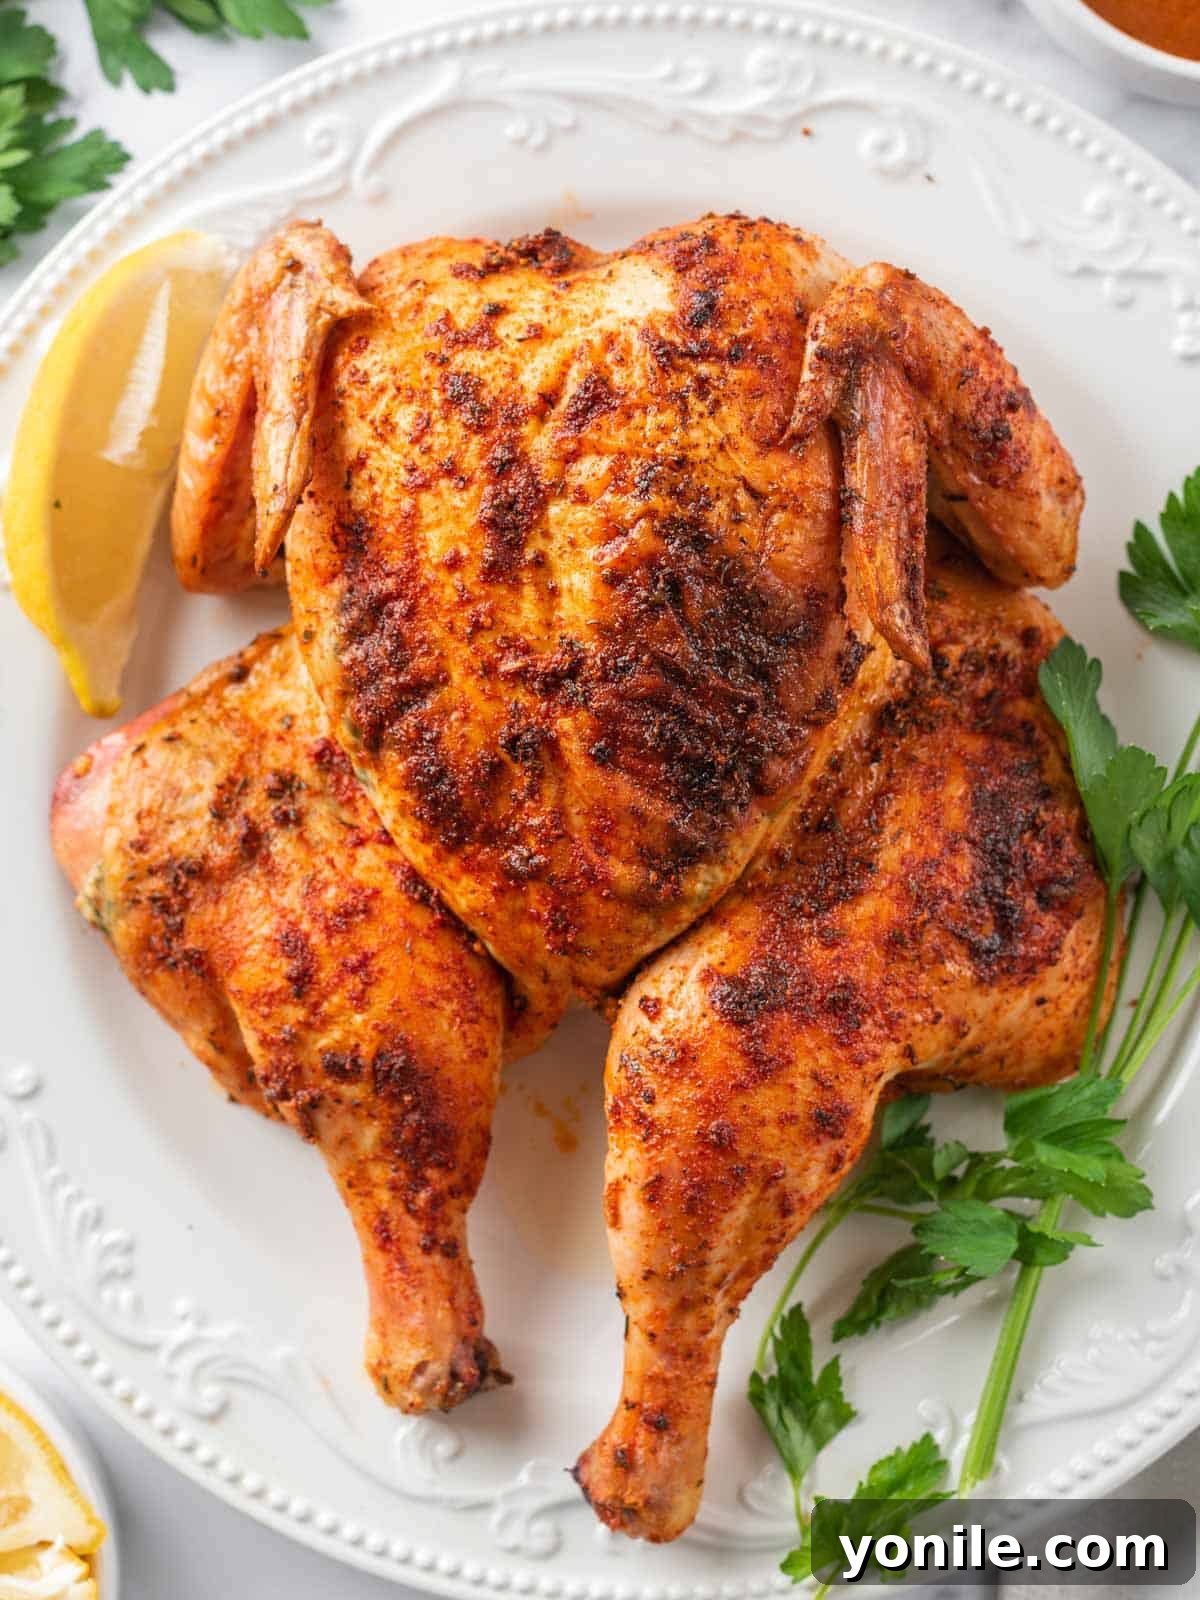
Unlock the secret to perfectly roasted chicken every time with this incredible Spatchcock Chicken recipe. This method, also known as butterflying, transforms an ordinary whole chicken into a culinary masterpiece that boasts incredibly crispy skin, succulent meat, and a significantly reduced cooking time. Forget about dry chicken breasts or undercooked dark meat; spatchcocking ensures even cooking, making it an ideal choice for busy weeknight dinners or impressive weekend gatherings.
If you’re looking for a fuss-free way to achieve a restaurant-quality roast chicken right in your own kitchen, this oven-grilled spatchcock chicken is your answer. It’s not just a recipe; it’s a game-changer for anyone who loves the comfort and flavor of roasted chicken but wishes it could be faster and more consistently delicious. With minimal effort and a few key techniques, you’ll be serving up a juicy, flavorful, and beautifully browned chicken that will become a family favorite.
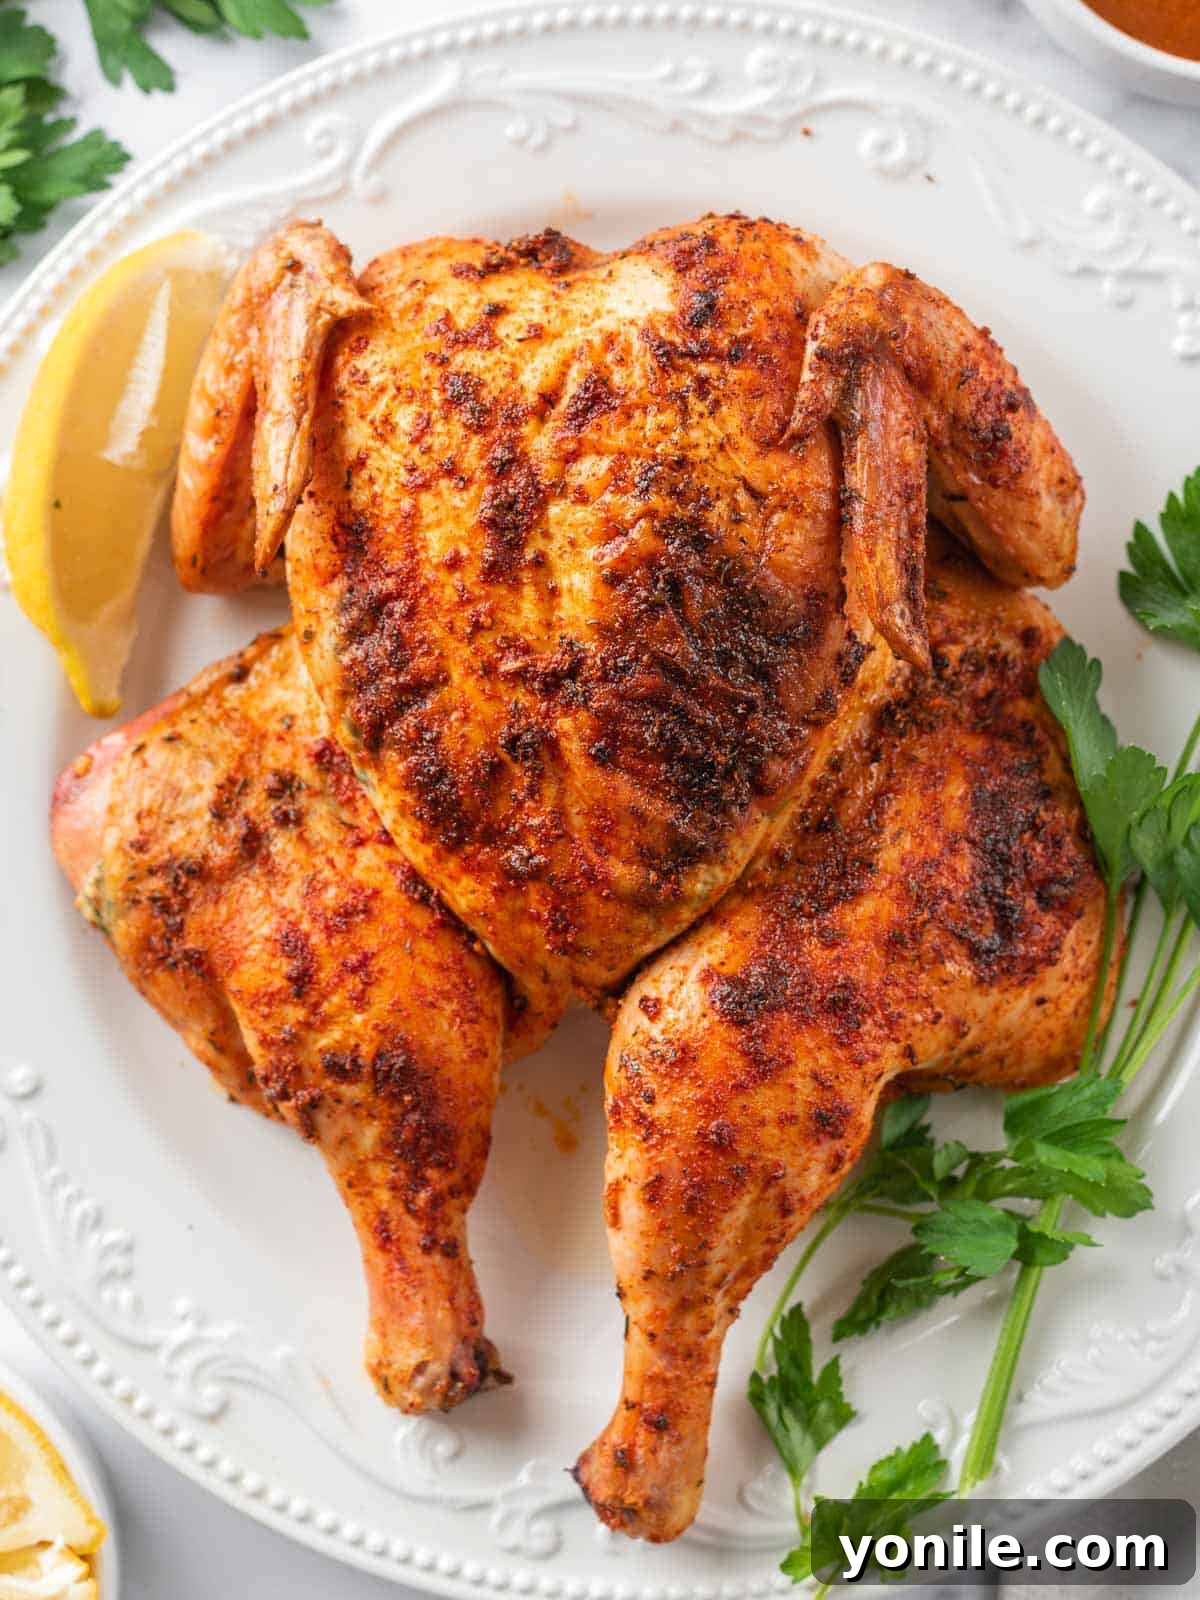
The term “spatchcocking” refers to the process of removing the chicken’s backbone and flattening it, allowing it to cook more quickly and evenly. This technique maximizes the surface area exposed to direct heat, resulting in wonderfully crisp skin across the entire bird. The breasts and thighs cook at a similar rate, eliminating the common issue of one part drying out while another finishes cooking. This means every bite, from the tender breast meat to the flavorful thighs, is perfectly cooked and bursting with flavor.
Beyond its culinary advantages, spatchcocking makes carving the chicken significantly easier. With the bird laid flat, you can effortlessly separate the major sections, making serving a breeze. This recipe is designed to be simple, flavorful, and universally appealing, making it a guaranteed hit at any dinner table. Chicken is a beloved staple in many households, and a perfectly roasted one rarely leaves any leftovers. For more easy and delicious chicken inspiration, be sure to explore other comforting recipes like my Creamy Chicken Alfredo Lasagna or my Baked Chicken and Broccoli Pasta, both perfect for a quick and satisfying meal.
Why This Marinated Spatchcock Chicken Recipe Is a Must-Try
This marinated spatchcock chicken isn’t just another dinner idea; it’s a revolutionary approach to roasting chicken that guarantees impressive results with minimal fuss. Here’s why this method will quickly become a cherished part of your culinary repertoire:
- Dramatically Faster Cooking: By flattening the chicken, you increase its surface area, allowing heat to penetrate more efficiently. This means your chicken cooks in significantly less time compared to a whole, unspatchcocked bird, making it incredibly practical for busy schedules. You can achieve a fully cooked, tender chicken in roughly half the time!
- Effortless Carving and Serving: The flattened structure of a spatchcocked chicken makes carving incredibly simple. No more struggling with a wobbly bird; you can easily cut along the bone lines to separate breasts, thighs, and drumsticks, providing neat, attractive portions for everyone at the table. This ease of carving is a major time-saver and stress-reducer, especially when serving guests.
- Consistently Juicy and Tender: Traditional whole chicken roasting can often lead to dry breast meat while the darker meat finishes cooking. Spatchcocking ensures that the breast and thigh meat are exposed to even heat distribution, resulting in both white and dark meat reaching optimal doneness simultaneously. This innovative technique guarantees that your chicken remains incredibly juicy and tender throughout, from the first bite to the last.
- Unbeatable Crispy Skin: A key advantage of spatchcocking is the increased exposure of the chicken skin to the oven’s direct heat. This leads to a beautifully golden-brown and delightfully crispy skin across the entire bird, not just the top. The texture contrast between the crackling skin and the moist meat is simply irresistible.
- Enhanced Flavor Penetration: With the chicken laid open, the flavorful marinade and spice rub can reach more of the meat, infusing every fiber with a rich, aromatic taste. This deep flavor penetration ensures a truly delicious eating experience.
Essential Equipment for Spatchcock Chicken
Preparing a perfect spatchcock chicken requires a few basic kitchen tools that make the process smooth and enjoyable:
- Sharp Kitchen Shears: This is arguably the most crucial tool for spatchcocking. A heavy-duty, sharp pair of kitchen shears will make quick work of removing the chicken’s backbone, which is key to flattening the bird. Don’t attempt this with regular scissors, as it can be frustrating and unsafe.
- Large Cutting Board: You’ll need ample space to work on your whole chicken. A large, sturdy cutting board will provide a stable surface for trimming and seasoning.
- Roasting Pan with a Wire Rack: A good roasting pan, ideally with a fitted wire rack, is essential. The rack elevates the chicken, allowing air to circulate around it for even cooking and extra crispy skin, while the pan below catches all the delicious drippings. Lining the pan with aluminum foil will simplify cleanup.
- Meat Thermometer: For perfectly cooked chicken that is both safe and tender, a reliable meat thermometer is indispensable. This ensures you cook the chicken to the correct internal temperature without overcooking.
- Mixing Bowls: You’ll need a couple of bowls for preparing your flavored butter and spice rub.
- Pastry Brush (Optional but Recommended): A pastry brush is helpful for spreading the flavored butter evenly under and over the chicken skin.
Oven Spatchcock Chicken Ingredients
The magic of this spatchcock chicken recipe lies in its simple yet powerfully flavorful ingredients. Each component plays a vital role in creating a tender, juicy, and aromatic roast chicken.
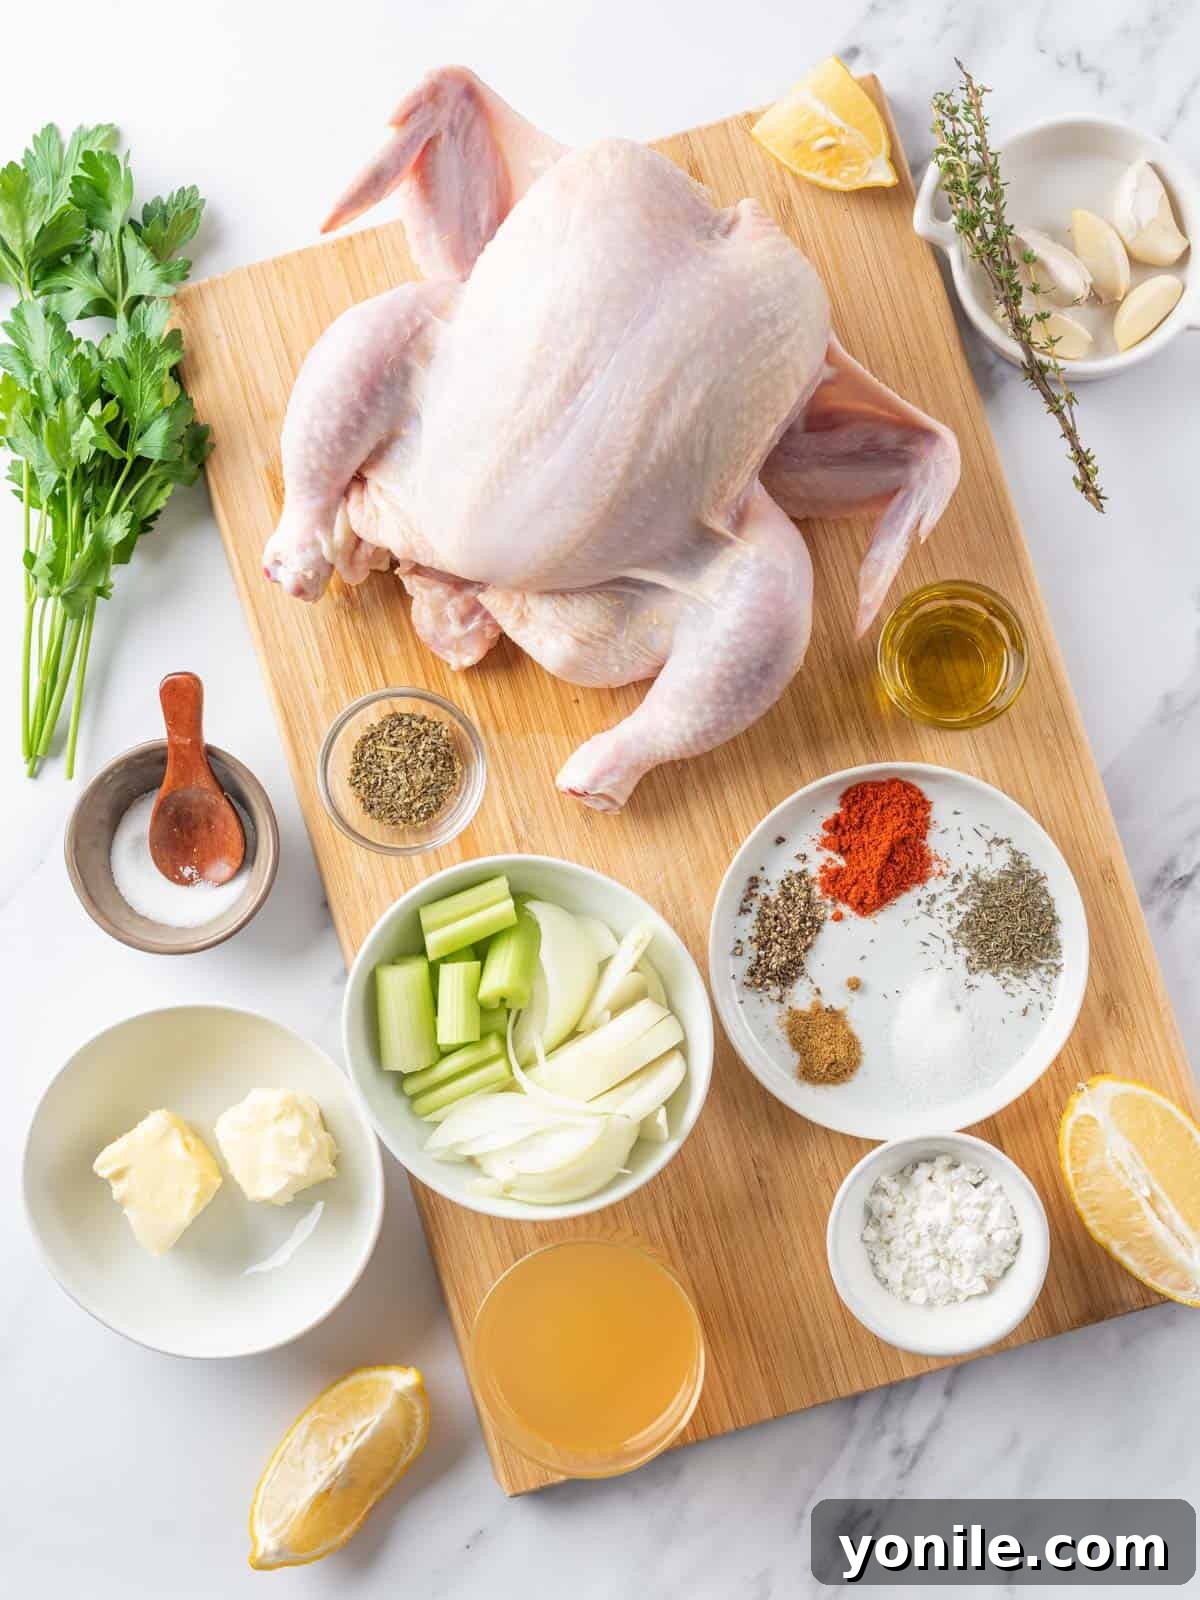
- For the Flavored Butter: This butter mixture is the secret weapon for moisture and flavor.
- Unsalted Butter: Using unsalted butter allows you to control the overall saltiness of the dish. Ensure it’s at room temperature for easy mixing and spreading.
- Minced Garlic: Fresh garlic adds a pungent, aromatic depth that complements chicken beautifully.
- Fresh Parsley: Chopped fresh parsley provides a vibrant, herbaceous note and a touch of color.
- Italian Seasoning: A blend of dried herbs like oregano, basil, thyme, and rosemary, this seasoning offers a classic, aromatic profile.
- For the Chicken Seasoning: This spice rub creates a delicious crust and infuses the chicken with rich, savory flavors.
- Paprika: Contributes a beautiful reddish hue and a mild, sweet, peppery flavor.
- Black Pepper: Adds a hint of warmth and spice.
- Salt: Essential for seasoning the meat and enhancing all other flavors.
- Dried Thyme: Earthy and slightly minty, thyme is a classic pairing for poultry.
- Ground Cumin: Offers a warm, earthy, and slightly smoky undertone that adds complexity.
- Whole Chicken: A 4-5 lb whole chicken is ideal for this recipe. Ensure it is completely thawed before starting; never attempt to roast a frozen or partially frozen chicken using this method, as it will cook unevenly.
- Olive Oil: Used for coating the chicken and for the aromatics in the pan. You can use any high-quality cooking oil you prefer, such as avocado oil.
- Onion: Cut into thick wedges, the onion adds a sweet and savory base to the pan drippings. Any type of onion (yellow, white, or red) will work well.
- Celery Stalk: Cut into 1-inch pieces, celery contributes a subtle earthy flavor and additional moisture to the pan sauce.
- Fresh Thyme (or Rosemary): Fresh herbs in the roasting pan impart a beautiful fragrance and deeper flavor to the chicken as it cooks. Rosemary is an excellent alternative or addition.
- Chicken Broth: I recommend using low-sodium chicken broth to control the salt content in your pan sauce. It adds moisture and forms the base of your delicious gravy.
- Lemon Juice: Freshly squeezed lemon juice brightens the flavors of the pan sauce, adding a zesty tang. Avoid bottled juice for the best taste.
- Cornstarch: A small amount of cornstarch is used to thicken the pan drippings into a luscious, silky gravy.
How to Cook a Spatchcock Chicken: Step-by-Step Guide
Follow these detailed steps to prepare and roast your perfect spatchcock chicken, ensuring a flavorful and tender result every time.
- Step 1: Prepare Your Equipment and Preheat Oven
Preheat your oven to 450°F (232°C). This high initial temperature helps to crisp the skin. Line a sturdy roasting pan with aluminum foil for easier cleanup, and place a wire rack inside the pan. - Step 2: Create the Flavored Butter Mixture
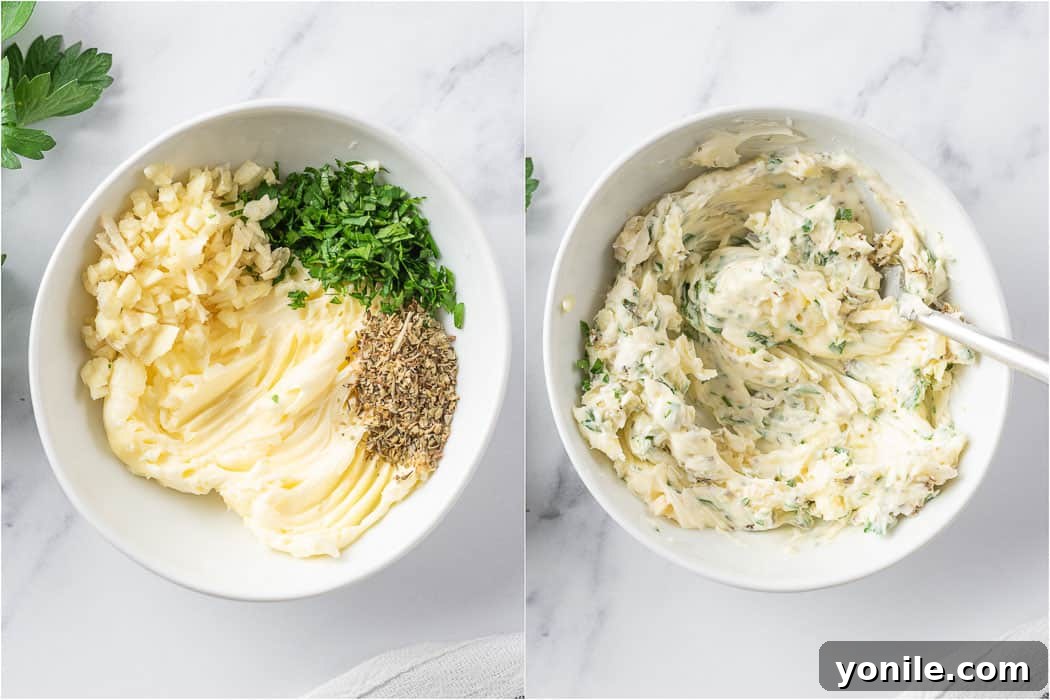
In a medium bowl, combine the softened unsalted butter with minced garlic, chopped fresh parsley, and Italian seasonings. Mix until all ingredients are well incorporated and fragrant. Set this aside.
- Step 3: Prepare the Dry Spice Rub
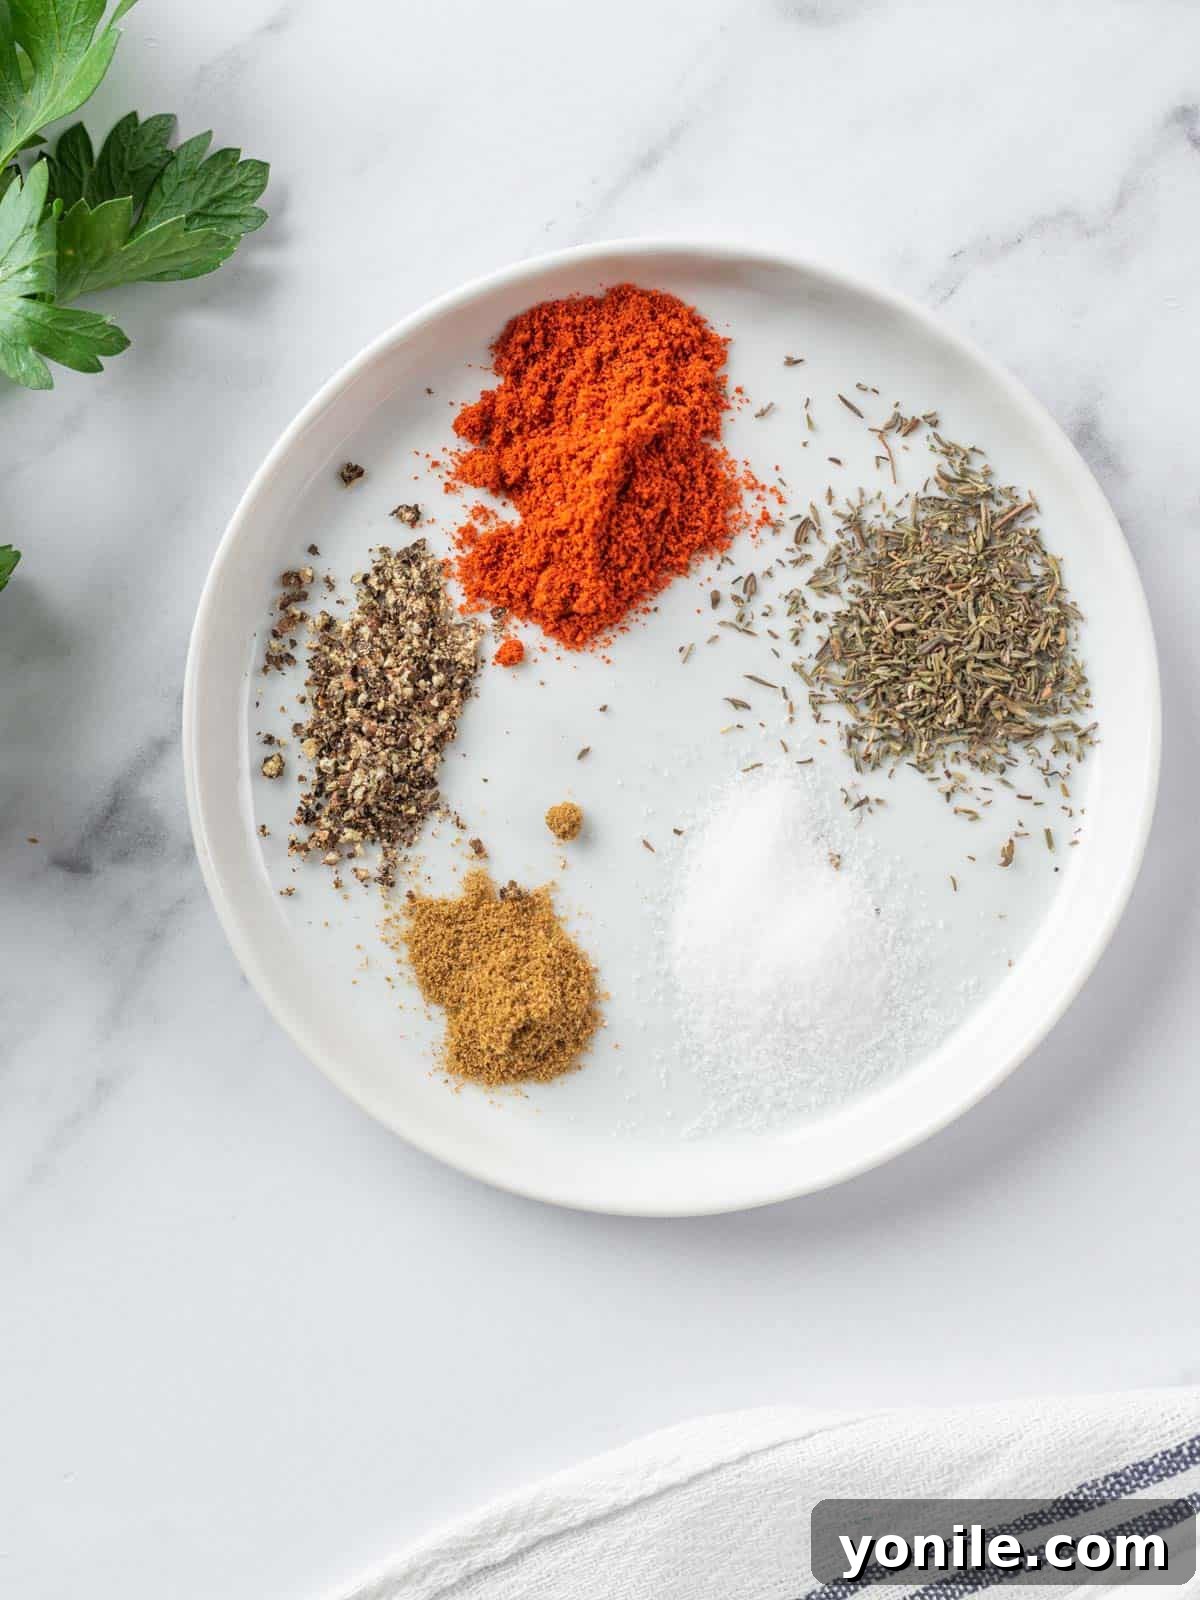
In a separate small bowl, combine the dry spices: paprika, black pepper, salt, dried thyme, and ground cumin. Stir them together until evenly mixed. This will be your primary seasoning for the chicken.
- Step 4: Spatchcock the Chicken
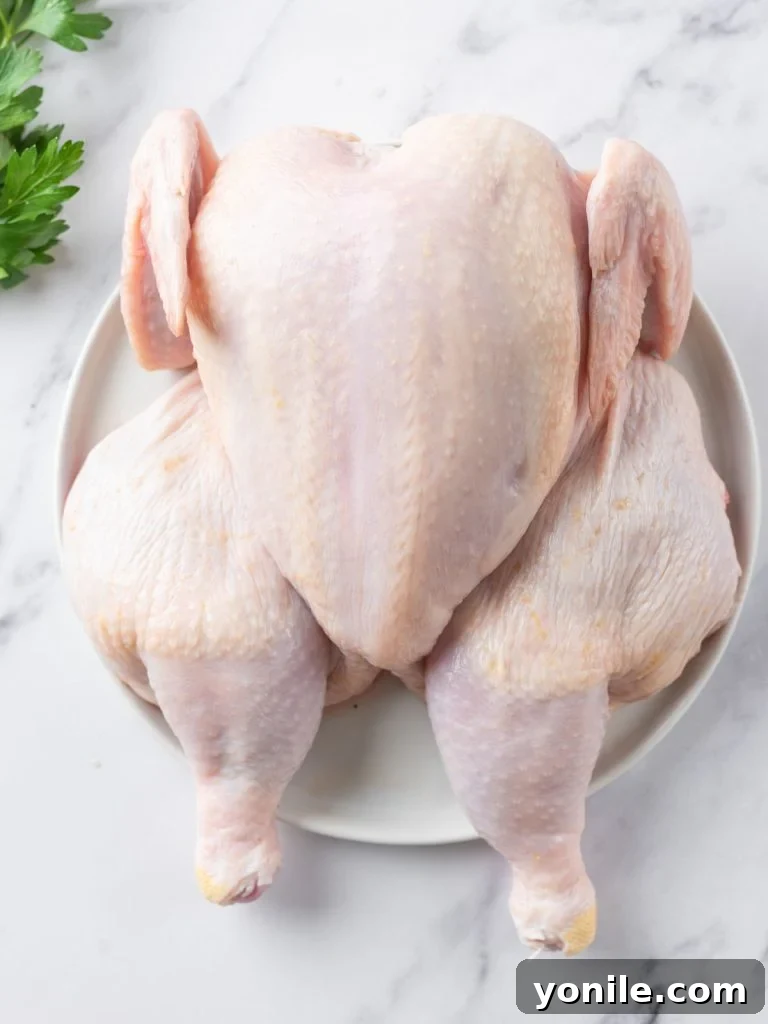
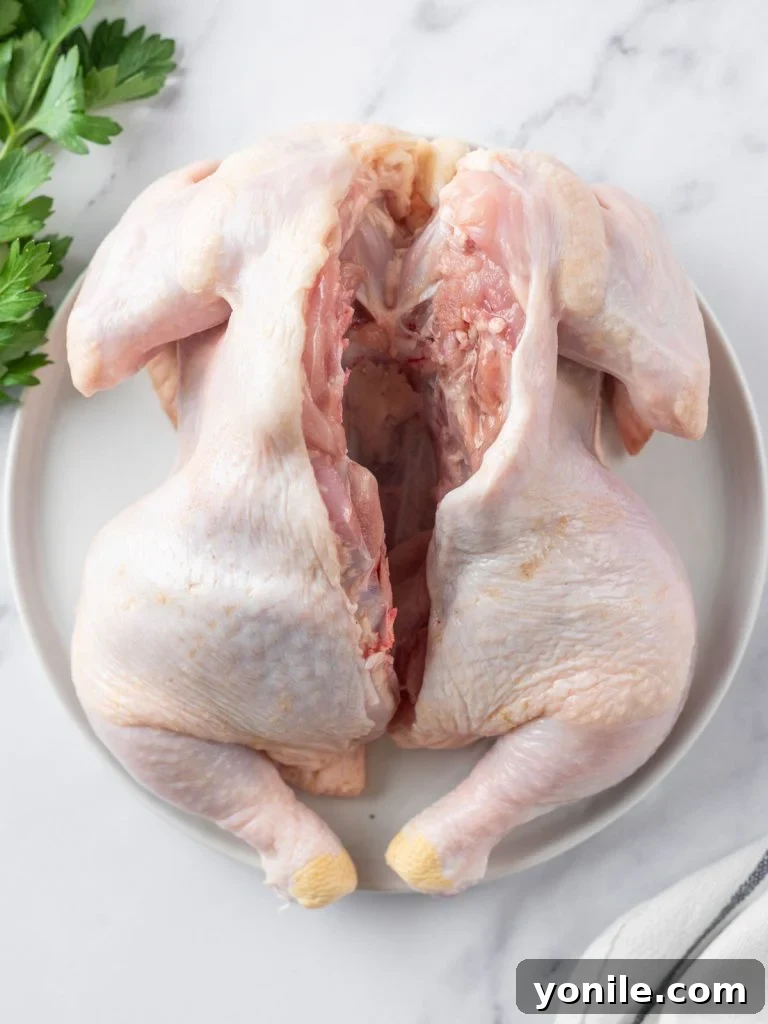
Place the thawed whole chicken breast-side down on a large cutting board. Using a very sharp pair of kitchen shears, cut along both sides of the backbone, from the tail to the neck, to remove it completely. You might need to apply a bit of force. Once the backbone is removed, flip the chicken breast-side up. Press down firmly on the breastbone with the heels of your hands until you hear a crack and the chicken lies completely flat. This is the spatchcocking process. Remember to pat the chicken completely dry with paper towels to ensure crispy skin.
- Step 5: Season the Chicken Generously
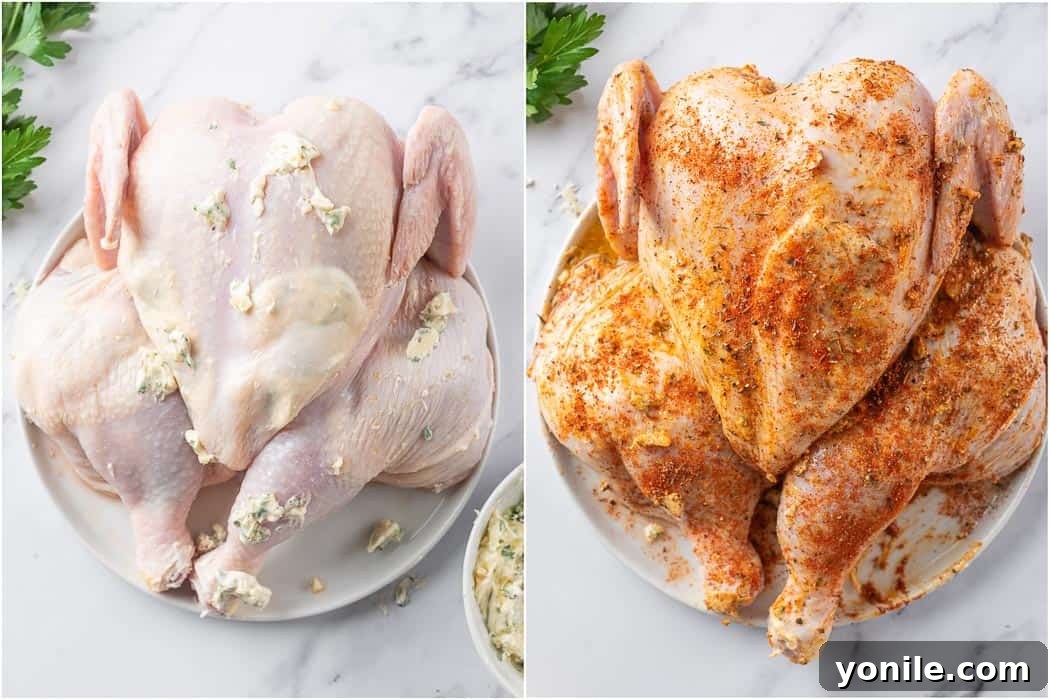
Gently lift the skin over the breast and thigh areas and spread about two-thirds of the flavored butter mixture directly onto the meat underneath the skin. This ensures maximum flavor and moisture. Then, rub the remaining butter mixture all over the outer skin of the chicken. Finally, sprinkle the dry spice mix evenly over the entire chicken, ensuring every part is well coated.
- Step 6: Prepare the Roasting Pan Base
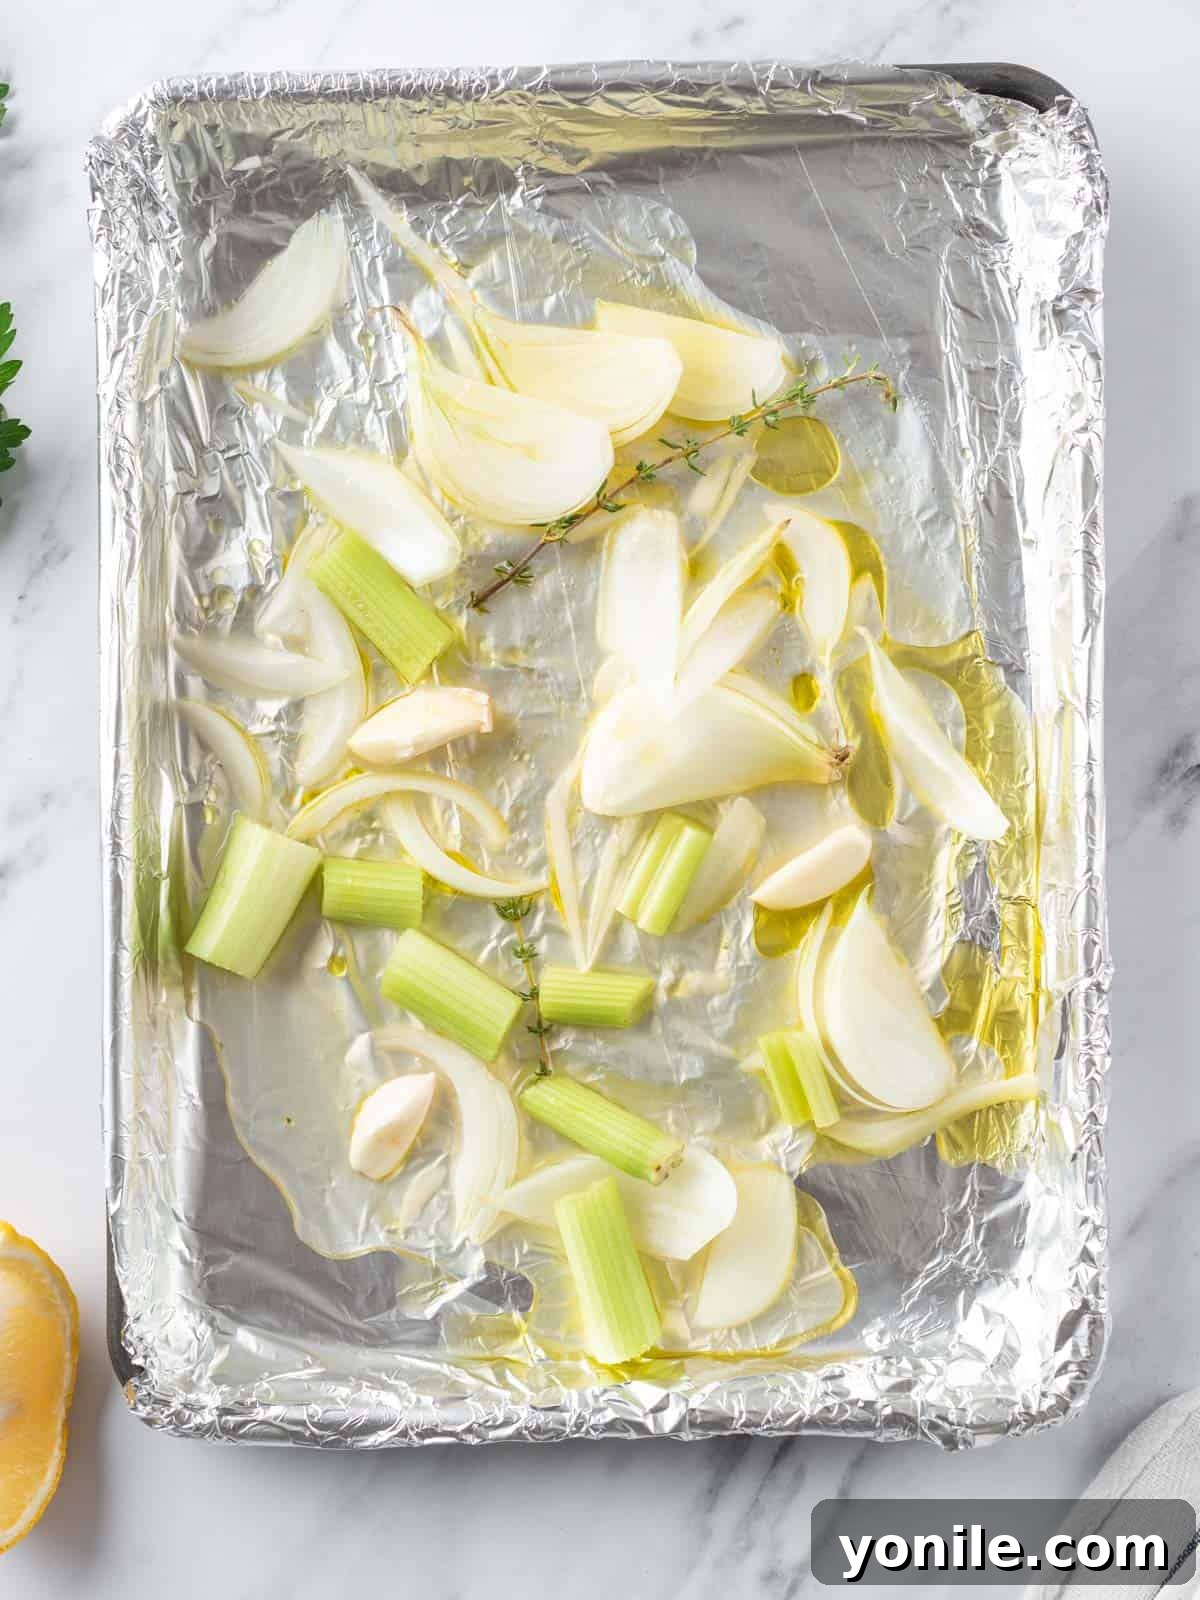
In the bottom of your foil-lined roasting pan (beneath the wire rack), add olive oil, thick-cut onion wedges, celery pieces, fresh thyme sprigs, and chicken broth. These aromatics will infuse the chicken with additional flavor and create a wonderful base for your pan sauce.
- Step 7: Roast the Chicken
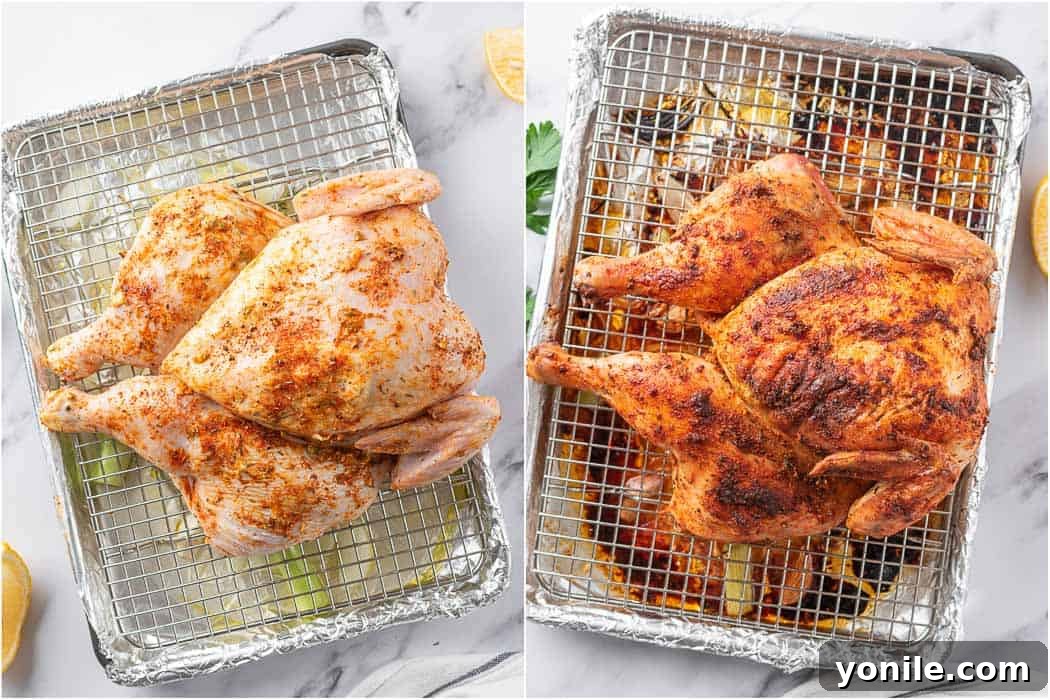
Carefully place the seasoned chicken, breast-side up, on the wire rack in the prepared roasting pan. Transfer the pan to the preheated 450°F (232°C) oven and roast for 20 minutes. This initial high heat helps crisp the skin. After 20 minutes, reduce the oven temperature to 350°F (175°C) and continue baking for another 50-60 minutes, or until the internal temperature of the thickest part of the thigh (without touching the bone) reaches 160-165°F (71-74°C).
- Step 8: Rest the Chicken and Prepare the Gravy
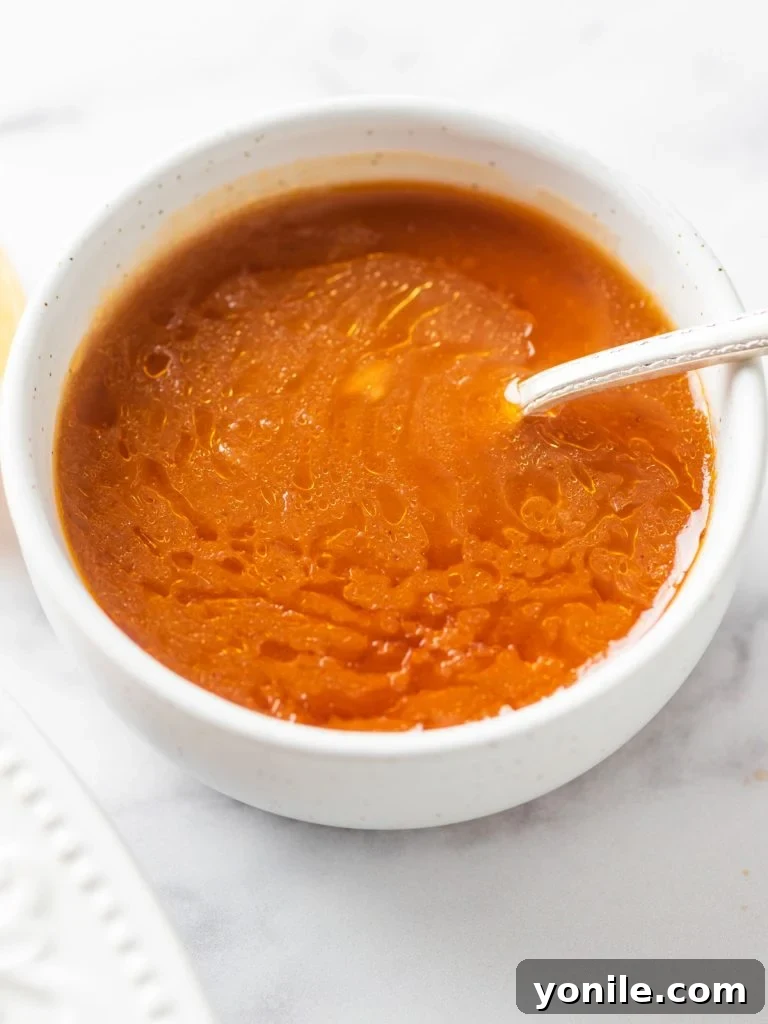
Once the chicken is cooked through, carefully remove the roasting pan from the oven. Transfer the chicken from the wire rack to a clean cutting board and tent it loosely with aluminum foil. Let it rest for at least 10-15 minutes. This crucial resting period allows the juices to redistribute throughout the meat, ensuring a moist and tender result. While the chicken rests, transfer the cooked vegetables and broth from the roasting pan to a skillet. Stir in the fresh lemon juice and cornstarch. Bring to a gentle simmer over medium heat, whisking constantly, until the sauce thickens to your desired consistency.
- Step 9: Slice and Serve
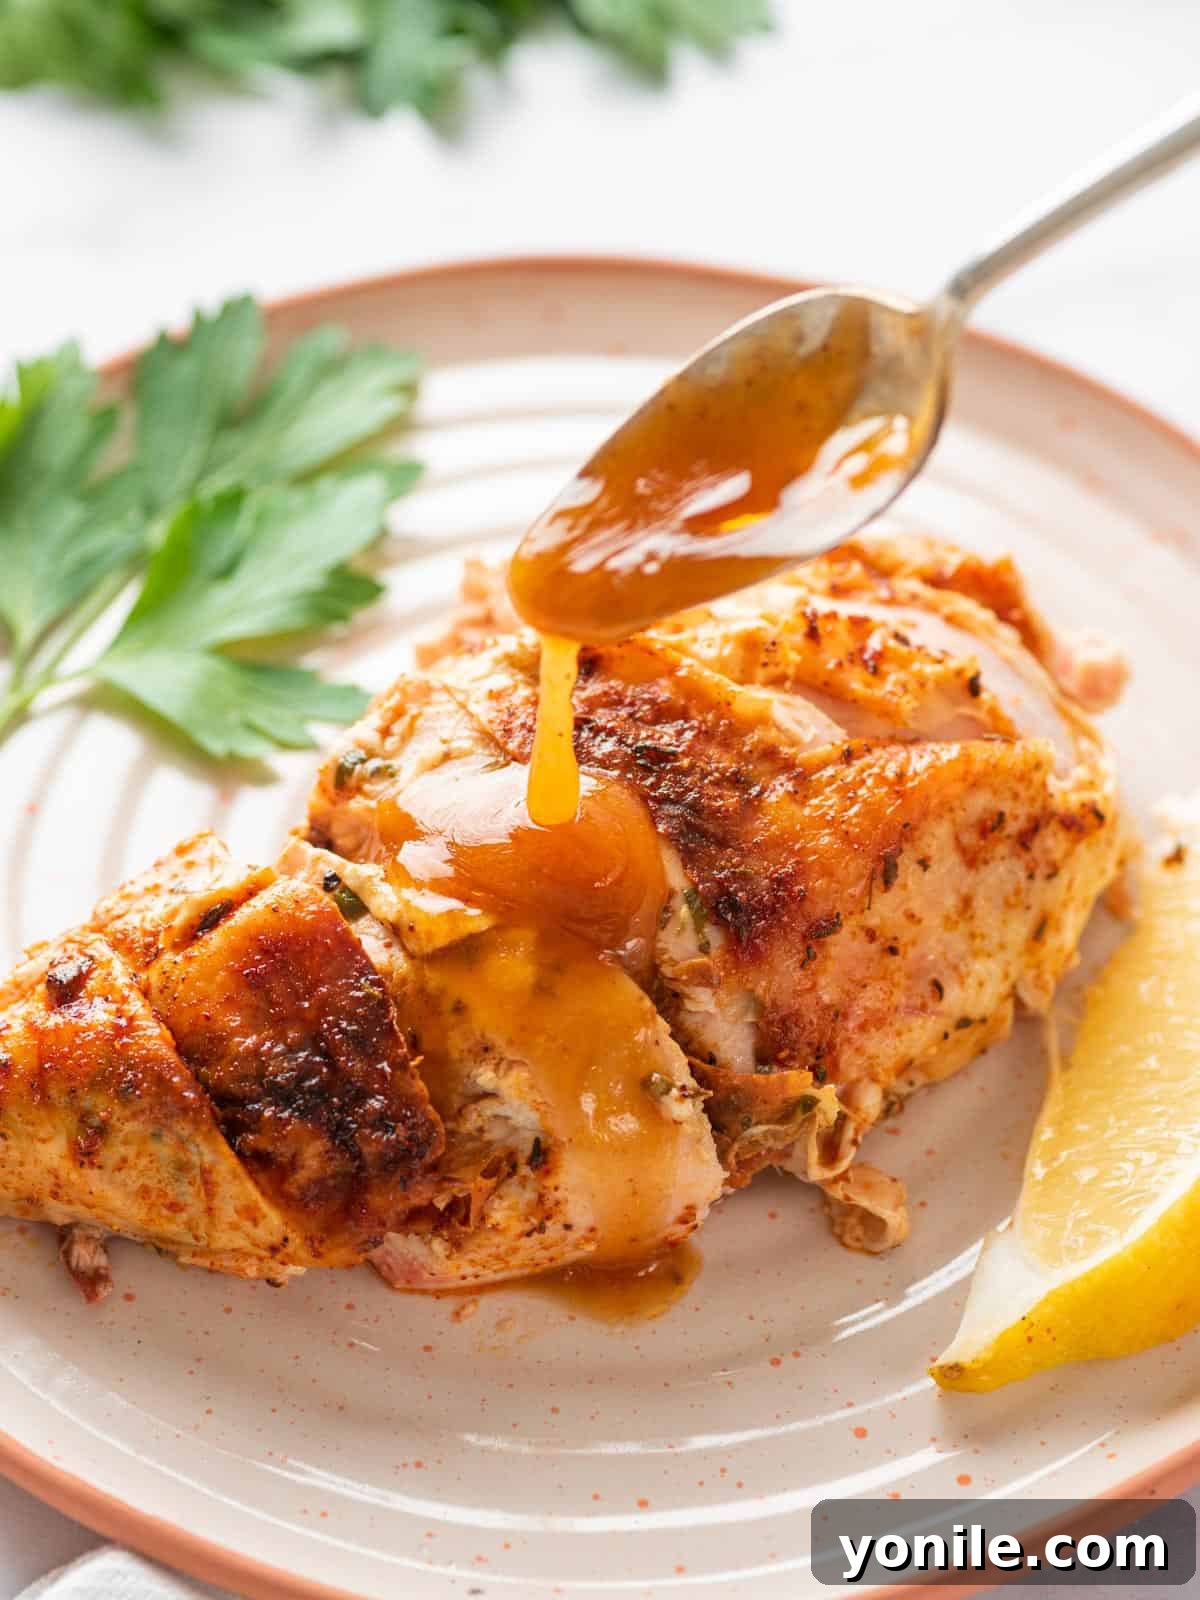
Carve the rested chicken into individual portions. Serve immediately with a generous drizzle of the homemade pan gravy.
Tips for the Best Oven Roasted Spatchcock Chicken
Achieving a show-stopping spatchcock chicken is easier than you think, especially with these expert tips:
- Bring Chicken to Room Temperature: For the most even cooking, allow your raw, seasoned chicken to sit at room temperature for about 30 minutes before placing it in the oven. This takes the chill off the meat, preventing it from seizing up and ensuring more consistent heat penetration.
- Monitor Internal Temperature: Do not rely solely on cooking time. A meat thermometer is your best friend. Remove the chicken from the oven when the internal temperature in the thickest part of the thigh (avoiding the bone) reaches 160-165°F (71-74°C). The temperature will continue to rise by another 5-10 degrees while the chicken rests, reaching the safe internal temperature of 165°F (74°C).
- Invest in Quality Kitchen Shears: A sharp, heavy-duty pair of kitchen shears is non-negotiable for easily cutting through the chicken’s spine. This will make the spatchcocking process effortless and safe, transforming a potentially daunting task into a simple step.
- Season Generously and Thoroughly: Don’t skip seasoning both under and over the skin. Once spatchcocked, there’s significantly more surface area exposed, allowing for deeper flavor penetration. The seasoned butter under the skin also contributes to incredibly moist meat.
- Pat Dry for Crispy Skin: Excess moisture on the chicken skin will steam instead of crisp. Before applying any seasoning, thoroughly pat the entire chicken dry with paper towels. This crucial step is key to achieving that coveted golden, crunchy skin.
- Always Rest Your Chicken: After roasting, transfer the chicken to a cutting board and tent it loosely with foil. Allow it to rest for 10-15 minutes before carving. During this time, the muscle fibers relax, and the juices, which have migrated to the center of the bird during cooking, redistribute throughout the meat, ensuring every slice is incredibly juicy.
- Flavor Variations are Welcome: Feel free to customize the herbs and spices to your preference. Rosemary, sage, lemon zest, smoked paprika, or a touch of cayenne pepper can all add delicious twists. If you prefer not to use butter, avocado oil is a fantastic substitute due to its high smoke point and neutral flavor.
- Consider a Cast Iron Skillet: While a roasting pan with a rack is excellent, a large cast iron skillet can also be used. The heavy bottom provides great heat retention, which can further enhance crispiness.
- Don’t Discard the Backbone: The removed backbone is a treasure! Freeze it and use it to make homemade chicken broth later.
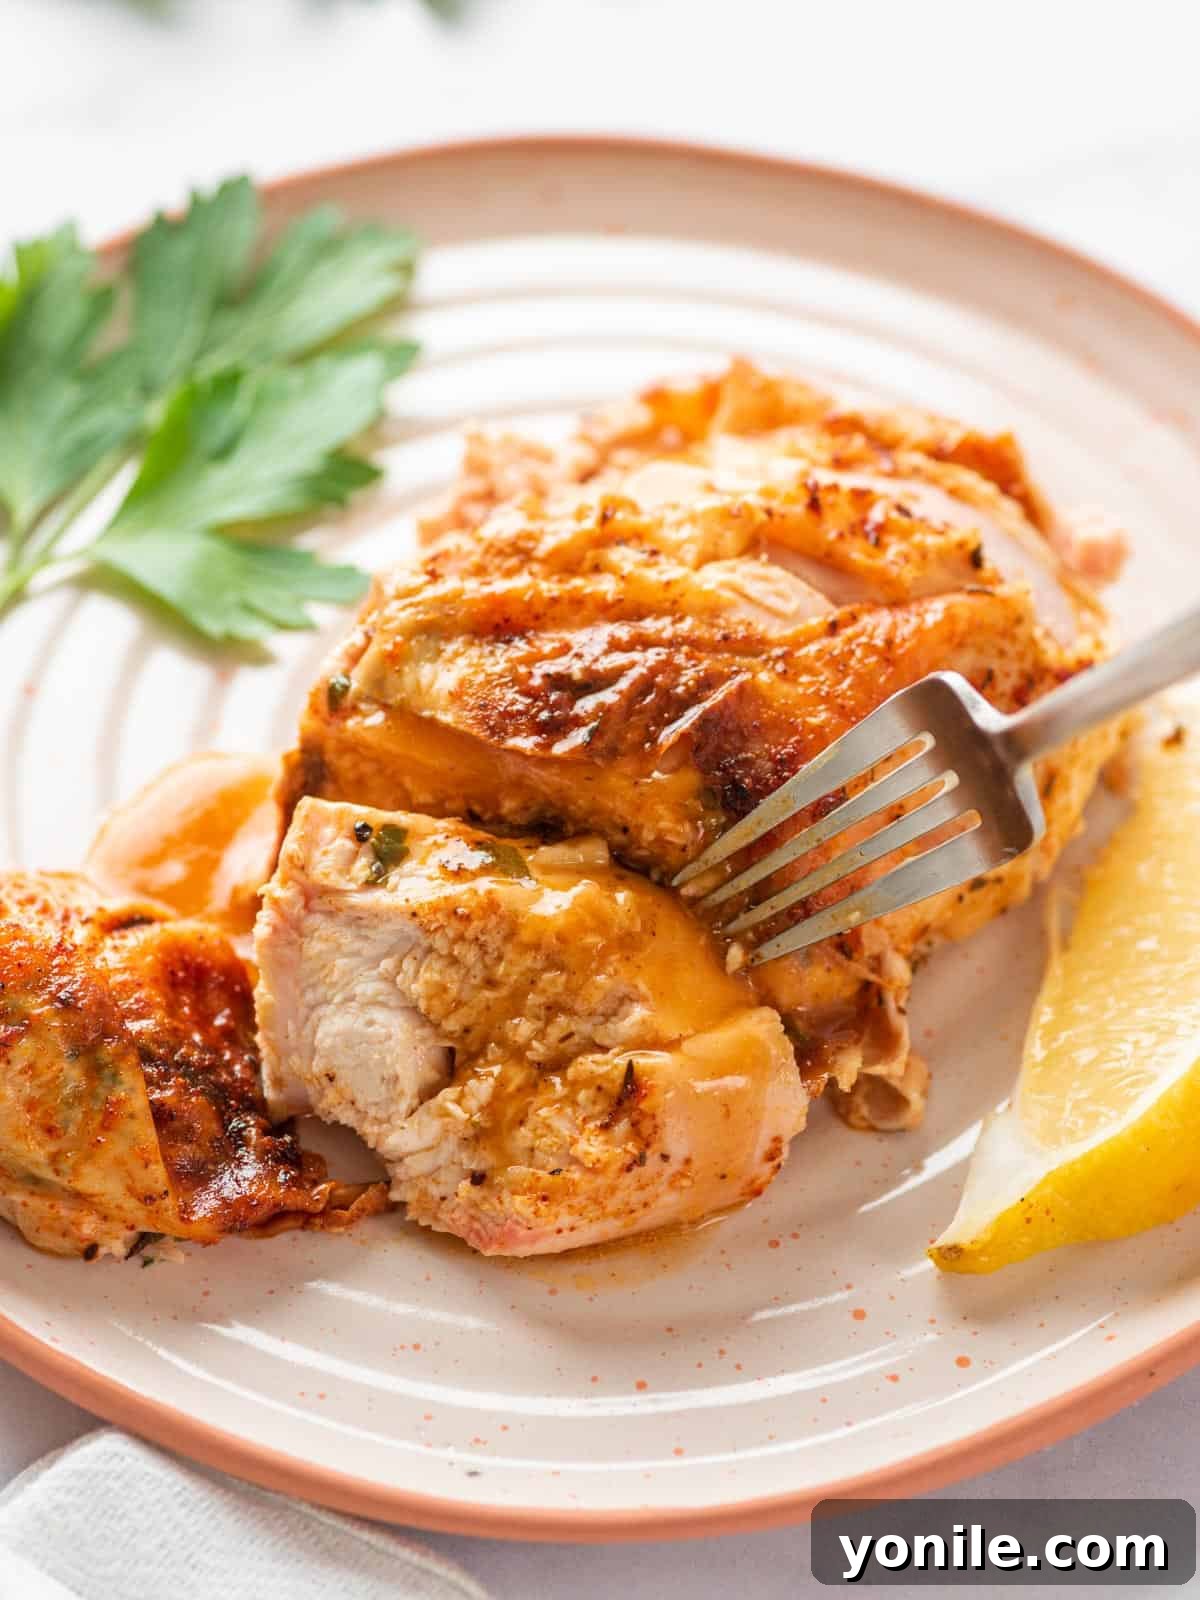
Delicious Serving Suggestions
A beautifully roasted spatchcock chicken deserves equally delicious accompaniments. Here are some ideas to complete your meal:
- Roasted Vegetables: Roasting vegetables like potatoes, carrots, broccoli, or asparagus alongside the chicken in the same pan (or a separate one) can create a flavorful and convenient side dish.
- Creamy Mashed Potatoes: A classic pairing, creamy mashed potatoes soak up the delicious pan gravy beautifully.
- Fresh Green Salad: A light, crisp green salad with a vinaigrette dressing provides a refreshing contrast to the rich chicken.
- Rice Pilaf or Quinoa: For a heartier side, a savory rice pilaf or a fluffy quinoa salad works wonderfully.
- Warm Bread: Serve with crusty bread to sop up every last drop of the amazing pan sauce.
Frequently Asked Questions About Cooking Spatchcock Chicken
Spatchcocking a chicken offers several key advantages. It allows the chicken to cook much more evenly, ensuring that both the breast and thigh meat finish cooking at the same time, preventing dry breasts. Additionally, the flattened bird cooks significantly faster and yields an incredible amount of crispy, golden-brown skin across its entire surface, as more of it is exposed to direct heat.
To maintain maximum moisture and flavor, store any leftover spatchcock chicken in an airtight container in your refrigerator. It’s often best to avoid carving the entire chicken at once; storing larger, uncut pieces helps the meat retain its juiciness when reheated.
Yes, spatchcock chicken freezes very well. Once cooked and cooled, place individual pieces or larger sections into a resealable freezer bag, removing as much air as possible, or an airtight freezer-safe container. It can be stored in the freezer for up to 3 months. Thaw in the refrigerator overnight before reheating.
While often used interchangeably for whole chickens, there’s a slight nuance. Spatchcocking a whole chicken involves removing the backbone to flatten the entire bird. Butterflying typically refers to cutting a boneless piece of meat (like a chicken breast) horizontally almost all the way through, then opening it up like a book to create a thinner, larger piece.
For optimal crispy skin and a beautiful golden-brown exterior, it is generally best to roast a spatchcock chicken uncovered. This allows the skin to render fat and crisp up. However, if you notice the skin browning too quickly during the initial high-heat phase, you can loosely tent it with aluminum foil for the first 30-45 minutes (depending on the chicken’s size) before removing the foil to finish cooking and crisping the skin.
The most accurate way to determine if your chicken is done is by using a reliable meat thermometer. Insert the thermometer into the thickest part of the thigh, making sure not to touch any bone. The chicken is safe to eat when it reaches an internal temperature of 165°F (74°C). Pay particular attention to the thigh area, as it often takes slightly longer to cook than the breast.
Absolutely! Spatchcocking is an excellent technique for grilling as well. The flattened bird cooks more evenly on the grill, preventing flare-ups and ensuring juicy results with beautiful grill marks and smoky flavor. You’ll typically use a two-zone grilling method: searing over direct heat then finishing over indirect heat.
While kitchen shears are highly recommended for ease and safety, you can use a very sharp chef’s knife to remove the backbone. Be extremely cautious and ensure you have a stable cutting surface. It requires more effort and precision, but it is achievable.
More Delightful Chicken Recipes to Explore
If you loved this Spatchcock Chicken recipe, you’ll surely enjoy these other simple and delicious chicken dishes:
- Classic Oven Baked Roasted Whole Chicken
- Comforting Baked Chicken and Broccoli Pasta
- Sweet and Savory Crispy Honey Chicken
- Rich and Creamy Chicken Florentine
- Hearty and Easy Chicken Stew
- Simple Baked Chicken and Broccoli Pasta
We truly hope you enjoy creating and savoring this fantastic Spatchcock Chicken recipe. It’s a wonderful way to bring a flavorful and impressive meal to your table with ease. Give it a try, enjoy the process, and share your delicious creations with friends and family!
If you make this recipe and love it, please consider leaving a star rating and a comment below to share your experience. Your feedback is invaluable! You can also share your culinary masterpieces with me on INSTAGRAM using my hashtag, so I can see your delicious recreations! Stay connected and follow Cookin’ With Mima on FACEBOOK | INSTAGRAM | PINTEREST for all the latest recipes, cooking tips, and social updates. Happy cooking!
Pin
Oven Roasted Spatchcock Chicken
Ingredients
For Flavored Butter
- 4 tbsp unsalted butter, softened
- 1 tbsp garlic, minced
- 1 tbsp fresh parsley, chopped
- 1 tsp Italian seasoning
For Spatchcock Chicken & Pan Sauce
- 1 tbsp paprika
- 1 tsp black pepper
- 1 tsp salt
- 1 tsp dried thyme
- ½ tsp ground cumin
- 1 (4-5 lb) whole chicken, thawed
- 2 tbsp olive oil
- 1 medium onion, cut into thick wedges
- 1 stalk celery, cut into 1-inch pieces
- Fresh thyme sprigs, a few
- 1 cup chicken broth, low sodium recommended
- 2 tbsp lemon juice, freshly squeezed
- 1 tbsp cornstarch
Instructions
-
Preheat your oven to 450°F (232°C). Line a roasting pan with aluminum foil and place a wire rack inside.
-
In a bowl, combine the softened unsalted butter, minced garlic, chopped parsley, and Italian seasoning to create the flavored butter mixture. Set aside.
-
In a separate small bowl, mix together the paprika, black pepper, salt, dried thyme, and ground cumin for your spice rub. Set aside.
-
Place the chicken breast-side down on a cutting board. Using sharp kitchen shears, carefully cut along both sides of the backbone to remove it. Flip the chicken breast-side up and press down firmly on the breastbone to flatten the chicken completely. Pat the entire chicken dry with paper towels.
-
Gently separate the skin from the breast and thigh meat. Spread about two-thirds of the flavored butter mixture directly onto the meat under the skin. Then, rub the remaining butter over the outer skin of the chicken.
-
Generously sprinkle the prepared spice mix all over the chicken, ensuring even coverage on all sides.
-
In the bottom of the prepared roasting pan (under the wire rack), add the olive oil, thick-cut onions, celery, fresh thyme sprigs, and chicken broth.
-
Place the seasoned chicken breast-side up on the wire rack. Roast in the preheated 450°F (232°C) oven for 20 minutes.
-
Reduce the oven temperature to 350°F (175°C) and continue baking for another 50-60 minutes, or until a meat thermometer inserted into the thickest part of the thigh reads 160-165°F (71-74°C).
-
Remove the chicken from the oven and transfer it to a clean cutting board. Tent loosely with aluminum foil and let it rest for 10-15 minutes.
-
While the chicken rests, transfer the cooked vegetables and pan broth to a skillet. Stir in the lemon juice and cornstarch. Bring to a simmer over medium heat, whisking until the sauce thickens to create a delicious gravy.
-
Carve the rested chicken into desired portions and serve immediately with the prepared pan sauce.
Notes
- Ensure your chicken is at room temperature before roasting for more even cooking.
- Always use a meat thermometer to check for doneness; aim for 160-165°F (71-74°C) in the thigh before resting.
- Sharp kitchen shears are essential for easily removing the backbone.
- Season generously, both under and over the skin, for maximum flavor.
- Pat the chicken very dry to achieve crispy skin.
- Resting the chicken for 10-15 minutes after roasting is crucial for juicy results.
- Flavor Adaptations: Feel free to experiment with different herbs (like rosemary or sage) and spices to suit your taste. If butter isn’t preferred, avocado oil makes an excellent alternative.
Nutrition
Love this recipe? Share your thoughts!Rate it and leave a comment below!