
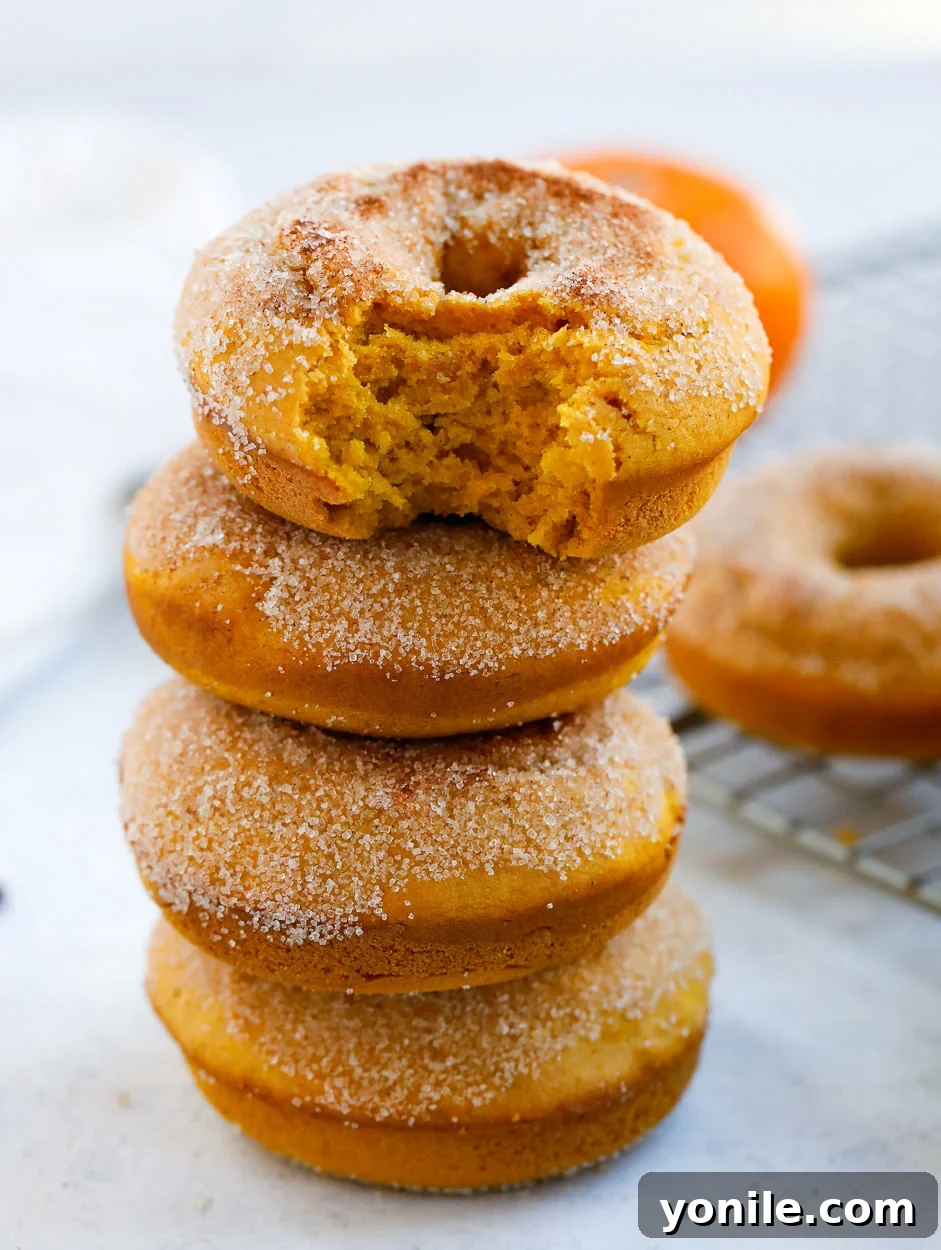
As the crisp autumn air settles in and leaves begin to display their vibrant hues, there’s nothing quite like the comforting aroma of freshly baked treats. This season, elevate your fall baking with our super yummy and undoubtedly “kid-approved” Baked Pumpkin Donuts! Forget the guilt of fried indulgences; these delightful donuts are baked to golden perfection, offering a healthier twist on your favorite seasonal recipe. Once they emerge from the oven, still warm and inviting, each donut is lovingly brushed with melted butter and then generously dipped in a sweet, aromatic cinnamon sugar mixture, creating an utterly irresistible flavor profile. Prepare to fall in love with every single bite!
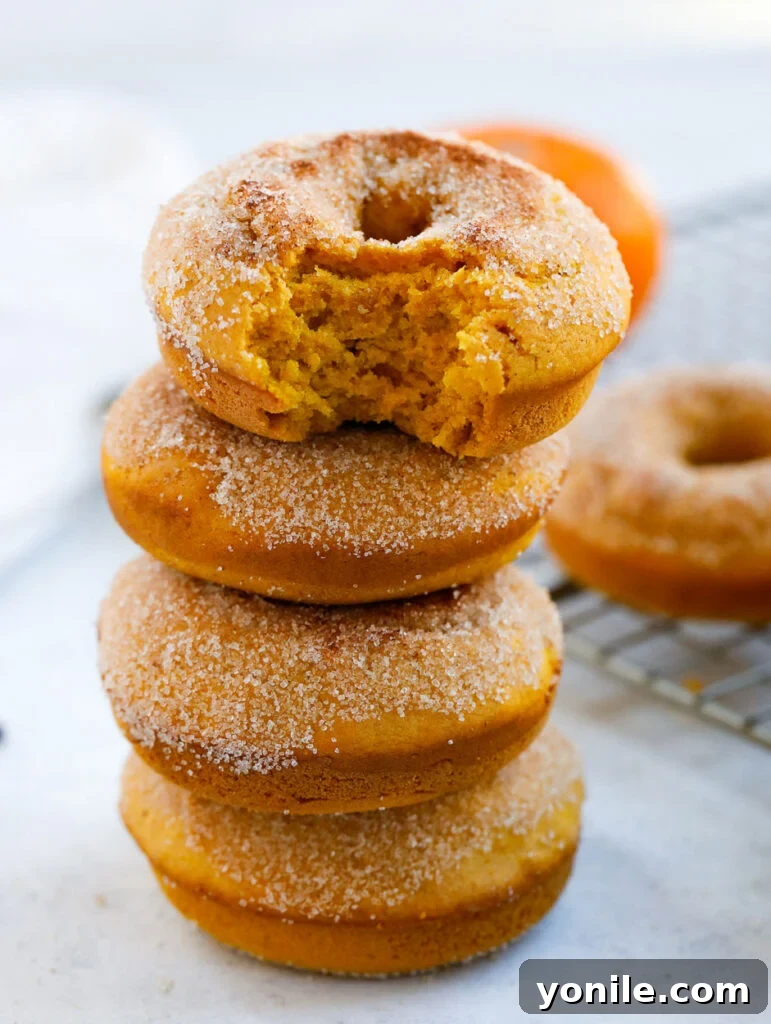
Imagine starting your day with a steaming cup of coffee and a tender, melt-in-your-mouth Baked Pumpkin Donut. This recipe promises not only ease of preparation but also an explosion of authentic fall flavor. While they are exceptionally delicious adorned with their classic cinnamon sugar coating, these versatile cake-style donuts can also be enjoyed plain or customized with any topping your heart desires – from a simple powdered sugar dusting to a rich cream cheese glaze. Don’t miss out on this quintessential autumn experience!
If you’re eager to explore more delightful sweet treats that capture the essence of homemade goodness, be sure to also try my Funfetti Cookie Sandwiches for a burst of colorful fun, or perhaps my decadent Nutella Swirl Banana Muffins for another comforting breakfast or dessert option. Each recipe is crafted to bring joy to your kitchen and smiles to your family.
Why These Baked Pumpkin Donuts Are Your New Fall Favorite
These aren’t just any pumpkin donuts; they’re a celebration of fall, designed for ease, flavor, and a touch of healthier indulgence. Here’s why you’ll adore them:
- Baked, Not Fried for a Healthier Indulgence: Say goodbye to the messy, oil-laden process of deep-frying. Baking these donuts significantly reduces the fat content, making them a much healthier alternative without sacrificing any of that beloved donut texture or flavor. Enjoy them guilt-free!
- Generous Batch Size for Sharing: This recipe yields a fantastic batch of 16 delicious donuts, perfect for feeding a crowd, bringing to a potluck, or ensuring you have plenty to enjoy throughout the week. If you’re cooking for a smaller household, the recipe is easily halved.
- Incredibly Satisfying Cake-Donut Texture: Unlike some dense or overly airy baked goods, these pumpkin donuts boast a wonderfully soft, moist, and tender cake-like crumb. They truly capture the essence of a classic cake donut, making every bite incredibly satisfying and comforting.
- Versatile Topping Options: While our recommended cinnamon sugar coating is a game-changer, these donuts are a blank canvas for creativity. Enjoy them as is, dust them with powdered sugar, drizzle with a simple glaze, or get adventurous with cream cheese frosting or chocolate ganache.
- Effortless and Quick Preparation: With just a few common pantry staples, you can whip up the batter and have these delightful pumpkin donuts ready to bake in no time. From start to finish, you’re looking at about 20 minutes of active prep and bake time, making them ideal for busy mornings or spontaneous cravings.
- Authentic Fall Flavor: The combination of real pumpkin puree and a warming blend of pumpkin spice creates an unparalleled taste that perfectly encapsulates the spirit of autumn.
Essential Ingredients for Your Pumpkin Donuts
Crafting these delectable baked pumpkin donuts requires a simple list of ingredients, many of which you likely already have on hand. Quality ingredients ensure the best flavor, so opt for fresh where possible.
- Pumpkin Puree: The star ingredient, providing moisture, color, and that unmistakable pumpkin flavor. Ensure it’s 100% pumpkin puree, not pumpkin pie filling.
- Milk: Adds richness and helps create the perfect batter consistency. Any type of milk works here.
- Melted Butter: Contributes to the tender texture and rich flavor of the donuts, and is also essential for the glorious cinnamon sugar coating.
- Canola Oil or Vegetable Oil: Provides additional moisture and helps achieve a light and airy crumb.
- Light Brown Sugar: Offers a deeper, molasses-rich sweetness compared to white sugar, enhancing the fall flavors.
- Pumpkin Spice: The warming blend of cinnamon, nutmeg, ginger, and cloves that defines autumn baking.
- Eggs: Act as a binder, adding structure and richness to the donut batter.
- All-Purpose Flour: The primary dry ingredient, giving the donuts their foundational structure.
- Baking Powder: The leavening agent that helps these baked donuts rise and become fluffy.
- Salt: A crucial flavor enhancer that balances the sweetness and brings out the pumpkin spice notes.
- Cinnamon Sugar Dip: A simple yet magical blend of melted butter, granulated sugar, and ground cinnamon for that iconic donut finish.
Step-by-Step Guide: Crafting Your Baked Pumpkin Donuts
Follow these straightforward steps to create a batch of perfectly baked pumpkin donuts that will impress everyone:
- Prepare Your Batter to Perfection: Begin by taking two separate, shallow bowls. In one bowl, combine all your wet ingredients (pumpkin puree, milk, melted butter, canola oil, brown sugar, eggs). In the other, whisk together your dry ingredients (all-purpose flour, pumpkin spice, baking powder, salt). Once both mixtures are well-combined in their respective bowls, pour the wet ingredients over the dry. Mix thoroughly using a whisk or spatula until you achieve a wonderfully smooth, uniform batter. Be careful not to overmix, as this can lead to tougher donuts.
- Effortlessly Fill Your Donut Pan: For a clean and easy transfer, scoop your smooth batter into a large piping bag or a sturdy ziplock bag. Snip a small corner off the bag – just enough to create a steady stream of batter. Lightly spray your non-stick donut pan with cooking spray to prevent sticking. Carefully pipe the batter into each donut cavity, filling them approximately three-quarters of the way full. This allows ample space for the donuts to rise beautifully without overflowing.
- Bake to Golden-Brown Perfection: Place your filled donut pan into a preheated oven set to 350°F (175°C). Bake for about 15 minutes, or until the donuts appear golden brown and firm to the touch. You can test for doneness by gently inserting a toothpick into the center of a donut; if it comes out clean, they’re ready! Avoid overbaking to maintain their moist texture.
- Coat with Irresistible Cinnamon Sugar: Once baked, remove the pan from the oven and let the donuts cool in the pan for about 5 minutes. This brief cooling period helps them firm up before handling. While they are still warm, gently remove each donut. Working one at a time, lightly brush each donut all over with additional melted butter, then immediately dip it into your prepared cinnamon sugar mixture, ensuring an even and generous coating. The warmth of the donut helps the butter and sugar adhere perfectly.
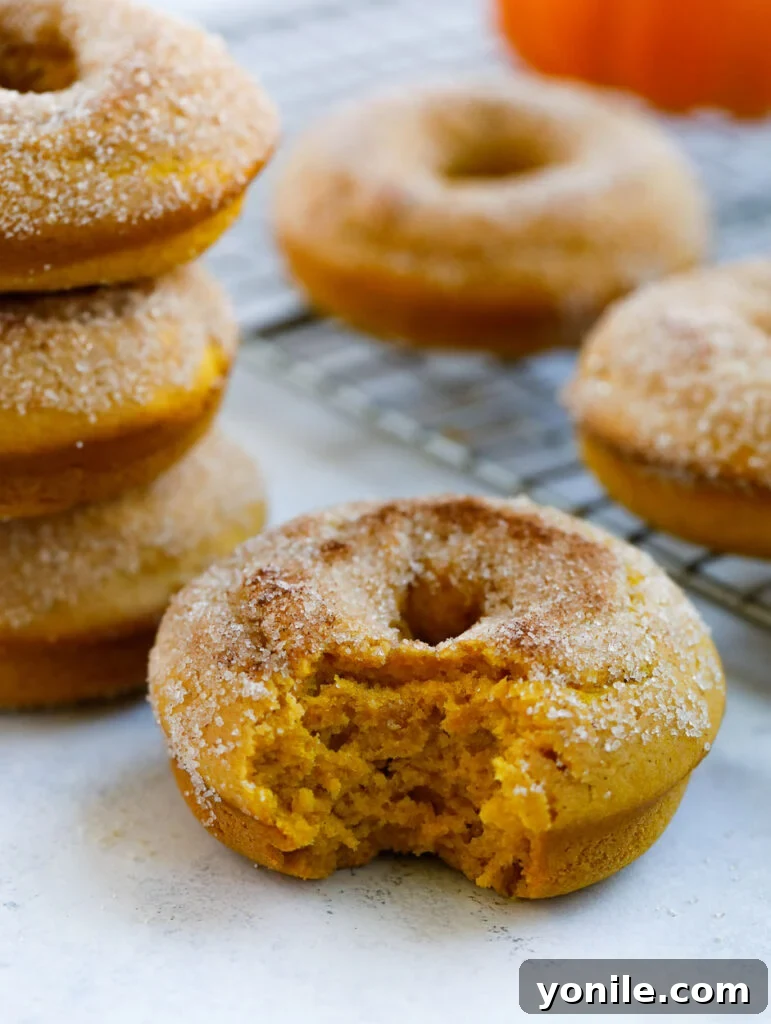
Expert Tips for Perfect Pumpkin Donuts
Achieving bakery-quality baked pumpkin donuts at home is simpler than you think with these helpful tips:
- Ensure a Smooth Batter: When combining your wet and dry ingredients, whisk thoroughly but gently. The goal is a uniform, lump-free batter. Overmixing can develop the gluten in the flour too much, leading to a tougher, chewier donut rather than the desired soft, cake-like texture.
- Simplify Filling Your Donut Molds: For the cleanest and most efficient way to fill your donut pans, use a piping bag or a large ziplock bag with a corner snipped off. This method gives you precise control, minimizes mess, and ensures evenly shaped donuts.
- Don’t Overfill Your Molds: Always remember to fill each donut cavity only about three-quarters of the way full. This critical step allows adequate room for the donuts to rise and expand during baking, preventing them from overflowing and losing their classic shape.
- Test for Doneness Accurately: While a toothpick test is reliable, another great way to check if your donuts are done is to gently poke the top with your finger. If the donut springs back readily, it’s cooked through. If your finger leaves an indentation, they likely need a few more minutes in the oven. This ensures a perfectly baked, moist interior.
- Homemade Pumpkin Puree Elevates Flavor: While canned pumpkin puree is incredibly convenient (and perfectly acceptable!), making your own from scratch can truly enhance the flavor and freshness of these donuts. The process is simple and yields a vibrant, naturally sweet puree.
- Always Use Pumpkin Puree, Not Pie Filling: This is a crucial distinction! Canned pumpkin puree is 100% cooked pumpkin. Pumpkin pie filling, however, is already seasoned and sweetened, which will throw off the balance of your donut recipe. Always double-check the label.
- Versatile Serving Options: These donuts are wonderfully adaptable. Enjoy them warm, fresh out of the oven, simply plain, or with the classic cinnamon sugar coating. Feel free to experiment with other toppings like a simple vanilla glaze, chocolate drizzle, or even a sprinkle of chopped nuts.
- Apply Cinnamon Sugar While Warm: For the best adherence, ensure you brush the donuts with melted butter and dip them in the cinnamon sugar mixture while they are still warm, but not piping hot. The warmth helps the butter stick, which in turn helps the sugar coating cling beautifully to the surface of the donut.
Frequently Asked Questions About Pumpkin Donuts
Are pumpkins good for you?
Absolutely! Many people tend to think of pumpkins primarily as Halloween decorations or a festive pie filling for Thanksgiving. However, it’s high time to recognize the incredible nutritional benefits packed into this versatile orange plant! Pumpkins are remarkably low in calories, making them a fantastic addition to a healthy diet. A single cup of cooked pumpkin contains a mere 49 calories, largely due to its impressive 94% water content. Beyond being low-calorie, pumpkins are rich in essential vitamins and minerals. They are an excellent source of Vitamin A (in the form of beta-carotene, an antioxidant), Vitamin C, Vitamin E, potassium, and fiber. The high fiber content aids digestion and promotes a feeling of fullness, while antioxidants combat free radicals in the body. So, yes, incorporating pumpkin into your diet, perhaps through these baked donuts, is a delicious way to boost your nutrient intake!
How do I make pumpkin puree?
While I often rely on store-bought pumpkin puree for convenience (saving precious time in the kitchen!), knowing how to make it from scratch is an invaluable skill, especially since it’s not readily available in all regions. Plus, homemade puree offers a depth of flavor that can truly elevate your baking. Here’s a simple, effective method to make your own pumpkin puree:
- Select Your Pumpkin: Choose a small baking pumpkin, often labeled “sugar pumpkin” or “pie pumpkin,” as these varieties are less fibrous and more flavorful than carving pumpkins.
- Prepare for Roasting: Wash the pumpkin, then carefully cut it in half. Scoop out all the seeds and fibrous strands from the inside. You can save the seeds for roasting later!
- Roast to Perfection: Place the pumpkin halves face down onto a sheet pan lined with parchment paper. This prevents sticking and makes cleanup easier. Bake in a preheated 400°F (200°C) oven for about 45-50 minutes, or until the flesh is fork-tender. Larger pumpkins may require more baking time.
- Cool and Scoop: Once baked, remove the pumpkin from the oven and let it cool completely. This step is crucial, as handling hot pumpkin can be difficult. Once cool, scoop all the tender, cooked flesh out of the skin.
- Puree Until Smooth: Transfer the scooped pumpkin flesh into a food processor. Process until it is exceptionally smooth and creamy. If the puree seems too thick, you can add a tablespoon of water at a time until you reach your desired consistency, though roasting generally keeps it from being too watery.
- Storage: Your fresh pumpkin puree can be refrigerated in an airtight container for up to one week, or frozen for up to six months. This way, you can enjoy pumpkin treats long after the season ends!
Roasting is the preferred method for making pumpkin puree as it concentrates the flavor and results in a thicker, less watery puree. Boiling pumpkin cubes, while an option, tends to retain a lot of moisture, often leading to a loose, less flavorful puree that might require extra straining.
Can I Make These Donuts Ahead of Time?
Yes, these baked pumpkin donuts can be made a little in advance! You can prepare the batter and store it covered in the refrigerator for up to 24 hours. When you’re ready to bake, simply give the batter a gentle stir and proceed with filling your donut pan. The donuts are best enjoyed fresh, but if you need to bake them ahead, see the storage tips below. For best results with the cinnamon sugar coating, it’s always ideal to apply it just before serving.
How to Store These Baked Pumpkin Donuts
To keep your delicious baked pumpkin donuts as fresh as possible, proper storage is key. At room temperature, these donuts are best enjoyed within 1-2 days. If stored in a completely sealed, airtight container, they can become quite moist due to condensation, and the cinnamon sugar coating may absorb into the donut, losing its crispness. For optimal freshness and to maintain the integrity of the cinnamon sugar coating, store them on a wire rack inside a large tupperware box or under a cake dome. This allows for some air circulation while still protecting them from drying out too quickly. If your home is particularly warm or humid, refrigeration can extend their freshness, though it may slightly alter the texture.
Can I Freeze Baked Pumpkin Donuts?
Absolutely! Baked pumpkin donuts freeze beautifully, making them an excellent make-ahead treat. To freeze, allow the baked donuts to cool completely without any toppings. Once completely cool, place them in a single layer on a baking sheet and freeze for about an hour until firm. This prevents them from sticking together. Then, transfer the frozen donuts to a freezer-safe airtight container or heavy-duty freezer bag, separating layers with parchment paper. They can be stored in the freezer for up to 2-3 months. When ready to enjoy, thaw them at room temperature for about 30 minutes, or gently warm them in the microwave for a few seconds. Once thawed and warmed, you can then brush them with melted butter and dip them in cinnamon sugar for that fresh-baked experience.
What If I Don’t Have a Donut Pan?
No donut pan? No problem! While a donut pan gives them their classic shape, you can still enjoy the deliciousness of baked pumpkin donuts. The easiest alternative is to bake them in a standard muffin tin. Fill the muffin cups about two-thirds full with batter. The baking time will be similar, around 15-20 minutes, or until a toothpick inserted comes out clean. They’ll come out looking like mini pumpkin muffins, but they’ll taste just as wonderful with that cinnamon sugar topping!
Serving Suggestions for Your Fall Donuts
These baked pumpkin donuts are incredibly versatile and pair well with a variety of beverages and occasions. They make a fantastic breakfast treat alongside a fresh cup of coffee or tea. For a cozy autumn afternoon, serve them with warm apple cider or a pumpkin spice latte. They’re also perfect as a light dessert after a fall meal or as a delightful snack for school lunchboxes (without the cinnamon sugar coating if packing). For an extra special touch, consider serving them warm with a scoop of vanilla ice cream or a dollop of whipped cream.
More Delicious Pumpkin Recipes to Explore
If you find yourself craving more pumpkin goodness after devouring these donuts, be sure to check out these other fantastic fall recipes:
- Pumpkin Spice French Toast: A delightful breakfast twist on a classic.
- Pumpkin Chocolate Chip Pancakes: Fluffy pancakes infused with pumpkin and chocolate.
- Chocolate Chip Pumpkin Muffins: Moist and flavorful muffins perfect for any time of day.
I genuinely hope you enjoy all the recipes I share with you, and this delicious Baked Pumpkin Donut recipe is no exception. It’s a true taste of autumn that brings warmth and comfort to any home. Please give it a try, savor every moment, and consider sharing your experience and feedback with us!
If you try this delightful recipe and love it, we’d be thrilled to see your creations! Please use our hashtag on INSTAGRAM for a chance to be featured in our stories! And for all our latest social posts, culinary inspiration, and new recipes, be sure to follow us at Cookin’ With Mima on FACEBOOK | INSTAGRAM | PINTEREST. Happy baking!
Baked Pumpkin Donuts
By: Mariam Ezzeddine
These Baked Pumpkin Donuts are delicious, easy to make, and can be ready in less than half an hour. They’re kid-friendly and a healthier alternative to regular fried donuts, perfect for a delightful fall treat.
Ingredients
- 1 1/2 cups pumpkin puree
- 1/3 cup milk
- 1/3 cup butter, melted
- 1/4 cup canola or vegetable oil
- 1 cup light brown sugar
- 1 tbsp. pumpkin spice
- 2 eggs
- 2 1/2 cups all-purpose flour
- 1 tbsp. baking powder
- 1/4 tsp. salt
- Cinnamon Sugar Dip (optional):
- 1/3 cup butter, melted (for brushing)
- 1/2 cup sugar + 1 tbsp. cinnamon, mixed together
Instructions
- In two separate bowls, mix the wet ingredients and dry ingredients independently. Pour the wet mixture over the dry mixture. Mix well until you achieve a nice smooth batter, being careful not to overmix.
- Transfer the batter into a piping bag or a ziplock bag and snip a small corner. Spray a non-stick donut pan with cooking spray and then fill each section of the donut pan about 3/4 of the way full.
- Bake in a preheated 350°F (175°C) oven for 15 minutes or more, until a toothpick inserted into a donut comes out clean.
- Let the donuts cool in the pan for 5 minutes. Then, remove them and brush each donut with additional melted butter before dipping it into the cinnamon sugar mixture, one at a time, ensuring a generous coating.
Notes
- Make sure to whisk to obtain a nice smooth batter without any clumps. Avoid overmixing.
- To make filling the molds easier and cleaner, place your batter in a ziplock bag, cut the corner, and pipe it in.
- Only fill your donut molds 3/4 full to allow room for the donut to expand during baking.
- When the donuts appear almost done, gently poke the top with your finger. If the donut bounces back, they’re done. If your finger leaves a mark, they need a little longer. A clean toothpick test also works!
- You can use canned pumpkin puree, but homemade tastes amazing and adds a special touch.
- If using canned pumpkin, ensure it is 100% pumpkin puree and not pumpkin pie filling, which is already seasoned and sweetened.
- These donuts are delicious plain, with the cinnamon sugar, or with any other toppings you like.
- If adding the cinnamon sugar topping, make sure to apply it before the pumpkin donuts cool completely. This helps the coating adhere properly.
Nutrition Information (per serving)
Serving Size: 1g | Calories: 258kcal | Carbohydrates: 26.6g | Protein: 3.4g | Fat: 15.9g | Saturated Fat: 8.1g | Sodium: 143.6mg | Sugar: 9.9g