
Embark on a delightful culinary journey with a dessert that often intimidates but is surprisingly simple to master: Easy Crème Brûlée. This classic French dessert, with its luxurious, creamy custard base and signature crackable caramel topping, brings gourmet elegance straight to your kitchen. Forget the complexity; this recipe is designed for everyone, from seasoned bakers to enthusiastic novices, promising a truly unforgettable treat that’s as beautiful to behold as it is delicious to devour.
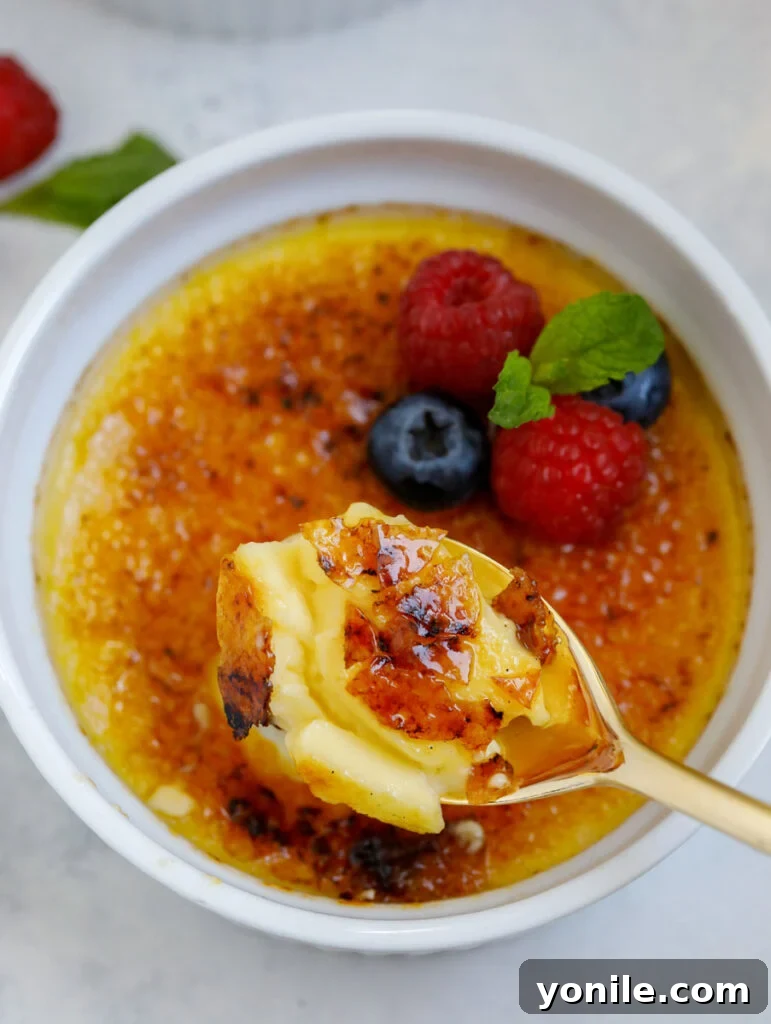
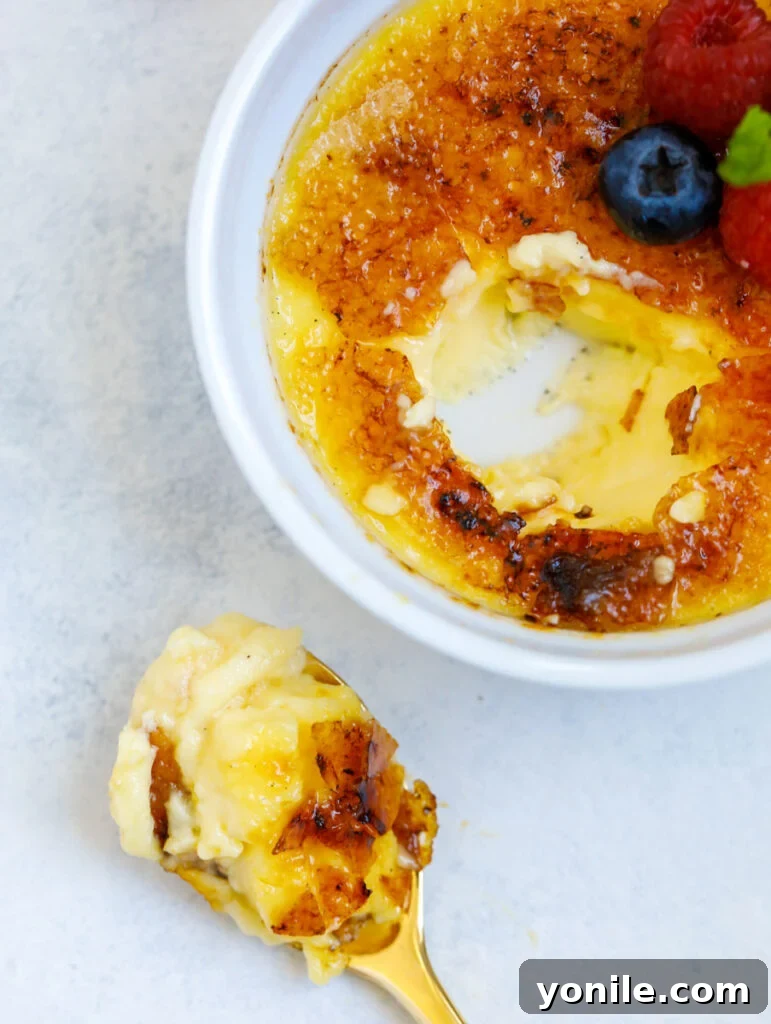
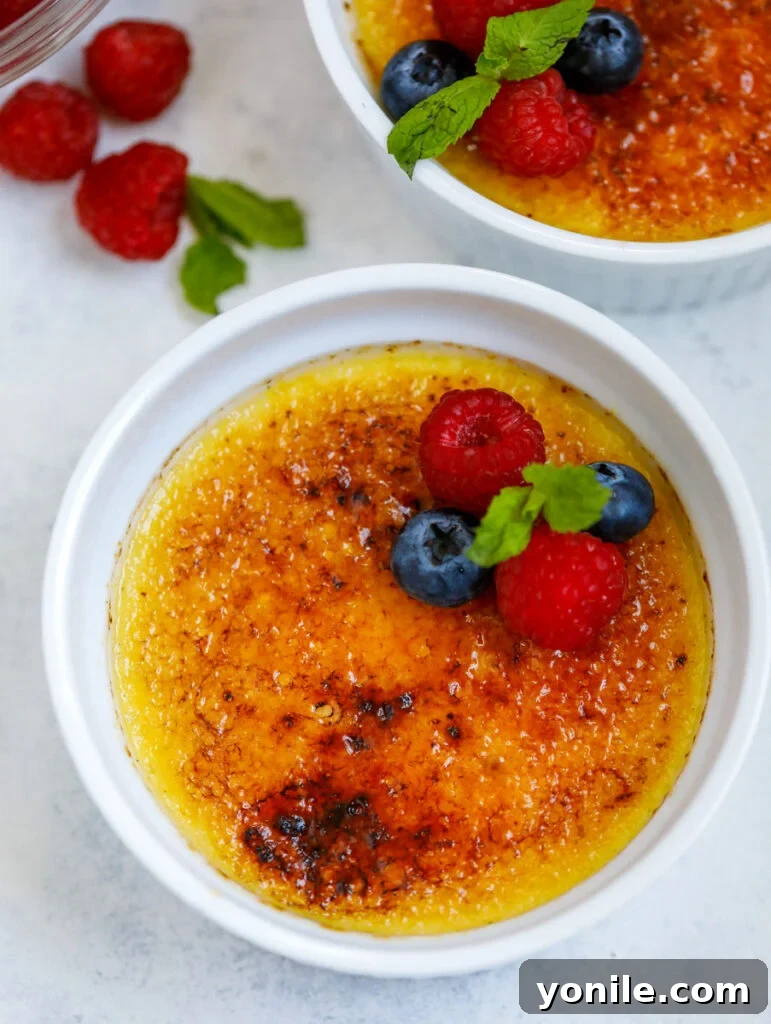
Imagine the satisfying ‘crack’ as your spoon shatters a glistening, golden caramel shell, revealing a velvety-smooth, rich vanilla custard beneath. This homemade crème brûlée recipe elevates your dessert repertoire, delivering a restaurant-quality experience right at home. Garnish with a vibrant medley of fresh berries for a dessert that’s not just a feast for the palate but also a stunning centerpiece on any table. It’s the perfect blend of simplicity and sophistication, proving that incredible desserts don’t have to be difficult.
Craving more delightful confections? Explore other popular dessert recipes like our Decadent Chocolate Chip Cheesecake and the effortlessly elegant Flaky Raspberry Puff Pastry Tart, each offering a unique twist on classic indulgence.
Why You’ll Adore This Easy Crème Brûlée Recipe
Crème Brûlée is a dessert that captivates with its contrasting textures and rich flavors. Our simplified recipe ensures that achieving this culinary marvel is well within reach for every home cook. Here’s why this version will quickly become a cherished favorite:
- A Dreamy, Velvety Custard Filling: At the heart of this easy crème brûlée is a sumptuously rich and incredibly creamy vanilla custard. Made with just a few core ingredients, it boasts a profound, comforting flavor that truly hits the spot. The secret lies in fresh egg yolks, heavy cream, and a touch of vanilla, creating a silky texture that melts in your mouth and leaves a lasting impression of pure indulgence.
- The Iconic, Crisp Caramel Topping: The hallmark of any perfect crème brûlée is its gloriously crisp caramel topping. This recipe guides you to create that flawless, glassy sugar shell with ease. Just a thin layer of granulated sugar, expertly torched, transforms into a brittle, golden crust. The moment your spoon breaks through this sugary layer, revealing the soft custard below, is pure dessert bliss – a symphony of textures that defines the crème brûlée experience.
- Effortlessly Elegant and Simple to Master: Don’t let its sophisticated appearance fool you. While crème brûlée often graces the menus of high-end restaurants, our easy crème brûlée recipe demystifies the process, making it surprisingly simple to whip up at home. With only a handful of readily available ingredients and straightforward steps, you can create a dessert that looks incredibly impressive yet requires minimal fuss. It’s the ideal showstopper for dinner parties or a special treat for yourself.
Essential Ingredients You’ll Need for Homemade Crème Brûlée
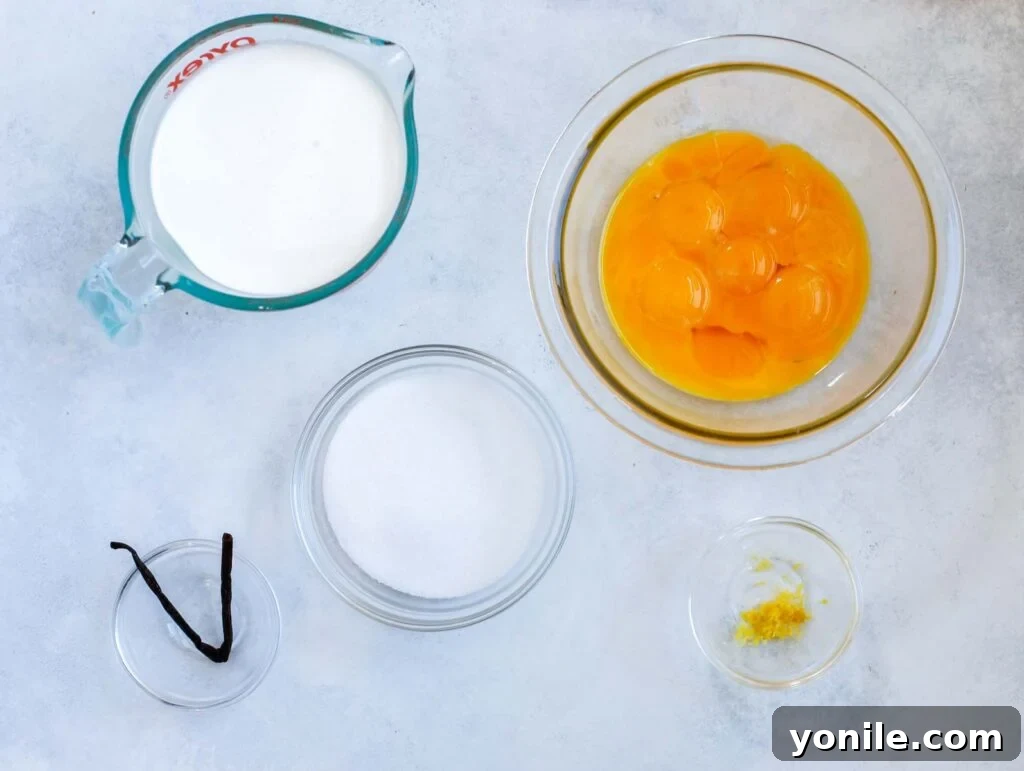
Crafting the perfect crème brûlée requires a few high-quality ingredients that work in harmony to create its distinct flavor and texture. Here’s what you’ll need:
- Egg Yolks: These are the foundation of your custard, providing richness, emulsification, and that beautiful golden hue. Using only yolks ensures a smooth, dense, and luxurious texture.
- Heavy Cream: The primary liquid component, heavy cream (or whipping cream) imparts the signature richness and velvety consistency to the custard. Do not substitute with lighter creams, as they won’t achieve the same decadent result.
- Vanilla Bean or Vanilla Extract: Vanilla is the quintessential flavor for crème brûlée. A whole vanilla bean, with its scraped seeds and pod, offers the most profound and aromatic vanilla essence. If a vanilla bean is unavailable, high-quality pure vanilla extract is an excellent alternative.
- Granulated Sugar: Used in both the custard for sweetness and, crucially, for the iconic caramel topping. Fine granulated sugar is ideal as it dissolves smoothly into the custard and caramelizes evenly on top.
- Lemon Zest (Optional but Recommended): A subtle touch of lemon zest adds a bright, fresh counterpoint to the richness of the cream and vanilla, enhancing the overall flavor profile without overpowering it. Orange zest can also be used for a slightly different citrus note.
- Fresh Berries (for Topping): While optional, a vibrant mix of fresh berries (strawberries, raspberries, blueberries) adds a pop of color, a touch of acidity, and a refreshing contrast to the sweet, creamy dessert.
How to Make This Easy Crème Brûlée Recipe: Step-by-Step
Making crème brûlée might seem intricate, but by following these clear steps, you’ll achieve perfection every time. The key is careful attention to detail, especially during the tempering and baking phases.
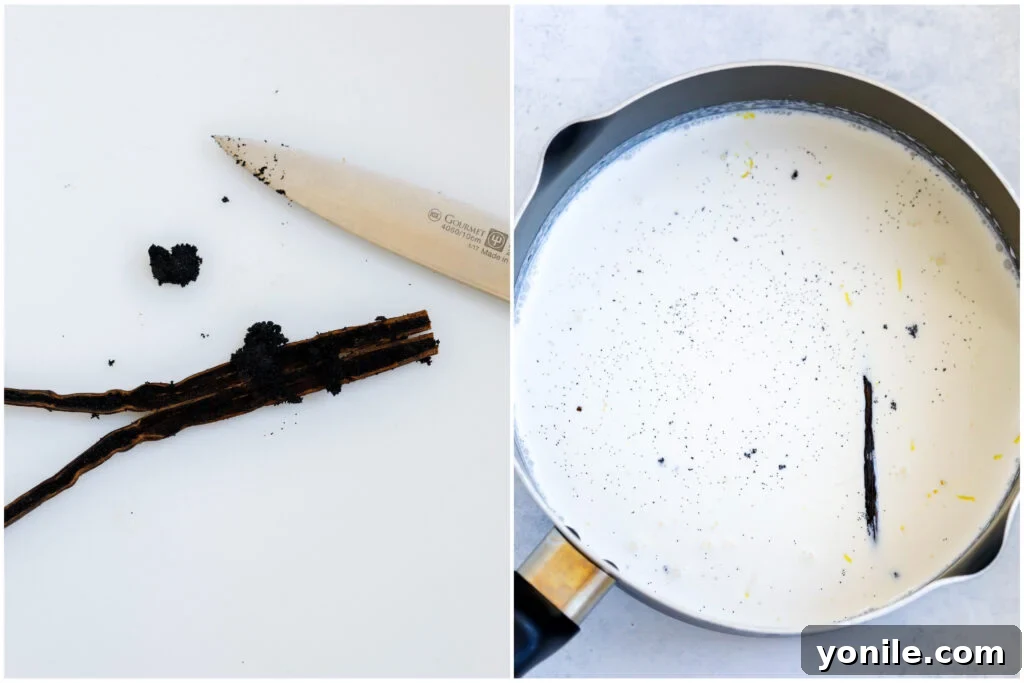
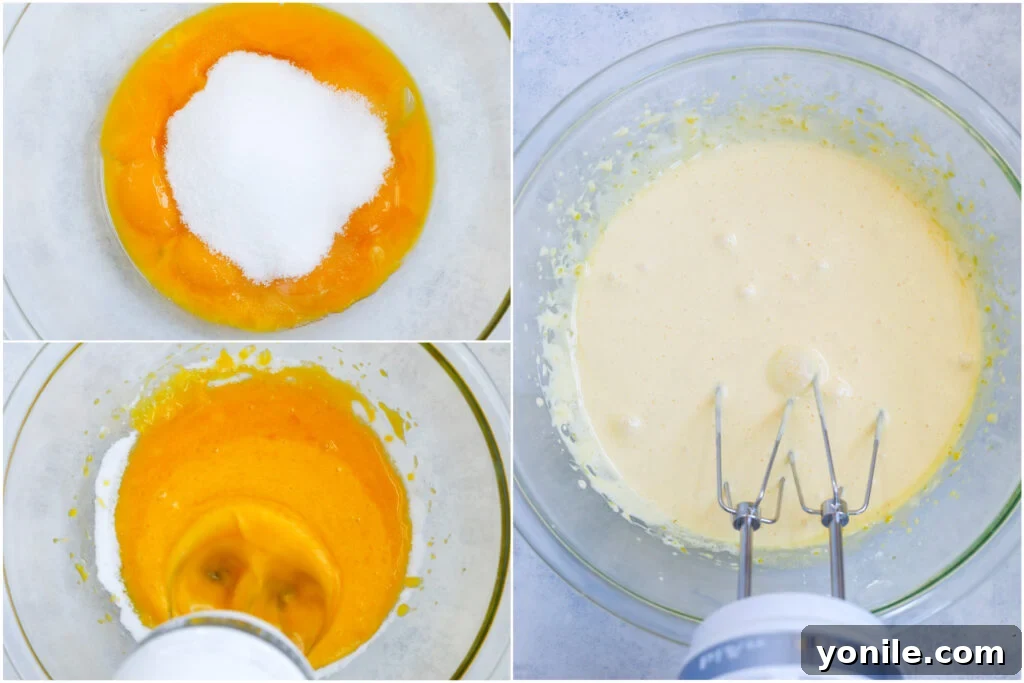
- Prepare Your Custard Base: Begin by infusing your heavy cream. In a medium saucepan, combine the heavy cream, vanilla (seeds scraped from a split vanilla bean pod, and the pod itself, or vanilla extract), and lemon zest. Gently bring this mixture to a simmer over low heat, stirring occasionally to ensure the flavors meld beautifully. Do not let it boil vigorously. In a separate bowl, whisk your egg yolks with the granulated sugar until the mixture becomes pale and fluffy, signifying that the sugar has begun to dissolve and the yolks are lightened.
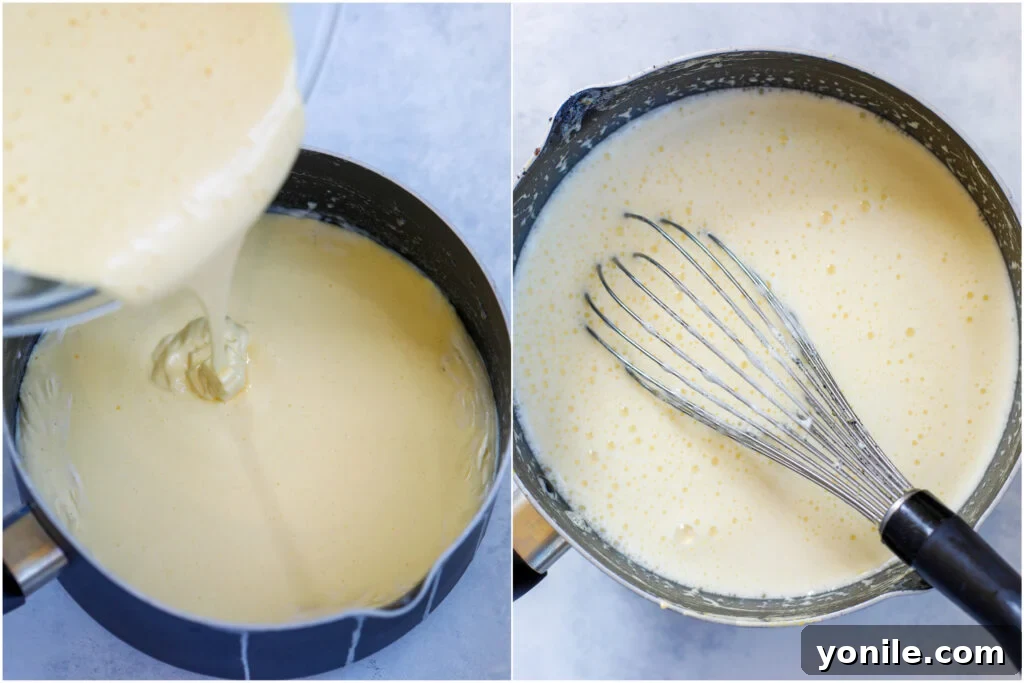
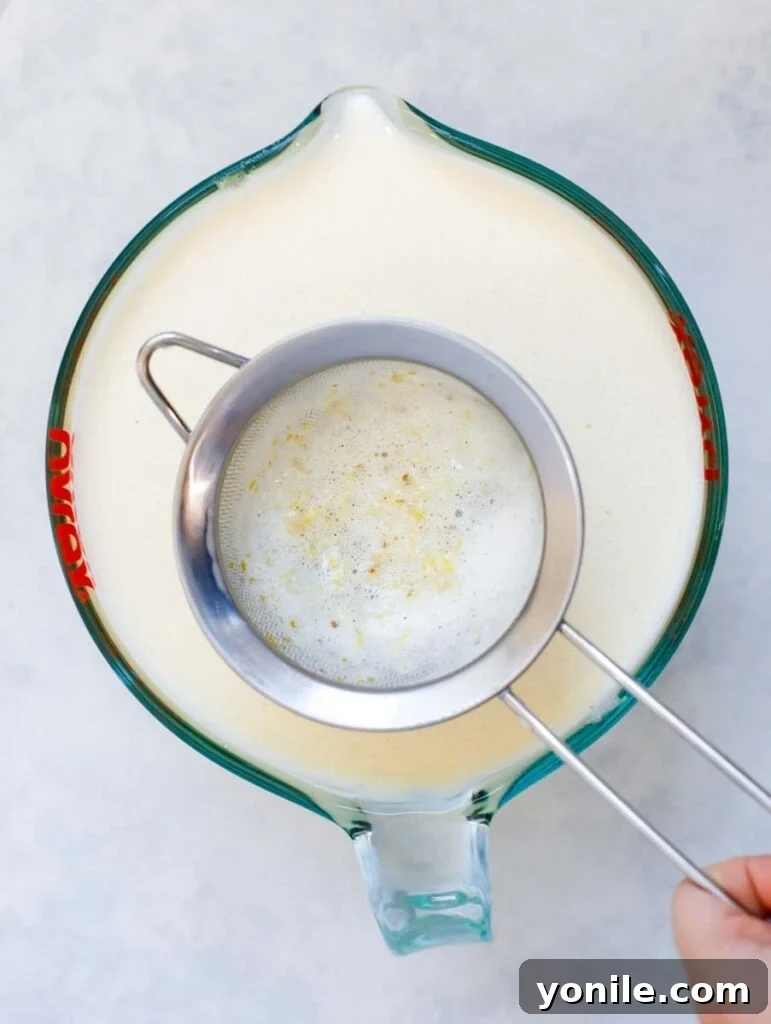
- Temper and Strain the Custard: Once the cream mixture reaches a gentle simmer, remove it from the heat. Gradually pour the hot cream mixture into the whisked egg yolks and sugar, continuously whisking to temper the eggs. This crucial step prevents the eggs from scrambling, ensuring a smooth custard. Continue whisking for about 30 seconds until the mixture is well combined and slightly thickened. Next, pour the entire custard mixture through a fine-mesh sieve into a pitcher or another clean bowl. This step removes the vanilla bean pod, lemon zest, and any potential egg clumps, guaranteeing an incredibly silky and uniform custard.
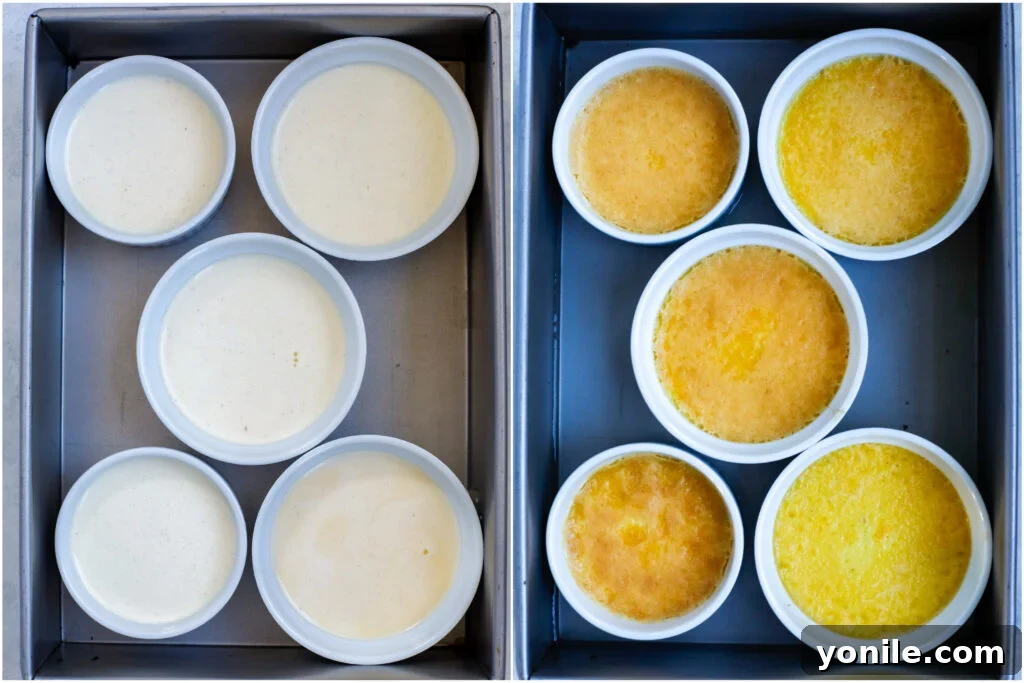
- Bake in a Water Bath: Preheat your oven to 300°F (150°C). Carefully pour the strained custard mixture into individual ramekins, filling them almost to the rim (about 90% full). Arrange the filled ramekins in a deep baking dish. Place the baking dish on an oven rack, then pour boiling water into the larger dish, reaching about halfway up the sides of the ramekins. This water bath (bain-marie) ensures that the custards bake gently and evenly, preventing them from cracking or cooking too quickly. Bake for approximately 50-60 minutes, or until the edges are set but the centers still have a slight jiggle.
- Chill to Perfection: Once baked, carefully remove the ramekins from the hot water bath using tongs. Let them cool completely at room temperature before transferring them to the refrigerator. Chill for at least 2 hours, or preferably overnight, allowing the custards to firm up and fully set. This chilling process is essential for the perfect creamy texture.
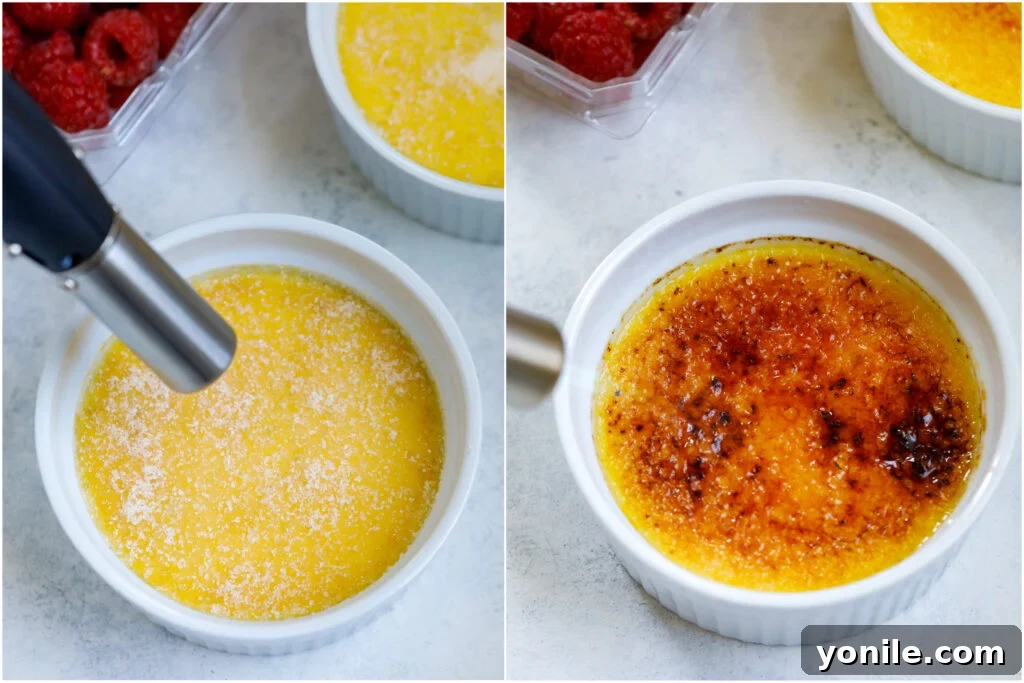
- Create the Signature Caramel Topping: Just before serving, take your chilled crème brûlées from the fridge. Sprinkle a thin, even layer of granulated sugar over the top of each custard. Using a kitchen torch, caramelize the sugar until it melts, bubbles, and turns a beautiful amber color, forming a hard, brittle shell. Work quickly and evenly to avoid burning the sugar or heating the custard too much.
- Garnish and Serve: Immediately after torching, garnish your freshly brûléed custards with fresh berries for a burst of color and flavor. Serve these elegant homemade crème brûlées right away to enjoy the delightful contrast between the warm, crisp topping and the cold, creamy custard. Enjoy every delectable bite!
Recipe Notes and Tips for Crème Brûlée Success
Achieving the perfect crème brûlée involves a few crucial techniques and considerations. Keep these tips in mind to ensure your dessert turns out flawlessly every time:
- Ramekin Size Matters: The yield of this recipe can vary. While typically making 6 servings, the actual number depends heavily on the size and depth of the ramekins you use. Ensure your ramekins are oven-safe and of a consistent size for even cooking.
- Pre-Boil Your Water: For the water bath (bain-marie), it’s vital to use boiling water. If you don’t have an electric kettle, start boiling water on your stove in a separate pot well in advance. This ensures the hot water is ready to go as soon as your custard is poured into the ramekins, minimizing preparation time and maintaining an even oven temperature.
- Timing the Caramelization: Only caramelize the sugar topping right before you plan to serve the crème brûlée. Storing the dessert in the refrigerator after torching will cause the caramel shell to absorb moisture from the air and soften, losing its desirable crunch. Freshly torched caramel is key to the authentic crème brûlée experience.
- Skim the Foam: After whisking the egg yolks and heavy cream together, you might notice a thin layer of foam on the surface of your custard mixture. For the smoothest, most professional-looking finish, it’s best to gently skim off this foam layer before pouring the custard into the ramekins. This prevents an undesirable spongy texture on the top of your baked custard.
- Always Preheat Your Oven: Ensure your oven is fully preheated to the specified temperature (300°F or 150°C) before placing the baking dish with the ramekins inside. A consistently heated oven is crucial for the custards to bake evenly and set correctly.
- Embrace Vanilla Bean: While vanilla extract works, a fresh vanilla bean truly elevates the flavor of your crème brûlée. Split the bean lengthwise, scrape out the fragrant seeds, and add both the seeds and the pod to the cream as it heats for maximum infusion. If using extract, ensure it’s pure vanilla extract for the best taste.
Frequently Asked Questions (FAQs) About Crème Brûlée
How to Store Crème Brûlée Effectively
To enjoy your delicious crème brûlée over a few days, proper storage is key. You can store the baked custards in the refrigerator for up to 3-4 days, uncovered, before adding the sugar topping. Once the custard is completely cooled, cover each ramekin tightly with plastic wrap to prevent a skin from forming and to keep it fresh. If you notice any condensation on the surface after a day or two in the fridge, gently blot it dry with a paper towel before adding the sugar. Remember, only caramelize the sugar right before serving to maintain its crispness.
What Can I Use for Crème Brûlée if I Don’t Have a Torch?
While a kitchen torch offers the best control for a perfect caramel topping, you can still achieve a delicious crust without one. The most common alternative is using your oven’s broiler. Sprinkle an even layer of granulated sugar over the chilled custards, then place them on a baking sheet in the oven, positioned under the broiler. Watch them *very* carefully – sugar can burn quickly! This method works, but the downside is that the broiler’s heat can warm the custard slightly, and it’s harder to get an even caramelization compared to a torch. Another clever, albeit more tedious, method is to heat the back of a metal spoon over a gas flame until it’s very hot, then carefully press it against the sugar layer on the custard to melt and caramelize it in sections. Exercise extreme caution with this technique.
Do I Need Ramekins for Crème Brûlée?
Using individual ramekins is highly recommended for crème brûlée. Their small size and sturdy construction allow the custard to cook evenly, resulting in that signature silky texture throughout. They also provide the perfect surface area for a beautiful, individual caramel topping. While you could technically use a larger, wide ceramic dish, the cooking time and results may vary significantly. A large dish might cook unevenly, with the edges setting much faster than the center, potentially leading to a less consistent custard texture. For the authentic experience and best results, individual ramekins are indeed preferred.
More Irresistible Desserts to Explore
If you’ve enjoyed mastering this easy crème brûlée, you’re sure to love these other fantastic dessert recipes from our collection:
- The Best Lemon Bars Recipe
- Exquisite Strawberry French Tart
- Refreshing Strawberry Cheesecake Ice Cream
- Rustic Mixed Berry Galette
We truly hope you enjoy every recipe we share with you, especially this spectacular Easy Crème Brûlée. We encourage you to try it out, savor its flavors, rate your experience, and share this delightful creation with your cherished friends and family!
Should you try this recipe and love it, please share your culinary masterpieces with us on INSTAGRAM using our hashtag for a chance to be featured in our story! And don’t forget to follow Cookin’ With Mima on FACEBOOK, INSTAGRAM, and PINTEREST to stay updated with all our latest social posts and mouth-watering recipes.
Classic Crème Brûlée
By: Mariam Ezzeddine
This Easy Crème Brûlée recipe delivers a creamy custard with a perfect crunchy caramel topping that’s a breeze to whip up! Delicious, simple, and impressive.
Prep Time: 15 minutes
Cook Time: 1 hour
Total Time: 1 hour 15 minutes
Servings: 6 servings
Equipment
- Ramekins
- Kitchen Torch (or broiler/hot spoon method)
- Fine-mesh sieve
- Deep baking pan (for water bath)
Ingredients
- 7 whole egg yolks
- 3 cups heavy cream
- 1 pod vanilla bean (preferably, or 2 tsp pure vanilla extract)
- 1 cup fine granulated sugar (divided: 2/3 cup for custard, 1/3 cup for topping)
- 1 tsp lemon zest (or orange zest)
- Fresh berries for topping (optional)
Instructions
- Preheat your oven to 300°F (150°C).
- Start boiling approximately 1 liter of water in a kettle or pot for the water bath.
- If using a vanilla bean, slice it in half lengthwise and scrape out all the fragrant seeds.
- In a saucepan, combine the heavy cream, vanilla beans (and pod), and lemon zest. Bring the mixture to a gentle simmer over low heat, stirring occasionally.
- In a separate mixing bowl, whisk the egg yolks with 2/3 cup of the granulated sugar until the mixture is light in color and fluffy.
- Once the heavy cream mixture begins to simmer, remove it from the heat. Slowly and gradually pour the hot cream into the egg yolk mixture while continuously whisking for about 30 seconds. This tempering process ensures a smooth, creamy texture and prevents the eggs from scrambling.
- Pour the custard mixture through a fine-mesh sieve into a pitcher or a clean bowl to remove the vanilla bean pod, lemon zest, and any potential clumps, ensuring a perfectly smooth custard.
- Carefully pour the strained custard mixture into your ramekins, filling them about 90% full, up to the rim line as shown in the photos.
- Arrange the filled ramekins in a deep baking dish. Place the baking dish into the preheated oven, then carefully pour the pre-boiled hot water into the larger dish, creating a water bath that reaches about 2 inches up the sides of the ramekins.
- Bake for 50-60 minutes, or until the edges of the custard are set but the center still has a slight, delicate jiggle. Baking time can vary slightly depending on your oven.
- Once baked, carefully remove the ramekins from the hot water bath using tongs. Allow them to cool completely at room temperature, then transfer them to the refrigerator to chill for at least 2 hours, or until thoroughly cold and set.
- When you are ready to serve, take the chilled crème brûlées from the fridge. Evenly spread a thin layer of the remaining 1/3 cup granulated sugar over the top of each custard. Use a kitchen torch to melt and caramelize the sugar, creating a hard, brittle caramel shell.
- Garnish immediately with fresh berries and serve your exquisite homemade crème Brûlée to enjoy the perfect contrast of warm, crisp caramel and cold, creamy custard.
Notes
- If you cannot find a vanilla bean (which is highly recommended for superior flavor), use 2 teaspoons of pure vanilla extract instead.
- The final number of servings may exceed 6, depending on the specific size of the ramekins you are using.
- If you lack an electric water kettle, begin boiling water on your stove in advance to ensure it’s ready for the water bath when your custard is prepared.
- Caramelize the sugar topping just before serving. Storing crème brûlée in the refrigerator after caramelizing will cause the sugar shell to soften and lose its delightful crunch due to moisture absorption.
- After whisking the egg batter and hot heavy cream together, a foamy layer might form on top. For the smoothest custard, it’s best to remove this foam before pouring the custard into the ramekins.
- Always ensure your oven is fully preheated to the correct temperature before baking for consistent results.
Nutrition (per serving)
Calories: 544 kcal
Carbohydrates: 37g
Protein: 3g
Fat: 44g
Saturated Fat: 28g
Cholesterol: 176mg
Sodium: 46mg
Potassium: 89mg
Fiber: 1g
Sugar: 33g
Vitamin A: 1766 IU
Vitamin C: 2mg
Calcium: 77mg
Iron: 1mg