
Craving the aroma of freshly baked bread without the hassle of endless kneading or specialized equipment? You’ve landed in the perfect spot! This incredibly simple **No-Knead Artisan Bread** recipe delivers a phenomenal loaf with a wonderfully fluffy, chewy interior and a perfectly golden, crispy crust. It’s truly a game-changer for anyone who loves homemade bread but shies away from complex baking techniques.
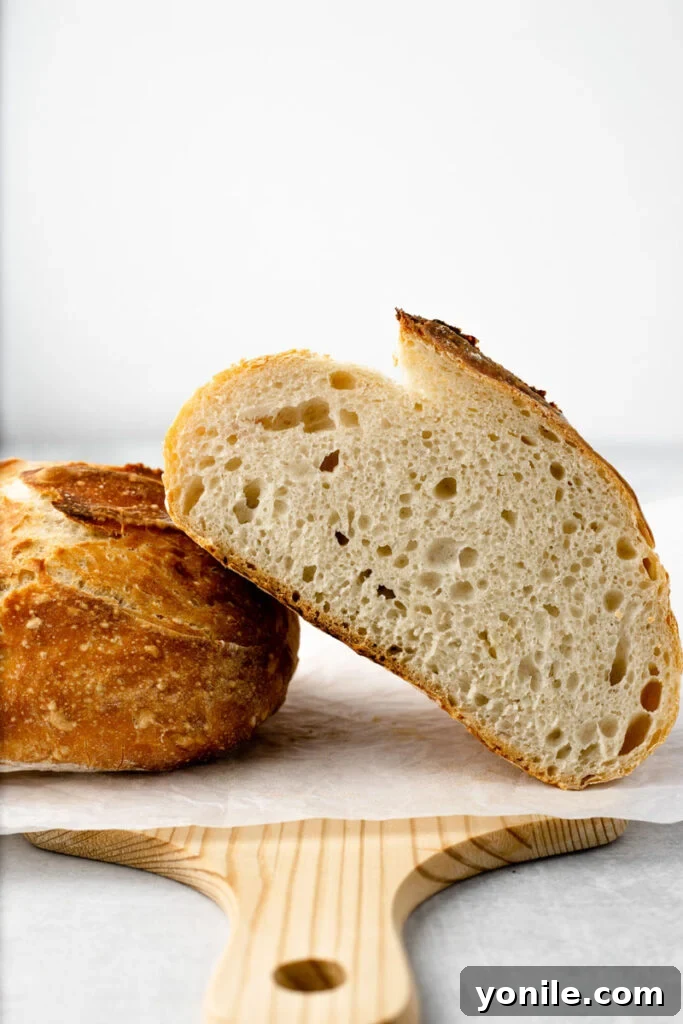
If you’re new to the world of home baking, or simply seeking an effortless path to artisan-quality bread, this recipe is your ideal starting point. You’ll be amazed by how such minimal effort can yield such spectacular results. This isn’t just any bread; it’s the kind of rustic, crusty loaf that elevates any meal. Imagine tearing into a warm slice, perfectly paired with a hearty bowl of soup, sopping up rich sauces, serving as the base for a gourmet avocado toast, or simply enjoyed with a drizzle of olive oil and a pinch of salt. What makes it truly exceptional is its “no-knead” nature – no stand mixer, no heavy lifting, just a few minutes of mixing, and time does all the hard work for you.
Ready to expand your baking repertoire? Explore more delightful creations like my Easy Challah Bread, Hawaiian Sweet Rolls, or my go-to Everyday Sandwich Bread! Each recipe is designed for ease and deliciousness.
Why This No-Knead Artisan Bread Will Become Your Go-To Recipe
There are countless reasons why this 4-ingredient no-knead bread has captured the hearts of home bakers worldwide. From its simplicity to its incredible texture and flavor, it’s designed to impress with minimal fuss. Here’s a closer look at why you’ll adore this foolproof recipe:
- Unbelievably Easy & Foolproof: Say goodbye to the intimidation often associated with bread making. This recipe eliminates the strenuous kneading process, which is often the biggest hurdle for beginners. With just a handful of common ingredients and simple mixing, it’s almost impossible to get wrong. There’s no fancy equipment to buy or clean, making it a perfect entry point into the rewarding world of baking. Your hands-on “work” time is literally just a few minutes!
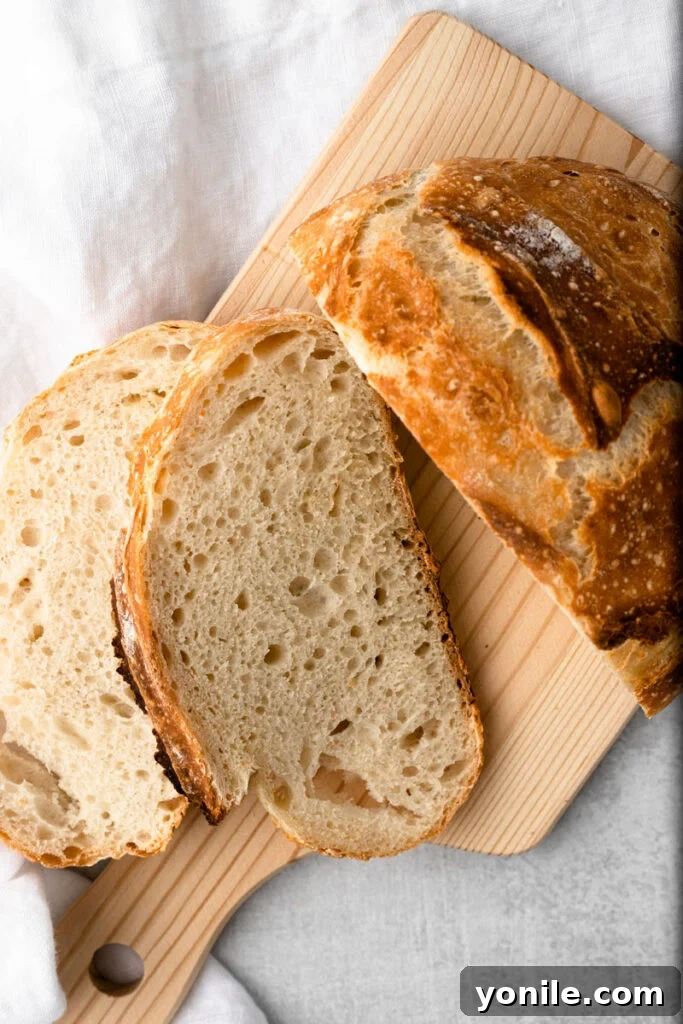
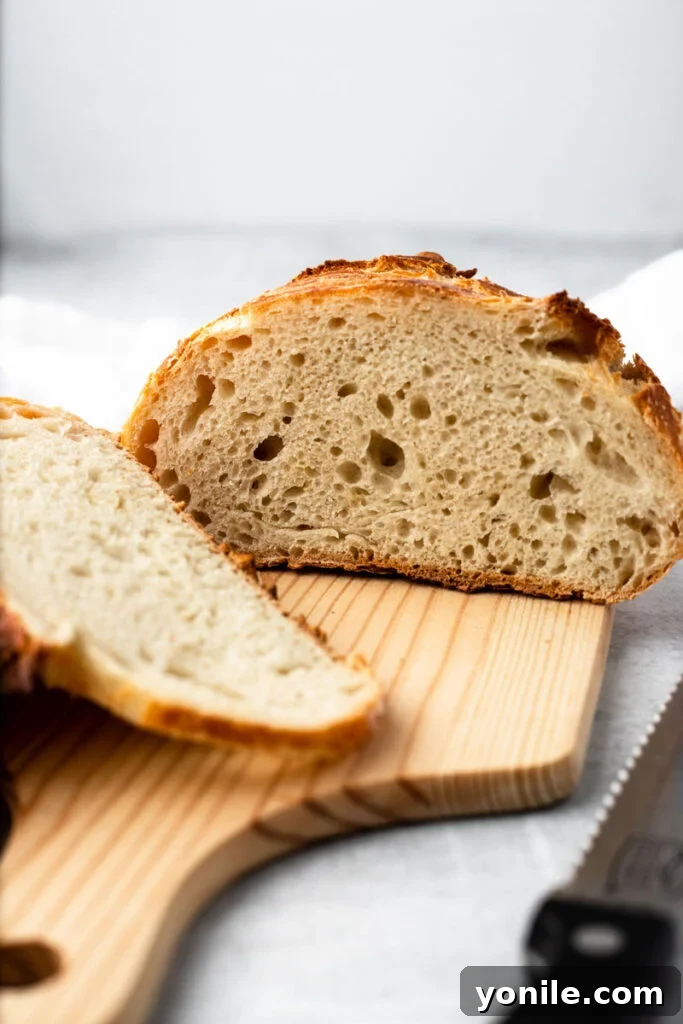
- Authentic Bakery-Quality Taste and Texture: Despite its simplicity, this bread tastes and feels like it came straight from a gourmet bakery. The magic lies in the long, slow fermentation process, which develops complex flavors and a unique texture. The interior is wonderfully fluffy, airy, and delightfully chewy, providing a satisfying bite every time. The exterior boasts a thick, robust golden crust that shatters with a satisfying crunch, delivering that signature artisan experience.
- Made with Only Four Basic Ingredients: You probably already have everything you need in your pantry! This minimalist approach proves that extraordinary bread doesn’t require an extensive shopping list. We’re talking about all-purpose flour, sea salt, instant yeast, and lukewarm water. If you consider water a pantry staple rather than an “ingredient,” then it’s effectively just three! This simplicity makes it a budget-friendly and accessible recipe for everyone.
- Versatile for Any Occasion: This rustic loaf is perfect for nearly any culinary application. It’s robust enough to hold up to hearty stews and creamy dips, yet tender enough to complement delicate spreads. From serving alongside a holiday meal to an everyday breakfast toast, its versatility is unmatched.
Essential Ingredients for Your Homemade No-Knead Artisan Bread
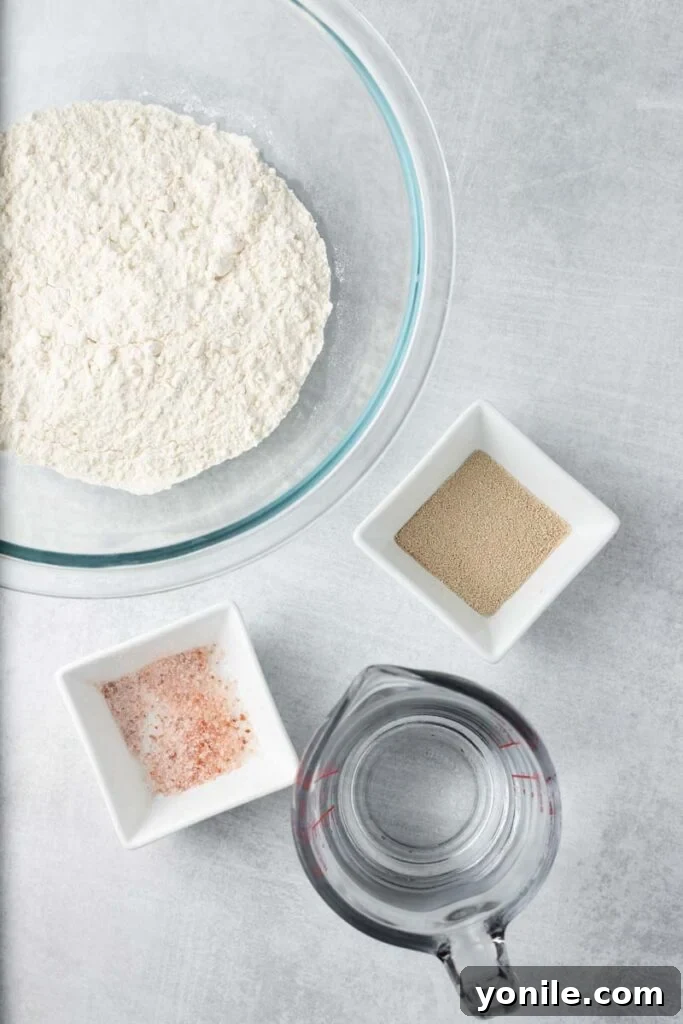
Crafting this incredible bread requires just four fundamental ingredients. Each plays a crucial role in achieving that perfect artisan texture and flavor. The beauty of this recipe is its reliance on kitchen staples, proving that delicious bread doesn’t need exotic flours or elaborate additions.
- All-Purpose Flour: There’s no need for specialty bread flours here! Standard all-purpose flour works beautifully, providing the ideal balance of protein to develop a lovely crumb without excessive gluten development that would typically require extensive kneading. Its availability makes this recipe accessible to everyone.
- Sea Salt: More than just a flavor enhancer, salt plays a vital role in controlling yeast activity and strengthening the gluten structure. Use a good quality sea salt for the best flavor, which truly shines through in the finished loaf.
- Instant Yeast: This is the leavening agent that makes your bread rise. Instant yeast is fantastic for no-knead recipes because it can be mixed directly with the dry ingredients without prior activation. Its reliable performance ensures a beautiful rise and airy crumb.
- Lukewarm Water: The temperature of your water is critical for activating the yeast without killing it. Lukewarm water (think bathwater temperature, not hot) provides the perfect environment for the yeast to wake up and start its work, hydrating the flour to form a cohesive dough.
Step-by-Step Guide: How to Make No-Knead Artisan Bread
Making this bread is deceptively simple. Follow these straightforward steps to achieve a magnificent loaf with minimal effort. Remember, patience is your most important ingredient!
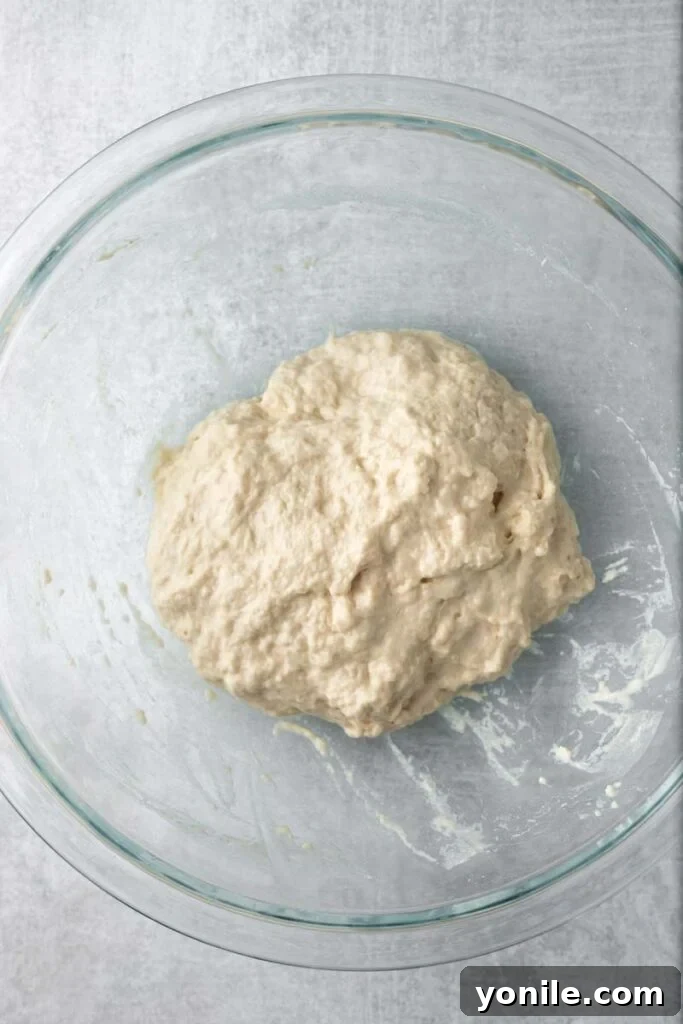
- Step 1: Combine the Ingredients. In a large mixing bowl, thoroughly combine all the dry ingredients (flour, salt, and instant yeast). Then, pour in the lukewarm water. Using a wooden spoon or a sturdy spatula, mix everything together until no dry spots of flour remain and a shaggy, wet dough forms. This should take no more than 2-3 minutes. There’s absolutely no need for kneading – simply ensure all ingredients are well incorporated. The dough will be quite sticky; that’s exactly what you want!
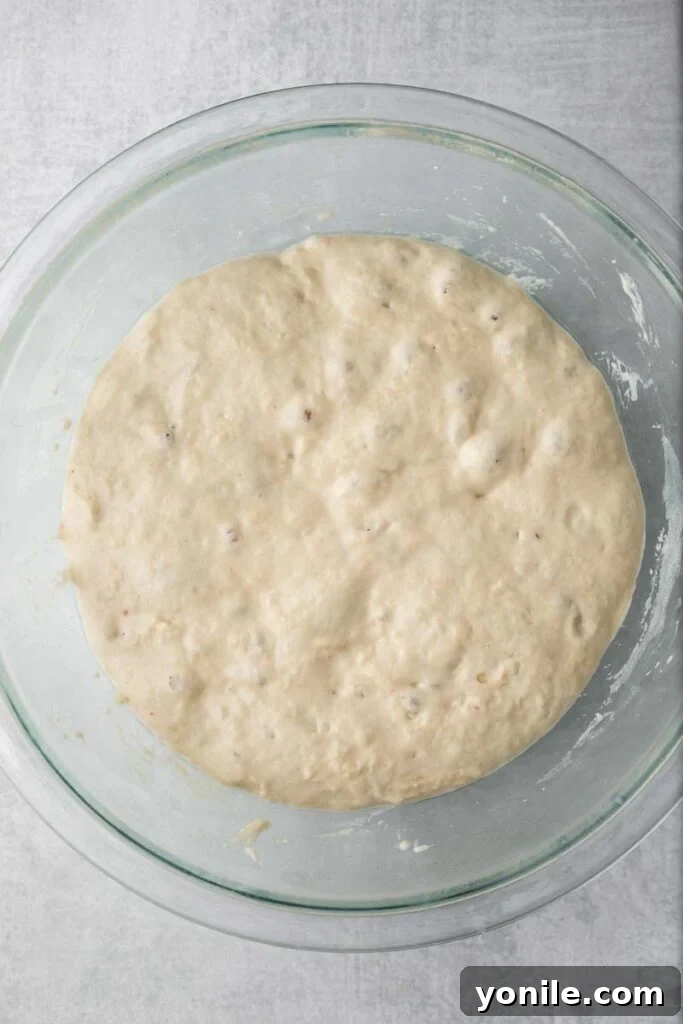
- Step 2: First Rise (Bulk Fermentation). Once your ingredients are combined, cover the bowl tightly with a clean tea towel or plastic wrap. Let the dough rest and rise at room temperature for approximately 2 to 2.5 hours. During this time, the yeast will begin to ferment, producing gas and causing the dough to double in size and develop small bubbles.
- Step 3: Refrigerate for Flavor Development. After the initial rise (about 2.5 hours), transfer the covered bowl with the dough into the refrigerator. Allow it to refrigerate overnight, ideally for 8 to 12 hours. This crucial cold fermentation step significantly enhances the flavor of the bread, creating those complex, tangy notes characteristic of true artisan loaves. Additionally, cold dough is much easier to handle and shape, making the next steps simpler.
- Step 4: Preheat Oven and Dutch Oven. The next day, approximately 20-30 minutes before you’re ready to bake, place your Dutch oven (with its lid) into the oven. Preheat the oven to a scorching 450°F (232°C). It’s essential to preheat the Dutch oven thoroughly as this creates the steamy environment needed for that incredible crispy crust.
- Step 5: Prepare and Shape the Dough. While the oven preheats, prepare your workspace. Lay a large sheet of parchment paper on your counter – ensure it’s large enough to easily transfer the dough into the Dutch oven. Lightly sprinkle flour over the parchment paper. Carefully remove the cold, refrigerated dough from its bowl onto the floured surface. Gently shape the dough into a round ball (a boule) by pulling the edges of the dough towards the center, forming a seam at the bottom. Flip the dough over so the seam is facing down.
- Step 6: Optional Scoring. For a truly professional look and to help control the expansion of your loaf, you can lightly score the top of the dough with a few slashes using a sharp knife or a bread lame. This step is optional, but it prevents the bread from bursting haphazardly as it bakes.
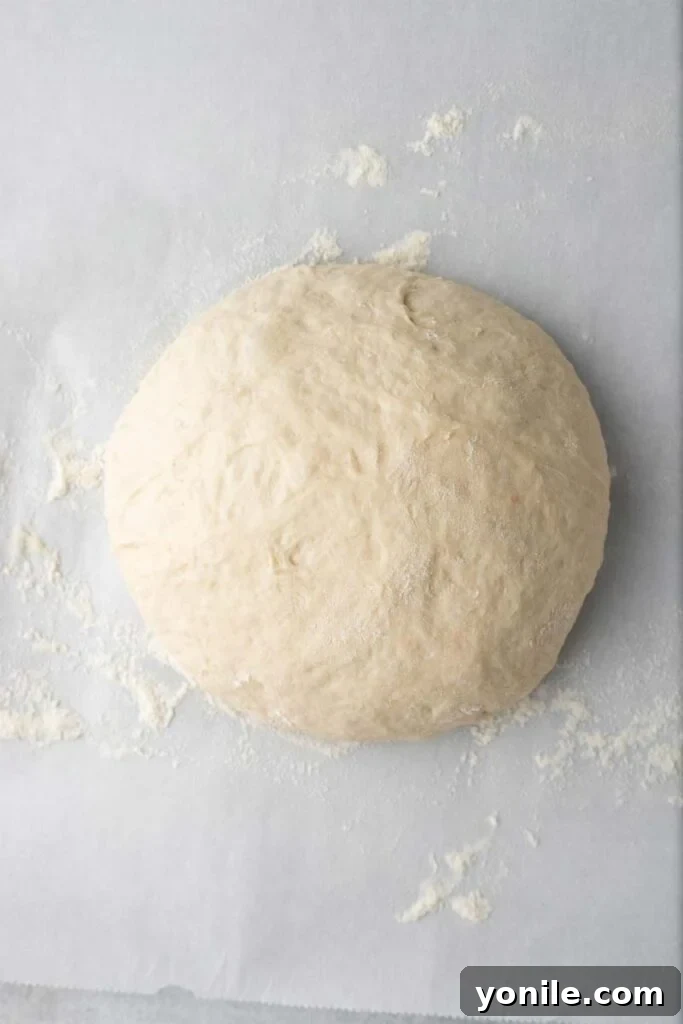
- Step 7: Bake Covered. Carefully, and with oven mitts, remove the preheated Dutch oven from the oven. Using the parchment paper as a sling, gently lower the shaped dough into the hot Dutch oven. Cover it with the lid and return it to the oven. Bake for approximately 25 minutes. The lid traps steam, which keeps the crust soft during the initial bake, allowing the bread to expand fully.
- Step 8: Bake Uncovered for Golden Crust. After 25 minutes, carefully remove the lid from the Dutch oven. Continue baking for an additional 20 minutes, or until the bread achieves a beautiful deep golden-brown crust. Removing the lid allows the steam to escape and the crust to become wonderfully crisp and caramelized.
- Step 9: Cool Completely and Enjoy! Once baked to perfection, carefully remove the Dutch oven from the oven and lift the bread out using the parchment paper. Transfer the bread to a wire rack and allow it to cool completely before slicing. This cooling step is crucial; slicing hot bread can result in a gummy texture. Patience is key for that perfect interior!
Expert Tips & Important Notes for Perfect No-Knead Bread
While this recipe is incredibly forgiving, a few key tips can elevate your no-knead artisan bread from great to absolutely extraordinary. Pay attention to these details for the best possible results:
- The Magic of Cold Fermentation: Do not skip the overnight refrigeration! This extended cold rise, ideally for 8 to 12 hours (or even up to 24 hours), is paramount for developing the rich, nuanced flavors characteristic of true artisan bread. It’s where the flour and yeast work together slowly to create complex notes, and it also makes the dough much easier to handle.
- Invest in a Quality Dutch Oven: A heavy-bottomed cast iron Dutch oven with a tight-fitting lid is indispensable for this recipe. It needs to withstand the high preheating temperature of 450°F (232°C). Not all pots labeled “Dutch oven” are cast iron; always double-check to ensure yours is suitable for high-temperature baking. The even heat distribution and ability to trap steam are what give this bread its signature crust.
- Embrace the Rustic Charm: Don’t stress about shaping a perfectly round boule. This is artisan bread, and a slightly irregular, rustic shape adds to its charm and authentic appeal. Imperfections often make it even more beautiful!
- Optimal Rising Environment: If your kitchen is particularly cool, and your dough isn’t rising adequately at room temperature, there’s a simple trick. Turn your oven OFF, but turn the oven light ON. The warmth from the light bulb creates a perfectly cozy, slightly warm environment for your dough to rise effectively.
- Understanding Dough Scoring: Scoring the top of your bread with a sharp blade before baking isn’t just for aesthetics. It provides a controlled path for the bread to expand as it bakes, preventing it from bursting randomly in weaker spots. If you choose not to score it, the bread will create its own “score” by tearing wherever the pressure is greatest.
- Listen to Your Dough: The exact rise times can vary depending on ambient temperature and yeast activity. Look for visual cues – the dough should be visibly puffy and bubbly, not just doubled in size.
Frequently Asked Questions About No-Knead Artisan Bread
New to no-knead bread or simply have a few lingering questions? We’ve got you covered with answers to some of the most common queries about this simple yet sensational recipe.
Lukewarm water is crucial for activating the yeast without harming it. The ideal range is between 98°F and 105°F (37°C to 40°C). When you test it with your finger, it should feel warm but not hot, similar to bathwater. If the water is too hot, it will kill the yeast, preventing your bread from rising. If it’s too cold, the yeast won’t activate effectively, leading to a sluggish or non-existent rise.
While all-purpose flour is recommended for its balanced results and accessibility, bread flour can be used as a direct substitute. Bread flour has a higher protein content, which can result in a slightly chewier crumb. However, I do not recommend substituting with gluten-free flours or 100% whole wheat flour, as they behave very differently in a no-knead context and would require significant adjustments to hydration and technique to achieve a similar result.
Absolutely! This no-knead artisan bread freezes beautifully, allowing you to enjoy fresh-tasting bread anytime. Once the bread has completely cooled after baking, wrap it tightly in plastic wrap, then place it in an airtight freezer bag or aluminum foil. It can be stored in the freezer for up to 2 months without significant loss of quality.
Whether to slice your bread before freezing depends on how you plan to use it. If you prefer to grab individual slices for toast or sandwiches, slicing it first is highly recommended. This way, you can easily remove a single slice and toast it without having to thaw the entire loaf. If you typically consume the whole loaf in one go after thawing, then freezing it unsliced is perfectly fine.
Reheating frozen bread is incredibly easy and brings it back to its almost-fresh state. First, allow the frozen bread to come to room temperature (this might take a few hours for a whole loaf, or less for slices). Once thawed, simply place it in a 350°F (175°C) oven for about 5-10 minutes, or until it’s warmed through and the crust is crisp again. For slices, a toaster works wonders.
This no-knead artisan bread is at its absolute best during the first 1-2 days after baking. During this time, the crust is crisp and the interior is soft and chewy. After 2 days, while still edible, the crust may soften. For the best experience after the initial freshness window, I recommend toasting slices to revive the texture and flavor. Always store homemade bread in an airtight container or a bread bag at room temperature to prevent it from drying out.
Explore More Delicious Bread & Breakfast Recipes!
If you’ve fallen in love with the art of baking after trying this no-knead recipe, or simply want to find more ways to enjoy bread, here are a few more delightful recipes from my kitchen you might enjoy:
- Pumpkin Spice French Toast: A comforting and flavorful breakfast perfect for fall.
- Cinnamon Swirl French Toast: Indulge in a sweet and aromatic breakfast treat.
- And don’t forget to check out my Easy Challah Bread for another rewarding baking experience!
I genuinely hope you find joy in all the recipes I share, and especially in this delightful No-Knead Artisan Bread. Give it a try, savor every bite, and feel free to rate it and share your success with friends and family!
If you bake this recipe and love it, please share your creations with me on INSTAGRAM using my hashtag for a chance to be featured! Also, make sure to follow Cookin’ With Mima on FACEBOOK, INSTAGRAM, and PINTEREST for all my latest recipes and culinary inspiration.
Print Recipe
No-Knead Artisan Bread
Mariam Ezzeddine
12 hours
45 minutes
12 hours 45 minutes
8
servings
Ingredients
-
3 ¼
cup
all-purpose flour -
½
tbsp
sea salt -
½
tbsp
instant yeast -
1.5
cup
lukewarm water
Instructions
-
In a large bowl, mix all the ingredients with a wooden spoon until well combined, about 2-3 minutes. No kneading is required.
-
Cover the bowl with a tea towel and let the dough rise at room temperature for about 2.5 hours.
-
After 2.5 hours, place the covered bowl with the dough into the refrigerator and let it chill overnight (8-12 hours) to develop flavor and ease handling.
-
The next day, place a Dutch oven with its lid into the oven and preheat the oven to 450°F (232°C) for at least 20 minutes.
-
On a table, lay out a large piece of parchment paper (big enough to hold the dough) and sprinkle some flour on top.
-
Carefully transfer the refrigerated dough onto the floured parchment paper.
-
Gently shape the dough into a round ball by pulling the sides towards the middle to form a seam. Invert the dough so the seam is at the bottom.
-
Optional: Score the top of the dough with a few shallow slashes using a sharp knife or bread lame.
-
Carefully remove the hot Dutch oven from the oven. Using the parchment paper as a sling, gently lower the dough into the Dutch oven. Cover with the lid and bake for about 25 minutes.
-
After 25 minutes, remove the lid and continue baking for another 20 minutes, or until the bread is golden brown and crusty.
-
Once baked, remove the bread from the oven and transfer it to a wire rack to cool completely before slicing and serving.
Notes
- Refrigerating the dough for 8 to 12 hours is crucial for developing the best flavor.
- Ensure your Dutch oven is made of cast iron and can withstand 450°F (232°C) temperatures.
- Don’t worry about a perfect round shape; a rustic look is part of artisan bread’s charm.
- For a warmer rising environment, place the dough in an OFF oven with the light on.
- Scoring the bread allows for controlled expansion and prevents random bursting during baking.
Nutrition
Calories:
186
kcal
|
Carbohydrates:
39
g
|
Protein:
5
g
|
Fat:
1
g
|
Saturated Fat:
1
g
|
Sodium:
437
mg
|
Potassium:
54
mg
|
Fiber:
1
g
|
Sugar:
1
g
|
Calcium:
8
mg
|
Iron:
2
mg
Like this recipe? Share your thoughts in the comments below!