
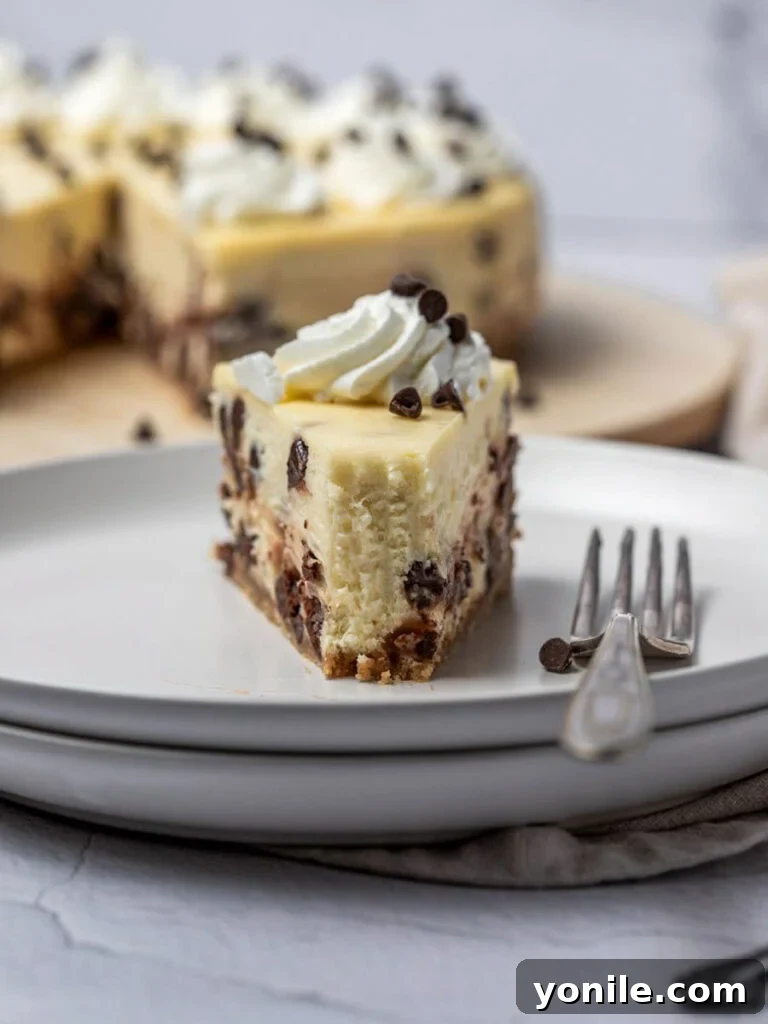
Indulge in a truly irresistible dessert with this spectacular Chocolate Chip Cheesecake! Forget complicated recipes – this show-stopping dessert is surprisingly easy to create, yet it delivers on all fronts: a rich, smooth cream cheese filling brimming with decadent chocolate chips, all resting on a perfectly golden, buttery graham cracker crust. Whether you’re a seasoned baker or just starting your culinary journey, this recipe promises a dessert that will impress everyone who takes a bite.
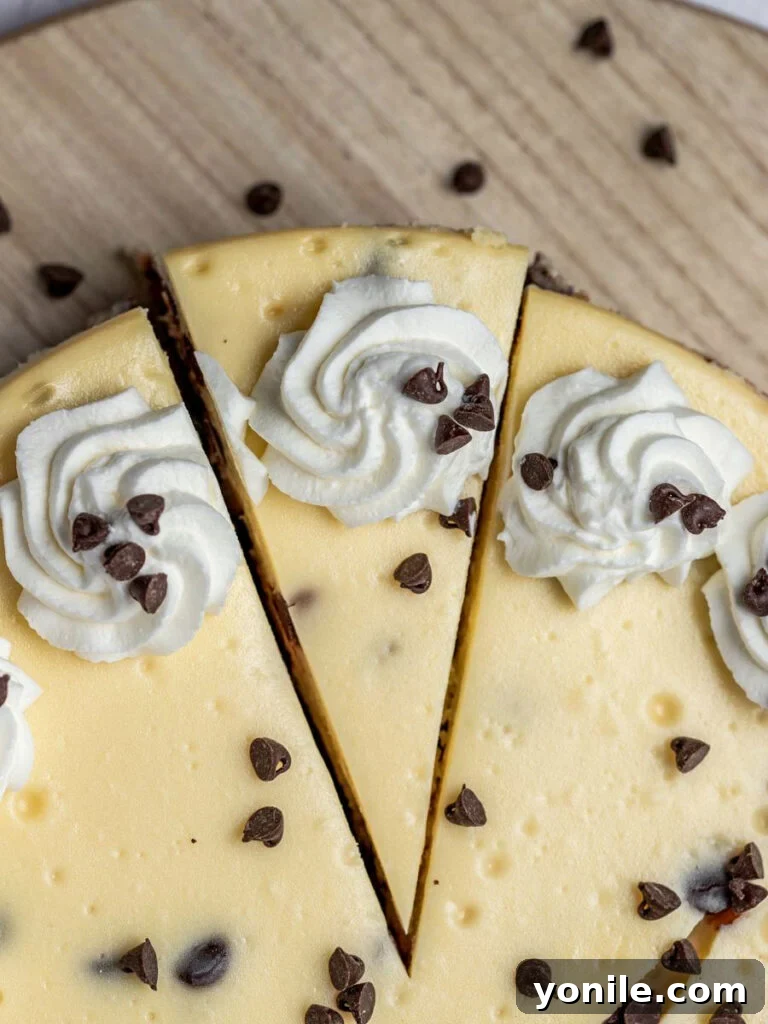
There’s a special kind of joy that comes from baking a homemade cheesecake, and we’ve certainly been enjoying it in our kitchen lately! After numerous delightful experiments, we’ve finally perfected what we believe is the ultimate baked chocolate chip cheesecake. This recipe captures the classic creamy texture, the sweet crunch of chocolate, and the satisfying graham cracker base that cheesecake lovers adore. It’s more than just a dessert; it’s a celebration of simple, wholesome ingredients coming together to create something truly magical.
If you’re eager to explore more of our family’s favorite dessert creations, be sure to try these other delightful recipes: Eggless Chocolate Chip Cookies, a fantastic option for those avoiding eggs; our refreshing Oatmeal Cookie Ice Cream Sandwiches, perfect for a warm day; and the iconic Oreo Ice Cream Sandwiches, a playful treat everyone loves.
Why You’ll Adore This Easy Chocolate Chip Cheesecake Recipe
This chocolate chip cheesecake isn’t just another dessert; it’s a testament to how effortless elegance can be. Here’s why this recipe will quickly become a cherished favorite in your baking repertoire:
- Remarkably Simple to Make: With just 10 core ingredients, you likely already have everything you need in your pantry and refrigerator. This makes it an ideal spontaneous dessert, and a wonderful way to utilize those leftover chocolate chips from your baking stash. The process is straightforward, ensuring a stress-free baking experience even for beginners.
- Effortlessly Freezer-Friendly: Have leftovers (if that’s even possible!) or want to prep ahead for future cravings? This cheesecake freezes beautifully. Its robust structure and rich flavor are perfectly preserved, allowing you to enjoy a slice of homemade heaven whenever the mood strikes. Detailed freezing instructions are provided to ensure optimal freshness.
- A Guaranteed Crowd-Pleaser for All Ages: Who doesn’t love chocolate chips? This dessert is inherently kid-friendly and universally appealing. Plus, since it’s completely nut-free, it’s a fantastic, worry-free option for school bake sales, potlucks, or any gathering where allergies might be a concern. It’s the perfect dessert to bring a smile to anyone’s face, from toddlers to grandparents.
- The Perfect Texture Every Time: Achieves that desirable creamy, smooth texture that melts in your mouth, without being overly dense or too light. The balance is just right, making each bite an exquisite experience.
- Customizable to Your Liking: While perfect as is, this recipe serves as an excellent base for various flavor enhancements and toppings, allowing you to tailor it to any occasion or personal preference.
Essential Ingredients for Your Homemade Chocolate Chip Cheesecake
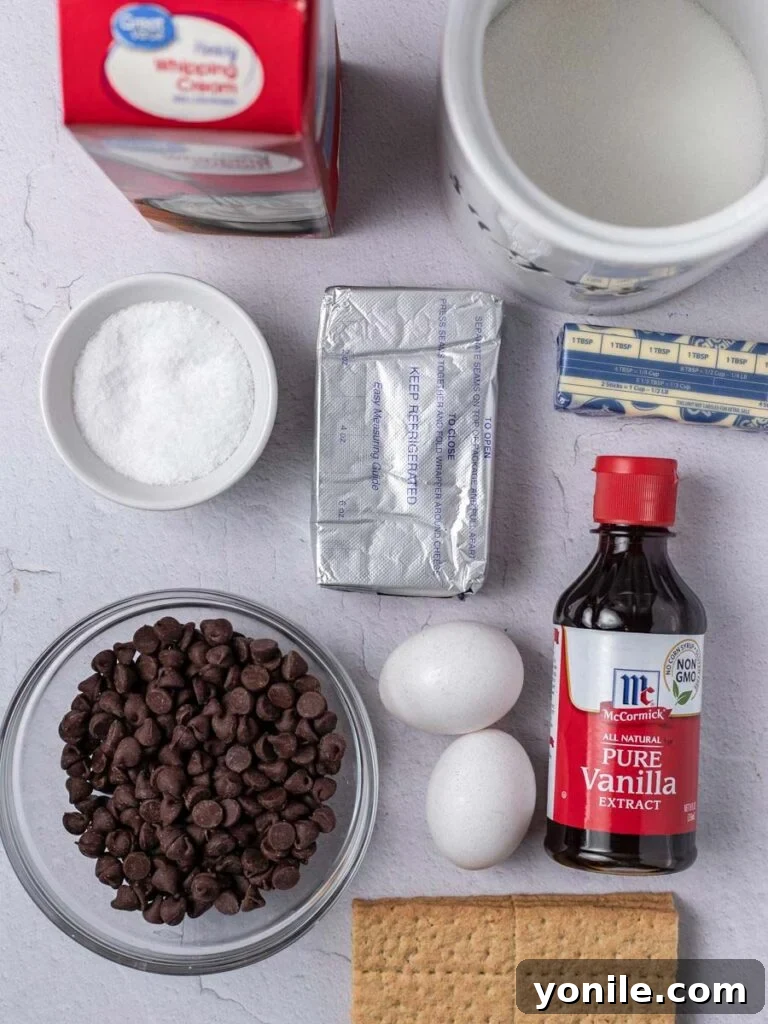
Crafting the perfect cheesecake starts with quality ingredients. For this delightful chocolate chip cheesecake, you’ll need two sets of ingredients: one for the foundation — the crunchy graham cracker crust — and another for the star of the show — the luscious cream cheese filling. Ensure all cold ingredients for the filling are at room temperature, as this is crucial for achieving a smooth, lump-free batter.
For the Golden Graham Cracker Crust
- Graham Crackers: Approximately 10 full sheets, crushed into fine crumbs. You can achieve this by hand, placing them in a zip-top bag and crushing with a rolling pin, or for a quicker method, use a food processor. Aim for a sandy texture with no large pieces.
- Unsalted Butter: Melted. Unsalted butter allows you to control the overall saltiness of your crust, ensuring a perfect sweet and savory balance.
- Granulated Sugar: A touch of sugar helps bind the crumbs and adds to the sweet flavor profile of the crust.
- Salt: Just a pinch enhances the flavors and provides a subtle counterpoint to the sweetness.
For the Silky Smooth Cheesecake Filling
- Cream Cheese: Four 8-ounce blocks, full-fat, and most importantly, at room temperature. This is non-negotiable for a smooth, homogenous filling without lumps. Plan ahead and take it out of the fridge at least an hour before you begin.
- Granulated Sugar: The primary sweetener for our creamy filling, ensuring it’s perfectly sweet without being cloying.
- Eggs: Four large eggs, also at room temperature. Eggs act as a binder and contribute to the cheesecake’s structure and richness. Adding them one at a time and ensuring they are at room temperature helps prevent overmixing and cracks.
- Heavy Cream: ½ cup, at room temperature. This ingredient adds an extra layer of richness and contributes to the cheesecake’s incredibly smooth, velvety texture.
- Vanilla Extract: One tablespoon. Always opt for high-quality, pure vanilla extract over artificial imitation vanilla. The difference in flavor is significant and will elevate your cheesecake.
- Chocolate Chips: 1 ½ cups. You can use semi-sweet, milk chocolate, or even dark chocolate chips, depending on your preference. These little pockets of melted chocolate throughout the creamy filling are what make this cheesecake truly special.
Step-by-Step Guide: How to Bake a Perfect Chocolate Chip Cheesecake at Home
Follow these detailed instructions to create a flawless chocolate chip cheesecake that will be the talk of any gathering. Precision and patience are key for cheesecake success!
For the Crust:
- Prepare Your Oven and Pan: Begin by preheating your oven to 350°F (175°C). Take a 9-inch springform pan and lightly spray the interior with a non-stick cooking spray. Crucially, wrap the entire exterior of the pan tightly with heavy-duty aluminum foil. This step is vital to prevent any water from seeping into your crust during the water bath baking process.
- Mix and Bake the Crust: In a medium-sized bowl, combine your finely crushed graham crackers, the melted unsalted butter, granulated sugar, and salt. Mix these ingredients thoroughly until everything is well combined and the mixture resembles wet sand. Once mixed, firmly press the crumb mixture into the bottom of your prepared springform pan, ensuring an even layer. Bake this crust in the preheated oven for 9-10 minutes, or until it turns a lovely golden brown. Remove the pan from the oven and set it aside to cool completely while you prepare the filling. A cool crust prevents the filling from baking unevenly at the bottom.
For the Filling and Baking:
- Adjust Oven Temperature: Once the crust is out and cooling, increase your oven temperature to 450°F (230°C). This initial high heat helps set the cheesecake’s exterior, preventing cracks.
- Prepare the Cheesecake Filling: In the bowl of a stand mixer fitted with a paddle attachment, beat the room-temperature cream cheese on medium speed until it is incredibly smooth and free of any lumps. This can take a few minutes. Next, add the granulated sugar and continue beating until it’s fully combined and the mixture is smooth and creamy. Scrape down the sides and bottom of the bowl frequently to ensure even mixing.
- Incorporate Eggs and Cream: Add the eggs one at a time, beating just until each egg is combined before adding the next. Overmixing at this stage can incorporate too much air, which can lead to cracks. After the eggs, add the room-temperature heavy cream and vanilla extract, beating only until they are just combined.
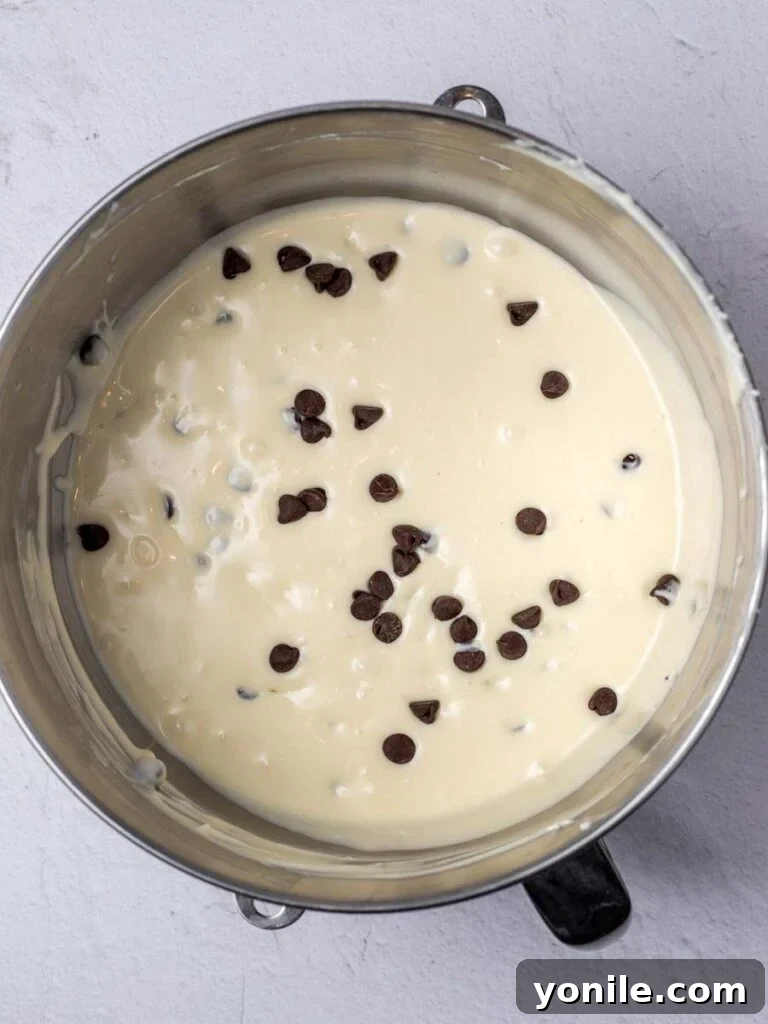
- Fold in Chocolate Chips: Gently fold in the chocolate chips using a spatula. Be careful not to overmix; you want the chocolate chips evenly distributed without deflating the batter.
- Pour Filling into Pan: Pour the luscious cheesecake filling over the cooled graham cracker crust in the prepared springform pan.
- Prepare the Water Bath: This step is essential for a crack-free, creamy cheesecake. Place your springform pan (with the foil-wrapped exterior) into a larger, deep baking pan. Boil enough water to fill the outer pan halfway up the sides of the springform pan. Carefully pour the boiling water into the larger pan, taking care not to splash any water onto the cheesecake itself.
- Bake the Chocolate Chip Cheesecake: Carefully place the deep pan with the cheesecake onto the center rack of your preheated oven. Bake at 450°F (230°C) for 15 minutes. This initial high heat creates a beautiful crust. After 15 minutes, without opening the oven door, reduce the oven temperature to 225°F (107°C) and continue baking for 1 hour and 20 minutes to 1 hour and 35 minutes. The cheesecake is done when only the very center (about 2-3 inches) gently jiggles when you carefully nudge the pan. It will continue to set as it cools.
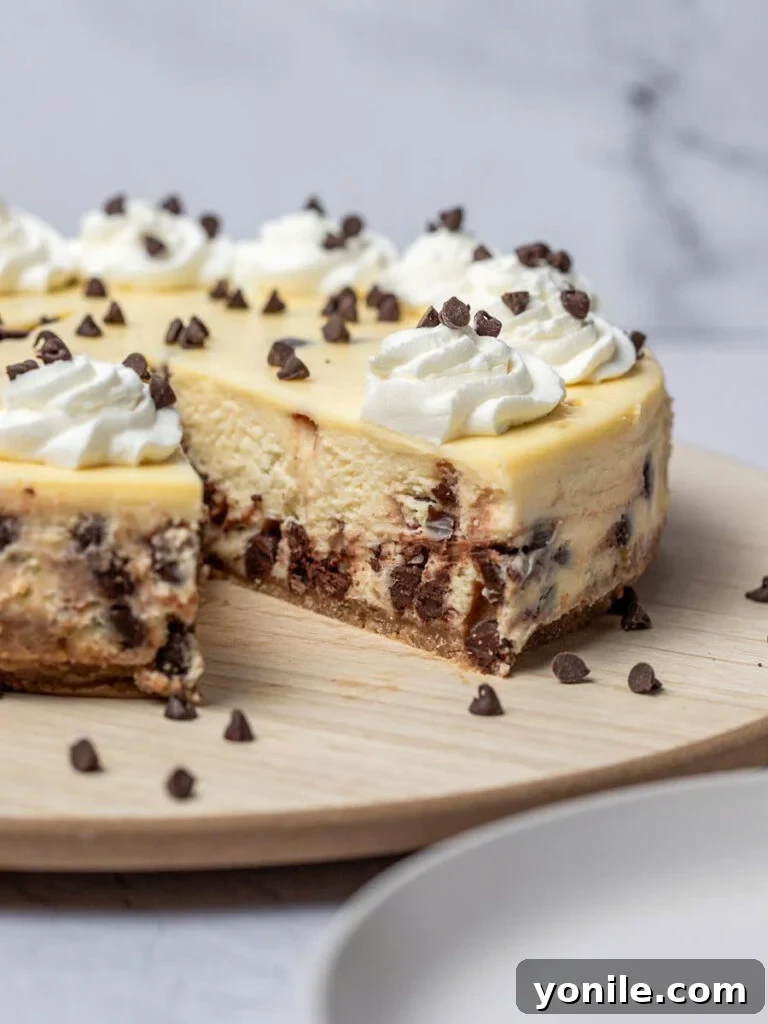
- Chill Before Serving: Once baked, remove the pan from the oven and carefully lift the springform pan out of the water bath. Allow the cheesecake to rest on a wire rack on your counter for about an hour, or until it reaches room temperature. Resist the urge to open the springform pan yet! Transfer the cooled cheesecake to the refrigerator to chill overnight (at least 8 hours). Chilling is critical for the cheesecake to fully set and achieve its perfect dense, creamy texture.
The Science Behind the Perfect Cheesecake: Why a Hot Water Bath is Essential
Baking a cheesecake in a hot water bath (bain-marie) might seem like an extra step, but it’s a game-changer for achieving that famously smooth, crack-free surface and even texture. Here’s why it’s so important:
- Even, Gentle Baking: The water bath acts as a buffer, providing a moist, consistent, and gentle heat environment around the cheesecake. This prevents the edges from baking and setting too quickly while the center remains raw. Even baking minimizes drastic temperature changes within the batter.
- Prevents Cracks: The primary reason for cracks in cheesecakes is often uneven baking or rapid cooling. The water bath ensures that the cheesecake bakes slowly and cools gradually, reducing the chances of the top surface cracking due to sudden shrinkage.
- Moist, Creamy Texture: The steam created by the hot water bath keeps the oven environment humid, which prevents the cheesecake from drying out. This results in an incredibly moist, rich, and creamy texture that simply melts in your mouth, a hallmark of a perfectly baked cheesecake.
- Prevents Over-Rising and Deflation: Without a water bath, cheesecakes tend to rise excessively in the oven and then dramatically deflate as they cool, leading to a dense, uneven texture. The gentle heat of the water bath helps the cheesecake rise slowly and evenly, maintaining its structure.
Beyond the Water Bath: Additional Tips to Prevent Cheesecake Cracks
While the water bath is your best friend in the quest for a perfect cheesecake, a few other techniques can significantly contribute to a flawless, crack-free top:
- Avoid Overmixing the Filling: When preparing your cheesecake batter, beat the cream cheese until smooth, then add sugar. Once you start incorporating the eggs, mix them in one at a time, just until combined. Overmixing introduces too much air into the batter. As the cheesecake bakes, these air bubbles expand and then burst and collapse upon cooling, which can lead to unsightly cracks on the surface.
- Tap Out Air Bubbles: After pouring the filling into the crust, gently tap the springform pan on your countertop a few times. This helps to release any trapped air bubbles that might have formed during mixing. Much like making macarons, this simple step ensures a denser, more uniform batter and a smoother finish.
- Resist Opening the Oven Door: This is perhaps the hardest rule to follow for eager bakers! Drastically opening the oven door, especially during the crucial baking and initial cooling phase, causes a sudden drop in temperature. This sudden change can shock the delicate cheesecake, leading to immediate cracking. Trust the process and your oven, and keep that door closed until the specified baking time is complete.
- Room Temperature Ingredients: Always ensure your cream cheese, eggs, and heavy cream are at room temperature. Cold ingredients don’t blend smoothly with sugar, resulting in a lumpy batter that requires more beating (leading to more air bubbles) and can cause an uneven bake.
Storing Leftover Chocolate Chip Cheesecake for Freshness
Proper storage is essential to maintain the deliciousness and texture of your homemade chocolate chip cheesecake. To enjoy any leftover slices within the week, transfer them to an airtight container. This prevents the cheesecake from absorbing odors from the refrigerator and keeps it from drying out, ensuring each slice remains as fresh and creamy as the first.
How to Freeze Cheesecake for Future Indulgence
Cheesecake freezes beautifully, making it an excellent dessert for meal prepping or simply saving some for a later treat. Here’s how to freeze it effectively:
- Freezing Individual Slices: For convenient single servings, wrap each cheesecake slice tightly in plastic wrap. Ensure it’s completely sealed to prevent freezer burn. Then, place the wrapped slices into an airtight freezer bag or container. Frozen slices can be stored for up to one month. To thaw, simply transfer a slice to the refrigerator for a few hours, or enjoy it slightly frozen for a firmer, almost ice cream-like texture.
- Freezing a Whole Cheesecake: If you plan to freeze the entire cheesecake, ensure it is thoroughly chilled first. Once cold, wrap the whole cheesecake (still in its springform base, if possible, or on a sturdy cardboard round) first in plastic wrap, and then again in aluminum foil. This double layer provides maximum protection against freezer burn. Store the wrapped cheesecake in an airtight container or a heavy-duty freezer bag. A whole cheesecake can be frozen for up to two months. Thaw it slowly in the refrigerator overnight for the best results.
Mastering the Art of Cutting Cheesecake Neatly
A beautifully baked cheesecake deserves to be sliced just as elegantly. To achieve perfectly clean cuts and avoid a messy presentation, follow these simple tricks:
- The Hot Knife Method: This is the most common and effective technique. Before each cut, run a sharp, thin-bladed knife under hot water for about 10-15 seconds. Wipe the blade completely dry with a clean cloth. The warm, dry blade will glide through the dense cheesecake without sticking, leaving a clean edge. Repeat this process for every single slice.
- The Dental Floss Trick: For an incredibly clean, almost surgical cut, unflavored dental floss works wonders. Take a long piece of unflavored floss (flavored floss will impart an unwanted taste), hold it taut between your hands, and press it straight down through the cheesecake. This method is particularly good for maintaining crisp edges. Again, use a new piece of floss for each cut for the cleanest results.
Exciting Recipe Variations to Customize Your Cheesecake
While this chocolate chip cheesecake is divine on its own, it also serves as a fantastic canvas for culinary creativity. Here are some delightful variations to inspire you:
- Decadent Chocolate Cheesecake: Transform this into an even richer dessert by adding ⅓ to ½ cup of unsweetened cacao powder to the cream cheese filling mixture. This will give you a deep, dark chocolate cheesecake base, perfectly complemented by the chocolate chips.
- Flavorful Chip Swaps: Don’t limit yourself to just semi-sweet chocolate chips! Experiment with other delightful chip varieties like creamy butterscotch chips, rich peanut butter chips, refreshing mint chocolate chips, or elegant white chocolate chips, perhaps swirled with dark chocolate for a marbled effect.
- Fresh Fruit and Whipped Cream Topping: For a lighter, brighter finish, top your chilled cheesecake with a generous dollop of freshly whipped cream and an assortment of vibrant fresh berries (strawberries, raspberries, blueberries). The tartness of the fruit beautifully balances the richness of the cheesecake.
- Sprinkle Fun: Turn your cheesecake into a festive treat by gently folding in ½ cup of colorful sprinkles into the filling just before pouring it into the crust. This adds a playful touch and is perfect for birthdays or celebrations.
- Milk Chocolate Icing Drizzle: For an extra layer of sweetness, prepare a simple milk chocolate ganache or icing and drizzle it artfully over the cooled cheesecake before serving.
- Caramel Indulgence: A drizzle of homemade or store-bought caramel sauce or salted caramel sauce over the top of your cheesecake adds a sophisticated and wonderfully sweet-salty dimension that pairs exquisitely with chocolate.
- Nutty Crunch: For those without nut allergies, sprinkle chopped toasted pecans, walnuts, or almonds over the crust before baking, or mix them into the filling for added texture and flavor.
- Citrus Zest Brightness: Add the zest of one lemon or orange to the cream cheese filling for a subtle, bright counterpoint to the richness.
More Irresistible Homemade Desserts to Explore
If you loved creating this chocolate chip cheesecake, you’ll be thrilled to discover more delightful recipes from our kitchen that are perfect for any occasion. Expand your baking repertoire with these crowd-pleasing homemade treats:
- Chocolate Chip Pumpkin Muffins: A seasonal favorite, perfectly spiced and packed with chocolate.
- Nutella Ice Cream: A simple, no-churn recipe for all Nutella lovers.
- Quick No-Bake Chocolate Cake: Ideal for when you need a decadent dessert in a hurry.
- Gingerbread Christmas Tree Cookies: Festive and fun, perfect for holiday baking.
- Double Chocolate Chip Muffins: For the ultimate chocolate enthusiast, these muffins are a delightful morning treat or anytime snack.
Chocolate Chip Cheesecake Recipe Card
Chocolate Chip Cheesecake
By: Mariam Ezzeddine
This 10-ingredient Chocolate Chip Cheesecake is a simple but beautiful show-stopping dessert! A golden graham cracker crust underneath a smooth cream cheese cheesecake filling, sprinkled with chocolate chips, you’re not going to believe how easy this cheesecake is to make.
Prep Time: 20 minutes
Cook Time: 1 hour 45 minutes
Resting Time: 8 hours
Total Time: 10 hours 5 minutes
Servings: 12 slices
Ingredients
For Crust:
- 10 graham crackers, crushed
- 5 tablespoons unsalted butter, melted
- 3 tablespoons granulated sugar
- ¼ teaspoon salt
For Filling:
- 4 (8-oz) blocks cream cheese, room temperature
- 1 ¼ cup granulated sugar
- 4 eggs, room temperature
- ½ cup heavy cream, room temperature
- 1 tablespoon vanilla extract
- 1 ½ cup chocolate chips
Instructions
For Crust:
- Preheat your oven to 350°F (175°C). Spray a 9-inch springform pan with non-stick spray and wrap the outside tightly with foil.
- In a medium bowl, combine the crushed graham crackers, melted butter, sugar, and salt. Mix until fully combined. It should have the texture of wet sand.
- Firmly press the crumbs into the bottom of the prepared pan, ensuring an even layer.
- Bake the crust for 9-10 minutes or until golden brown. Remove the pan from the oven and allow it to cool completely while you prepare the filling.
For Filling:
- Preheat your oven to 450°F (230°C).
- In the bowl of a stand mixer fitted with a paddle attachment, beat the cream cheese on medium speed until smooth. Add the sugar and beat until fully combined and smooth.
- Add the eggs one at a time, combining fully and scraping down the sides and bottom of the bowl between each addition. Avoid overmixing.
- Add the heavy cream and vanilla and beat until just combined. Gently fold the chocolate chips into the mixture with a spatula.
- Pour the filling into the prepared pan over the cooled crust.
- Place the cheesecake into a deep pan. Boil enough water to fill the pan up to halfway up the cheesecake pan.
- Carefully pour the boiling water into the deep pan, stopping halfway up the springform pan’s sides.
- Place the entire pan assembly on the center rack of your oven.
- Bake for 15 minutes at 450°F (230°C), then reduce the temperature to 225°F (107°C) for 1 hour and 20 minutes to 1 hour and 35 minutes, or until only the center of the cheesecake jiggles slightly.
- Remove the pan from the oven and allow it to rest on the counter for an hour or until room temperature. Transfer the cheesecake to the fridge to chill overnight (at least 8 hours).
Nutrition Information
Serving: 12 slices | Calories: 242kcal | Carbohydrates: 33g | Protein: 3g | Fat: 11g | Saturated Fat: 6g | Cholesterol: 81mg | Sodium: 153mg | Potassium: 48mg | Fiber: 1g | Sugar: 27g | Vitamin A: 371IU | Calcium: 26mg | Iron: 1mg
I sincerely hope you enjoy all the delicious recipes I share with you, and that this delightful Chocolate Chip Cheesecake recipe brings immense joy to your kitchen and your taste buds. I highly encourage you to try it, savor every moment of baking, and of course, enjoy eating it! If you do, please consider rating it and sharing your experience with your friends and family.
If you try this recipe and love it, please share your creation with me on INSTAGRAM using my hashtag! You might even get featured in my story! Also, don’t forget to follow Cookin’ With Mima on FACEBOOK | INSTAGRAM | PINTEREST for all my latest culinary posts and new recipes. Happy baking!