
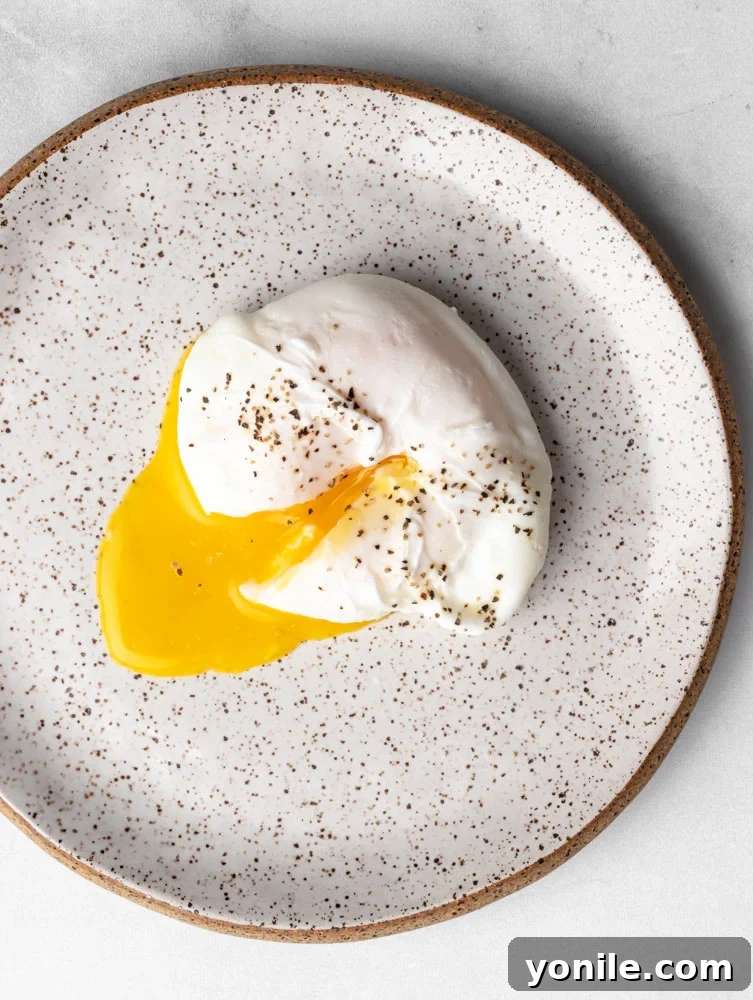
A perfectly poached egg is a culinary marvel, a delicate balance of tender, firm whites cradling a luscious, golden, runny yolk. This exquisite creation elevates any meal, from a simple breakfast to a sophisticated brunch or a light dinner. If you’ve ever dreamt of mastering the art of poaching eggs, but felt intimidated by the process, this comprehensive guide is for you. We’ll demystify poaching, providing step-by-step instructions for various methods, along with essential tips and troubleshooting advice to ensure your poached eggs are perfect every single time.
The Ultimate Guide to Poaching Eggs: Perfectly Creamy Yolks Every Time
Whether you’re a seasoned home cook or a complete novice in the kitchen, learning how to poach an egg is a rewarding skill. This guide will walk you through the fundamentals, explore different techniques, and share expert insights to help you achieve consistently stunning results. Prepare to impress your taste buds and your guests with flawlessly poached eggs that are both simple to make and incredibly satisfying.
What is a Poached Egg? Unveiling the Culinary Delight
A poached egg is an egg cooked outside its shell by gently submerging it in hot (but not boiling) liquid, typically water. The beauty of poaching lies in this gentle cooking technique: the low temperature allows the egg white to set into a soft, tender outer layer while preserving the yolk’s liquid, creamy center. Unlike frying, poaching doesn’t require any added fats, resulting in a cleaner, purer egg flavor that is both light and incredibly nutritious. The controlled environment of poaching water prevents the delicate egg from being agitated, ensuring it retains its elegant, compact shape.
Why Poach Eggs? The Benefits Beyond Beauty
Beyond their undeniable visual appeal, poached eggs offer a multitude of benefits that make them a favorite among health-conscious foodies and culinary enthusiasts alike:
- Healthy & Wholesome: Poaching is one of the leanest cooking methods for eggs, requiring no oil or butter. This makes poached eggs an excellent source of high-quality protein with minimal added calories or fats.
- Incredibly Versatile: Poached eggs are not just for breakfast. They seamlessly integrate into a wide range of dishes, from hearty grain bowls and vibrant salads to comforting noodle soups and classic brunch staples.
- Pure Egg Flavor: The gentle poaching process allows the natural, delicate flavor of the egg to shine through without being masked by other cooking agents. It’s an authentic taste experience.
- Elegant Presentation: A well-poached egg, with its neatly wrapped whites and vibrant, flowing yolk, adds an instant touch of gourmet sophistication to any plate, making even simple meals feel special.
- Quick & Easy: Once you’ve mastered a method, poaching an egg takes only a few minutes from start to finish. This makes it an ideal option for a fast, nutritious meal on busy mornings or a quick addition to lunch or dinner.
Gathering Your Tools: Ingredients and Equipment
Preparing the perfect poached egg requires minimal ingredients and a few common kitchen tools. Quality and preparation are key to success.
The Essential Ingredient: Fresh Eggs
The type of egg (white, brown, large, small) matters less than its freshness. **Fresh eggs are paramount for poaching.** They have thicker, more viscous whites that hold together beautifully, forming a compact shape with minimal wispy strands. As eggs age, their whites become thinner and more watery, leading to a sprawling, less attractive poached egg. If your eggs aren’t farm-fresh, don’t despair! Our guide includes a crucial straining technique that effectively mimics the results of fresh eggs by removing the thinner, outer whites.
Indispensable Equipment for Poaching
Having the right tools at hand will make your poaching experience smooth and stress-free:
- Deep Pot: An essential for methods like the whirlpool, providing ample depth for the egg to fully submerge and allowing the whites to form a desirable shape.
- Shallow Pot or Large Pan with a Lid: Ideal when you plan to poach multiple eggs simultaneously, especially with the shallow water method. The lid helps create a steamy environment that cooks the egg tops evenly.
- Fine Mesh Sieve (Strainer): This is your secret weapon for consistently beautiful poached eggs. It allows you to drain off the watery, loose whites, leaving only the thicker, more desirable white and yolk. This minimizes “egg wisps” in the water.
- Small Microwave-Safe Bowl: Necessary if you opt for the quick and convenient microwave poaching method.
- Slotted Spoon: A non-negotiable tool for gently lifting delicate poached eggs from the water. Its design allows excess water to drain away without damaging the egg’s structure.
- Small Individual Bowls or Ramekins: Crack each egg into a separate bowl before introducing it to the poaching water. This allows for easy inspection, prevents yolk breakage, and makes for a controlled transfer.
- Timer: Precision is key. A kitchen timer ensures you cook your eggs to your exact preferred doneness, from super runny to slightly firmer yolks.
Mastering the Art: Four Popular Poaching Methods
There isn’t a single “right” way to poach an egg; various methods cater to different needs and preferences. Explore these four popular techniques to find the one that best suits you.
1. The Classic Whirlpool Method (Ideal for 1-2 Eggs)
This technique is renowned for producing perfectly round, compact poached eggs. The swirling water helps the egg whites gracefully wrap around the yolk, creating a visually appealing result.
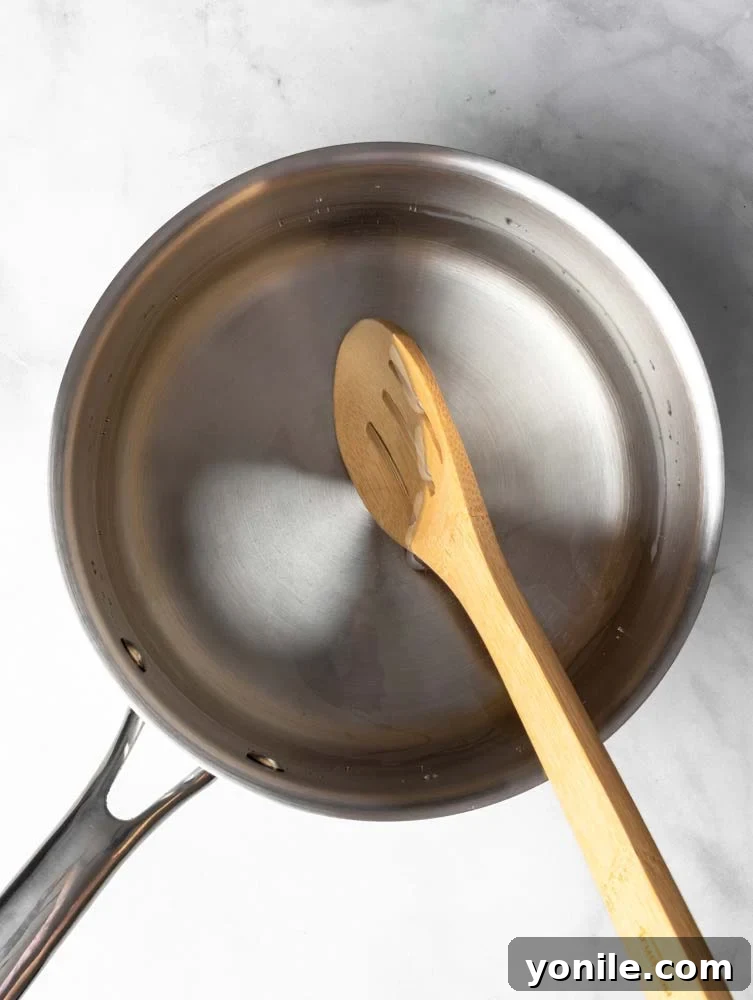
- Prepare the Water: Fill a deep pot with at least 4 inches of water. Bring the water to a rolling boil, then immediately reduce the heat to a very gentle simmer. The water should have small, lazy bubbles and subtle movement, not a vigorous boil.
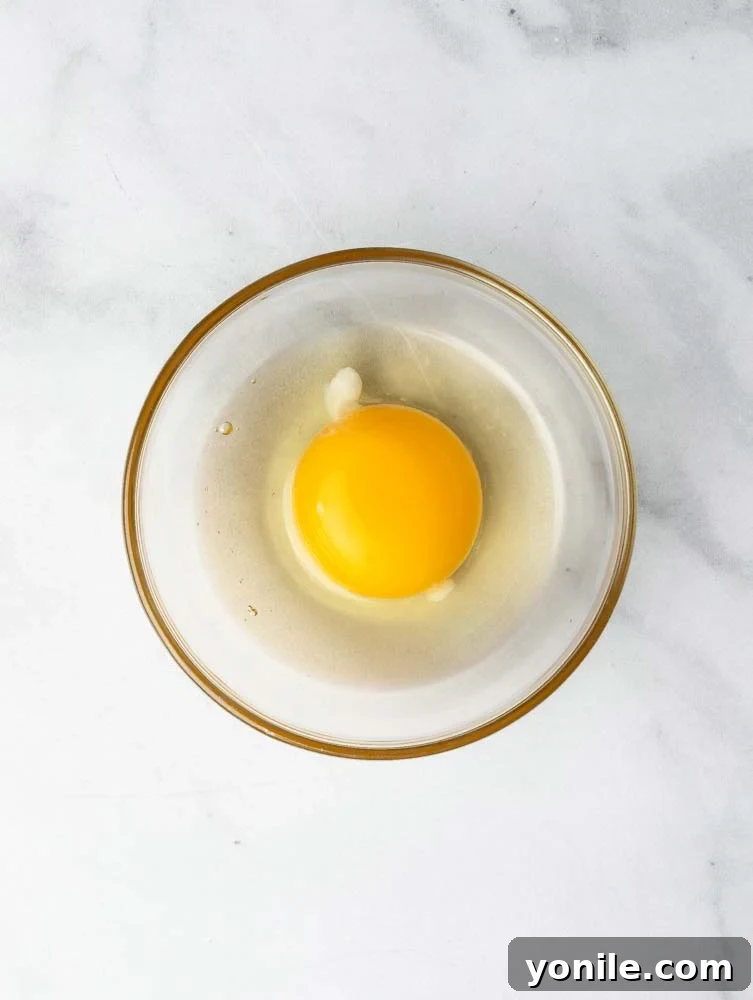
- Strain the Egg (Highly Recommended): Crack one egg into a fine mesh sieve placed over a small bowl. Allow it to sit for about 30-60 seconds to drain off any thin, watery outer whites. This step is critical for a neat, compact egg, especially if your eggs are not farm-fresh. Gently slide the strained egg into a small ramekin or individual bowl.
- Create the Whirlpool: Using a spoon, stir the gently simmering water quickly in one direction to create a distinct but soft whirlpool in the center of the pot.
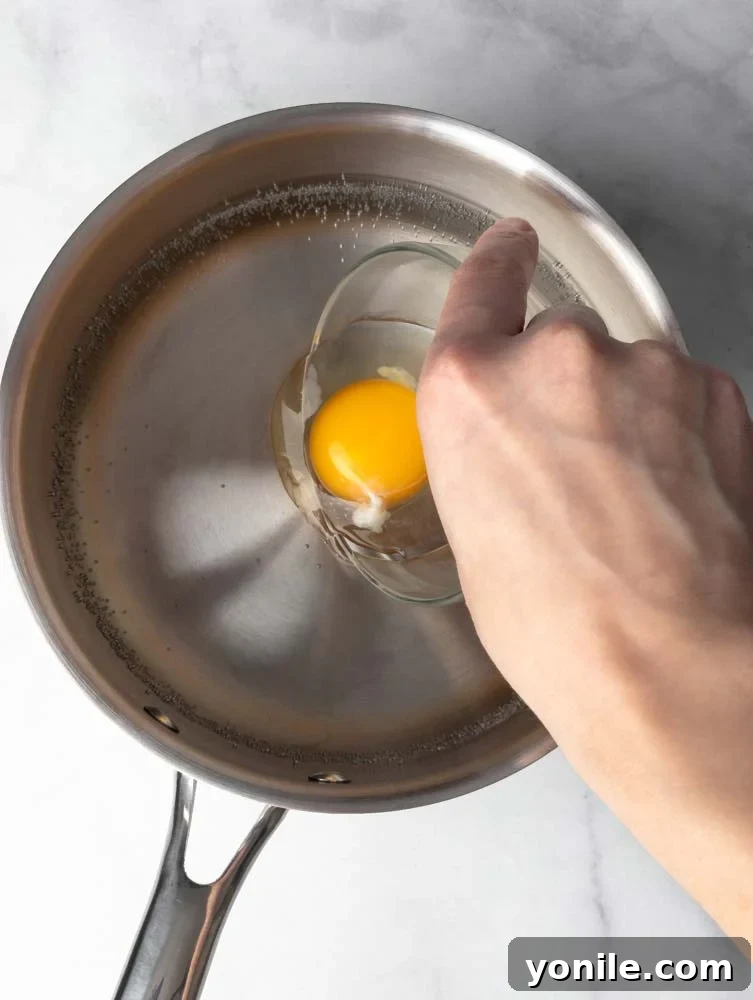
- Introduce the Egg: Carefully slide your prepared egg from the ramekin into the very center of the swirling water. The circular motion will help the whites gather tightly around the yolk as they set.
- Cook to Perfection: Let the egg cook undisturbed for 3 minutes for a soft, runny yolk. If you prefer a slightly firmer yolk, allow it to cook for 3.5 to 4 minutes. Resist the urge to poke or stir the egg while it cooks.
- Remove and Serve: Using a slotted spoon, carefully lift the poached egg from the water, allowing excess liquid to drain. You can gently dab the bottom of the spoon on a paper towel to remove any remaining water. Serve immediately with your desired seasonings.
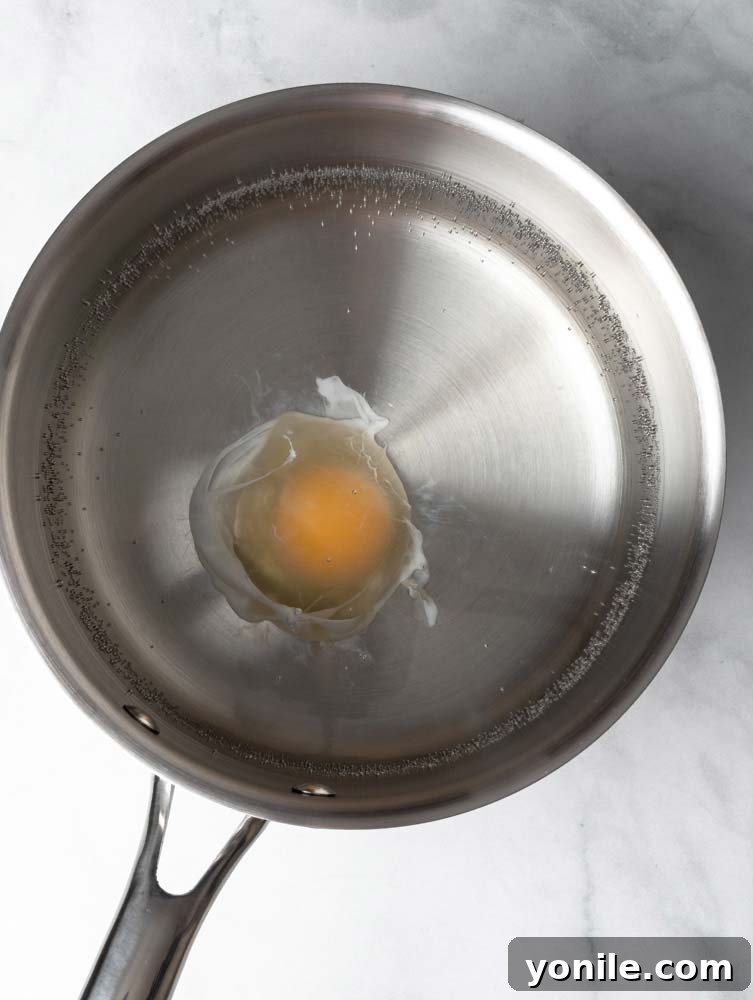
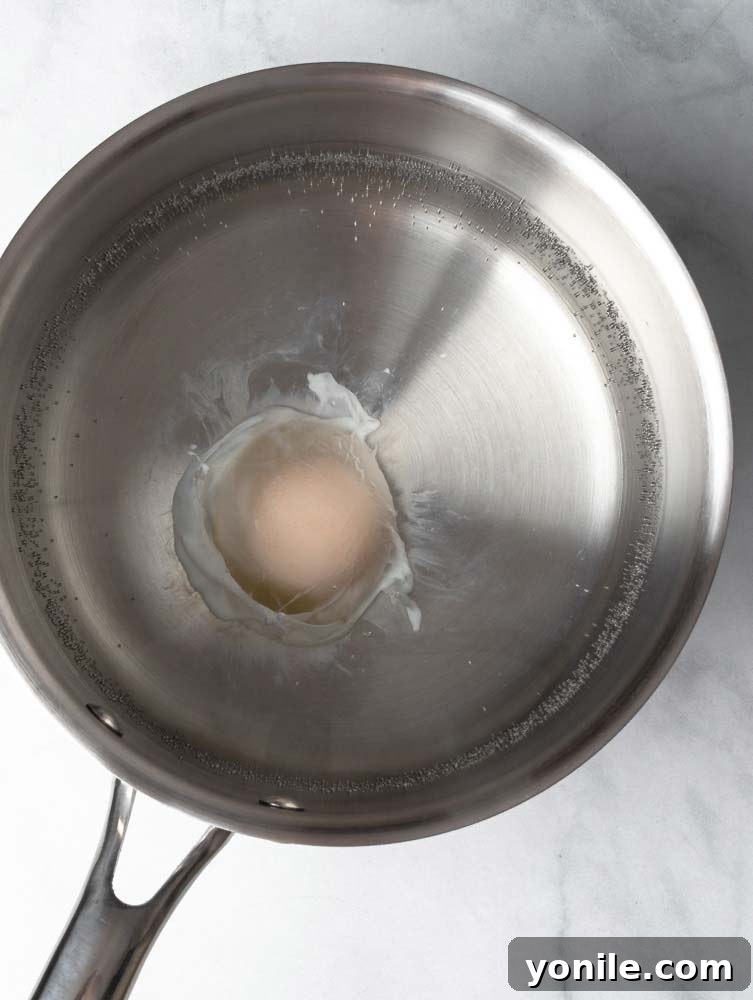
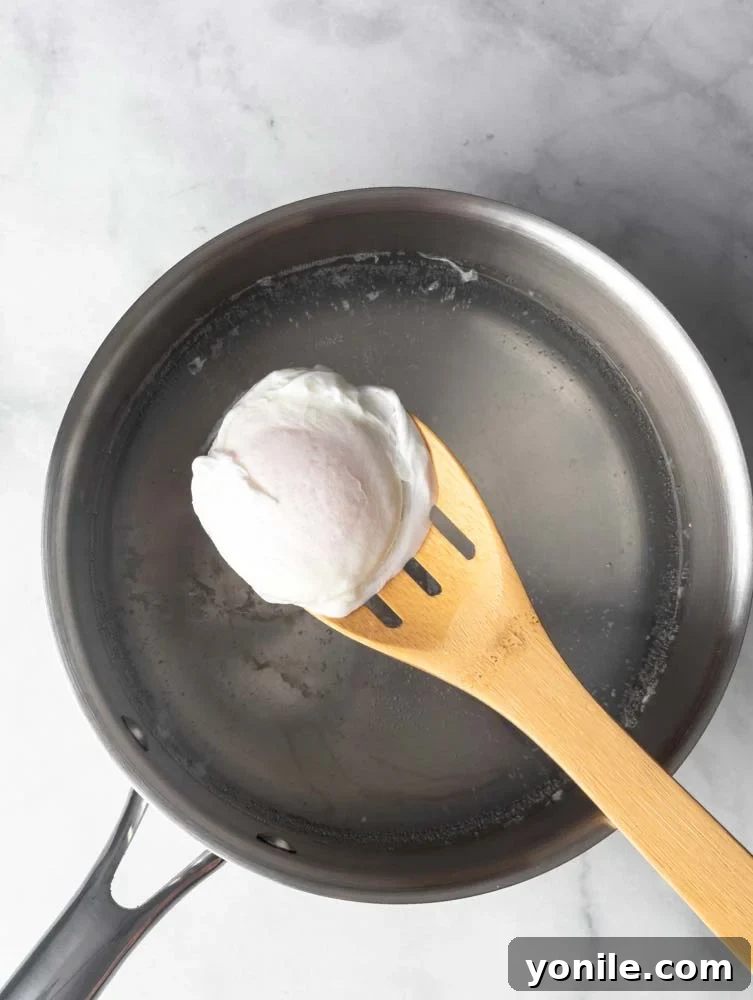
2. The Shallow Water Method (Excellent for Poaching Multiple Eggs)
When you need to poach more than one or two eggs, the shallow water method is incredibly efficient. It’s less intricate than the whirlpool method and yields equally delightful results.
- Prepare the Pan: Choose a shallow, wide pan or skillet and fill it with about 2 inches of water. Bring this water to a boil over medium-high heat.
- Strain Eggs Individually: Crack each egg into a fine mesh sieve, allowing the thin, watery whites to drain for approximately 30-60 seconds. Transfer each strained egg into its own separate small bowl or ramekin. This preparation step ensures neat eggs and prevents simultaneous breakage.
- Reduce Heat and Add Eggs: Once the water reaches a boil, immediately reduce the heat significantly until it’s barely simmering. You should see just a few wisps of steam and tiny, lazy bubbles. Carefully slide each prepared egg into the water, ensuring there is ample space between them to prevent sticking and allow even cooking.
- Cover and Cook: Promptly place a lid on the pan to trap the steam. Let the eggs cook undisturbed for 4 to 4.5 minutes for a perfectly runny yolk. The steam trapped by the lid helps cook the tops of the eggs evenly.
- Remove and Serve: Turn off the heat. Using a slotted spoon, carefully remove each poached egg, allowing any excess water to drain. Gently dab with a paper towel if needed and serve immediately.
3. The Strainer Method (For Ultimate Control and Neatness)
This method offers exceptional control over the egg’s shape and is particularly useful for achieving very compact whites, even with eggs that aren’t perfectly fresh. It’s almost foolproof for a tidy result.
- Heat Water: In a medium-sized pot, bring 3-4 inches of water to a boil. Once boiling, reduce the heat to a very gentle simmer, ensuring the water is barely bubbling.
- Prepare Egg in Sieve: Crack an egg directly into a fine mesh sieve. Allow the thin, liquid whites to strain through for approximately 30-60 seconds. This leaves the thicker white and the yolk neatly contained within the sieve.
- Submerge Sieve: Gently lower the mesh sieve containing the egg into the simmering water. The water level should reach just below the rim of the sieve, allowing the egg to be fully submerged within the sieve.
- Shape the Egg: While the egg is poaching inside the sieve, gently run a spoon around the egg. This action helps to loosen the whites from the sieve and encourages them to wrap tightly around the yolk, ensuring they don’t stick and create a perfect shape.
- Cook and Serve: Let the egg poach in the sieve for 3 minutes, or until the whites are fully set and the yolk is cooked to your preference. Carefully lift the sieve from the water, then transfer the egg to a slotted spoon, drain any residual water, and serve.
4. The Microwave Method (Quick, Convenient, and Surprisingly Effective)
For the fastest poached egg, especially when time is of the essence, the microwave can be an unexpectedly effective tool. While it may not always yield the most traditional oval shape, it’s incredibly efficient and delivers a delicious result.
- Prepare Water: In a small, microwave-safe bowl (preferably a deeper one), add 1 cup of water.
- Strain and Add Egg: Crack an egg into a mesh sieve to strain off excess liquid whites, as this helps prevent the egg from exploding. Gently add the strained egg to the water in the microwave-safe bowl.
- Microwave: Carefully place the bowl in the microwave. Microwave on high for 60 seconds. Note that cooking times can vary significantly based on your microwave’s wattage; you may need to adjust slightly (e.g., between 50-75 seconds) until you find the perfect timing for your appliance.
- Check Doneness and Serve: Carefully remove the bowl from the microwave. The whites should be set, and the yolk should still be wonderfully soft and runny. Use a slotted spoon to retrieve the egg from the water, gently drain any excess, and serve immediately.
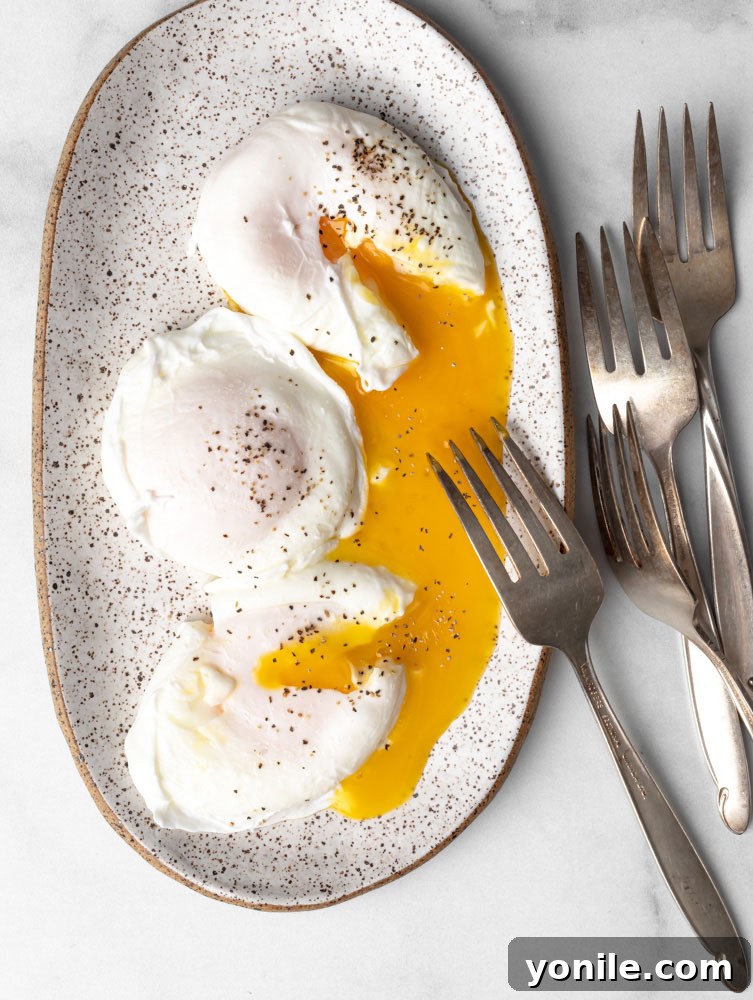
Tips for Poaching Perfection: Achieving Consistently Great Results
While the methods are straightforward, a few key tips can elevate your poached egg game from good to absolutely perfect:
- Prioritize Freshness: As reiterated, fresh eggs are your best friend. Their naturally thick whites hold their shape better, requiring less intervention.
- Always Strain Your Eggs: This single step is a game-changer. Even with fresh eggs, straining off the thin, watery whites ensures a compact, neat egg with no unsightly wisps floating in your poaching water.
- Master the Simmer: The water should be gently simmering, not aggressively boiling. A few lazy bubbles rising from the bottom are ideal. Vigorous boiling will tear the delicate egg apart and can make the whites tough.
- Individual Egg Preparation: Always crack each egg into a separate small bowl or ramekin before adding it to the poaching water. This allows you to check for any shell fragments or broken yolks and ensures a smooth, controlled slide into the water.
- Avoid Overcrowding: Give your eggs ample space in the poaching vessel. Overcrowding drops the water temperature too quickly, leading to uneven cooking and potential sticking. Poach in batches if necessary.
- Maintain Water Temperature: Keep a close eye on your water. If it starts to boil too rapidly, remove it from the heat for a few seconds or add a small splash of cold water to bring it back to a gentle simmer.
- Precise Timing: For a soft, runny yolk, 3 to 4 minutes is generally the sweet spot. Adjust slightly based on the size of your eggs and your preferred yolk consistency. A little practice will help you find your perfect timing.
- Gentle Removal and Draining: Always use a slotted spoon to carefully remove poached eggs. Gently dab the bottom of the spoon on a paper towel to remove excess water before plating; this prevents a soggy dish.
Troubleshooting Common Poaching Problems
Even with the best preparation, things can sometimes go awry. Here’s how to identify and fix common issues you might encounter when poaching eggs:
- Excessive White Spreading/Wisps: This is almost always due to older eggs with thinner whites, or water that is too hot and boiling too vigorously. The solution: always strain your eggs, and ensure your water is at a very gentle simmer.
- Yolk Too Hard / Whites Too Soft: This indicates an issue with cooking time or water temperature. If your yolks are hard, you’ve either cooked them too long or in water that was too hot. If whites are still runny when the yolk is done, the water might be too cool, or your eggs weren’t fresh enough (refer back to straining).
- Egg Sticking to the Bottom of the Pot: This can happen if your pot isn’t deep enough, or if you add the egg before the water has reached the correct gentle simmering temperature. Ensure adequate water depth and a proper simmer, and you can gently nudge the egg with your slotted spoon shortly after adding it to ensure it’s free.
- Vinegar Aftertaste: If you use vinegar and notice an acidic taste, it likely means you’ve added too much, or your eggs are particularly porous. Reduce the amount of vinegar next time, or consider skipping it altogether if straining your eggs provides sufficient shape retention.
Choosing the Best Eggs for Poaching
As repeatedly emphasized, **fresh eggs are undeniably the superior choice for poaching.** The structural integrity of a fresh egg’s albumen (egg white) is significantly higher; its proteins are tighter and more viscous, allowing the white to coagulate swiftly and compactly around the yolk when it hits the warm water. This results in that desirable, neat, and beautifully shaped poached egg. Older eggs, in contrast, have whites that have thinned out over time, causing them to spread haphazardly and create those “wispy” strands that detract from the perfect poached egg aesthetic. However, if farm-fresh eggs aren’t available, the simple act of straining your eggs through a fine mesh sieve is an excellent workaround. This process removes the thinner, more watery outer whites, leaving you with the thicker part that will set firmly and neatly, effectively mimicking the qualities of a very fresh egg.
Can You Make Poached Eggs Ahead of Time? Meal Prep Friendly!
Yes, absolutely! Poached eggs are surprisingly excellent for meal prepping and can be made in advance, making your busy mornings much smoother. Here’s how to do it:
- Poach your eggs to your desired level of doneness, perhaps slightly less cooked than usual if you prefer a very runny yolk, as they will warm up later.
- Immediately after poaching, transfer the cooked eggs into a bowl filled with ice water. This “shocks” them, rapidly stopping the cooking process and chilling them completely.
- Once thoroughly chilled, carefully place the eggs into an airtight container filled with fresh, cold water. Store this container in the refrigerator for up to 5 days.
This method ensures the eggs maintain their perfect texture and are ready for a quick reheat whenever you need them.
How to Reheat Poached Eggs Without Overcooking
Reheating previously poached eggs is a breeze and maintains their delicate texture, ensuring that creamy yolk remains intact:
- Fill a pot with hot water, similar to the gentle simmering temperature you would use for initial poaching. Avoid boiling water, as this can easily overcook the yolks.
- Using a slotted spoon, gently transfer the chilled poached eggs from the refrigerator (and their cold storage water) into the hot water.
- Allow the eggs to warm through for approximately 1-2 minutes. The goal is to bring them back to serving temperature without further cooking.
- Carefully remove the warmed eggs with a slotted spoon, gently dab off any excess water, and serve. They will taste just as delicious and have the same perfect texture as freshly poached eggs.
To Salt or Not to Salt the Poaching Water?
This is a common query, and the general consensus for poaching eggs is to **avoid salting the water.** While seasoning water is standard practice for many culinary tasks, adding salt to poaching water can be counterproductive. Salt increases the density of the water. When an egg is introduced into denser, salty water, the egg white tends to float more and spread out rather than coagulating tightly around the yolk. This often results in a less compact, more ‘frilly’ or unevenly shaped poached egg, deviating from the desired traditional spherical form. For the best shape and texture, it’s always recommended to season your poached egg with salt, freshly ground black pepper, and any other desired spices *after* it has been cooked and placed on your plate.
The Vinegar Debate: To Add or Not to Add?
The addition of vinegar to poaching water is a hotly debated topic among home cooks and professional chefs. Many swear by adding a small splash of white vinegar or apple cider vinegar, typically 1-2 teaspoons per liter of water. The acidity in the vinegar helps the egg whites to coagulate more quickly and firmly, making them less likely to spread and more likely to hold a neat, compact shape, especially useful with older eggs. However, there’s a potential drawback: some individuals find that vinegar can impart a subtle, undesirable acidic taste to the delicate egg, even in small quantities. Personally, if I’m using fresh eggs and have taken the time to strain them through a fine mesh sieve, I often skip the vinegar. These steps usually suffice to achieve a beautifully shaped egg without any risk of altering its pure flavor. Experiment to discover your preference; you might find that the vinegar helps, or you might prefer the clean taste of a vinegar-free poached egg.
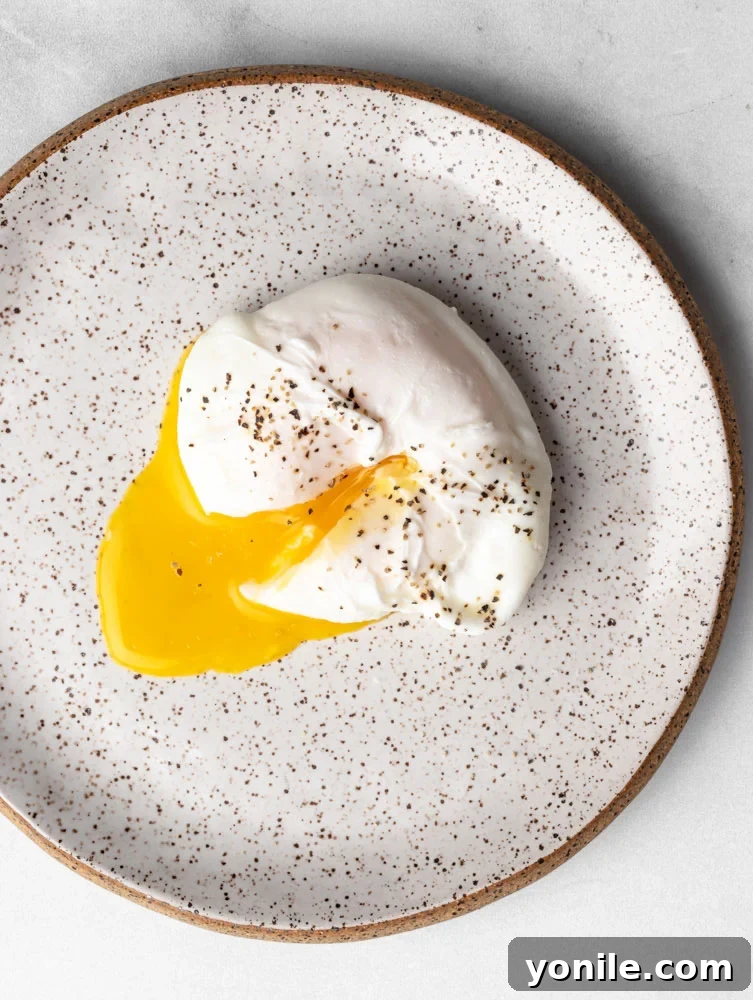
Delicious Ways to Enjoy Your Perfectly Poached Eggs
The versatility of a poached egg is one of its greatest strengths. It can elevate virtually any meal, transforming ordinary dishes into something extraordinary. Here are some popular and delightful ways to savor your perfectly poached creations:
- Classic Eggs Benedict: The most iconic use! Serve on a toasted English muffin with Canadian bacon (or ham) and a generous drizzle of rich hollandaise sauce.
- Avocado Toast Elevated: Transform your everyday avocado toast into a gourmet experience by topping it with a soft poached egg. The runny yolk creates a luxurious, creamy “sauce” that blends beautifully with the avocado.
- Healthy Grain Bowls & Salads: Add a protein boost and creamy richness to your favorite grain bowls (quinoa, farro, rice) or fresh green salads. The yolk acts as a natural, luscious dressing. Try it on a vibrant strawberry spinach salad or a hearty Mediterranean quinoa salad.
- Comforting Noodle Dishes: A poached egg is a fantastic and satisfying addition to instant ramen, pho, or any noodle soup. Break the yolk to thicken the broth and add an indulgent texture.
- Smoked Salmon & Asparagus: For a light, elegant meal, arrange poached eggs over blanched asparagus spears and slices of smoked salmon.
- On Top of Hash: Whether you’re making a classic potato hash or a creative leftover vegetable hash, a poached egg is the perfect crowning glory, adding moisture and a rich flavor.
- Gourmet Grilled Cheese or Panini: For a truly decadent twist, carefully slide a perfectly poached egg into a grilled cheese sandwich or panini just before serving. The warm yolk will ooze out with every glorious bite.
- Hearty Breakfast Burritos & Tacos: A runny poached egg adds incredible texture and richness to any breakfast burrito or taco, creating a delightful surprise.
Other Eggcellent Tutorials to Explore
If you’ve enjoyed mastering the art of poaching and want to further expand your egg-cooking repertoire, be sure to check out our other helpful guides for preparing eggs to perfection:
- How to Make Perfect Hard Boiled Eggs
- How to Make The Perfect Soft Boiled Egg
We sincerely hope this comprehensive guide inspires you to confidently poach eggs for any occasion. Don’t hesitate to experiment with different methods and explore new serving ideas to discover your personal favorites. Happy cooking!
How to Poach An Egg
By: Mariam Ezzeddine
Encased in firm whites with a creamy golden center, poached eggs are an ideal choice for any meal. Here are some methods to poach an egg to perfection.
Ingredients
- 1 egg, or more
Instructions
Whirlpool Method:
- In a pot, bring 4 inches of water to boil.
- Crack your egg into a mesh sieve and strain off liquid whites.
- Once boiled, lower the heat and stir the water quickly in one direction to create a whirlpool in your pot. Add your single egg into the center of the whirlpool. Let the eggs cook for 3 minutes.
- Remove the egg with a slotted spoon.
Shallow Water Method:
- This method is great if you are poaching 2+ eggs.
- In a shallow pan, bring 2 inches of water to a boil.
- Crack each of your eggs into a mesh sieve and strain off liquid whites and set each of them aside.
- Once boiled, lower the heat so the water is very gently simmering and then add your eggs, one at a time, with space between each of them. Place the lid on and let sit for 4 to 4.5 minutes.
- Turn off the heat and remove the eggs with a slotted spoon one at a time.
Strainer Method:
- In a pot, bring 3-4 inches of water to a boil.
- Crack each of your eggs into a mesh sieve and strain off liquid whites then once the water has boiled, lower the heat and place the mesh sieve with the egg into the pot of water.
- In the water, gently run a spoon around the egg inside the sieve to loosen the whites so they wrap around the egg yolk and don’t get stuck to the sieve.
- Let poach for 3 minutes or until the whites have set and serve.
Microwave Method:
- In a small microwave safe bowl, add in 1 cup of water.
- Crack each of your eggs into a mesh sieve and strain off liquid whites and add to the bowl.
- Microwave for 60 seconds.
- Remove the egg with a slotted spoon and serve.
Notes
Nutritional info only includes one egg and no additional ingredients.
Nutrition
Calories: 63kcal | Carbohydrates: 1g | Protein: 6g | Fat: 4g | Saturated Fat: 1g | Trans Fat: 1g | Cholesterol: 164mg | Sodium: 62mg | Potassium: 61mg | Sugar: 1g | Vitamin A: 238IU | Calcium: 25mg | Iron: 1mg
If you try this recipe and like it, please use my hashtag to share it with me on INSTAGRAM for a chance to be featured in my story! Also, follow me at Cookin’ With Mima on FACEBOOK | INSTAGRAM | PINTEREST for all of my latest social posts and recipes.