
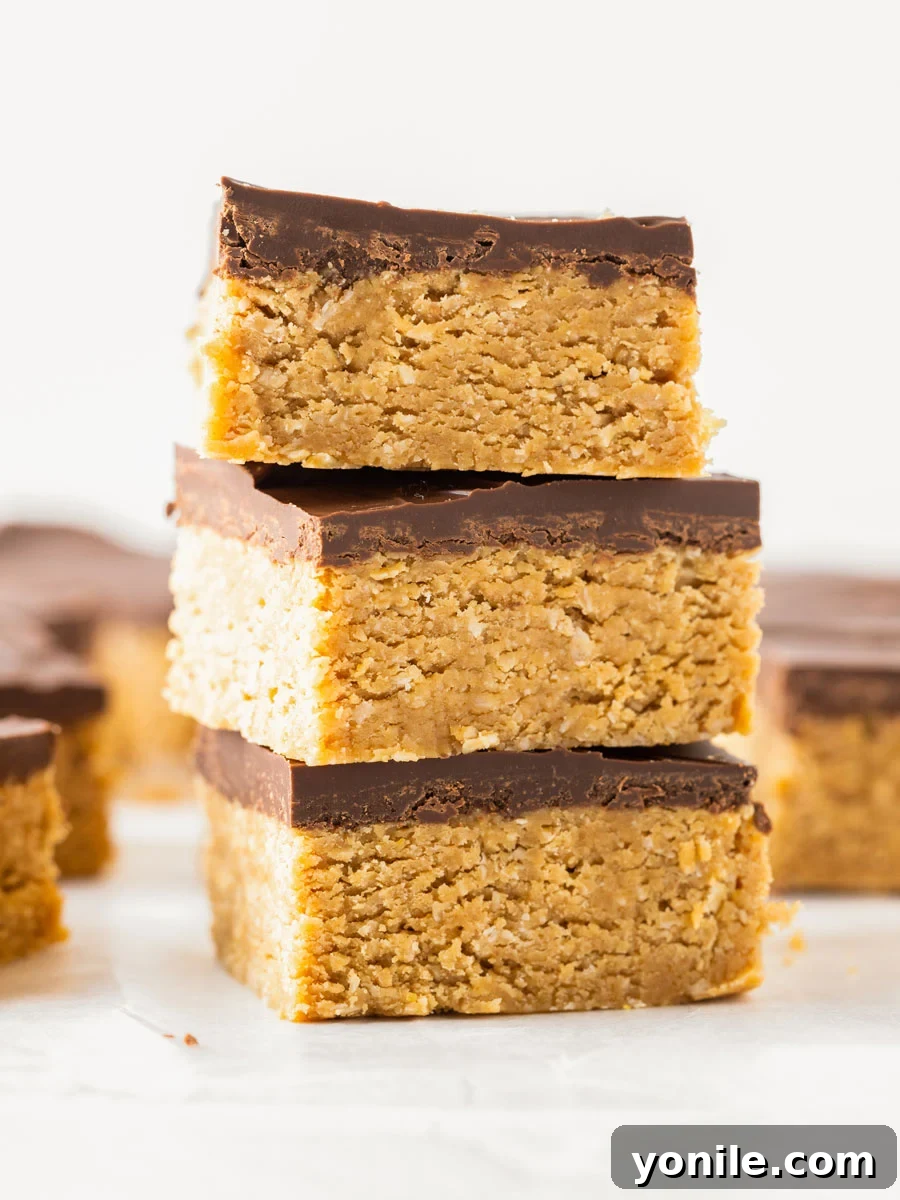
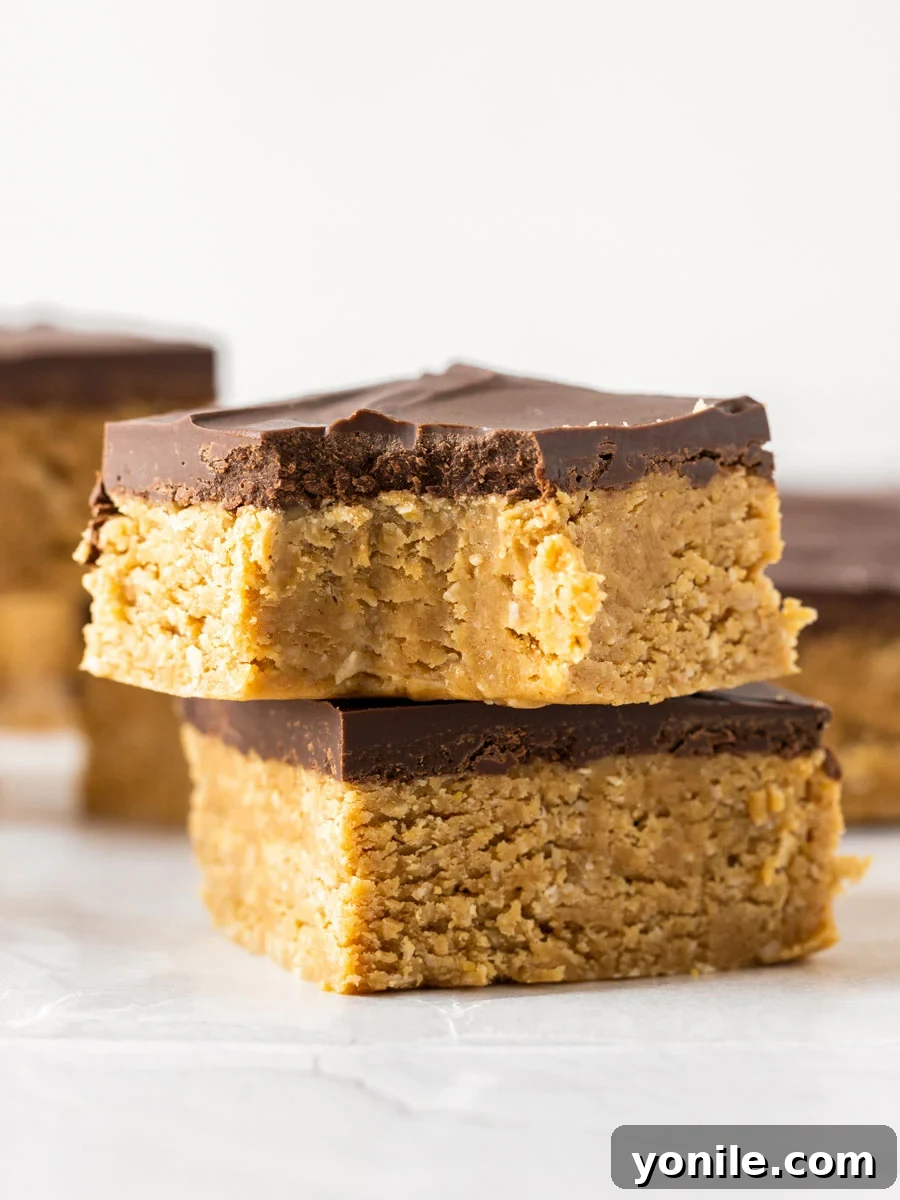
Welcome to the ultimate guide for creating irresistible, fuss-free desserts! If you’re craving a sweet treat that’s both simple and sensationally delicious, look no further than these no-bake Chocolate Peanut Butter Oatmeal Bars. Forget the oven and lengthy baking times; this recipe delivers rich, chewy, and decadent bars that perfectly combine the timeless flavors of chocolate and peanut butter. Ideal for hot summer days, busy weeknights, or anytime you need a quick dessert fix, these bars are a guaranteed crowd-plepleaser. They taste remarkably similar to your favorite peanut butter cups, but with a wholesome touch of oats that makes them surprisingly satisfying. In just a few minutes of prep and an hour of chilling, you can have a batch of these delightful bars ready to enjoy.
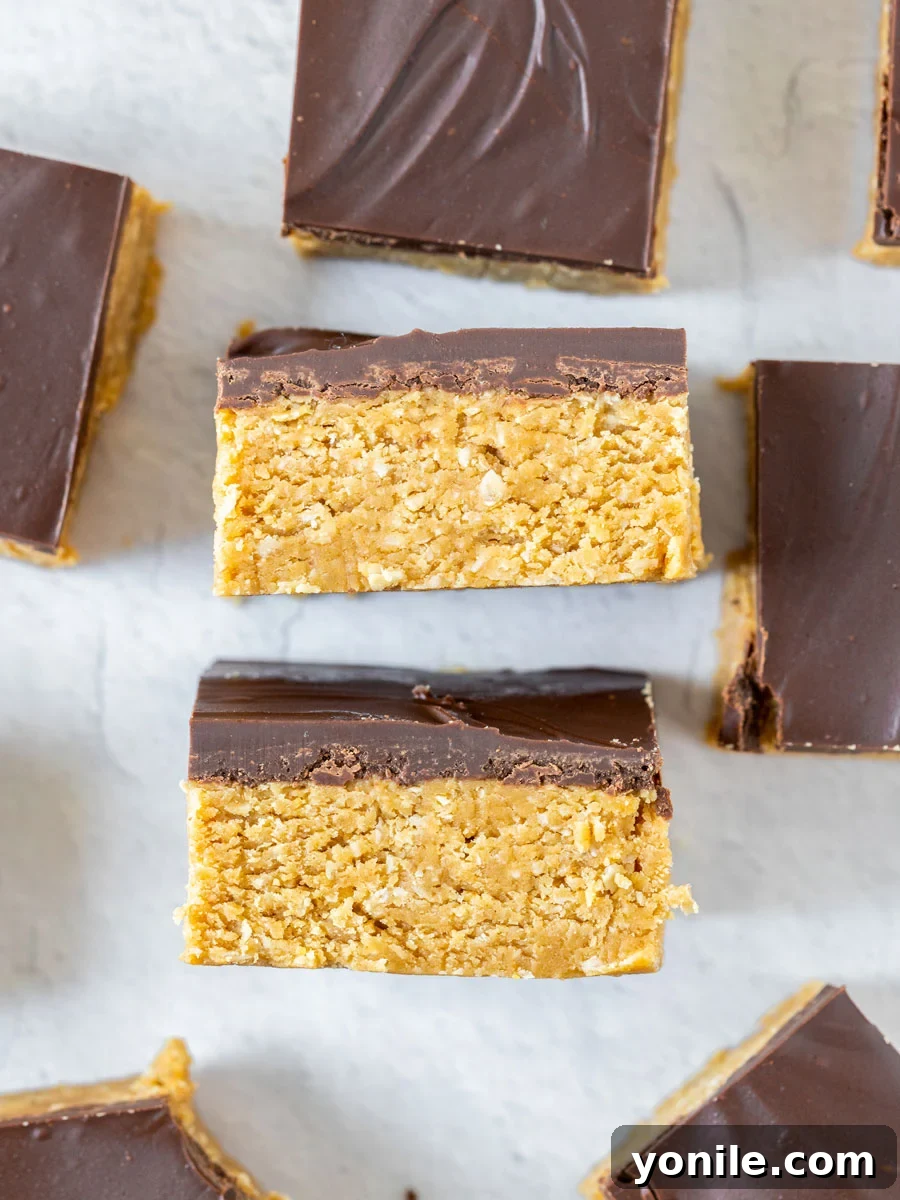
Crafted with just a handful of pantry staples, these no-bake chocolate peanut butter oatmeal bars are poised to become your go-to indulgence. Whether you’re a seasoned baker or a kitchen novice, the straightforward steps ensure perfect results every time. These bars are not just easy; they’re a testament to how simple ingredients can create extraordinary flavors. The combination of creamy peanut butter and rich chocolate, balanced with the hearty texture of oats, creates a snack or dessert that feels both comforting and luxurious. Get ready to impress your friends and family with a dessert that requires minimal effort but yields maximum flavor impact.
For those who love the comforting goodness of oatmeal in their desserts, you might also enjoy exploring other delightful recipes. Consider trying our Chocolate Chip Baked Oatmeal for a warm, comforting breakfast or brunch option, or our refreshing Blueberry Oatmeal Bake, perfect for a healthy start to your day or a light dessert.
Why You’ll Adore These No-Bake Chocolate Peanut Butter Bars
These chocolate peanut butter oatmeal bars aren’t just a dessert; they’re a revelation in convenience and flavor. Here’s why they’ll quickly become a cherished recipe in your culinary collection:
- Effortlessly Simple: No Baking Required! Say goodbye to preheating ovens and hovering over hot stoves. This recipe is designed for ease, making it perfect for scorching summer days when the last thing you want is to heat up your kitchen. It’s also ideal for dorm rooms, camping trips, or any time an oven is unavailable.
- Lightning Fast Preparation: Quick & Easy! From start to finish, you’re looking at an incredibly short active prep time of about 15 minutes. This makes it an ideal treat for busy schedules, unexpected guests, or sudden cravings. Just mix, press, chill, and serve!
- Minimal Ingredients, Maximum Flavor: Pantry Staples! You won’t need a long shopping list for these beauties. They rely on common pantry ingredients you likely already have on hand, transforming simple components into a dessert that tastes far more complex and indulgent than its preparation suggests.
- Unforgettable Taste: A Flavor Explosion! The harmonious blend of salty peanut butter and sweet chocolate is a classic for a reason. These bars capture that iconic taste perfectly, delivering a deeply satisfying experience with every bite. The addition of oatmeal provides a delightful chewy texture that elevates the experience.
- Versatile & Customizable: Your Dessert, Your Way! While delicious as is, this recipe is a fantastic canvas for your creativity. Easily adapt it with different nut butters, chocolate types, or fun toppings to suit any preference or occasion.
Essential Ingredients for Your No-Bake Chocolate Peanut Butter Oatmeal Bars
The beauty of these bars lies in their simplicity, utilizing a few key ingredients that come together to create a truly magical dessert. Each component plays a crucial role in achieving the perfect balance of flavor and texture:
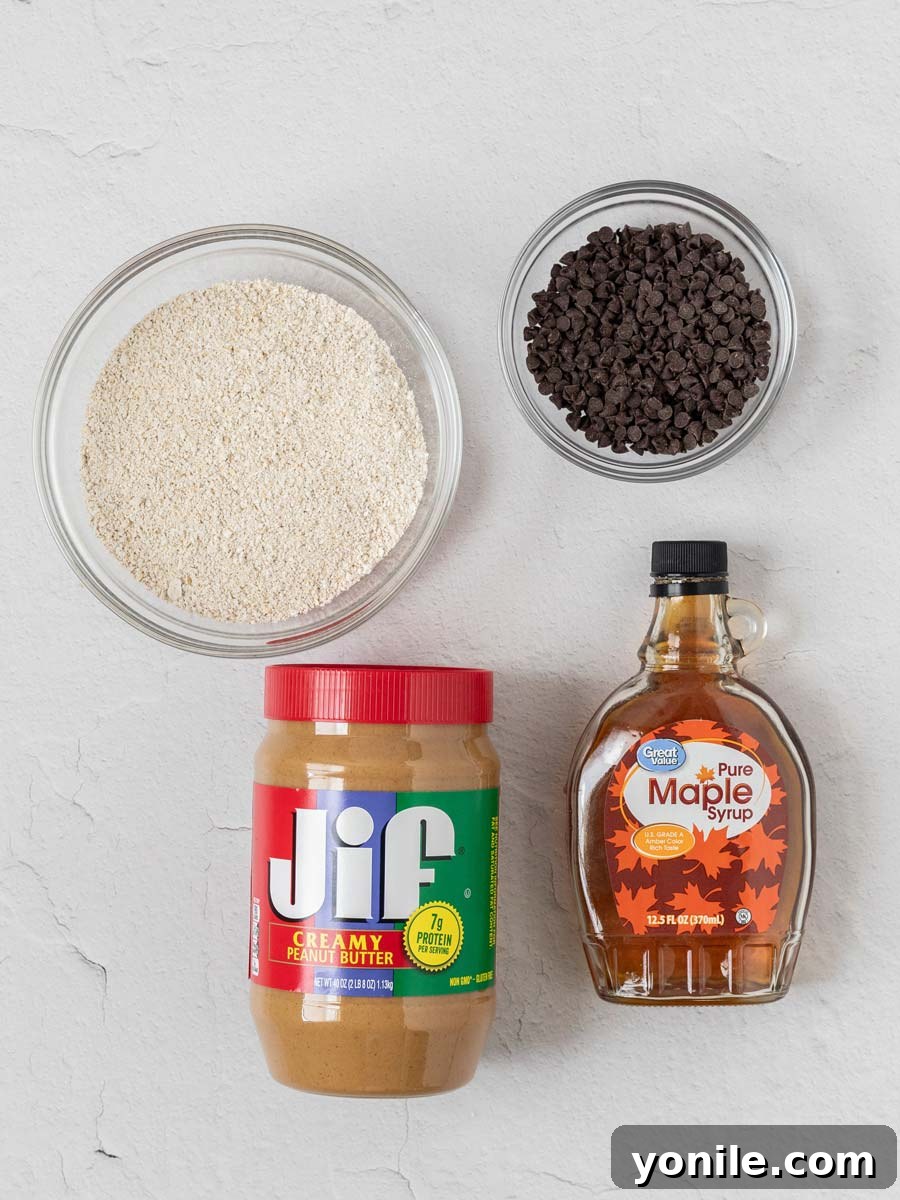
- Quick Oats: These finely cut oats are the backbone of our bar base, providing a wonderful chewy texture and acting as a binding agent that helps the bars hold their shape. Unlike rolled oats, quick oats absorb moisture faster, making them ideal for no-bake applications. They contribute a wholesome earthiness that complements the rich flavors.
- Creamy Peanut Butter: The undisputed star of the show! Creamy peanut butter lends a rich, smooth, and utterly indulgent texture, along with that beloved nutty flavor. We recommend using a conventional, stirred creamy peanut butter for the best consistency, as natural peanut butter (with separated oil) can sometimes alter the texture if not thoroughly mixed.
- Maple Syrup: This natural sweetener is preferred over granulated sugar for its ability to sweeten the base layer without introducing any graininess. Its liquid form ensures a smooth and uniform mixture, while its distinctive flavor subtly enhances the other ingredients. You can also use honey or agave nectar as alternatives if preferred.
- Dark Chocolate Chips: These chips are essential for creating the melt-in-your-mouth topping that forms the perfect bittersweet contrast to the creamy peanut butter base. Dark chocolate offers a sophisticated depth of flavor, but you can adjust to milk or semi-sweet chocolate chips based on your preference for sweetness.
- Vanilla Extract: While optional, a touch of pure vanilla extract can dramatically amplify the overall flavor profile, adding a warm, aromatic note that brings all the ingredients into a more cohesive and delicious harmony. Don’t skip it if you want that extra layer of deliciousness!
- Unsalted Butter (for topping): A small amount of butter is added to the chocolate topping to ensure a smooth, glossy, and perfectly spreadable consistency. It helps the chocolate set beautifully without becoming too hard or brittle.
Creative Substitutions and Exciting Variations
Part of the fun of this recipe is its adaptability. Feel free to get creative and customize these bars to your liking!
- Topping Adventures: Elevate your bars with an array of delicious toppings! A sprinkle of flaky sea salt not only looks elegant but also enhances the chocolate and peanut butter flavors. For an added textural crunch, consider a layer of crushed roasted peanuts, almonds, or even pretzels. Drizzle with white chocolate or add sprinkles for a festive touch.
- Base Layer Twists: While quick oats provide a fantastic chew, you can experiment with other crumbly bases. Crushed graham cracker crumbs offer a classic “cheesecake crust” flavor, while crushed pretzels introduce a delightful salty crunch that balances the sweetness. For a gluten-free option, ensure your oats are certified gluten-free.
- Nut Butter Alternatives: If peanut butter isn’t your preference or if you have allergy concerns, this recipe adapts beautifully to other nut and seed butters. Almond butter offers a slightly milder, sweeter flavor, while cashew butter provides a richer, creamier texture. For a nut-free version, sunflower seed butter (like SunButter) is an excellent choice, but be aware that it can sometimes react with baking soda/powder to create a greenish hue, which isn’t an issue in this no-bake recipe.
- Chocolate Choices: The recipe calls for dark chocolate chips, but don’t hesitate to swap them out. Milk chocolate chips will result in a sweeter, creamier topping, while semi-sweet chocolate offers a good middle ground. You could also use chopped chocolate bars for a more artisanal feel. For a marbled effect, swirl in some melted white chocolate.
- Extra Flavors: Consider adding a pinch of cinnamon or a dash of espresso powder to the peanut butter base for an extra layer of complexity. A sprinkle of cocoa powder can also deepen the chocolate flavor.
How to Craft Your Delicious Chocolate Peanut Butter Oatmeal Bars
Making these no-bake bars is a straightforward process, broken down into simple, easy-to-follow steps. Precision isn’t as critical as with baking, making this a very forgiving recipe perfect for all skill levels. Gather your ingredients and let’s begin!
Step 1: Prepare Your Pan. Start by preparing an 8×8-inch baking pan. Spray it lightly with non-stick cooking spray, then line it with parchment paper or aluminum foil, leaving an overhang on the sides. This overhang will act as “handles” to easily lift the bars out of the pan once chilled. Set the prepared pan aside.
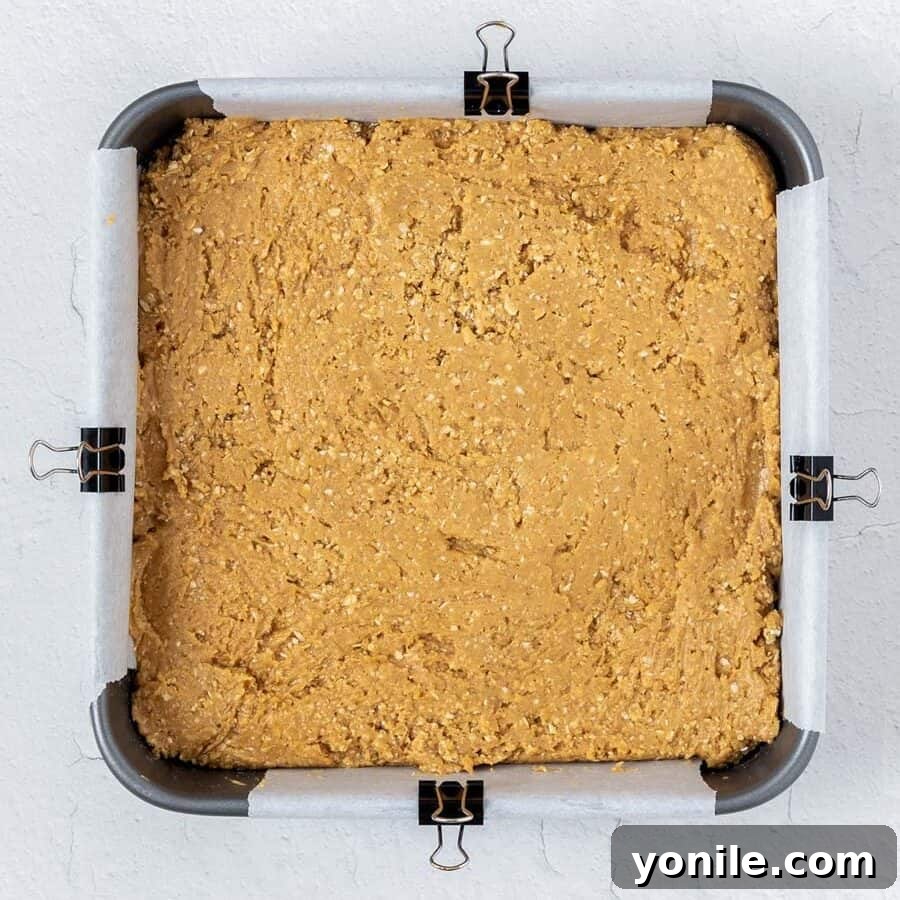
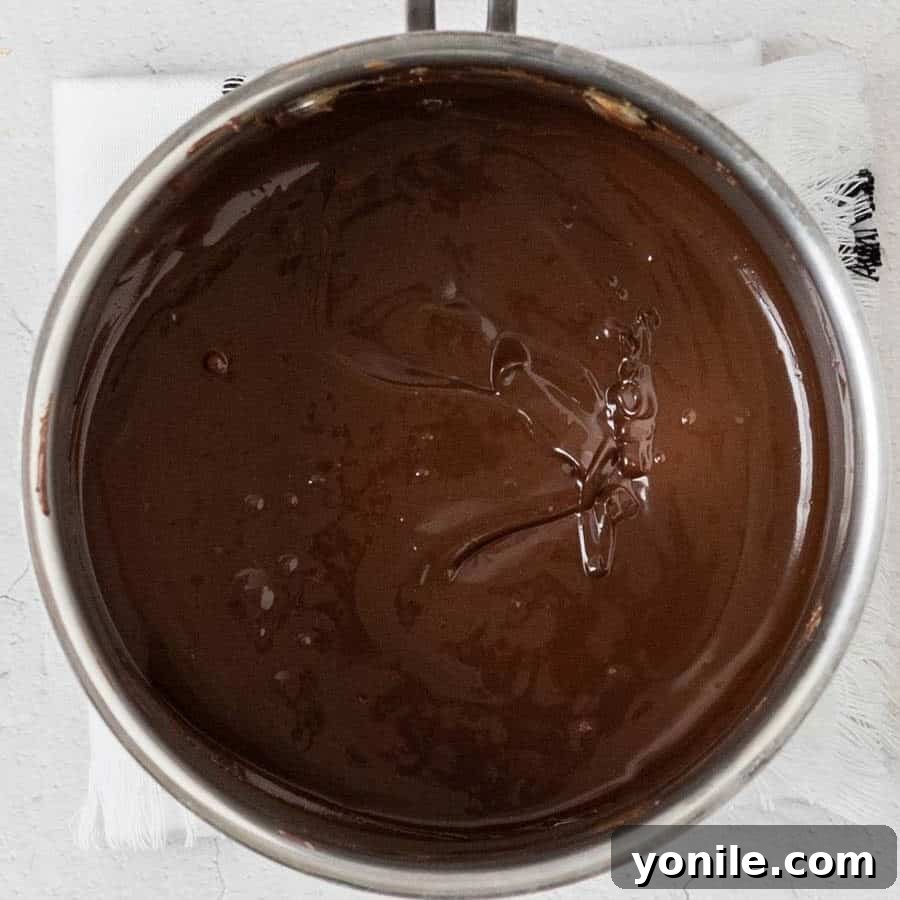
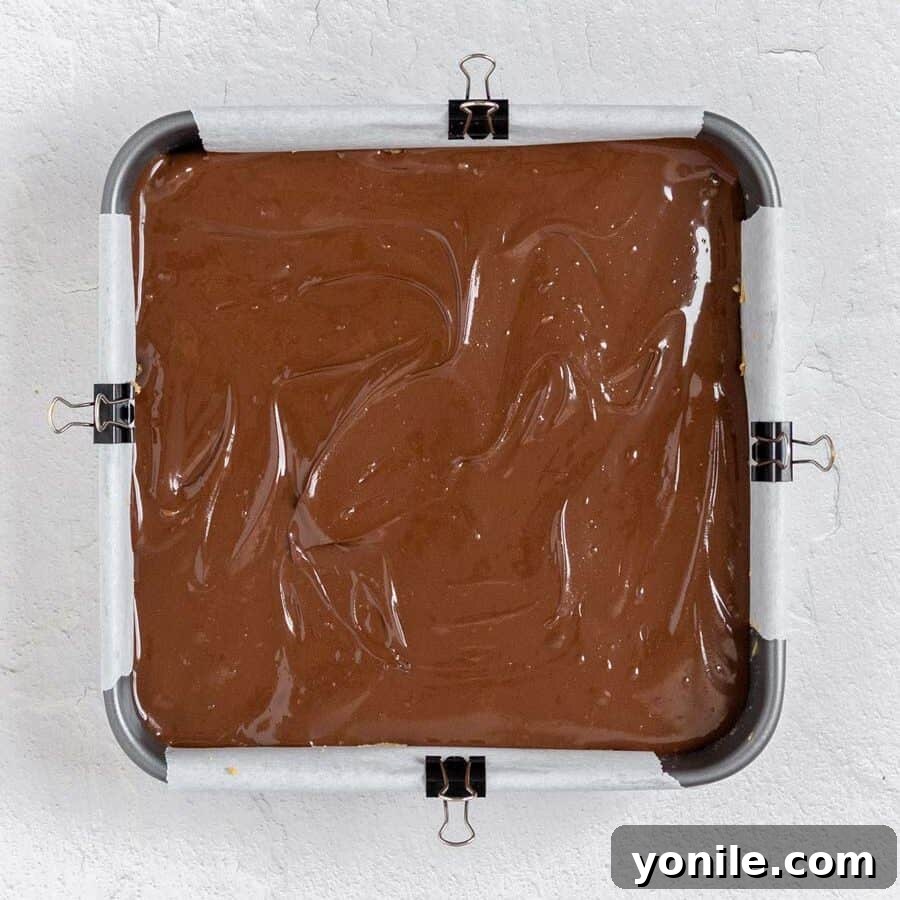
Step 6: Chill to Perfection. Once the chocolate topping is spread, transfer the pan to the refrigerator. Allow the bars to chill for a minimum of 1 hour, or until the chocolate topping is completely firm and set. This crucial step ensures that the bars are firm enough to cut cleanly and hold their shape beautifully. Once thoroughly chilled, use the parchment paper or foil overhang to lift the entire slab of bars out of the pan. Place it on a cutting board.
Step 7: Slice and Serve. Using a sharp knife, cut the chilled slab into 16 equal-sized bars. For the cleanest cuts, run your knife under hot water, wipe it clean, and make each slice with a single, firm motion, wiping the knife between cuts. Serve your no-bake chocolate peanut butter oatmeal bars chilled and enjoy every delicious bite!
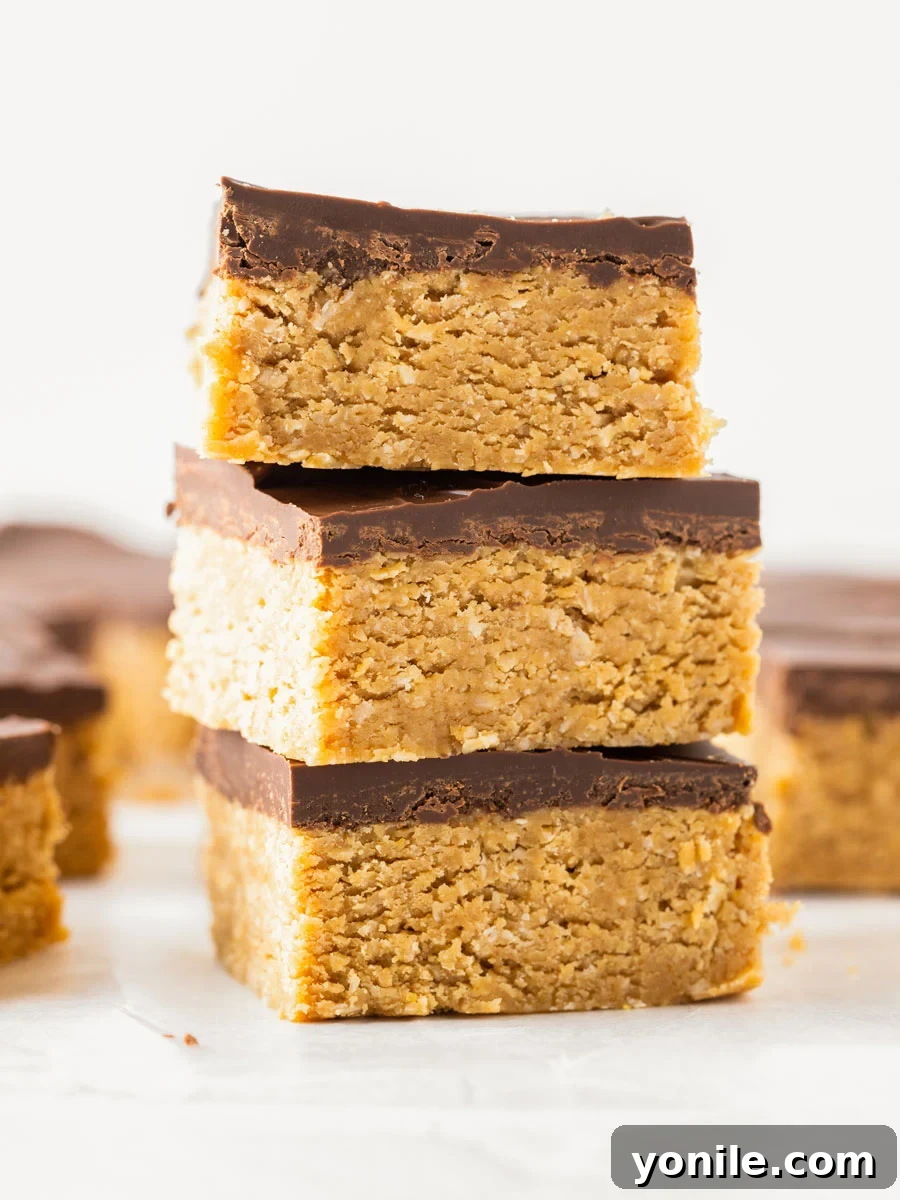
Tips to Perfect These Decadent Bars
Achieving bakery-worthy no-bake bars is easier than you think. Follow these expert tips for perfect results every time:
- Press Down Firmly for a Stable Base: This is a critical step for structural integrity. When pressing the oat and peanut butter mixture into the pan, ensure you apply consistent, firm pressure across the entire surface. A well-compacted base will prevent your bars from crumbling when cut and ensure they hold together beautifully.
- Chill Completely for Clean Slices: Patience is a virtue, especially when it comes to chilling. Allowing the bars to chill for at least 1 hour, or even longer (2-3 hours is ideal), ensures that both the base and the chocolate topping are fully set. Rushing this step can lead to messy cuts and a softer, less defined bar.
- Mastering the Art of Cutting: For those picture-perfect, clean slices, a simple trick makes all the difference. Before each cut, run your sharp knife under hot water and then quickly wipe it dry. The warm blade will glide through the chocolate topping and dense base without dragging or cracking, giving you smooth, neat edges. Repeat this process for every single slice.
- Even Spreading is Key: When spreading the chocolate topping, work quickly and evenly. A smooth, uniform layer not only looks appealing but also ensures each bar has a balanced ratio of chocolate to peanut butter goodness. Use an offset spatula or the back of a spoon for best results.
- Room Temperature for Peanut Butter: If your peanut butter is very cold and stiff, it might be harder to mix smoothly with the maple syrup. Letting it come to room temperature for about 30 minutes before starting the recipe can make the mixing process much easier and yield a silkier base.
Frequently Asked Questions About No-Bake Peanut Butter Bars
To get those beautifully neat, clean slices, the secret lies in your knife and a little heat. Before each cut, simply run your sharp knife under hot water for a few seconds, then wipe it completely dry. The warmth from the knife will help it glide smoothly through both the chocolate and the peanut butter oat base, preventing sticking and cracking. Remember to wipe the knife clean between each slice for the best results.
While it is technically possible to melt the ingredients in the microwave, I generally prefer using the stovetop. The stovetop allows for more even heat distribution and continuous stirring, which reduces the risk of burning or uneven melting. If you opt for the microwave, make sure to heat the ingredients in short bursts (15-30 seconds at a time) and stir thoroughly after each burst. Keep a very close eye on it to prevent overheating, especially with the chocolate, which can seize quickly.
These delicious bars are best stored in an airtight container in the refrigerator. They will maintain their freshness and firm texture for up to one week. If you’d like to prepare them further in advance or save some for later, they freeze beautifully! Simply place them in an airtight freezer-safe container or bag, separated by parchment paper, and they can be frozen for up to two months. Thaw in the refrigerator or at room temperature for a few minutes before serving.
Chocolate cracking is a common issue that usually occurs when the chocolate topping is too cold or brittle. To prevent this, allow the chilled bars to sit at room temperature for about 5-10 minutes before you begin cutting. This brief warm-up will slightly soften the chocolate, making it more pliable and less prone to cracking. Additionally, using a hot, clean knife (as mentioned in the first FAQ) will greatly help.
Yes, you can certainly use natural peanut butter. However, it’s crucial to ensure that it is very well-stirred before use. Natural peanut butter often has oil separation, and if not thoroughly incorporated, this can significantly affect the texture and consistency of your bars, making them potentially more oily or crumbly. For best results, stir your natural peanut butter vigorously until the oil is fully mixed in, or choose a no-stir natural peanut butter.
Explore More Delightful Dessert Bar Recipes
If you’ve fallen in love with the ease and deliciousness of these no-bake bars, you’ll be thrilled to discover more fantastic dessert bar recipes. These are perfect for entertaining, potlucks, or simply satisfying your sweet tooth with minimal fuss:
- Homemade Fruit and Nut Bars Recipe – A wholesome and energy-boosting option packed with natural goodness.
- Almond Joy Cheesecake Bars – Indulge in the tropical flavors of coconut and almond, combined with creamy cheesecake.
- Easy Coconut Cheesecake Bars – A simpler, yet equally delightful, take on the classic coconut and cream cheese pairing.
- Easy Crème Brûlée Cheesecake Bars – Experience the sophisticated flavors of crème brûlée in a convenient bar format.
- Key Lime Pie Bars – Zesty, tangy, and refreshingly sweet, these bars are a bright and vibrant treat.
These No Bake Chocolate Peanut Butter Oatmeal Bars are truly a fantastic creation – incredibly easy to make and bursting with an unbeatable combination of flavors. With just a few simple ingredients and absolutely no need to turn on your oven, they offer the perfect solution for a quick dessert, a delightful snack, or even a wholesome treat. Serve them chilled, and be prepared to watch them vanish in record time!
We absolutely love hearing from you! If you whip up this recipe or any other culinary adventure from our collection, please take a moment to leave a star rating and a comment in the section below. Your feedback helps us grow and inspires other home cooks. Don’t forget to connect with us at Cookin’ With Mima on Facebook | Instagram | Pinterest to stay updated with all our latest social posts, delicious recipes, and kitchen tips!
5 out of 5 stars (based on 5 ratings)
Print Recipe
Chocolate Peanut Butter Oatmeal Bars
By: Mariam Ezzeddine
Decadent and velvety, these No Bake Chocolate Peanut Butter Oatmeal Bars are a breeze to prepare! They are the ideal indulgence for times when your oven is occupied or when you wish to avoid warming up the kitchen. A perfect balance of nutty and sweet, with a satisfying chewy texture.
10 minutes
5 minutes
1 hour
1 hour 15 minutes
12 bars
Ingredients
For the creamy peanut butter base:
- 2 cups creamy peanut butter (conventional, no-stir preferred)
- ½ cup maple syrup (or honey/agave nectar)
- 3 cups quick oats (certified gluten-free if needed)
- 1 teaspoon vanilla extract (optional, but highly recommended for flavor)
For the rich chocolate topping:
- 1¼ cup dark chocolate chips (or semi-sweet/milk chocolate chips)
- ¼ cup creamy peanut butter
- 1 tablespoon unsalted butter
Instructions
- Prepare the Pan: Lightly spray an 8×8-inch baking pan with non-stick spray. Line the pan with parchment paper or foil, ensuring enough overhang on the sides to easily lift the bars out later. Set aside.
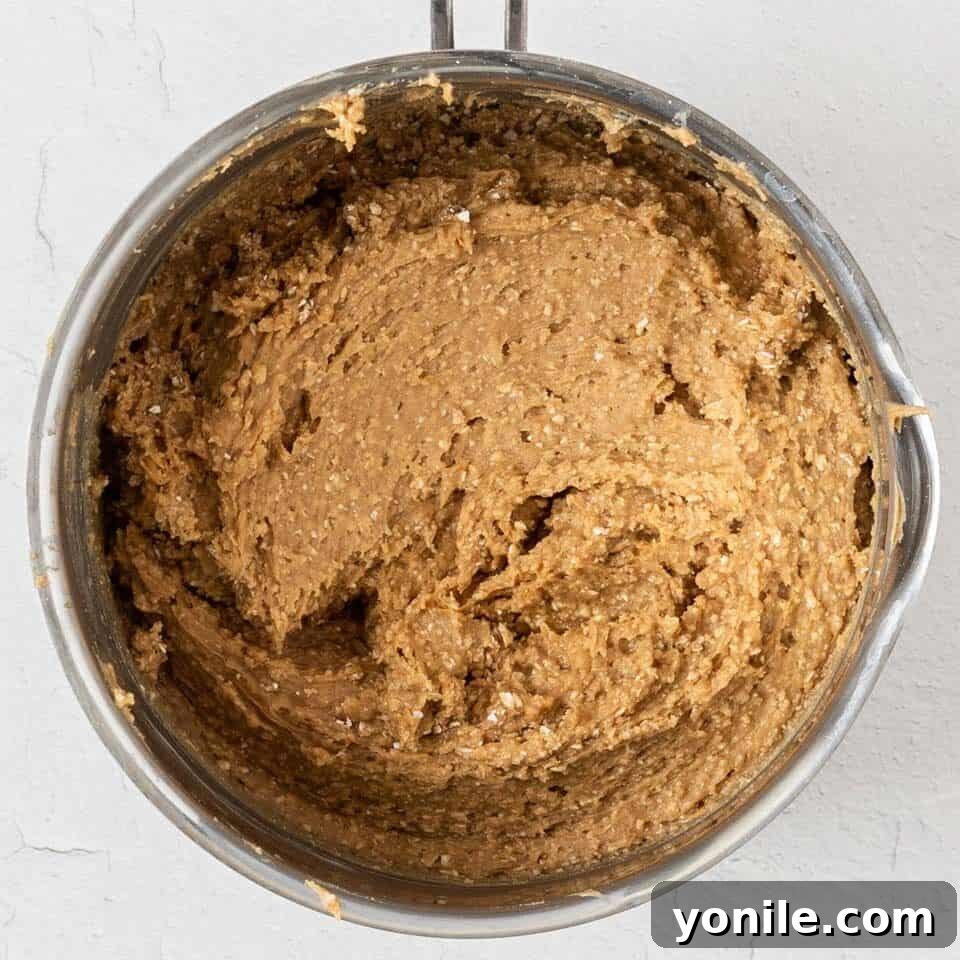
- Make the Peanut Butter Base: In a medium saucepan, combine the 2 cups of creamy peanut butter and the maple syrup. Heat over medium heat, stirring constantly until the mixture is smooth and well combined. Remove the saucepan from the heat. Stir in the quick oats and vanilla extract until everything is thoroughly mixed and the oats are fully coated. The mixture will be thick and sticky.
- Press the Base: Transfer the peanut butter oat mixture into the prepared pan. Using the back of a spoon, a rubber spatula, or lightly greased hands, press the mixture firmly and evenly into the bottom of the pan, making sure it’s compacted from edge to edge.
- Prepare the Chocolate Topping: In a small, separate saucepan, combine the dark chocolate chips, the remaining ¼ cup of creamy peanut butter, and the 1 tablespoon of butter. Heat over very low heat, stirring continuously until all ingredients are completely melted and blended into a smooth, glossy chocolate mixture. Ensure you don’t overheat the chocolate.
- Pour the Topping: Carefully pour the warm melted chocolate mixture over the pressed oat base. Use a spatula to gently and evenly spread the chocolate to cover the entire surface of the bars.
- Chill Thoroughly: Place the pan in the refrigerator and chill for at least 1 hour, or until the chocolate topping is completely firm and set. Adequate chilling is crucial for clean cuts.
- Cut and Serve: Once chilled, use the parchment paper/foil overhang to lift the entire slab of bars from the pan onto a cutting board. For clean slices, warm a sharp knife under hot water, wipe it dry, and cut the slab into 16 equal-sized bars. Wipe the knife clean between each cut. Serve chilled and enjoy!
Notes for Success
- Press Down Firmly: Ensure the base layer is well-compacted into the pan to help the bars hold together and prevent crumbling.
- Chill Completely: Don’t rush the chilling process! At least 1 hour is needed for the bars to set properly for optimal texture and ease of cutting.
- Clean Cuts: For professional-looking slices, use a sharp knife warmed under hot water and wipe it clean between each cut.
Nutrition Information (per bar)
- Calories: 511 kcal
- Carbohydrates: 44g
- Protein: 15g
- Fat: 33g
- Saturated Fat: 11g
- Polyunsaturated Fat: 7g
- Monounsaturated Fat: 13g
- Trans Fat: 0.04g
- Cholesterol: 3mg
- Sodium: 230mg
- Potassium: 495mg
- Fiber: 5g
- Sugar: 20g
- Vitamin A: 31 IU
- Vitamin C: 0.1mg
- Calcium: 105mg
- Iron: 2mg