
Have you ever experienced the disappointment of a poorly cooked hard-boiled egg? Perhaps you’ve encountered chalky, dry yolks, or rubbery, unappetizing whites, leaving you hesitant to try again. But what if we told you that consistently achieving perfectly cooked hard-boiled eggs with irresistibly creamy yolks and effortlessly peelable shells is not just a dream, but an easily attainable skill? This comprehensive guide is dedicated to transforming your egg-boiling experience, ensuring every egg you prepare is a delightful culinary success.
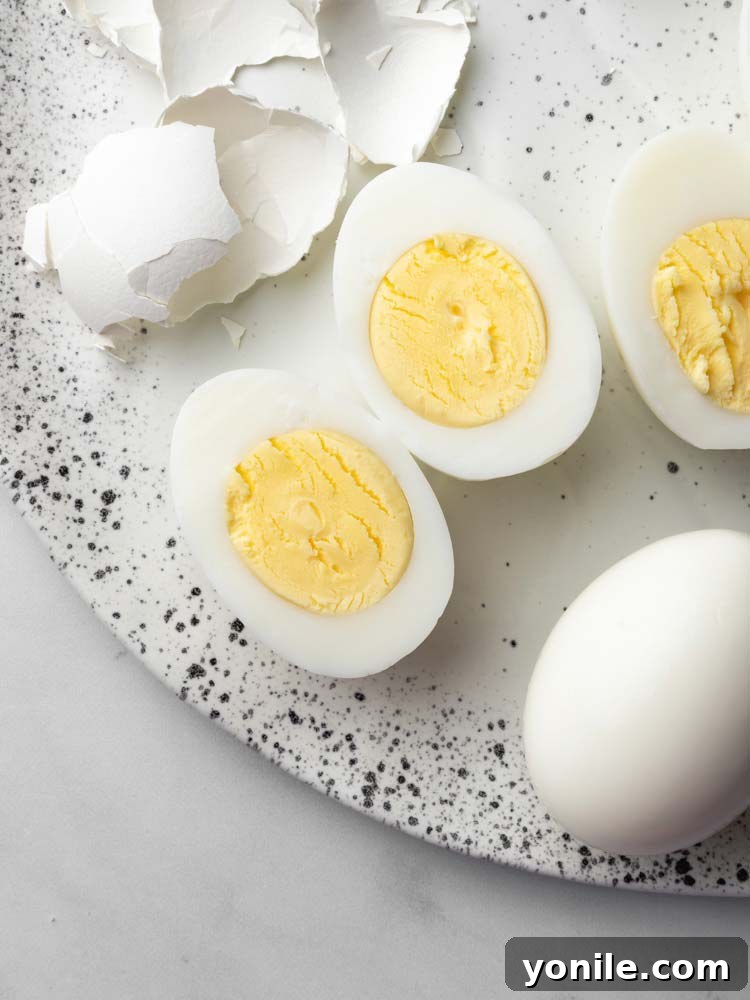
Mastering Perfect Hard-Boiled Eggs: Your Ultimate Guide to Creamy Yolks and Easy Peeling
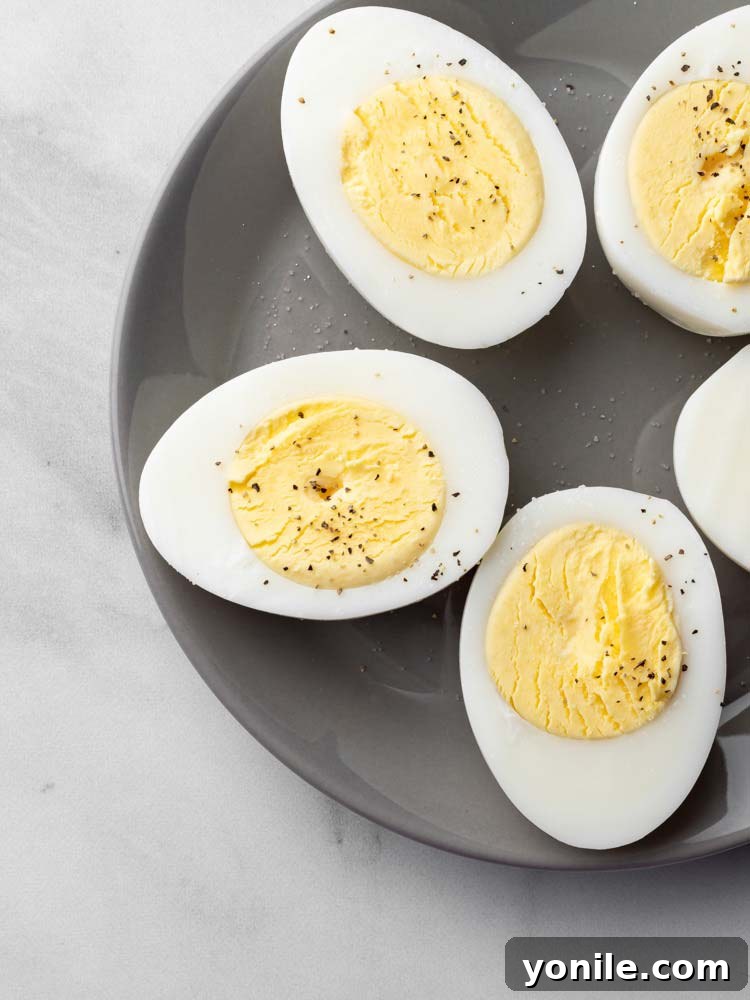
The quest for the perfect hard-boiled egg ends here. Imagine an egg where the yolk is beautifully creamy, without a hint of green discoloration, and the whites are tender, not rubbery. Such an egg is a versatile staple, perfect for quick snacks, elevating meals, or as a foundational ingredient for countless dishes. While it might seem challenging to achieve this consistency every time, with the right techniques and a few expert tips, you can master the art of perfect hard-boiled eggs in your own kitchen. This guide will walk you through four distinct, foolproof methods, along with crucial advice to ensure your eggs are always top-notch, delivering creamy yolks and shells that peel with ease.
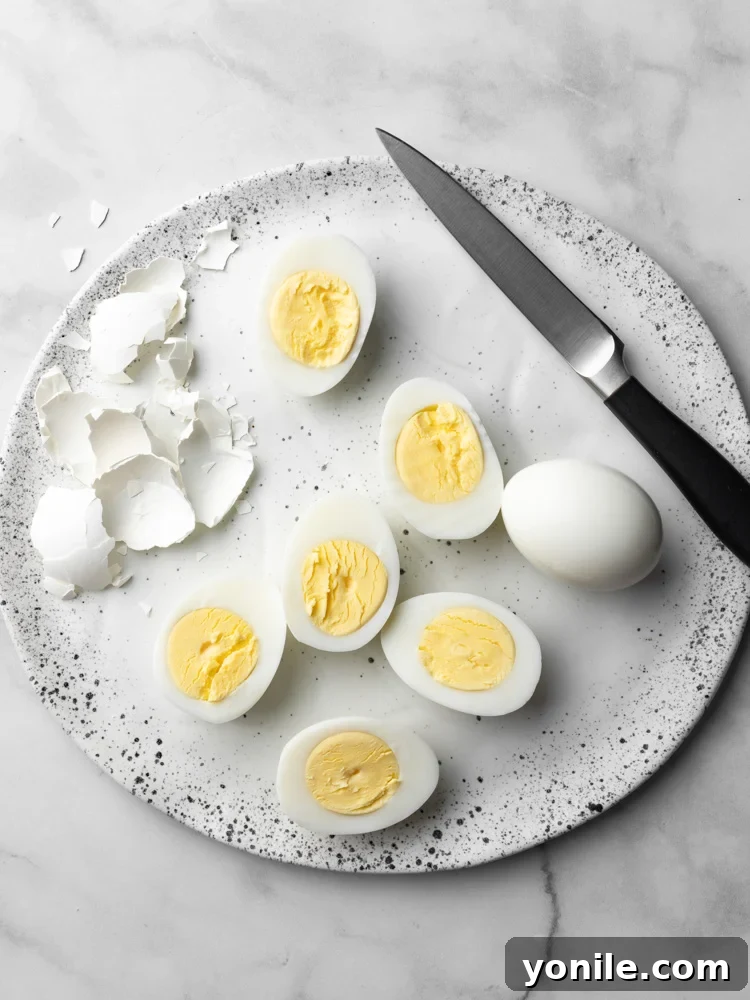
The Culinary Powerhouse: What Are Hard-Boiled Eggs Good For?
Hard-boiled eggs are far more than just a simple breakfast item; they are a nutritional powerhouse and an incredibly versatile ingredient that can enhance a myriad of dishes. Their convenience, affordability, and high protein content make them an excellent addition to almost any meal or snack. Here’s a detailed look at some popular and creative ways to incorporate your perfectly prepared hard-boiled eggs:
- Elevate Sandwiches and Wraps: Sliced or chopped, hard-boiled eggs add a satisfying texture and a significant protein boost to your favorite sandwiches, subs, or lunch wraps. Pair them with avocado, lettuce, and tomato for a wholesome meal.
- Enhance Salads: A classic and indispensable topping for garden salads, Cobb salads, or Caesar salads. They provide both substance and visual appeal, turning a simple salad into a filling meal. Try them with a vinaigrette for a refreshing twist.
- Deviled Eggs: The Ultimate Appetizer: Transform your perfectly cooked eggs into this quintessential party appetizer. Halve them, scoop out the creamy yolks, mix with mayonnaise, mustard, and seasonings, then pipe the mixture back into the whites for an irresistible treat.
- Rich Egg Salad: A beloved lunch option, perfect when finely chopped and mixed with mayonnaise, a touch of Dijon mustard, finely diced celery or onion, and a sprinkle of salt and pepper. Serve it on toast, crackers, or in lettuce cups.
- Stylish Toast Topper: A simple yet satisfying way to start your day or enjoy a light meal. Thinly slice and season hard-boiled eggs on a piece of avocado toast, plain buttered toast, or alongside some smoked salmon for an elegant presentation.
- Quick and Healthy Snack: A grab-and-go, protein-packed snack, ideal for busy schedules, post-workout recovery, or a midday energy boost. They are naturally portion-controlled and incredibly satisfying.
- Enjoy Them On Their Own: Seasoned lightly with a pinch of salt, a dash of freshly ground black pepper, or a sprinkle of paprika, they are a delicious, wholesome, and incredibly easy snack all by themselves.
- Noodle Dishes and Soups: Halved hard-boiled eggs are a fantastic addition to ramen, pho, or other noodle soups. They soak up the broth’s flavor and add a wonderful textural contrast and protein.
- Global Cuisine Adaptations: In many cuisines, hard-boiled eggs are incorporated into flavorful curries, hearty stews, or even used in pickled forms, showcasing their incredible adaptability.
Essential Ingredients and Equipment for Perfect Hard-Boiled Eggs
Before you begin your journey to hard-boiled egg perfection, let’s ensure you have all the necessary components. The beauty of hard-boiled eggs lies in their simplicity, requiring only basic ingredients and common kitchen tools, making them an accessible option for cooks of all skill levels.
The Simple Ingredients You’ll Need
- Eggs: The star of our culinary show! Medium to large-sized eggs are ideal for consistency. The color of the shell (white or brown) has no bearing on the internal quality or taste, so choose what you prefer or what’s available. For significantly easier peeling, consider using eggs that are a few days or even a week old, rather than ultra-fresh ones. Older eggs tend to peel more cleanly because the pH of the egg white increases over time, making it less adhesive to the inner membrane.
- Water: Essential for all boiling and steaming methods. Make sure you have enough cold water on hand.
- Ice: Crucial for preparing an immediate ice bath. This step is non-negotiable for achieving perfectly cooked, easily peelable eggs with vibrant, creamy yolks.
The Essential Equipment You’ll Need
- Primary Cooking Vessel of Choice: You’ll need one of the following, depending on your preferred method:
- Saucepan with a Lid: For the traditional stovetop boiling or simmering methods. A tight-fitting lid is important for retaining heat and steam.
- Instant Pot (or other Pressure Cooker): For a consistent, hands-off, and often easiest-to-peel method.
- Muffin Tin: For the less conventional but equally effective oven-baked method.
- Large Slotted Spoon or Tongs: These tools are indispensable for safely adding eggs into hot water (or removing them) and carefully transferring the cooked eggs into the ice bath. This prevents accidental cracking of the shells and protects your hands from scalding temperatures.
- Large Bowl of Ice Water: This is a critical piece of equipment. Prepare a bowl filled with cold water and plenty of ice cubes. The abrupt temperature change from hot cooking water to icy cold water serves two vital purposes: it immediately halts the cooking process, preventing the dreaded grey-green ring around the yolk, and it causes the egg whites to contract rapidly, separating them from the shell’s inner membrane, which dramatically facilitates easier peeling.
How to Make Perfect Hard-Boiled Eggs: Four Foolproof Methods Unveiled
There isn’t just one single path to hard-boiled perfection. Depending on your kitchen setup, time constraints, and personal preference, you can choose from these four reliable cooking methods. Each technique is designed to consistently deliver eggs with creamy yolks and tender whites, ensuring a delightful eating experience every time.
Method 1: The Classic Cold Water Start (For Gentle and Consistent Cooking)
This is arguably the most common and straightforward method, offering excellent consistency and reducing the risk of cracking, making it ideal for beginners. Starting eggs in cold water allows them to heat up gradually with the water, promoting even cooking and minimizing thermal shock to the shells.
- Step 1: Arrange Eggs in Saucepan. Gently place your eggs in a single layer at the bottom of a saucepan. Ensure there’s enough space so they don’t knock against each other during cooking. Avoid overcrowding the pan.
- Step 2: Cover with Cold Water. Pour cold tap water over the eggs until they are submerged by at least one inch. Make sure all eggs are fully covered.
- Step 3: Bring to a Full Boil. Place the saucepan on the stove over high heat. Bring the water to a rapid, rolling boil.
- Step 4: Remove from Heat and Rest. As soon as the water reaches a full, vigorous boil, immediately remove the pan from the heat. Keep the lid securely on and resist the urge to peek or lift the lid. This allows the residual heat from the water to gently cook the eggs without harsh boiling, which can lead to overcooking.
- Step 5: Precisely Time the Rest. Allow the eggs to sit undisturbed in the hot water for 10 to 12 minutes for perfectly hard-boiled eggs with beautifully creamy, bright yellow yolks. For a slightly firmer yolk, you can extend the sitting time by an additional minute, up to 13 minutes.
- Step 6: The Essential Ice Bath. Promptly transfer the cooked eggs from the hot water to a prepared large bowl of ice water using a slotted spoon. Let them cool completely in the ice bath for at least 5 minutes. This critical step immediately halts the cooking process, preventing any further denaturation of proteins that could lead to rubbery whites or the dreaded grey-green ring around the yolk. It also helps the egg whites contract, aiding significantly in easier peeling.
- Step 7: Peel and Enjoy. Once thoroughly cooled, peel the eggs under cool running water or directly in the ice bath for the easiest removal of shells.
Method 2: The Gentle Simmering Water Start (Prevents Cracking and Ensures Smooth Whites)
This method involves carefully lowering eggs into already simmering water. Many chefs prefer this technique for its ability to prevent cracking, especially with delicate or very fresh eggshells. It requires a bit more attention to ensure the water maintains a gentle simmer but yields equally fantastic results with smooth, unblemished whites.
- Step 1: Prepare Simmering Water. Fill a saucepan about three-quarters full with cold water and bring it to a full boil over high heat. Once boiling, reduce the heat significantly to achieve a gentle, steady simmer with small, consistent bubbles, rather than a vigorous boil.
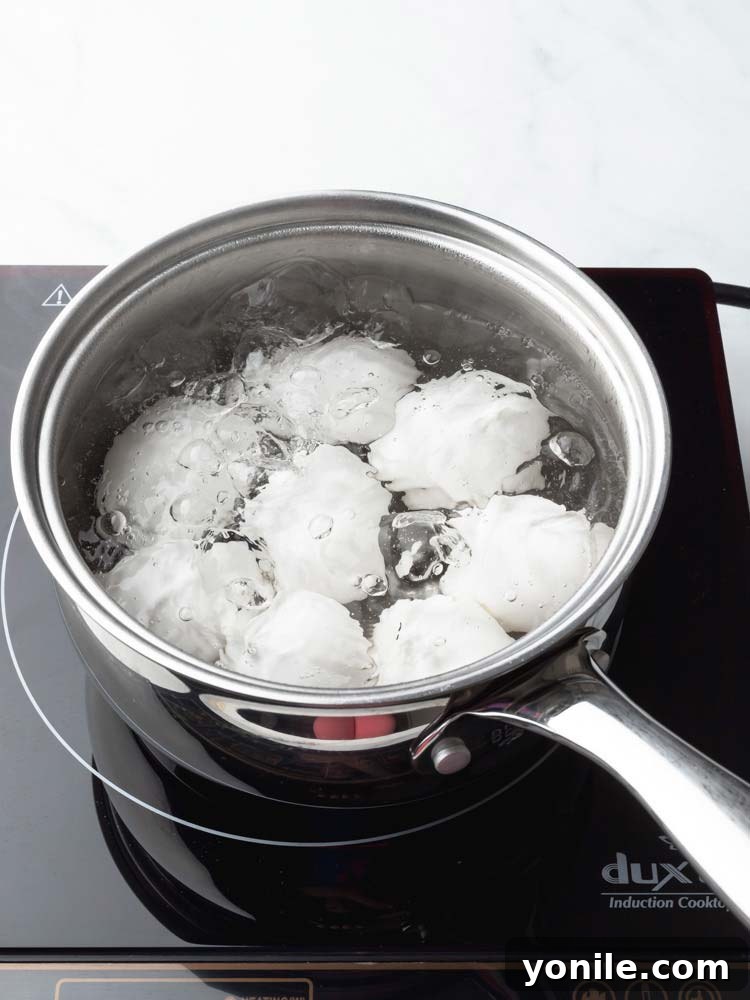
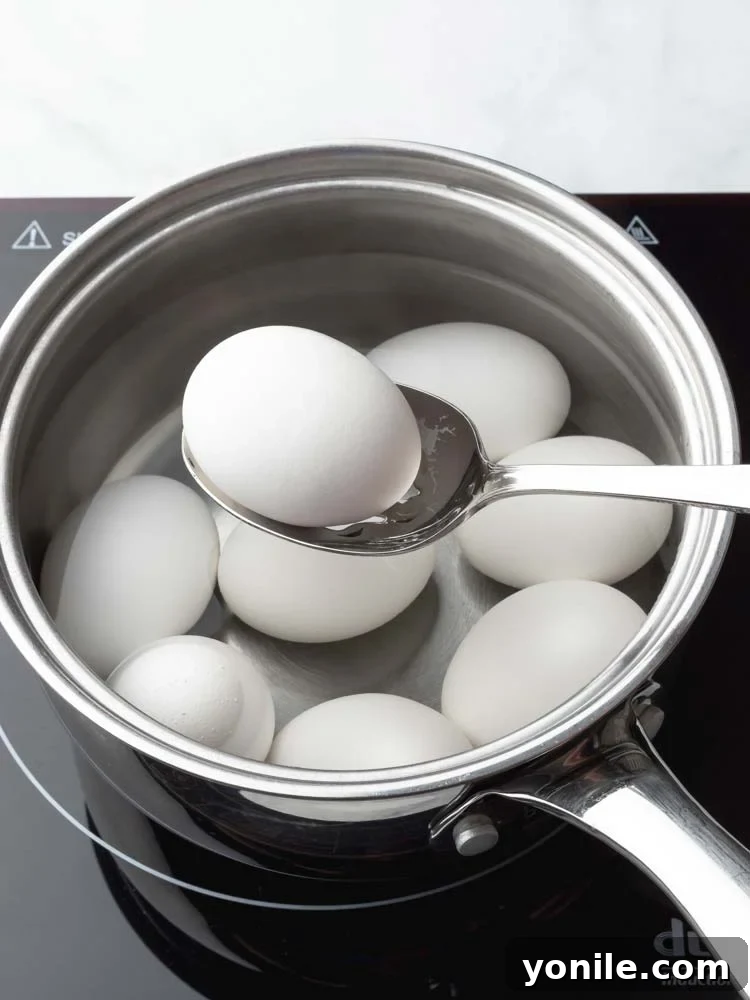
- Step 2: Gently Add Eggs. Using a large slotted spoon, very carefully lower each egg into the simmering water one by one. Take your time to avoid splashing or accidentally cracking the shells.
- Step 3: Simmer for Optimal Time. Allow the eggs to simmer gently for 12 to 14 minutes. The gentle bubbling ensures even cooking without vigorous agitation that could cause cracking, resulting in smooth, evenly cooked whites.
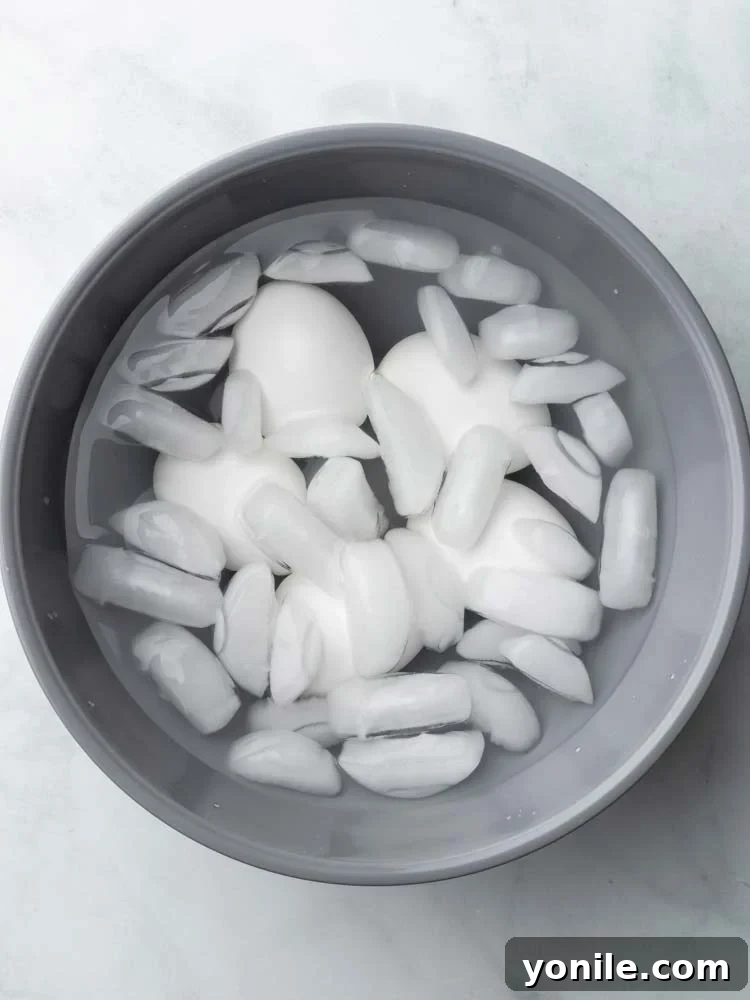
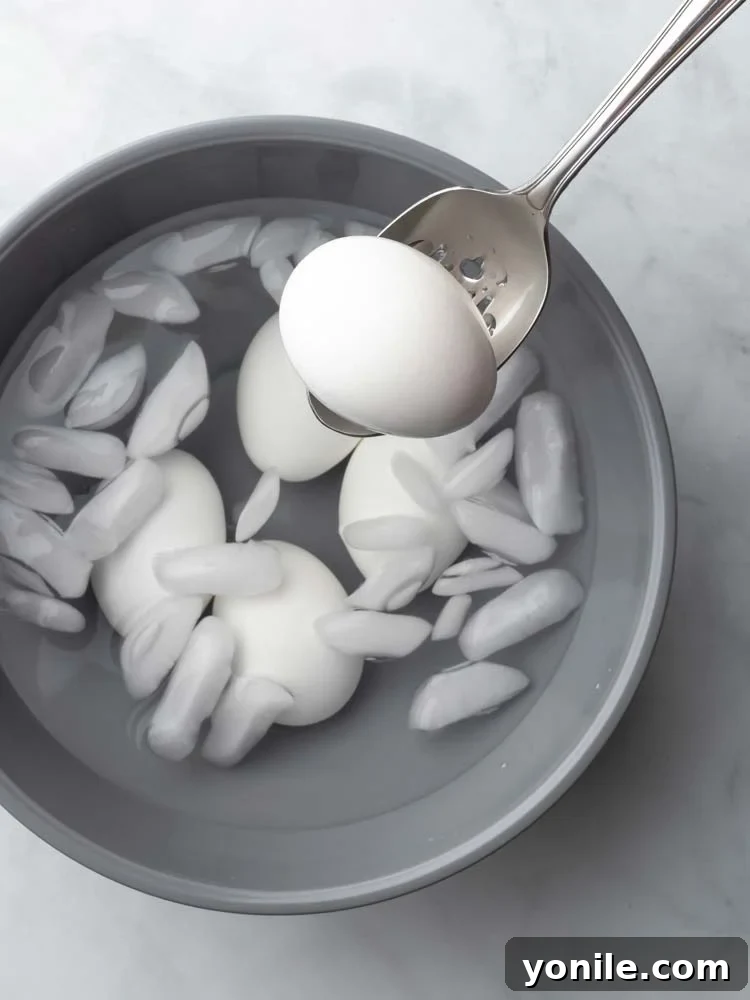
- Step 4: Immediate Ice Bath. As soon as the cooking time is complete, quickly remove the eggs from the simmering water with a slotted spoon and plunge them into a large bowl of ice water. Let them cool thoroughly for at least 5 minutes. This rapid cooling is essential for stopping the cooking process and making the eggs remarkably easier to peel.
- Step 5: Peel and Serve. Once thoroughly cooled, peel and enjoy your perfectly simmered hard-boiled eggs.
Method 3: Instant Pot Hard-Boiled Eggs (The 5-5-5 Method for Unbeatable Easy Peeling)
The Instant Pot (or any electric pressure cooker) is a true game-changer for hard-boiled eggs. It consistently produces eggs that are incredibly easy to peel and perfectly cooked, thanks to the even steam heat and rapid depressurization. Many swear by the “5-5-5 method” for its highly reliable results.
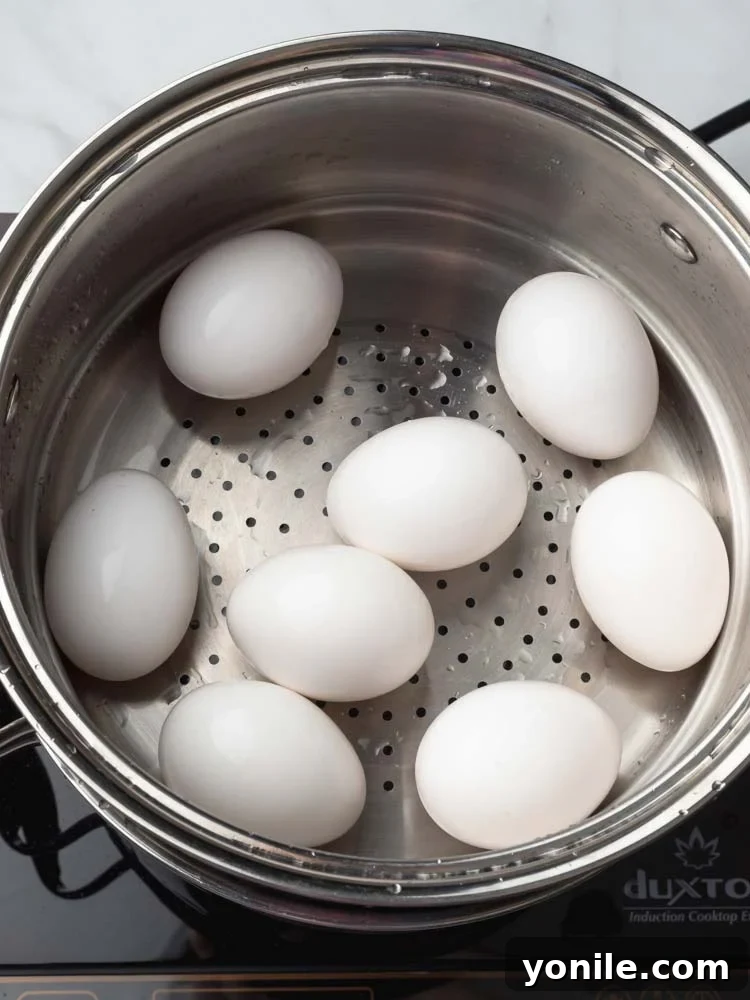
- Step 1: Set Up Instant Pot. Place the trivet or steamer rack at the bottom of your Instant Pot liner. This keeps the eggs elevated above the water, allowing them to steam rather than boil directly.
- Step 2: Add Eggs and Water. Carefully arrange your eggs on the rack in a single layer. Pour 1 cup of cold water into the Instant Pot liner. This water is crucial for creating the steam needed for pressure cooking.
- Step 3: Pressure Cook (5 Minutes). Close the lid of the Instant Pot, ensuring it’s sealed correctly. Set the steam release valve to the “Sealing” position. Cook on High Pressure for 5 minutes.
- Step 4: Natural Release and Quick Release (5 Minutes Each). Once the 5 minutes of cooking are complete, allow a Natural Pressure Release (NPR) for 5 minutes. This means you do nothing and let the pressure release on its own. After 5 minutes of NPR, carefully move the steam release valve to “Venting” for a Quick Release (QR) of any remaining pressure. Once the floating valve drops, it’s safe to open the lid.
- Step 5: Ice Bath (5 Minutes). Immediately remove the eggs from the Instant Pot (they will be very hot!) and immerse them in a large bowl of ice water. Let them cool for at least 5 minutes. This shock cooling is incredibly crucial not only for stopping the cooking and preventing the green ring but also for making these eggs famously easy to peel.
- Step 6: Peel and Enjoy. Once thoroughly cooled, you’ll be amazed at how effortlessly these Instant Pot eggs peel, leaving you with perfect, smooth hard-boiled eggs every single time!
Method 4: Oven Baked Hard-Boiled Eggs (Hands-Off Convenience for Batches)
While less common than stovetop or pressure cooking, baking eggs in the oven offers a wonderfully hands-off approach, perfect for cooking a large batch without needing to monitor a pot of boiling water. This method yields a slightly different texture, often described as more custard-like, but still perfectly hard-boiled and delicious.
- Step 1: Preheat Oven. Preheat your oven to 325°F (160°C). Accurate oven temperature is important for consistent results with this method.
- Step 2: Prepare Eggs in Muffin Tin. Carefully place individual eggs into the cavities of a muffin tin. This keeps them from rolling around and ensures even heat exposure from all sides. No water is needed for this dry-heat method.
- Step 3: Bake. Bake the eggs for 30 minutes. Keep an eye on them towards the end of the baking time, as oven temperatures can vary slightly. You may notice some slight browning on the shells, which is normal.
- Step 4: Essential Ice Bath. As soon as they are done, use tongs to carefully transfer the hot eggs into a prepared large bowl of ice water. Let them cool completely for at least 5 minutes. The immediate ice bath is crucial for stopping the cooking process, preventing overcooked yolks, and facilitating easier peeling.
- Step 5: Peel and Serve. Once thoroughly cooled, peel and enjoy your oven-baked hard-boiled eggs. You might notice some minor brown spots on the whites due to direct dry heat exposure, which is perfectly normal and does not affect the flavor or safety of the egg.
The Science Behind Perfect Hard-Boiled Eggs: Avoiding Common Pitfalls
Understanding a little bit of the chemistry at play when cooking eggs can empower you to consistently achieve perfect results and confidently avoid common mistakes that lead to less-than-ideal hard-boiled eggs.
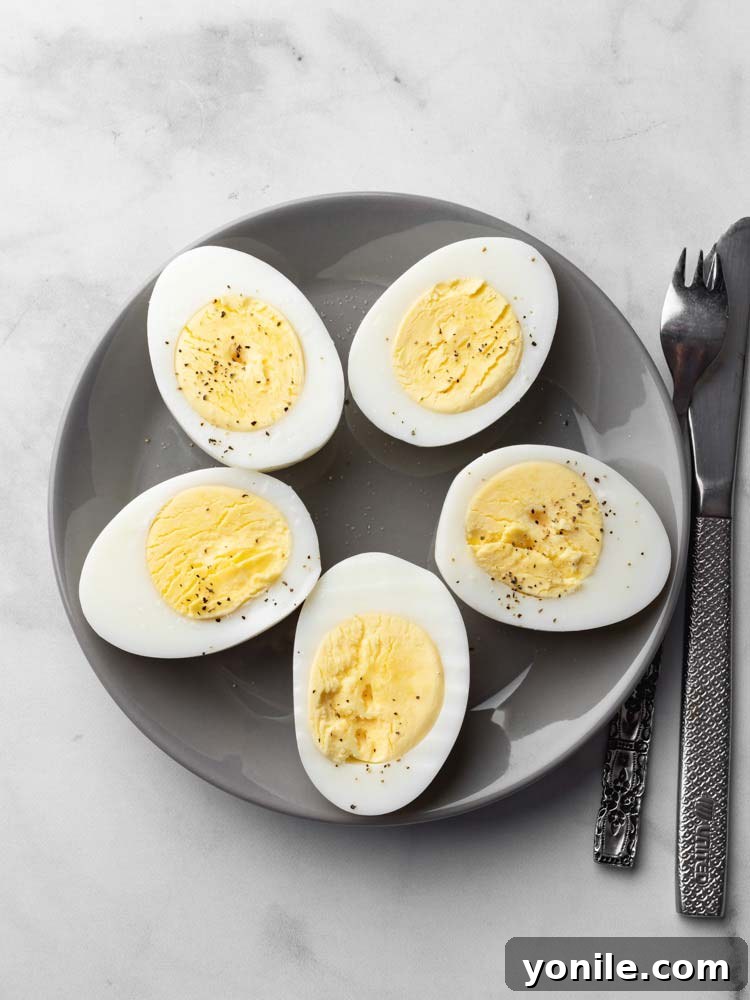
- Why the Green Ring Appears: That unsightly grey-green ring around the yolk is a tell-tale sign of overcooking. When an egg is exposed to high heat for too long, the hydrogen sulfide in the egg white reacts with the iron in the yolk, creating iron sulfide (ferrous sulfide). This compound has a distinctive greenish hue. The immediate transfer to an ice bath is paramount because it rapidly cools the egg, stopping this chemical reaction and preserving the vibrant yellow color of the yolk.
- Rubbery Egg Whites: Similarly, rubbery or tough egg whites are another indicator of overcooking. Egg whites are primarily protein. When protein is heated too intensely or for an excessive duration, it denatures (changes structure) and coils too tightly, resulting in a rubbery texture. Gentle cooking methods and a quick cool-down ensure the protein in the whites sets perfectly, remaining tender and pleasant to eat.
- Chalky, Dry Yolks: A chalky or crumbly yolk means the egg was cooked for too long, causing too much moisture to evaporate or be pushed out from within the yolk. The goal for a perfect hard-boiled egg is a creamy, moist yolk. This is achieved by precise timing of the cooking process and the immediate cessation of cooking through an ice bath, which preserves the yolk’s tender consistency.
- The Importance of the Ice Bath: Beyond preventing the green ring and rubbery texture, the ice bath serves a crucial role in making eggs easier to peel. The rapid cooling causes the egg white to shrink slightly more than the shell, detaching the cooked white from the inner shell membrane. This tiny separation makes a world of difference when it comes time to peel, allowing for much cleaner and frustration-free removal of the shell.
How to Peel Hard-Boiled Eggs with Remarkable Ease
Peeling can sometimes be the most frustrating part of the hard-boiled egg journey. But with the right technique and the crucial aid of an ice bath, you can minimize shell fragments and end up with beautifully smooth, intact eggs every time.
Method 1: Gentle Cracking and Peeling Under Water
This classic method is highly effective, especially when combined with the magic of the ice bath. The water acts as a lubricant and helps to separate the shell from the egg.
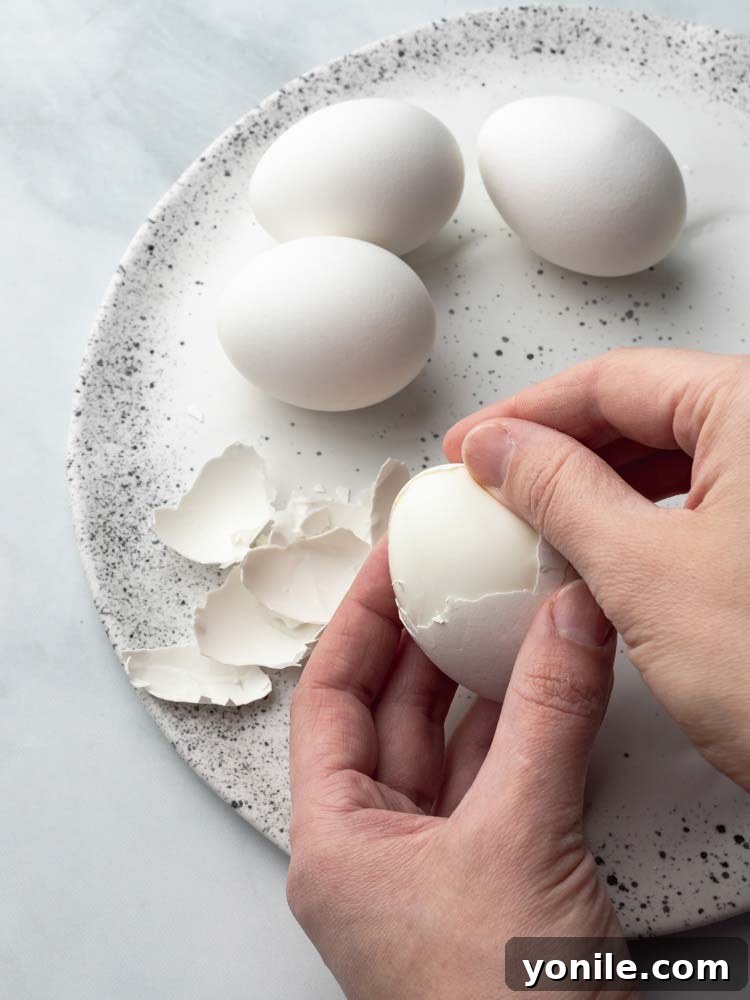
- Step 1: Gentle Crack. Once the egg has cooled sufficiently in the ice bath (or after at least 5 minutes), gently tap the broader end of the egg on a hard surface, such as a countertop. The broader end often contains a small air pocket, making it an ideal starting point for breaking the shell.
- Step 2: Initiate Peeling. Start to carefully remove small pieces of the cracked shell, feeling for the membrane underneath.
- Step 3: Leverage Running Water (Highly Recommended). For the cleanest and easiest peel, hold the egg under a gentle stream of cool running water while peeling. The water helps to get under the membrane, lubricating it and washing away tiny shell fragments, making the entire process significantly smoother and cleaner. Alternatively, you can peel the egg while it’s still submerged in the ice bath.
Method 2: The Rolling Technique for Efficient Shell Removal
This method aims to create multiple cracks across the entire shell at once, often allowing for the removal of larger shell pieces in one go.
- Step 1: Tap and Roll. Gently tap the egg’s main body flat against the counter to create initial cracks. Then, place your palm over the egg and roll it firmly but gently back and forth on the counter, applying even pressure. You should hear and feel the shell cracking all around the egg.
- Step 2: Peel Away. Once the shell is extensively cracked, it should now be easily removable in larger sections. Again, using running water can still be beneficial, especially if the membrane proves to be particularly sticky in certain spots.
Pro Tips for Effortlessly Peelable Hard-Boiled Eggs
Beyond the specific cooking method, a few key factors can significantly impact how easily and cleanly your hard-boiled eggs peel, saving you time and frustration.
- Avoid Straight-from-the-Fridge Eggs (Optional but Helpful): While some methods (like the Instant Pot) negate this, for stovetop boiling, allowing your eggs to warm up closer to room temperature for about 15-30 minutes before cooking can help prevent cracking when introduced to hot water and may slightly aid in peeling by reducing the initial temperature shock.
- Older Eggs Are Your Best Friend for Peeling: This is perhaps the most important tip for easy peeling. Very fresh eggs (those purchased just a day or two ago, or less than a week old) often have a stronger inner membrane that adheres tightly to the egg white, making them notoriously difficult to peel without tearing the whites. Eggs that are a week or two old (but still well within their expiry date) have had time for air to penetrate the shell, and the egg’s pH slightly increases, which causes the inner membrane to separate more easily from the cooked white.
- The Ice Bath is Absolutely Critical: We cannot stress this enough! The rapid transfer from hot cooking temperatures to an icy cold bath is the single most important step for easy peeling. The sudden temperature change causes the egg white to contract quickly, effectively detaching it from the inner shell membrane. This crucial separation is the “secret” to achieving clean, easy peels every single time. Do not skip this step!
Storing Hard-Boiled Eggs: Shelf Life, Safety, and Best Practices
Proper storage is paramount to enjoying your hard-boiled eggs safely and for as long as possible. Whether you’ve peeled them or plan to keep them in their shells, handling them correctly extends their freshness and prevents spoilage, ensuring they remain a healthy and convenient food option.
- Immediate Refrigeration is a Must: Always store hard-boiled eggs in an airtight container in the refrigerator as soon as they have cooled down from the ice bath. This protects them from absorbing odors from other foods in your fridge and significantly maintains their freshness and quality.
- Optimal Storage Duration: When stored properly in the fridge at 40°F (4°C) or below, hard-boiled eggs (whether peeled or unpeeled) can last safely for up to one week. After one week, their quality and safety may begin to diminish.
- Critical Room Temperature Warning: Never leave hard-boiled eggs at room temperature for more than 2 hours. Like other perishable foods, they are highly susceptible to rapid bacterial growth when left out, which can lead to severe foodborne illness. This is a non-negotiable food safety rule.
- Peeled vs. Unpeeled Storage: While both peeled and unpeeled hard-boiled eggs can be stored for about a week, unpeeled eggs generally tend to last slightly longer and maintain their moisture and flavor better due to the protective shell. If you store peeled eggs, it’s a good practice to keep them in a sealed container with a damp paper towel to prevent them from drying out and absorbing fridge odors. Change the paper towel every couple of days if it dries out.
How To Reheat Hard-Boiled Eggs (With Important Cautions)
While hard-boiled eggs are traditionally enjoyed cold directly from the fridge, you might occasionally find yourself wanting to warm them up. It’s important to approach reheating with caution to maintain their texture and avoid potential hazards, as eggs can be tricky to reheat.
- Best Eaten Cold or Room Temperature: Generally, hard-boiled eggs are at their best when enjoyed cold or allowed to come to room temperature after refrigeration. Reheating can sometimes noticeably alter their texture, making the whites tougher or the yolks drier and more chalky.
- Recommended Reheating Method (Boiling Water): If reheating is a must, keeping the shell on is highly recommended. Place the unpeeled hard-boiled egg(s) into a pot of gently boiling water for no more than 3 minutes. This method gently warms the egg all the way through without drastically changing its cooked texture. Immediately transfer to a plate and peel once cool enough to handle.
- Microwave Reheating (Use Extreme Caution and Generally Not Recommended): Microwaving a hard-boiled egg can be quite risky due to the way microwaves heat food. The rapid heating can cause steam to build up quickly inside the egg, leading to a potential explosion – either in the microwave itself or, more dangerously, when you bite into it. If you absolutely choose this method, microwave in very short 10-second increments, keeping the egg covered, and watching it extremely closely. It is generally not a recommended method for safety and quality reasons.
- Risk of Further Overcooking: Be aware that any reheating method carries the inherent risk of further cooking the egg. This means you risk turning creamy yolks into chalky ones, making tender whites rubbery, or causing that undesirable grey-green ring to appear around the yolk, even if it wasn’t there initially.
How Do You Know If Hard-Boiled Eggs Have Gone Bad?
Food safety is paramount, especially with protein-rich foods like eggs. Here’s how to confidently determine if your hard-boiled eggs are no longer safe to eat and when it’s time to discard them:
- The All-Important Sniff Test: This is your primary and most reliable indicator. A fresh, properly stored hard-boiled egg has a very faint, almost odorless smell. If your egg emits any sour, sulfurous, or foul odor – often described as a strong, pungent “rotten egg” smell – it’s a definitive sign that it has gone bad and must be discarded immediately. Trust your nose!
- Visual Cues (Less Common but Important): While less common for hard-boiled eggs if stored correctly, any visible signs of mold on the shell or peeled egg white, or unusual discoloration beyond the typical greenish ring of an overcooked yolk, is a clear indication of spoilage. The whites should be opaque and firm, and the yolk should be uniformly yellow (or slightly orange, depending on the chicken’s diet).
- Texture Change: If the egg whites feel unusually slimy or chalky, or the yolk has an odd, gritty consistency that wasn’t there before, these can be subtle indicators of spoilage.
- The Golden Rule: When in Doubt, Toss It Out: This timeless food safety principle applies strongly to hard-boiled eggs. If you are even slightly unsure about the freshness or safety of an egg, it is always the safest course of action to err on the side of caution and throw it away to avoid any potential health risks. Never gamble with food safety.
More Culinary Tutorials You May Enjoy
Expand your cooking skills and explore more delicious possibilities with these other helpful guides and recipes from our kitchen:
- How to Make Perfect Soft-Boiled Eggs – Master the art of runny yolks.
- How to Poach an Egg Flawlessly – Achieve restaurant-quality poached eggs every time.
- Creating Delicious Cauliflower Rice – A healthy and versatile low-carb alternative.
- How to Bake the Perfect Potato – Tips for crispy skins and fluffy interiors.
We genuinely hope this detailed guide empowers you to consistently create perfect hard-boiled eggs with creamy yolks and easy-to-peel shells. These simple yet powerful techniques will ensure your eggs are always a joy to eat, whether enjoyed on their own as a healthy snack or incorporated into more elaborate dishes. We encourage you to try these methods, experiment to find your favorite, and confidently add this fundamental culinary skill to your repertoire!
If you try any of these recipes or methods and love the results, please share your experience and culinary creations with us! Use my hashtag #CookinWithMima to share your photos and stories with me on INSTAGRAM for a chance to be featured in my story! Also, make sure to follow Cookin’ With Mima on FACEBOOK, INSTAGRAM, and PINTEREST for all the latest recipes, cooking tips, and culinary inspiration. Your engagement truly means a lot!
Print Recipe
How to Make The Hard-Boiled Eggs
Mariam Ezzeddine
14 minutes
14 minutes
6 servings
Ingredients
- 6 whole eggs
Instructions
Method 1: Cold Water Start
-
Place the eggs into the saucepan, fill the saucepan so that there’s 1 inch of cold water covering it, and bring it to a boil.
-
Once it has boiled, remove the pan from the heat with the lid on. Do not lift the lid.
-
Let the eggs sit for 10 to 12 minutes.
-
Once done, transfer the eggs from the hot water with a slotted spoon and dunk them into the ice water.
-
Allow the eggs to cool in the ice bath for at least 5 minutes before peeling.
Method 2: Simmering Water Start
-
Fill the saucepan ¾ full of cold water and bring it to a boil. Once it has boiled, lower the heat to a gentle rolling simmer.
-
Using a large slotted spoon, gently add your eggs into the saucepan one by one.
-
Simmer the eggs for 12 to 14 minutes.
-
Once done, quickly remove the eggs from the water and plunge them into the ice water.
-
Allow the eggs to cool in the ice bath for at least 5 minutes before peeling.
Method 3: Instant Pot (5-5-5 Method)
-
Add the Instant Pot rack to the bottom of the Instant Pot liner.
-
Place eggs onto the rack and add 1 cup of cold water.
-
Close the lid, set the valve to sealing, and cook on high pressure for 5 minutes.
-
Allow a 5-minute Natural Pressure Release, then Quick Release any remaining pressure.
-
Immediately remove the eggs and dunk them into the ice water for at least 5 minutes before peeling.
Method 4: Oven Baked
-
Preheat the oven to 325F (160C).
-
Place eggs in a muffin tin and bake for 30 minutes.
-
Once done, quickly remove the eggs from the oven and plunge them into the ice water.
-
Allow the eggs to cool in the ice bath for at least 5 minutes before peeling.
Notes
Nutrition
- Serving Size: 1 large egg
- Calories: 70 kcal
- Carbohydrates: 1g
- Protein: 6g (Corrected from original 1g, which is likely a typo for eggs)
- Fat: 5g (Corrected from original 1g, which is likely a typo for eggs)
- Saturated Fat: 2g (Corrected from original 1g)
- Cholesterol: 185mg (Corrected from original 4mg)
- Sodium: 62mg (Corrected from original 1mg)
- Potassium: 69mg (Corrected from original 1mg)
- Sugar: 0g (Corrected from original 1g)
- Vitamin A: 250IU (Approx. 5% DV)
- Calcium: 25mg (Approx. 2% DV)
- Iron: 0.8mg (Approx. 4% DV)