
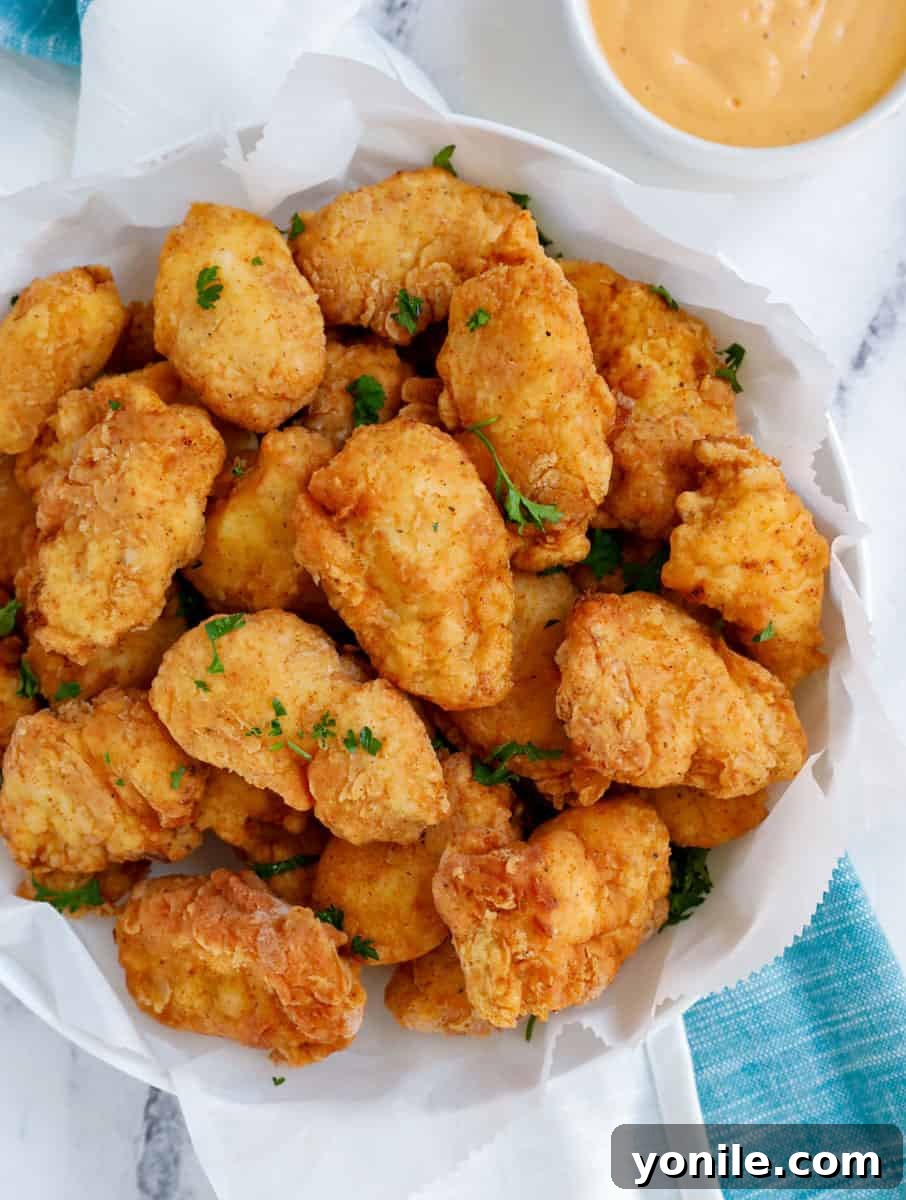
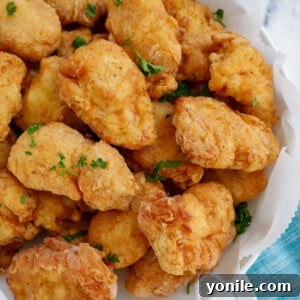
Welcome to the ultimate guide for crafting the most incredible Homemade Chicken Nuggets you’ve ever tasted! Prepare to elevate your snack game and transform weeknight dinners with these golden, crispy, and incredibly juicy bites. Forget those mysterious, processed store-bought versions; making your own chicken nuggets from scratch is surprisingly simple, deeply satisfying, and undeniably delicious. This recipe promises a culinary experience far superior to anything you’ll find in the freezer aisle, offering a perfect blend of tenderness on the inside and an irresistible crunch on the outside. Whether you’re planning a casual family meal, a fun game day spread, or simply seeking a comforting snack, these homemade nuggets are guaranteed to be a crowd-pleaser for every age and occasion. Get ready to impress your taste buds and loved ones with a recipe that’s quick to prepare and even quicker to disappear!
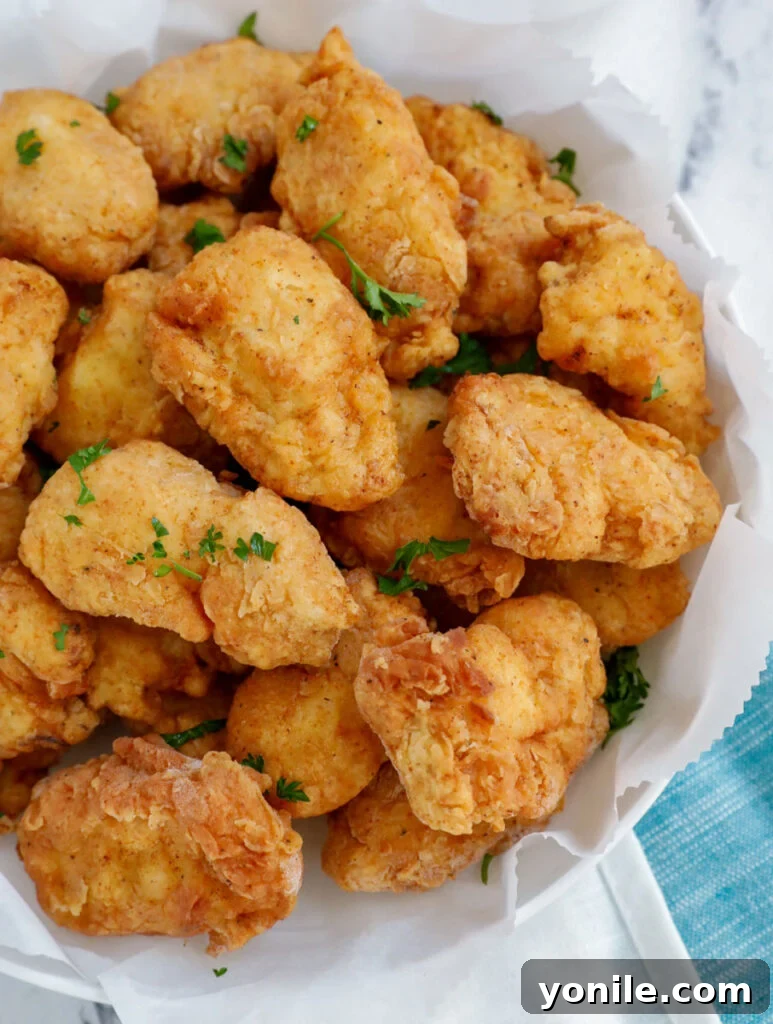
What makes these homemade chicken nuggets truly stand out? It’s all about the secret to their succulent interior and incredibly crunchy coating. Each piece of tender chicken is lovingly soaked in a rich, creamy buttermilk marinade, infused with a hint of sweet pickle juice for a unique savory-sweet tang that enhances the chicken’s natural flavor and ensures unparalleled juiciness. This perfectly marinated chicken is then coated in a meticulously seasoned flour mixture, creating that signature crisp exterior that crackles with every bite. The result is a gourmet take on a classic comfort food, far surpassing any fast-food alternative. These little golden beauties are versatile enough to be a fantastic appetizer, a delightful lunch, a satisfying dinner, or the star of your next movie night. They’re not just food; they’re an experience waiting to happen!
Craving more amazing chicken creations? Explore our collection of delightful recipes that bring exciting flavors to your table. We recommend trying our Oven Baked Chicken Cutlets for a lighter option, our bold Korean Fried Chicken Tenders for an adventurous twist, and our playful Homemade Popcorn Chicken for another bite-sized favorite.
Why You’ll Fall in Love with This Homemade Chicken Nuggets Recipe
Once you try this recipe, you’ll understand why it quickly becomes a family favorite. Here’s what makes these homemade chicken nuggets truly exceptional:
- Unbelievably Juicy Chicken: The secret to their incredible tenderness lies in the buttermilk marinade. Buttermilk contains lactic acid, which gently breaks down the chicken fibers without toughening them, resulting in supremely moist and tender chicken. The addition of sweet pickle juice not only adds a fantastic subtle tang that balances the richness but also further contributes to the chicken’s moisture, locking in all the delicious flavors during cooking. Each nugget is a burst of juicy perfection.
- Perfectly Crispy Coating: Achieving that satisfying crunch is simpler than you think! Our special seasoned flour coating, enhanced with a touch of cornstarch, ensures an extra-crispy exterior that’s light, airy, and incredibly flavorful. This double-dredging technique creates a robust crust that holds up beautifully, delivering that coveted textural contrast between the crunchy outside and the tender inside. You’ll hear the delightful crispness with every bite!
- Effortlessly Easy to Make: Ditch the processed, frozen nuggets for good! This recipe is designed for ease, allowing you to whip up a batch of delicious, wholesome chicken nuggets with minimal fuss. The steps are straightforward, making it an ideal recipe for home cooks of all skill levels. Plus, it yields a generous batch, perfect for feeding a hungry family, stocking up on freezer meals, or preparing for your next gathering. It’s a versatile dish that serves beautifully as a main course, a fun appetizer, or a delightful snack.
- Customizable Flavor Profile: While the base recipe is fantastic as is, it’s also incredibly adaptable. You can easily adjust the seasonings in your flour mix to suit your preference, adding a pinch of cayenne for a spicy kick, garlic powder for more savory depth, or dried herbs for an aromatic touch. Make it your own and discover endless flavor possibilities!
Essential Ingredients for Perfect Homemade Chicken Nuggets
Crafting these delectable chicken nuggets requires a few simple, fresh ingredients that come together to create magic. Here’s what you’ll need to gather:
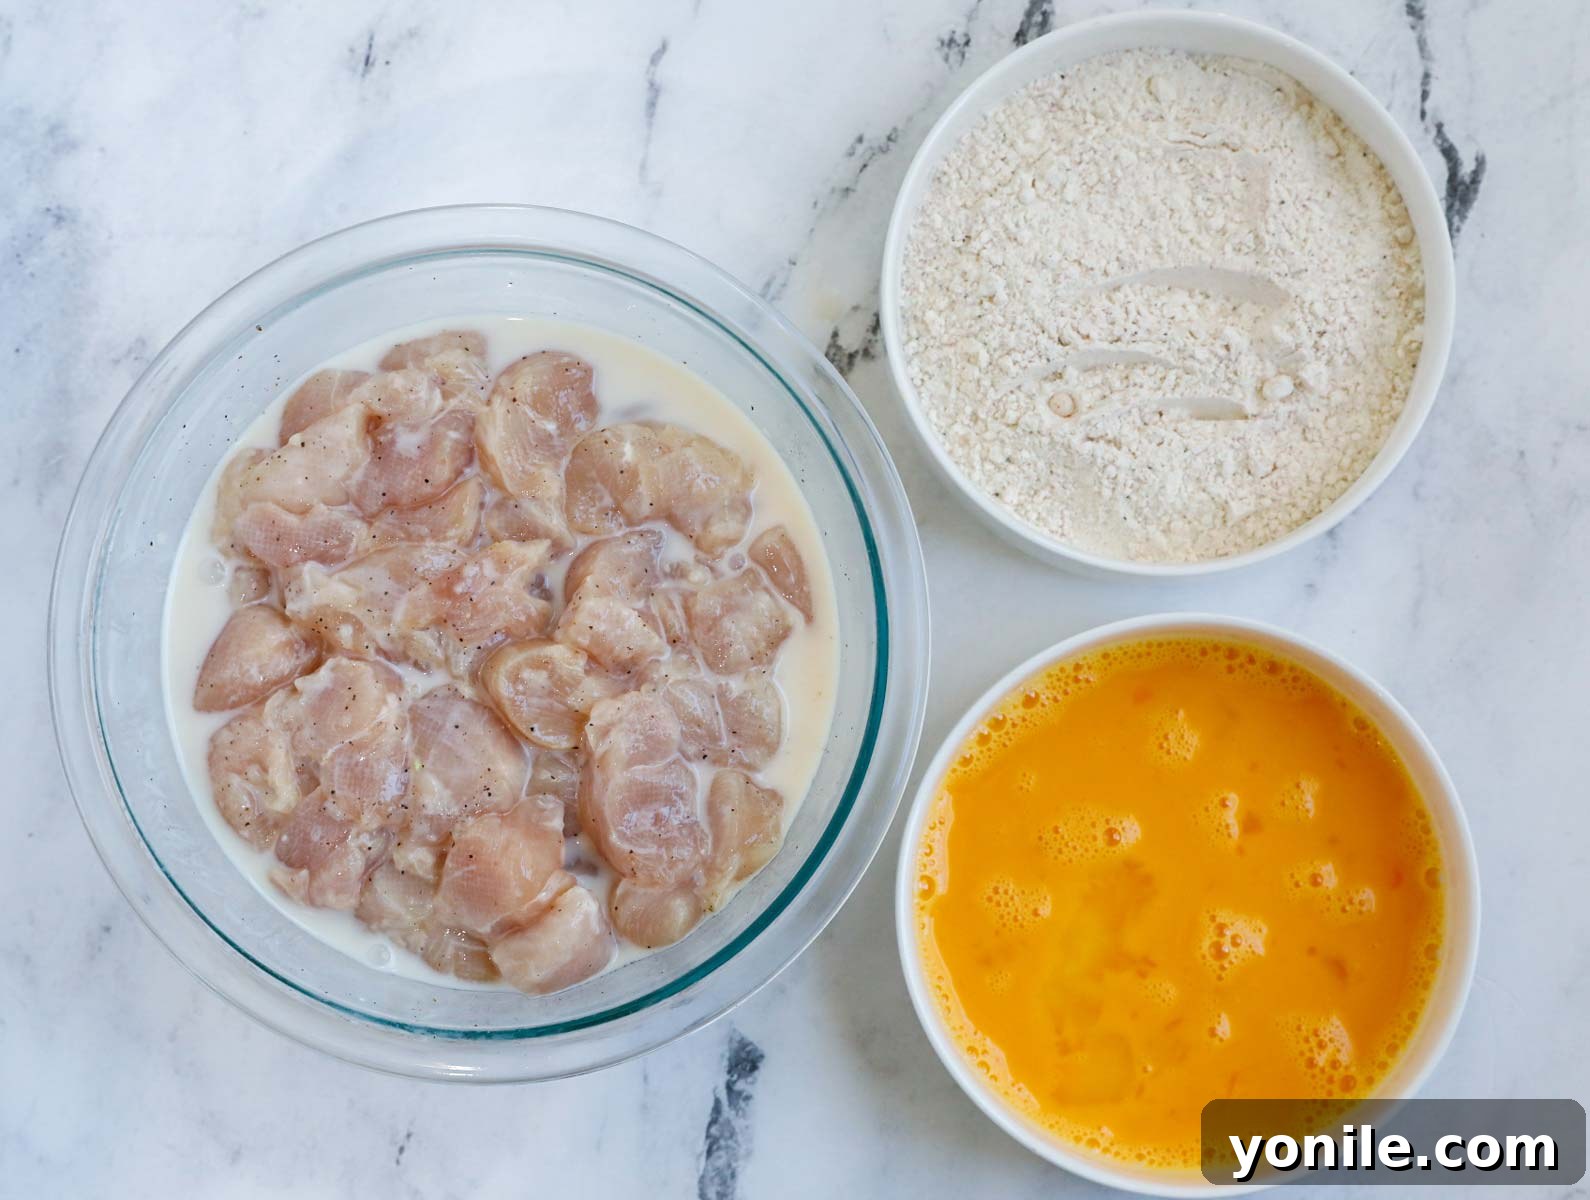
- Chicken Tenderloins: We highly recommend using chicken tenderloins for this recipe. Their naturally moist and tender texture is ideal for nuggets, ensuring every bite is incredibly succulent. If tenderloins aren’t available, boneless, skinless chicken breasts can be used; simply cut them into uniform 1-inch cubes.
- Buttermilk: This is a crucial ingredient for tenderizing the chicken. The lactic acid in buttermilk gently breaks down the proteins, resulting in an exceptionally moist and flavorful interior. Full-fat buttermilk is preferred for richness, but low-fat will also work.
- Sweet Pickle Juice: Don’t discard that pickle juice! It’s a game-changer, infusing the chicken with a unique sweet, tangy, and savory flavor that truly elevates these nuggets beyond the ordinary. It’s essentially the brine found in a jar of sweet pickles.
- Black Pepper: A foundational seasoning that adds a classic peppery warmth and enhances the overall savory profile of the chicken. Freshly ground black pepper offers the most potent flavor, but pre-ground works perfectly fine.
- Whole Eggs: Eggs act as the essential binding agent, helping the seasoned flour coating adhere securely to the chicken pieces. Whisked eggs create a bridge between the wet marinated chicken and the dry flour mixture.
- Neutral Oil for Frying: You’ll need enough oil for deep frying. Canola oil is a popular choice due to its high smoke point and neutral flavor, which won’t overpower the chicken. Other excellent alternatives include vegetable oil, corn oil, or if you prefer a healthier option with a high smoke point, avocado oil.
For the Crispy Flour Seasoning Mix:
- All-Purpose Flour: The base for our crispy coating, providing structure and absorbency.
- Paprika: Adds a beautiful golden hue and a mild, sweet, peppery flavor that complements the chicken perfectly. You can use sweet or smoked paprika for different flavor nuances.
- Salt: Essential for seasoning both the chicken and the coating, bringing out all the flavors.
- Black Pepper: A second layer of peppery flavor for the coating, ensuring seasoning throughout.
- Corn Starch: This is the secret ingredient for extra crispiness! Cornstarch helps create a light, super crunchy coating that stays crisp longer.
How to Make Delicious Homemade Chicken Nuggets: Step-by-Step
Follow these easy steps to create your own batch of perfectly crispy and juicy homemade chicken nuggets:
- Prepare the Dry Flour Mix: In a medium bowl, combine the all-purpose flour, paprika, salt, black pepper, and cornstarch. Whisk them thoroughly to ensure all the spices are evenly distributed. Set this mixture aside.
- Prepare the Chicken: Start by trimming any excess fat or sinew from the chicken tenderloins. If using chicken breast, cut it into uniform 1-inch cubes. Uniform pieces will ensure even cooking.
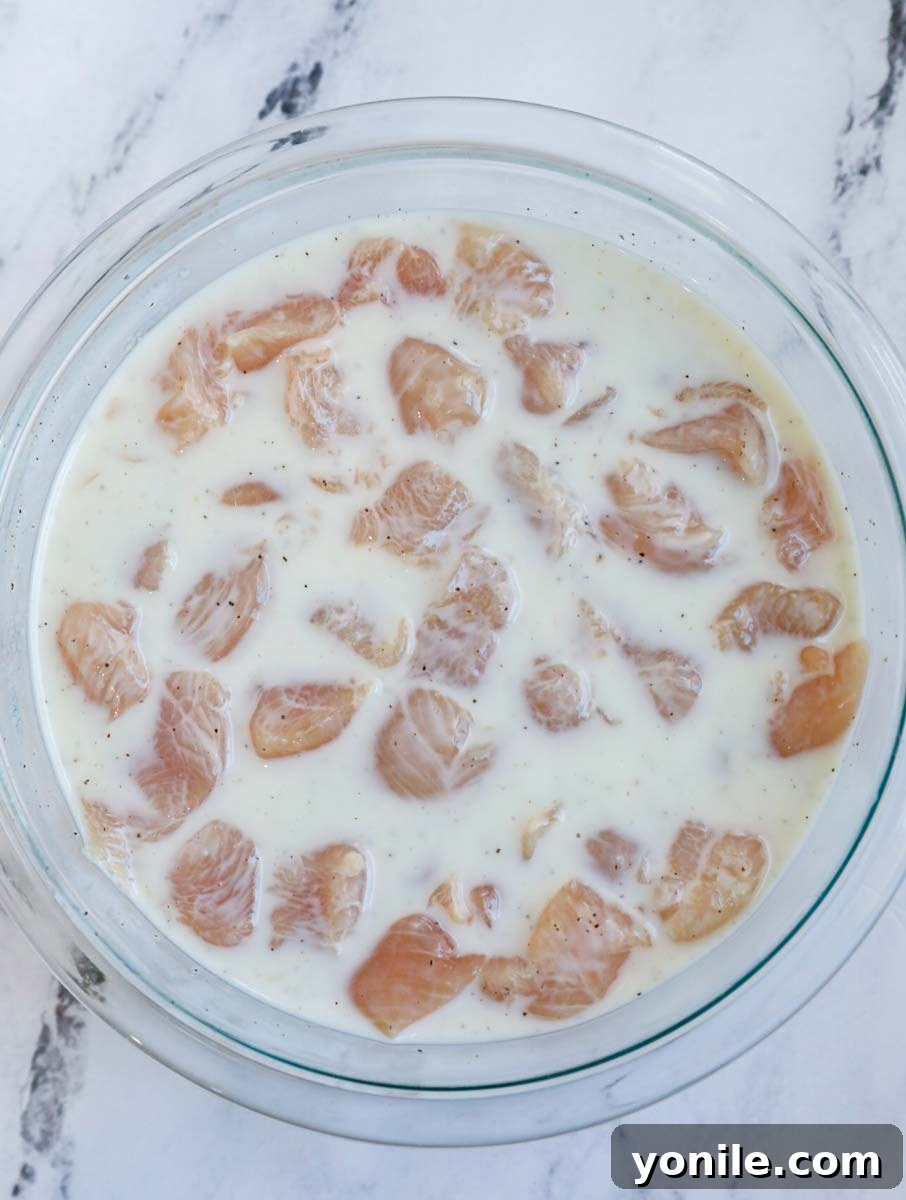
- Marinate the Chicken for Tenderness: Place the trimmed and cubed chicken pieces into a large bowl. Pour in the buttermilk, sweet pickle juice, and black pepper. Mix everything well to ensure all chicken pieces are coated. Cover the bowl tightly with plastic wrap and refrigerate for at least 1 hour. For optimal tenderness and flavor infusion, you can marinate the chicken for up to 4 hours, or even overnight if time permits. This step is key to juicy nuggets.
- Prepare the Egg Wash: In a separate shallow bowl, whisk the two whole eggs until well combined. This will be the middle layer of your breading station.
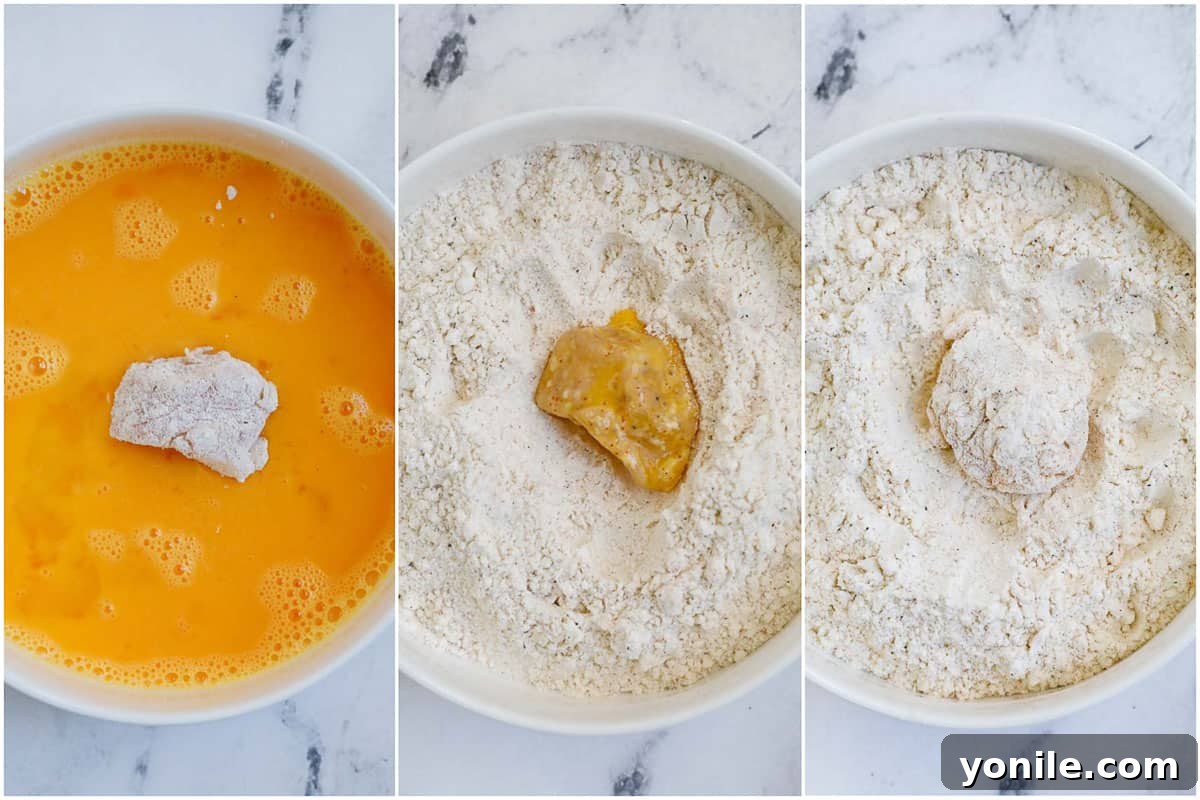
- Double-Coat for Ultimate Crispiness: Set up a breading station with three bowls: the seasoned flour mix, the whisked eggs, and the seasoned flour mix again. Take a marinated chicken piece, shake off any excess liquid, and first dredge it in the flour mixture, ensuring it’s fully coated. Next, dip it into the egg wash, allowing any excess to drip off. Finally, return the chicken to the flour mixture for a second, generous coating. Press the flour gently onto the chicken with your fingers to ensure it adheres well and creates a thick, crispy crust. Place the coated nugget on a clean baking sheet or plate and repeat with the remaining chicken pieces.
- Heat the Oil: Pour enough neutral oil (like canola or vegetable) into a deep skillet or Dutch oven to reach a depth of about 2-3 inches. Heat the oil over medium heat until it reaches 350°F (175°C). If you don’t have a thermometer, you can test the oil by dropping a tiny pinch of flour into it; if it sizzles vigorously, it’s ready.
- Fry in Batches: Carefully place a few coated chicken nuggets into the hot oil, ensuring not to overcrowd the pan. Overcrowding will lower the oil temperature and result in soggy, rather than crispy, nuggets. Work in small batches to maintain consistent oil temperature.
- Cook to Golden Perfection: Fry the chicken nuggets for 3-4 minutes per batch, or until they turn a beautiful golden brown and are cooked through. The internal temperature should reach 165°F (74°C). Use a slotted spoon or spider to carefully remove the cooked nuggets from the oil.
- Drain and Keep Warm: Transfer the fried nuggets to a baking sheet lined with paper towels to drain excess oil. To keep the cooked batches warm and crispy while you finish frying the rest, you can place the baking sheet in a preheated oven set to a low temperature (around 200°F or 95°C).
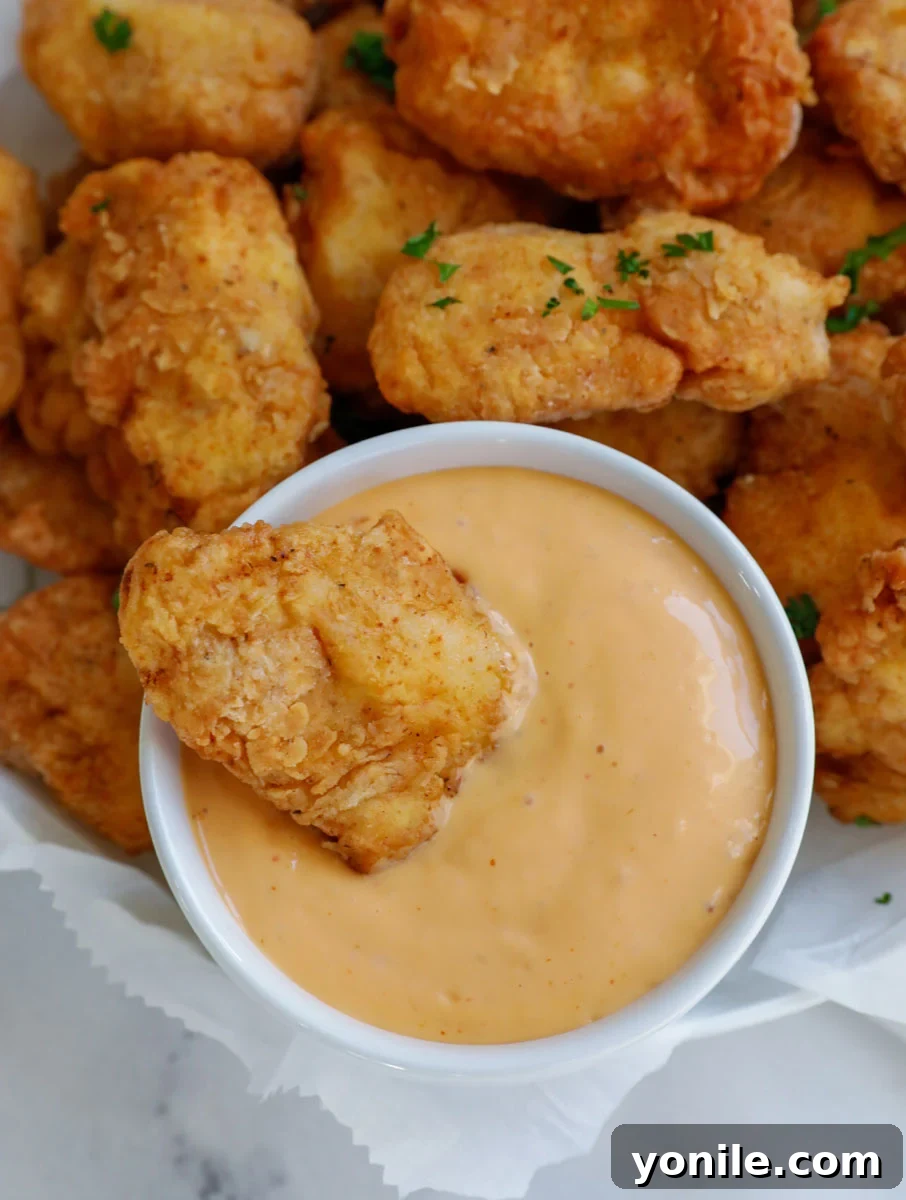
- Serve and Enjoy: Once all the nuggets are cooked, transfer them to a serving platter. Serve immediately with your favorite dipping sauces like honey mustard, BBQ sauce, ranch, or ketchup. Enjoy your incredibly delicious homemade chicken nuggets!
Expert Tips for the Best Homemade Chicken Nuggets
Achieving restaurant-quality chicken nuggets at home is easy with a few insider tips:
- Choose the Right Pan for Frying: For deep frying, ideally use a deep skillet, Dutch oven, or cast-iron pot. The depth helps contain oil splatter and allows the chicken to be fully submerged for even cooking and browning.
- Don’t Skimp on Marinating Time: The buttermilk marinade is crucial for flavor and tenderness. Allow the chicken to rest in the buttermilk for at least an hour. If you have more time, marinating for 2-4 hours, or even overnight, will yield even juicier and more flavorful results.
- Avoid Overcrowding the Pan: Frying in small batches is essential. Overcrowding significantly drops the oil temperature, leading to greasy, less crispy nuggets. Give each nugget space to fry properly and achieve that perfect golden-brown crisp.
- Keep Cooked Nuggets Warm: As you fry in batches, transfer the cooked nuggets to a wire rack set over a baking sheet in a preheated oven (around 200°F or 95°C). This keeps them warm and prevents them from getting soggy while you finish cooking the rest.
- Select a Neutral Frying Oil: Opt for oils with a high smoke point and neutral flavor, such as canola oil, vegetable oil, or corn oil. These oils won’t impart unwanted flavors to your delicious chicken. Avoid olive oil or butter for deep frying as they have lower smoke points.
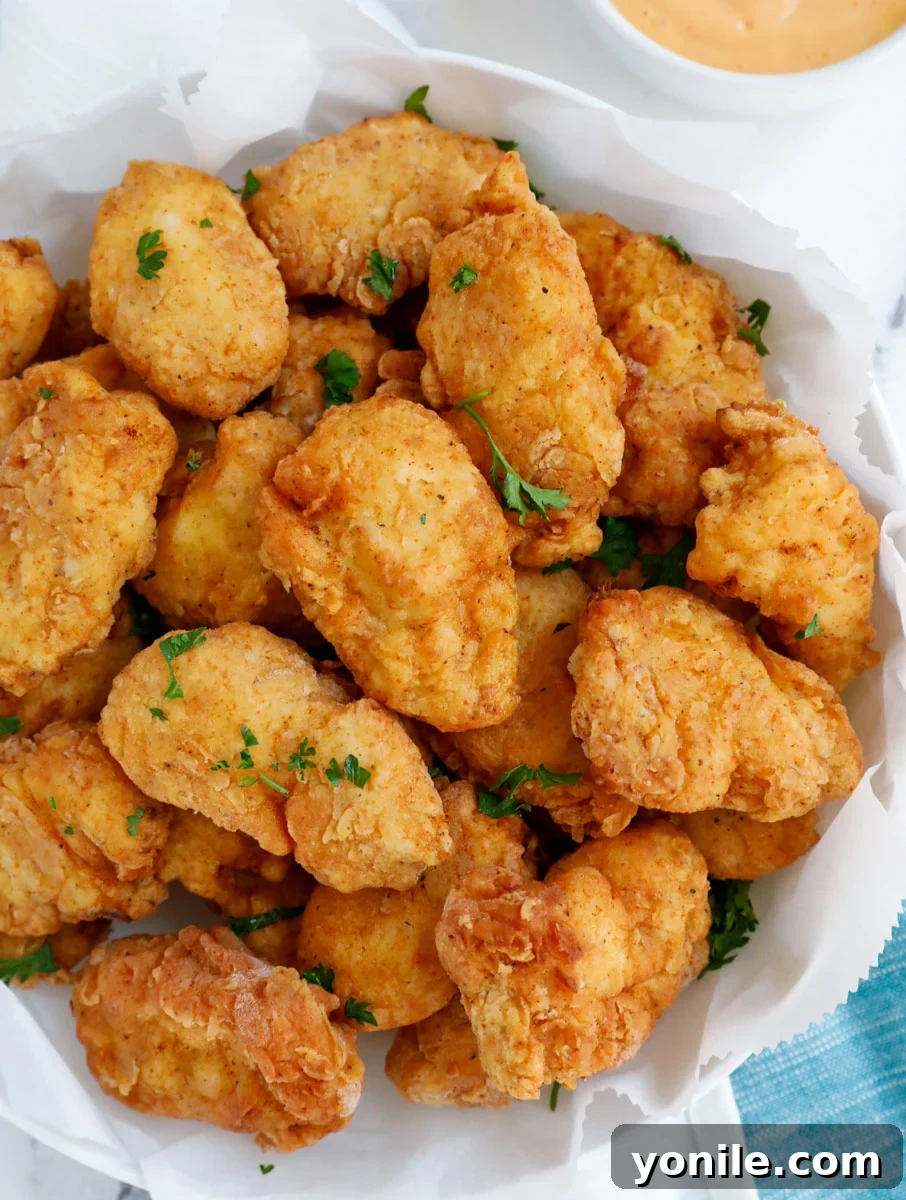
- Add a Pop of Freshness: For an extra touch of color and a burst of freshness, sprinkle your cooked nuggets with some finely chopped fresh parsley before serving.
- Maintain Oil Temperature: Use a kitchen thermometer to monitor your oil temperature. Keeping it consistently at 350°F (175°C) is key to evenly cooked and perfectly crispy nuggets. If the oil is too cool, they’ll be greasy; too hot, and they’ll burn on the outside before cooking through.
- Rest Before Frying: After breading, letting the chicken nuggets rest for 10-15 minutes helps the coating adhere better, reducing the chance of it falling off during frying.
Frequently Asked Questions About Homemade Chicken Nuggets
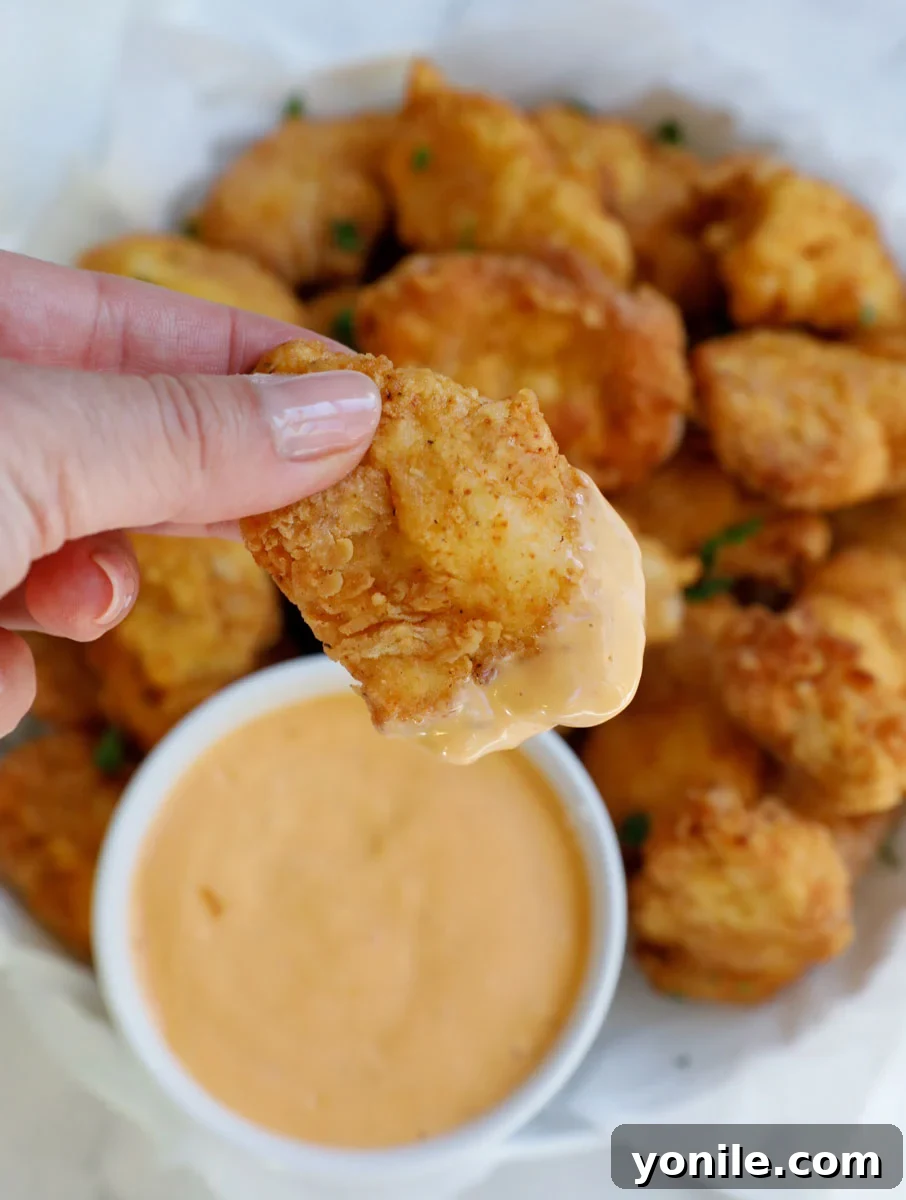
These Homemade Chicken Nuggets are incredibly versatile and pair well with a wide array of sides and dips, making them perfect for any meal or snack. For classic pairings, consider serving them with Crispy Air Fryer Sweet Potato Fries or crispy regular French fries. Other fantastic options include Baked Zucchini Fries for a healthier twist, creamy Homemade Mashed Potatoes, or flavorful Oven Roasted Baby Potatoes. For lighter options, a fresh garden salad or coleslaw provides a refreshing contrast. As for dipping sauces, the possibilities are endless! Classic ketchup and mustard are always winners, but don’t stop there. Try homemade honey mustard, tangy BBQ sauce, cool ranch dressing, spicy sriracha mayo, or a sweet and sour sauce to truly elevate your nugget experience.
Absolutely! Air frying is a fantastic way to achieve a similar crispiness with less oil. To air fry your homemade chicken nuggets: First, preheat your air fryer to 375°F (190°C). Arrange the breaded nuggets in a single layer in the air fryer basket, ensuring they are not overcrowded. This allows the hot air to circulate evenly. Generously spray the nuggets with olive oil spray or another neutral cooking spray. Air fry for 8-10 minutes, flipping them halfway through and spraying the other side again to ensure even browning and crispiness. Cooking time may vary depending on the size of your chicken pieces and your specific air fryer model, so check for doneness. Continue working in batches until all nuggets are cooked through and golden brown. The internal temperature should be 165°F (74°C).
Yes, baking is another great method for a less indulgent version of these crispy nuggets. After you’ve prepped and breaded your chicken nuggets: Preheat your oven to 400°F (200°C). Line a baking sheet with parchment paper or a non-stick wired rack (for extra crispiness underneath), leaving a little space between each nugget to prevent overcrowding. Lightly spray the nuggets generously with olive oil spray. Bake in the preheated oven for 12-15 minutes, flipping them halfway through the cooking time. You can respray them with oil after flipping for even browning. The cooking time might vary slightly based on the size of your nuggets, so keep an eye on them. The best indicator of doneness is an internal temperature of 160-165°F (71-74°C) using a meat thermometer.
Leftover homemade chicken nuggets are a real treat! To store them, allow them to cool completely to room temperature, then place them in an airtight container in the refrigerator for up to 3 days. When you’re ready to reheat, avoid the microwave, as it can make them soggy. For best results, place the cold nuggets on a baking sheet and bake them in a preheated oven at a medium setting, around 350°F (175°C), for about 10-15 minutes, or until they are heated through and regain their crispiness. You can also reheat them in an air fryer at 350°F (175°C) for 5-7 minutes for a quick crisp-up.
Absolutely! These homemade chicken nuggets are wonderfully freezer-friendly, making them perfect for meal prep. Cook the nuggets as directed, but consider cooking them to about 90% doneness if you plan to fully cook them later, as this prevents them from drying out during reheating. Allow the cooked nuggets to cool completely. Then, arrange them in a single layer on a baking sheet and flash freeze for 1-2 hours until solid. This prevents them from sticking together. Once frozen, transfer the solid nuggets to a freezer-safe container or a heavy-duty freezer bag. They can be stored in the freezer for 1-2 months. To reheat from frozen, you can bake them in a preheated oven at 400°F (200°C) for 20-25 minutes, or air fry them at 375°F (190°C) for 12-15 minutes, until heated through and crispy.
Discover More Irresistible Chicken Dishes to Try
If you loved making these homemade chicken nuggets, you’re sure to enjoy these other fantastic chicken recipes from our kitchen:
- Spinach Artichoke Stuffed Chicken Breast
- Grilled Chicken Satay
- Buffalo Chicken Stuffed Peppers
- Air Fryer Boneless Chicken Thighs
- Grilled Chicken Nuggets
We sincerely hope you cherish every bite of this **Homemade Chicken Nuggets** recipe, along with all the culinary delights we share. We encourage you to try it, savor the experience, leave your valuable feedback with a star rating and comment below, and spread the joy by sharing it with your cherished friends and family!
If this recipe becomes a new favorite, please consider leaving a star rating and a comment below to let us know. Your feedback is truly appreciated! Don’t forget to follow Cookin’ With Mima on FACEBOOK | INSTAGRAM | PINTEREST for our latest delicious recipes and engaging posts.
Best Homemade Chicken Nuggets Recipe
By: Mariam Ezzeddine
Prep Time: 20 minutes
Cook Time: 10 minutes
Resting Time: 1 hour
Total Time: 1 hour 30 minutes
Servings: 6 servings
Ingredients
Main Ingredients
- 3 lbs. chicken tenders, cut into 1 inch cubes
- 1 cup full-fat buttermilk
- ½ cup sweet pickle juice
- ½ tsp. black pepper
Dry Flour Mix
- 1 cup all-purpose flour
- 1 tsp. paprika
- 1 tsp. salt
- ½ tsp. black pepper
- 2 tbsps. corn starch
Other Ingredients
- 2 whole eggs
- Canola oil for frying (or other neutral oil)
Instructions
- In a medium bowl, thoroughly mix all the dry flour mix ingredients together (all-purpose flour, paprika, salt, black pepper, corn starch). Set aside.
- Trim the chicken tenders, removing any outer coat film or muscle particles. If using chicken breast, cut into uniform 1-inch cubes.
- Place the cubed chicken in a large bowl. Add 1 cup of buttermilk, ½ cup of sweet pickle juice, and ½ tsp of black pepper. Mix well to ensure all chicken pieces are coated. Cover with plastic wrap and refrigerate for at least 1 hour to marinate. Longer marination (up to 4 hours) will yield even juicier results.
- In another shallow bowl, whisk the 2 whole eggs together to create an egg wash.
- Set up your breading station: one bowl with the seasoned flour mix, one with the whisked eggs, and another with the seasoned flour mix. Take a marinated chicken piece, shake off any excess liquid, and first dredge it generously in the flour mix. Then, dip it into the egg wash, letting excess drip off. Finally, coat it one more time in the flour mix, pressing down gently with your fingers to ensure a good coating. Place the breaded chicken on a lined sheet pan and repeat with the remaining pieces.
- Heat the canola oil in a deep skillet or Dutch oven over medium heat. Maintain a consistent oil temperature of 350°F (175°C) using a kitchen thermometer.
- Working in batches, carefully place a few chicken pieces into the hot oil, making sure not to overcrowd the pan.
- Fry each batch for 3-4 minutes, or until the chicken nuggets are golden brown and cooked through (internal temperature should be 165°F / 74°C).
- Using a slotted spoon, remove the cooked chicken nuggets and place them on a baking sheet lined with paper towels to drain excess oil.
- To keep earlier batches warm and crispy while you finish frying, place the baking sheet in a preheated oven set to a low temperature (around 200°F or 95°C).
- Once all the batches are cooked, serve your homemade chicken nuggets immediately with your favorite dipping sauces. Enjoy!
Video
A video tutorial demonstrating the making of these crispy homemade chicken nuggets is available for visual guidance. This video typically covers the marinating, breading, and frying process, ensuring you achieve perfect results.
Notes
- For best frying results, use a deep pan or Dutch oven.
- Marinating the chicken in buttermilk for at least an hour, or longer, ensures maximum juiciness.
- Always fry in small batches to prevent the oil temperature from dropping and to ensure optimal crispiness.
- Keep cooked nuggets warm in a low oven while you finish frying the remaining batches.
- Use a neutral-flavored oil like canola, corn, or vegetable oil to avoid overpowering the chicken’s natural taste.
- Garnish with fresh parsley for a touch of color and a hint of freshness.
- Please note: Nutritional information provided does not include the amount of oil absorbed during frying.
Nutrition Facts
Approximate nutritional values per serving:
- Serving: 6g
- Calories: 388 kcal
- Carbohydrates: 25g
- Protein: 52g
- Fat: 8g
- Saturated Fat: 2g
- Cholesterol: 151mg
- Sodium: 921mg
- Potassium: 934mg
- Fiber: 1g
- Sugar: 2g
- Vitamin A: 539 IU
- Vitamin C: 3mg
- Calcium: 66mg
- Iron: 2mg
Like this recipe? Rate and comment below!
Your feedback helps us create more delicious recipes for you. Don’t hesitate to share your thoughts and a star rating!