
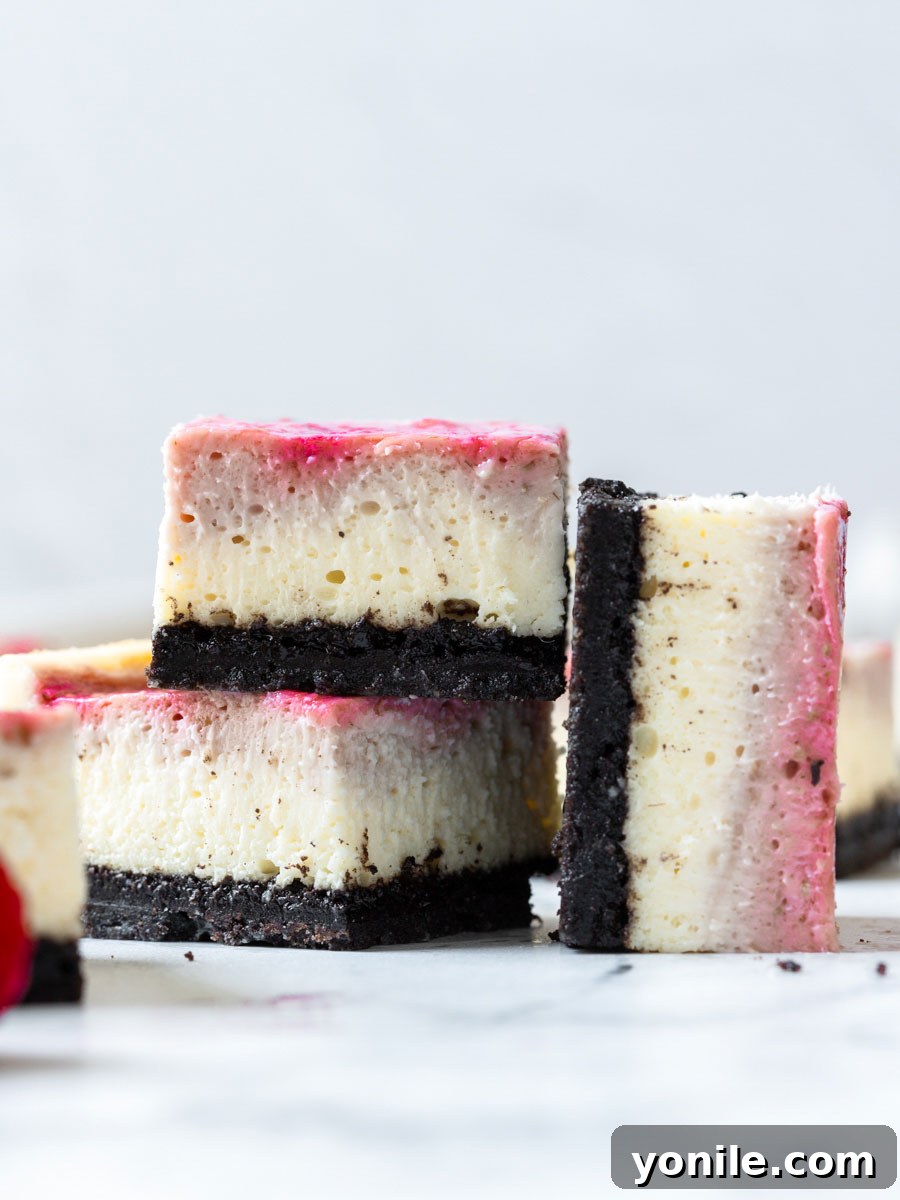
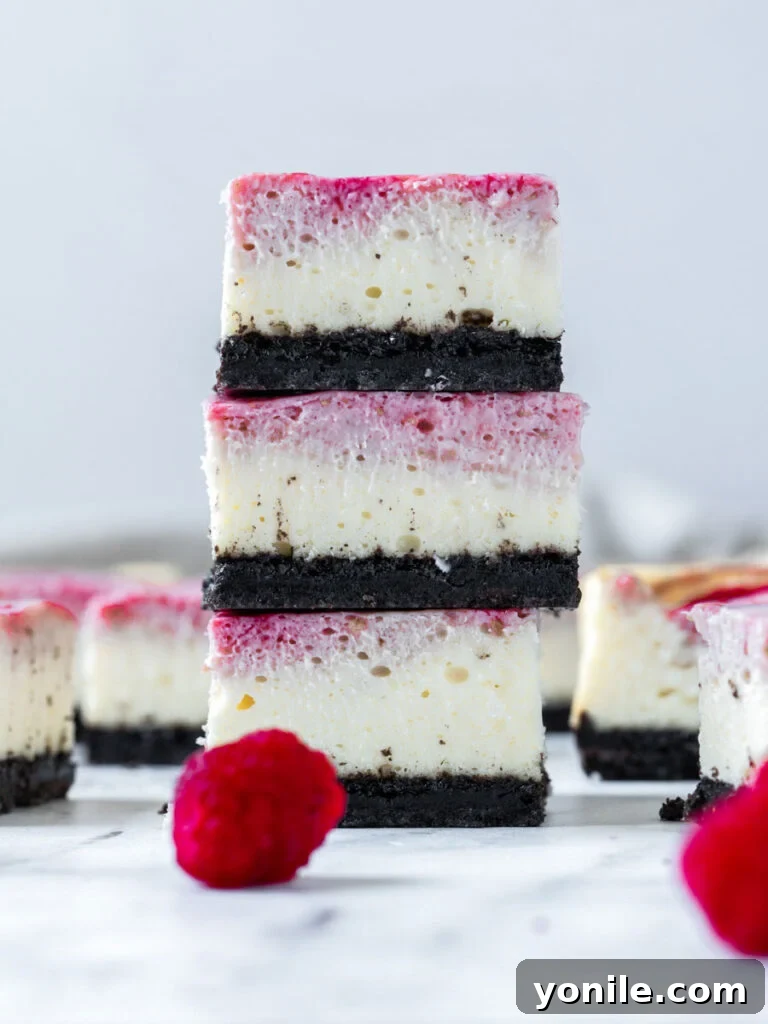
Indulge in a truly delightful dessert experience with these incredibly **Creamy Raspberry Cheesecake Bars**. Boasting a rich, velvety texture and bursting with the sweet, tangy essence of fresh raspberries, these bars are a show-stopping treat that’s surprisingly easy to prepare. Whether you’re hosting a sophisticated dinner party, a casual family gathering, or simply craving a luscious sweet escape, these beautifully swirled cheesecake bars are guaranteed to impress with both their stunning appearance and unforgettable flavor profile. Forget the fuss of a traditional cheesecake – these convenient bar-style treats offer all the decadent taste without the complex baking challenges, making them perfect for any home baker.
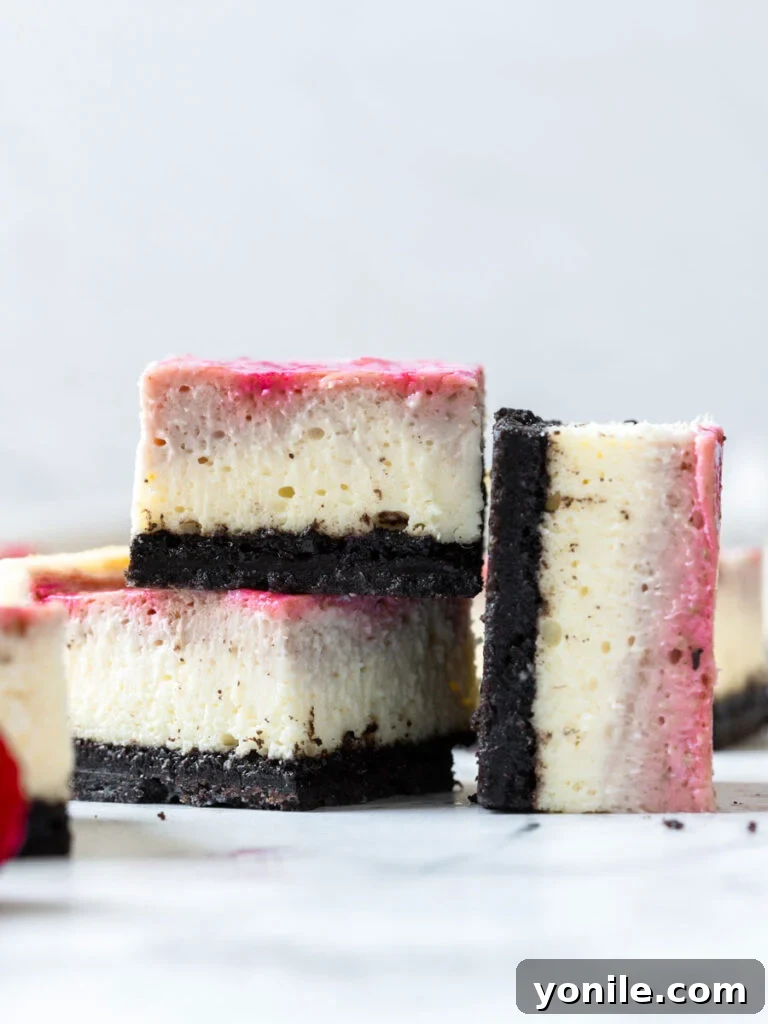
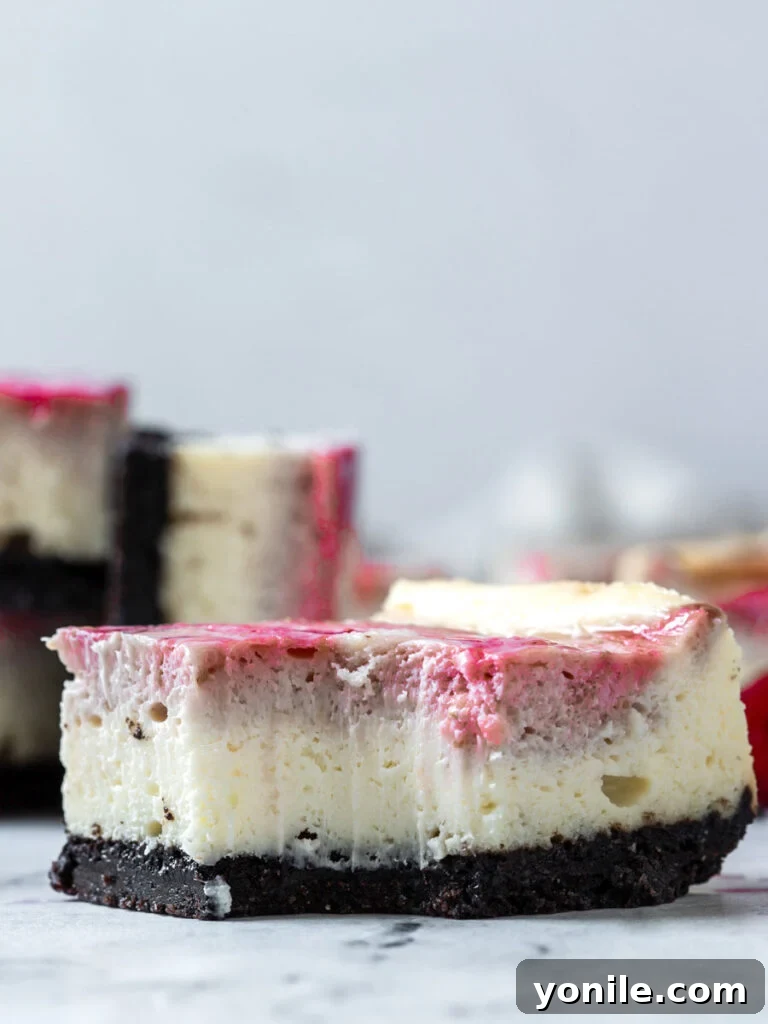
Each bite of these raspberry cheesecake bars delivers a symphony of textures and tastes. Imagine a deeply satisfying, crunchy Oreo cookie crust forming the perfect foundation, topped with an exquisitely smooth, creamy cream cheese filling. This canvas of rich indulgence is then artfully marbled with a vibrant, homemade raspberry puree, creating a beautiful pink swirl that’s as appealing to the eyes as it is to the palate. The contrast between the dark chocolatey crust, the subtle tang of the cheesecake, and the bright fruitiness of the raspberry swirl is simply irresistible. And since they are baked in a standard square pan and sliced into bars, you can leave that cumbersome springform pan in the cupboard!
Seeking more irresistible sweet delights to elevate your baking repertoire? Expand your dessert horizons with other beloved recipes like my elegant Lemon French Madeleines Cakes, which offer a delicate citrus zest, or my hearty and satisfying Double Chocolate Chip Muffins, perfect for a cozy morning treat. Each recipe is crafted to bring joy and deliciousness to your kitchen!
Why You’ll Absolutely Adore This Raspberry Cheesecake Bar Recipe
There are countless reasons why these Raspberry Cheesecake Bars will quickly become a cherished favorite in your dessert collection. They offer all the beloved characteristics of a classic cheesecake but with an enhanced level of convenience and unique flavor twists. Here’s a closer look at what makes this recipe truly special:
- Effortless Baking – No Water Bath Required! One of the most common hurdles with traditional cheesecakes is the intimidating water bath, a method often used to prevent cracks and ensure even baking. With this simplified cheesecake bar recipe, you can completely skip the water bath! This not only saves you time and effort but also makes the baking process less stressful, allowing you to achieve beautiful, smooth cheesecake bars with ease, every single time.
- Irresistible Oreo Cookie Crust. While a graham cracker crust is a classic choice, we take these cheesecake bars to the next level with a rich, dark, and utterly delicious Oreo cookie crust. The chocolatey crunch of the crushed Oreos provides a perfect textural contrast to the creamy filling and adds an extra layer of decadent flavor that complements the tart raspberries beautifully. It’s a simple swap that makes a huge difference in taste and appeal!
- Significantly Shorter Chill Time. Who has the patience to wait overnight for cheesecake to chill? This recipe is designed for those moments when a cheesecake craving strikes and you need a quicker turnaround. Unlike conventional cheesecakes that often require an overnight refrigeration period, these raspberry cheesecake bars firm up perfectly in just 3 hours. This means you can whip them up after lunch and have them perfectly chilled and ready to serve for dessert that very evening, making them ideal for spontaneous gatherings or last-minute sweet cravings.
- Vibrant and Flavorful Raspberry Swirl. The gorgeous raspberry swirl isn’t just for aesthetics; it infuses every bite with a bright, fruity tang that cuts through the richness of the cream cheese, creating a perfectly balanced flavor profile. Using fresh raspberries for a homemade puree ensures a vibrant, authentic fruit flavor that pre-made sauces simply can’t match.
- Perfectly Portioned & Easy to Serve. Baking cheesecake in a pan and slicing it into bars eliminates the hassle of cutting individual slices from a round cake, making serving a breeze. Each bar is a perfectly portioned dessert, ideal for parties, picnics, or simply enjoying individually without the need for plates and forks.
Essential Ingredients for Your Raspberry Cheesecake Bars
Crafting these delectable raspberry cheesecake bars requires a few simple, high-quality ingredients. The key to a truly smooth and rich cheesecake lies in using ingredients at the correct temperature and selecting the right types. Here’s a breakdown of what you’ll need:
- Oreos: The star of our crust! You’ll need about 25 cookies, finely crushed. The entire cookie, including the cream filling, contributes to a rich, chocolatey base that holds together wonderfully.
- Butter: Melted butter is essential for binding the Oreo crumbs into a cohesive crust. Unsalted butter is generally preferred in baking to control the overall saltiness of the dish, but salted butter can also work if that’s what you have on hand.
- Cream Cheese: Crucial for the creamy texture! You’ll need three 8-ounce blocks of full-fat cream cheese, brought to room temperature. Using full-fat ensures the richness and proper setting of the cheesecake. Avoid light or whipped cream cheese from a tub, as they have different fat and moisture contents that will affect the final texture.
- Granulated Sugar: Sweetens both the cheesecake filling and the raspberry puree. It dissolves easily, contributing to a smooth texture without graininess.
- Eggs: Three whole eggs, also at room temperature, help set the cheesecake and contribute to its smooth, custard-like consistency. Adding them one at a time and mixing gently prevents over-incorporation of air, which can lead to cracks.
- Heavy Cream: About 1/3 cup of heavy cream, at room temperature, adds extra richness and a silky mouthfeel to the cheesecake filling. It also helps achieve that desirable smooth texture.
- Vanilla Extract: A splash of pure vanilla extract enhances all the other flavors, adding a warm, comforting note to the cheesecake filling.
- Raspberries: Fresh raspberries are ideal for the vibrant puree, offering the best flavor and color. You’ll need about 1 cup. While fresh is best, frozen raspberries can be used if thawed and drained of excess liquid.
A Detailed Guide: How to Craft Your Own Raspberry Cheesecake Bars
Creating these heavenly raspberry cheesecake bars is a straightforward process when you follow these clear, step-by-step instructions. From the crunchy Oreo crust to the luscious raspberry swirl, each stage is designed for ease and delicious results.
Step-by-Step Instructions:
- 1. Prepare Your Equipment and Oven: Begin by preheating your oven to 350°F (175°C). This ensures your oven is at the correct temperature when the crust is ready. Next, prepare a 9×9 inch baking pan. Line the pan with aluminum foil or parchment paper, making sure to leave an overhang on two opposite sides. This “sling” will make it incredibly easy to lift the entire cooled cheesecake out of the pan for clean, effortless slicing.
- 2. Craft the Perfect Oreo Cookie Crust: In a medium-sized bowl, combine your finely crushed Oreo cookies with the melted butter. Stir these two ingredients together thoroughly until the cookie crumbs are fully moistened and resemble wet sand. This consistency is crucial for a firm crust. Transfer this mixture to your prepared 9×9 inch pan and press it down very firmly and evenly across the bottom. You can use the back of a spoon or the bottom of a flat glass to achieve a compact, uniform layer.
- 3. Bake and Cool the Crust: Place the pan with the pressed crust into the preheated oven and bake for 10 minutes. This short baking period helps to set the crust, making it sturdy. Once baked, remove the pan from the oven and set it aside to cool completely on a wire rack. It’s important for the crust to be cool before adding the cheesecake filling to prevent it from softening too much.
- 4. Adjust Oven Temperature: While the crust cools, reduce your oven temperature down to 325°F (160°C). This lower temperature is ideal for baking the cheesecake filling gently, preventing cracks and ensuring a creamy texture.
- 5. Prepare the Silky Cheesecake Filling: In the bowl of a stand mixer fitted with a paddle attachment, or using a large bowl with a hand mixer, beat the room temperature cream cheese and granulated sugar together on low speed. Mix until the mixture is completely smooth and no lumps remain. Be careful not to overbeat, as incorporating too much air can cause cracks later.
- 6. Incorporate Eggs, Cream, and Vanilla: Add the eggs into the cream cheese mixture one at a time, mixing on low speed just until each egg is combined before adding the next. Make sure to scrape down the sides of the bowl between additions to ensure everything is evenly mixed. Finally, gently mix in the heavy cream and vanilla extract until just combined. Overmixing at this stage can introduce too much air, which we want to avoid. Gently pour this smooth cheesecake filling over the cooled Oreo crust in your prepared pan.
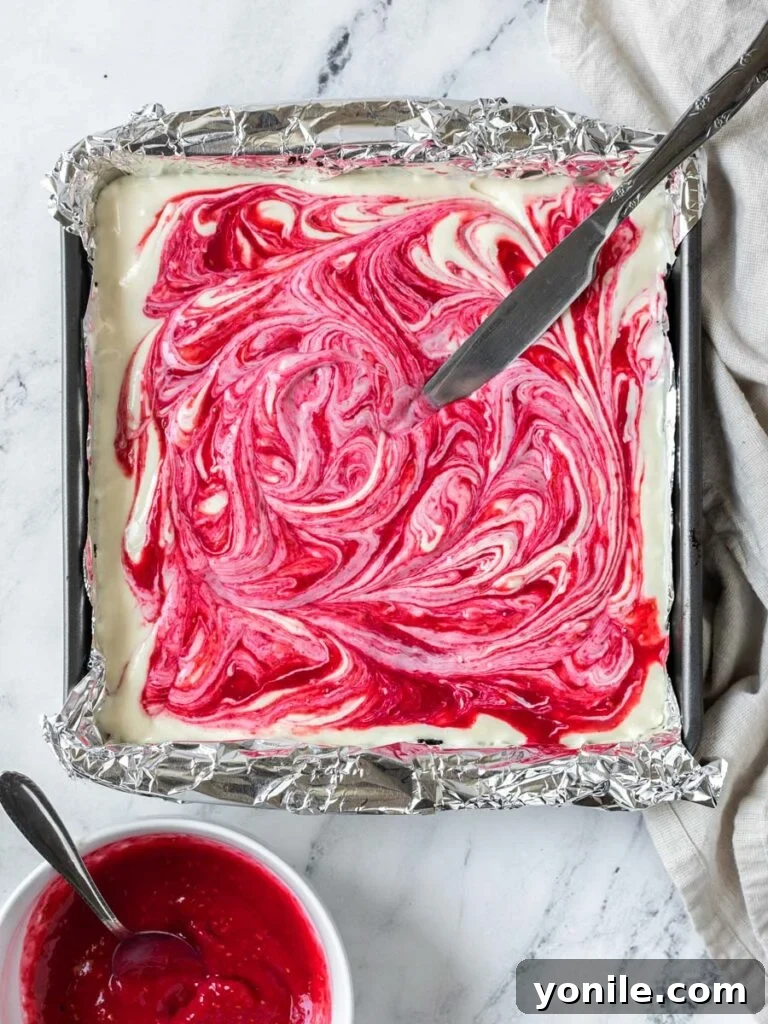
- 7. Create the Vibrant Raspberry Puree and Swirl: In a blender or food processor, combine the fresh raspberries and a tablespoon of granulated sugar. Blend until the mixture is completely smooth. You may strain the puree through a fine-mesh sieve if you prefer a seedless swirl, but it’s optional. Spoon about 1 tablespoon scoops of this vibrant raspberry puree all over the surface of the cheesecake filling. Once the puree is distributed, take a knife, skewer, or toothpick and gently swirl the raspberry puree into the cheesecake filling to create beautiful marble patterns. Don’t overmix; just a few graceful swirls are enough.
- 8. Bake the Cheesecake to Perfection: Carefully transfer the pan to your preheated 325°F (160°C) oven. Bake the cheesecake bars for approximately 30-40 minutes. The cheesecake is ready when the edges are set, but the very center still has a slight jiggle when you gently shake the pan. This indicates a perfectly creamy interior. Once baked, turn off the oven, but leave the cheesecake inside with the oven door closed for another 30 minutes. This slow cooling helps prevent cracks. After 30 minutes, crack the oven door open slightly and allow the cheesecake to sit there until it has completely cooled to room temperature.
- 9. Chill for Optimal Texture: Once the cheesecake has reached room temperature, carefully transfer the pan to the refrigerator. Chill the cheesecake bars for at least 3 hours, or ideally, for 4-6 hours, until they are thoroughly firm and cold. This chilling period is crucial for achieving the perfect dense and creamy cheesecake texture, and it also makes slicing much cleaner and easier.
- 10. Slice and Serve: Once completely chilled and firm, use the foil or parchment paper overhangs to lift the entire cheesecake out of the pan. Place it on a cutting board. For neat, clean slices, run a sharp knife under hot water and wipe it clean between each cut. Slice the cheesecake into 9 or 16 equal-sized bars, depending on your desired portion size. Serve immediately and enjoy!
Expert Tips for Unforgettable Cheesecake Bars
Achieving perfectly smooth, creamy, and crack-free cheesecake bars is easier than you think with a few insider tips. Pay attention to these details, and you’ll be baking like a pro in no time:
- Room Temperature is Non-Negotiable: This is arguably the most critical tip for cheesecake success! Ensure your cream cheese, eggs, and heavy cream are all at room temperature before you begin mixing. Cold ingredients, especially cream cheese, will not combine smoothly with sugar and other ingredients, resulting in a lumpy, inconsistent batter. Lumps can lead to an uneven texture and an unappealing final product. Plan ahead and take these ingredients out of the fridge at least an hour or two before baking.
- Always Opt for Full-Fat Cream Cheese Blocks: For that rich, dense, and creamy cheesecake texture we all crave, always use full-fat cream cheese sold in blocks. Avoid using light cream cheese or spreadable cream cheese in tubs. These variations contain more water and stabilizers, which will alter the consistency of your batter, preventing it from setting correctly and resulting in a runny, less flavorful cheesecake.
- Achieve the Right Crust Consistency: When combining your crushed Oreos and melted butter for the crust, the mixture should have the texture of wet sand. It should easily hold its shape when pressed between your fingers. If it’s too dry, add a tiny bit more melted butter; if it’s too wet, add a few more crushed cookies. This ensures a firm, stable crust that won’t crumble apart when sliced.
- Gentle Mixing is Key for Filling: Be incredibly careful not to overbeat your cheesecake filling once the cream cheese and sugar are smooth. Overmixing, especially after adding the eggs, incorporates too much air into the batter. This excess air can cause the cheesecake to puff up dramatically during baking and then deflate rapidly as it cools, leading to unsightly cracks on the surface. Mix just until ingredients are combined, using low speed.
- The “Jiggle Test” is Your Friend: When checking for doneness, rely on the “jiggle test.” The cheesecake bars are perfectly baked when the edges are set and firm, but the very center (about a 1-2 inch circle) still has a slight, custard-like jiggle. Overbaking will result in a dry, crumbly texture and increase the likelihood of cracks.
- Slow Cooling Prevents Cracks: Allowing the cheesecake to cool gradually in the turned-off oven, first with the door closed and then slightly ajar, is crucial. Rapid temperature changes are a common cause of cracks in cheesecake. This slow, gentle cooling process helps the cheesecake set evenly and prevents sudden shrinking.
Delightful Topping Ideas for Your Cheesecake Bars
While these raspberry cheesecake bars are absolutely sublime on their own, a little extra garnish can elevate them from delicious to truly extraordinary. Here are some creative and delectable ideas to top your bars and add an extra layer of flavor and visual appeal:
- Fresh Whipped Cream with Extra Raspberries: A classic for a reason! A dollop of light, airy homemade whipped cream adds a wonderful lightness and creaminess. Garnish with a few fresh raspberries (and maybe a mint leaf!) for an elegant finish and an extra burst of fresh fruit flavor.
- Rich Chocolate Ganache: For the ultimate chocolate-raspberry pairing, drizzle or spread a smooth, glossy chocolate ganache over the cooled bars. The deep bitterness of dark chocolate beautifully complements the sweet and tart raspberries.
- Sweet Caramel Sauce Drizzle: A luscious caramel sauce adds a buttery, sweet complexity that pairs surprisingly well with the fruitiness of the raspberries and the tang of the cream cheese. A drizzle creates beautiful lines and an inviting aroma.
- Melted Chocolate or Peanut Butter Drizzle: For a quick and easy topping, melt your favorite chocolate (dark, milk, or white) or creamy peanut butter and drizzle it artistically over the bars. This adds a customizable flavor dimension and a fun, modern look.
- Toasted Coconut Flakes: A sprinkle of toasted coconut flakes adds a tropical crunch and a nutty aroma that can be a delightful unexpected twist.
- Crushed Nuts: For added texture and earthy flavor, sprinkle some finely crushed pistachios, almonds, or walnuts over the bars just before serving.
- Lemon Zest or Candied Lemon Peel: A bright counterpoint! A little fresh lemon zest or some delicate candied lemon peel can enhance the brightness of the raspberries and add a sophisticated touch.
- Berry Coulis (Extra Puree): If you have extra raspberry puree or want to make a fresh batch, a spoon of it over each bar can amplify the berry flavor and add a beautiful glossy finish.
Storage and Freezing Tips for Lasting Enjoyment
These raspberry cheesecake bars are so delicious that leftovers might be a rarity, but should you find yourself with a few remaining, proper storage is key to maintaining their freshness and incredible flavor. They’re also excellent candidates for freezing, allowing you to enjoy a taste of summer sweetness long after they’re baked.
Storing Leftovers in the Refrigerator: Once your raspberry cheesecake bars have been sliced and enjoyed, any remaining portions should be promptly transferred to an airtight container. This protects them from absorbing odors from other foods in your fridge and keeps them from drying out. Store the container in the refrigerator, and the bars will remain wonderfully fresh and delicious for up to 5-7 days. Always keep cheesecake chilled until ready to serve.
Freezing Individual Cheesecake Bars: For convenient, single-serving treats you can enjoy anytime, freezing individual bars is an excellent option. First, wrap each individual bar tightly in plastic wrap, ensuring no air can get in. Then, place the wrapped bars into a freezer-safe airtight container or heavy-duty freezer bag. This double layer of protection helps prevent freezer burn. These individually frozen bars can be stored in the freezer for up to one month. To enjoy, simply thaw a bar in the refrigerator for a few hours or at room temperature for about 30-60 minutes until soft enough to eat.
Freezing a Whole Tray of Cheesecake (Uncut): If you’re preparing these bars ahead of time or have a large batch you wish to save, you can freeze the entire uncut tray. Once the cheesecake is completely chilled and firm, cover the entire pan tightly with several layers of plastic wrap, followed by a layer of aluminum foil. This comprehensive wrapping is crucial for protecting the cheesecake from freezer burn. Store the wrapped tray in the freezer for up to three months. To thaw, transfer the entire pan to the refrigerator and allow it to thaw slowly overnight. Once thawed, you can slice and serve as usual.
Frequently Asked Questions (FAQs) About Raspberry Cheesecake Bars
Achieving those picture-perfect, clean slices is simple! The trick is to use a sharp, thin knife. Between each cut, run your knife under hot water and then wipe it completely dry with a clean towel. The warm, clean blade will glide through the cheesecake smoothly, preventing sticking and ensuring beautiful, neat edges for every single bar. For best results, ensure the cheesecake is thoroughly chilled before slicing.
Absolutely! This recipe is wonderfully versatile when it comes to fruit. While raspberries provide a distinct flavor and color, you can easily substitute them with other berries to create different variations. Try making a puree with fresh or thawed strawberries for a classic twist, blueberries for a deeper, earthier note, or even blackberries for a touch of tartness. Each berry will bring its unique flavor profile and a beautiful new color to your cheesecake bars.
Using light cream cheese is generally not recommended for cheesecake recipes, including these bars. Full-fat cream cheese provides the necessary fat content and richness that contributes to the signature creamy, dense, and firm texture of a good cheesecake. Light versions contain more water and less fat, which can make the batter too runny. This often results in a cheesecake that doesn’t set properly, leading to a soft, watery, or crumbly texture. Stick with full-fat blocks of cream cheese for the best results and the most authentic, rich flavor.
If you’ve forgotten to take your cream cheese out of the fridge ahead of time, there are a couple of tricks to speed up the process. The easiest method is to unwrap the blocks of cream cheese and cut them into smaller cubes or pieces. Spread these pieces out on a plate, and they will soften much faster on the counter. Alternatively, you can remove all packaging and place the cream cheese blocks in a microwave-safe bowl. Microwave them in short bursts of 5 to 10 seconds, checking and flipping between each burst, until they are just softened but not melted. Be careful not to overheat it!
Preventing cracks primarily involves managing temperature and mixing. Ensure all ingredients are at room temperature to avoid lumps. Mix the cream cheese and sugar until just smooth, and then add eggs one at a time, mixing only until combined to avoid incorporating too much air. Do not overbake; the center should still be slightly jiggly. Most importantly, cool the cheesecake slowly: first, turn off the oven and leave the cheesecake inside for 30 minutes, then crack the oven door for another 30 minutes, and finally, transfer to room temperature before chilling in the fridge. Sudden temperature changes are the enemy of a smooth cheesecake surface.
Discover More Delightful Desserts You’ll Love
If you’ve fallen in love with these Raspberry Cheesecake Bars, you’ll be thrilled to explore more of my carefully crafted dessert recipes designed to bring joy to your kitchen. From fruity tarts to comforting puddings, there’s something for every sweet tooth:
- Strawberry French Tart: A classic, elegant tart bursting with fresh strawberries and a rich pastry cream.
- Lebanese Rice Pudding: A creamy, aromatic, and subtly spiced dessert that’s both comforting and exotic.
- Blueberry Bundt Cake: A moist, tender cake studded with juicy blueberries, perfect for breakfast or dessert.
- Blueberry Crisp Recipe: A simple yet satisfying dessert with tender baked blueberries and a buttery, crisp oat topping.
- Gluten-Free Banana Chocolate Chip Muffins: Deliciously moist and flavorful muffins, perfect for those seeking a gluten-free option without sacrificing taste.
I genuinely hope you enjoy exploring all the recipes I passionately share with you, and that this delightful Raspberry Cheesecake Bar recipe becomes a cherished favorite in your home. I encourage you to try it, savor every bite, and share your experience with friends and family!
If you recreate this recipe and find it as delicious as I do, please use my hashtag to share your culinary creation with me on INSTAGRAM for a chance to be featured in my story! Also, be sure to follow Cookin’ With Mima on FACEBOOK | INSTAGRAM | PINTEREST to stay updated on all my latest social posts, kitchen tips, and mouthwatering recipes. Happy baking!
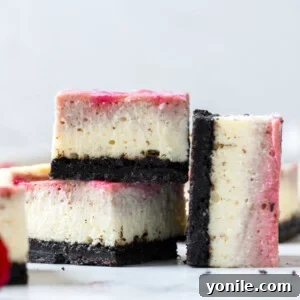
Raspberry Cheesecake Bars
Mariam Ezzeddine
20 minutes
50 minutes
3 hours
4 hours 10 minutes
9 bars
Ingredients
For the Oreo Crust:
- 25 pieces of Oreos, finely crushed (about 2 ½ cups crumbs)
- 6 tablespoons (85g) unsalted butter, melted
For the Cheesecake Filling:
- 3 (8-ounce) blocks full-fat cream cheese, softened to room temperature
- 1 cup (200g) granulated sugar
- 3 large whole eggs, room temperature
- 1/3 cup (80ml) heavy cream, room temperature
- 2 teaspoons vanilla extract
- 1 cup (125g) fresh raspberries
- 1 tablespoon granulated sugar (for raspberry puree)
Instructions
For the Crust:
- Preheat your oven to 350°F (175°C). Line a 9×9 inch square baking pan with aluminum foil or parchment paper, ensuring there is an overhang on two opposite sides for easy removal of the cheesecake later.
- In a small bowl, combine the finely crushed Oreos and the melted butter. Mix until the crumbs are fully moistened and resemble wet sand.
- Firmly press the Oreo mixture evenly into the bottom of the prepared pan. Use the back of a spoon or a flat-bottomed glass to compact it well.
- Bake the crust for 10 minutes. Remove the pan from the oven and place it on a wire rack to cool completely.
For the Cheesecake Filling:
- Once the crust has cooled, reduce the oven temperature down to 325°F (160°C).
- In the bowl of a stand mixer fitted with a paddle attachment, or using a large bowl with a hand mixer, beat the room temperature cream cheese and 1 cup of granulated sugar on low speed until completely smooth and creamy. Ensure there are no lumps.
- Add the eggs one at a time, mixing on low speed just until each egg is fully incorporated before adding the next. Scrape down the sides of the bowl as needed.
- Stir in the heavy cream and vanilla extract. Mix gently on low speed until just combined. Be careful not to overmix, as this can incorporate too much air.
- Gently pour the cheesecake filling over the cooled Oreo crust in the prepared pan.
- To make the raspberry puree: In a blender or food processor, combine the 1 cup of raspberries and 1 tablespoon of granulated sugar. Blend until completely smooth.
- Spoon about 1 tablespoon scoops of the raspberry puree randomly over the surface of the cheesecake filling. Using a knife, skewer, or toothpick, gently swirl the puree into the cheesecake mixture to create an attractive marbled effect.
- Carefully place the pan in the preheated 325°F (160°C) oven. Bake for 30-40 minutes, or until the edges are set and the very center still has a slight, delicate jiggle when gently nudged.
- Turn off the oven but leave the cheesecake inside with the door closed for 30 minutes. After 30 minutes, crack the oven door open slightly and allow the cheesecake to cool completely to room temperature inside the oven.
- Once at room temperature, transfer the cheesecake to the refrigerator and chill for a minimum of 3 hours, or ideally 4-6 hours, until it is thoroughly firm and cold.
- When the cheesecake is fully chilled, use the foil or parchment paper overhangs to lift the entire cheesecake out of the pan. Place it on a cutting board. For clean slices, run a sharp knife under hot water and wipe it dry between each cut. Slice into 9 or 16 equal-sized bars. Serve immediately and enjoy!
Recipe Notes
- It’s paramount to have all your dairy and eggs at room temperature for a smooth, lump-free cheesecake filling. Cold cream cheese, especially, will result in a clumpy batter.
- Always use full-fat cream cheese in block form. Avoid light cream cheese or spreadable cream cheese from tubs, as their composition will prevent the cheesecake from setting correctly.
- The Oreo crust mixture should resemble wet sand – firm enough to hold its shape when pressed. Adjust with more melted butter or crushed Oreos if needed.
- Exercise caution not to overbeat your cheesecake filling. Excess air incorporated into the batter can cause the cheesecake to puff up and then deflate, leading to undesirable cracks during or after baking.
- Cooling the cheesecake gradually in the turned-off oven and then slowly to room temperature is key to preventing cracks. Avoid sudden temperature changes.
Nutrition
Carbohydrates: 50g |
Protein: 2g |
Fat: 18g |
Saturated Fat: 8g |
Polyunsaturated Fat: 3g |
Monounsaturated Fat: 6g |
Trans Fat: 0.3g |
Cholesterol: 32mg |
Sodium: 136mg |
Potassium: 65mg |
Fiber: 1g |
Sugar: 38g |
Vitamin A: 382IU |
Vitamin C: 4mg |
Calcium: 22mg |
Iron: 1mg