

Unlock the secret to an irresistibly rich and decadent treat with this incredibly easy Homemade Caramel Sauce recipe! Forget store-bought alternatives; crafting your own caramel from scratch is surprisingly simple, requiring just a few common pantry ingredients and approximately 10 minutes of your time. The result is a smooth, luscious golden sauce that will transform any dessert, drink, or snack into a gourmet experience. Whether you’re topping a scoop of vanilla ice cream, enhancing a slice of cheesecake, or adding a touch of sweetness to your morning coffee, this versatile caramel sauce is your new kitchen staple. Follow along with our detailed guide, complete with essential tips and step-by-step instructions, to master the art of homemade caramel and elevate your culinary creations.
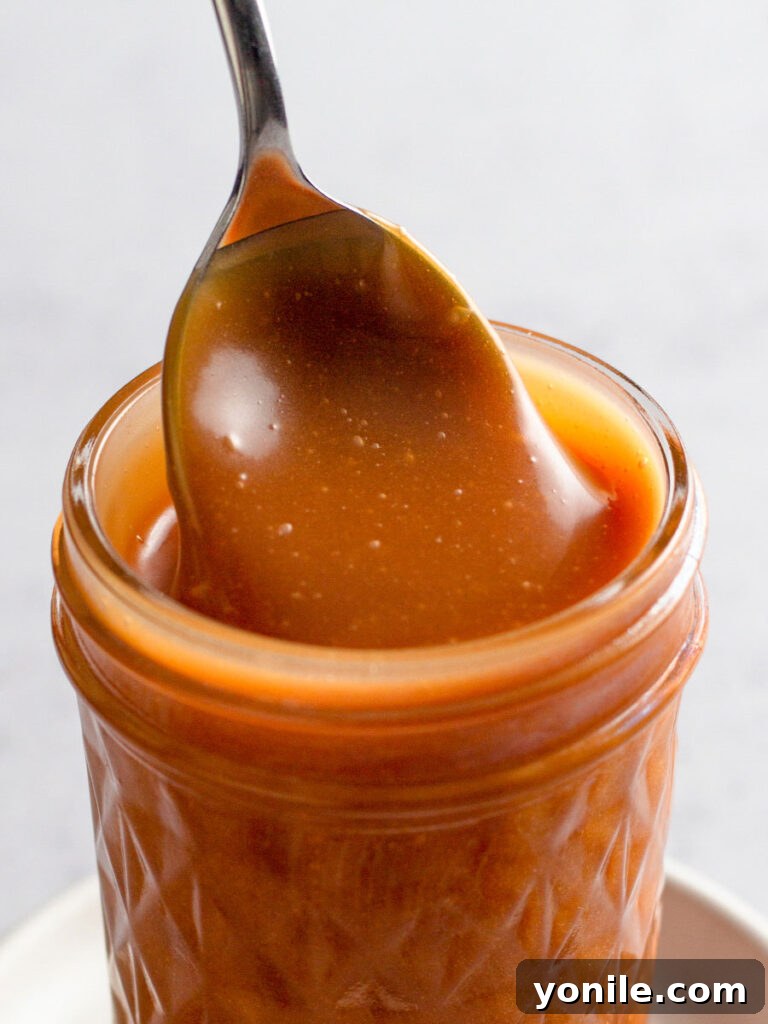
There’s a certain magic that happens when a warm, glossy drizzle of caramel graces your favorite treat. That unmistakable buttery, sweet, and slightly salty flavor creates a symphony in every bite, tying all the elements together beautifully. For those moments, nothing beats the pure, unadulterated taste of homemade caramel sauce. It’s a game-changer for anyone who appreciates quality ingredients and exceptional flavor. Once you experience how easy and rewarding it is to make your own, you’ll wonder why you ever settled for anything less. This recipe isn’t just about creating a condiment; it’s about adding a touch of gourmet elegance to your everyday.
Beyond this delightful caramel recipe, we have many more cooking guides to help you master fundamental kitchen techniques. Check out our comprehensive guide on How to Melt Chocolate for perfectly smooth results every time, or learn How to Bake the Perfect Potato for fluffy interiors and crispy skins. If you’re a true caramel enthusiast, don’t miss our Easy Homemade Crème Brûlée Recipe, which pairs exquisitely with a hint of this liquid gold.
Why This Homemade Caramel Sauce Recipe is a Must-Try
Our homemade caramel sauce isn’t just another recipe; it’s a culinary revelation that will quickly become a favorite in your kitchen. Here’s why you’ll be making this delectable sauce again and again:
- Effortless & Quick: Say goodbye to complicated techniques and lengthy preparation times. This recipe proves that exceptional flavor doesn’t require hours of work. With a simple, straightforward process, you can create a luxurious caramel sauce in just 10-15 minutes, making it perfect for last-minute dessert cravings or unexpected guests.
- Pure, Unadulterated Flavor: Unlike many store-bought options that can be overly sweet or contain artificial flavors, this homemade version offers a depth of rich, buttery, and perfectly balanced sweetness. The caramelization process creates complex notes that simply can’t be replicated, giving you a truly authentic and superior taste experience.
- Incredibly Versatile: The possibilities are truly endless! This caramel sauce isn’t just for topping; it’s an ingredient that can elevate a wide array of dishes. Drizzle it over hot fudge sundaes, pour it into your morning coffee or latte for a sweet pick-me-up, use it as a dip for fresh apple slices or pretzels, or swirl it into a milkshake. It’s also phenomenal when incorporated into baking, especially on top of this New York Style Cheesecake or as a filling for tarts and pastries.
- Only 4 Simple Ingredients: You likely already have everything you need in your pantry right now! This recipe calls for just granulated sugar, unsalted butter, heavy cream, and a pinch of salt. The accessibility of these basic ingredients means you can whip up a batch whenever the craving strikes, without a special trip to the grocery store.
Essential Ingredients for Your Perfect Caramel Sauce
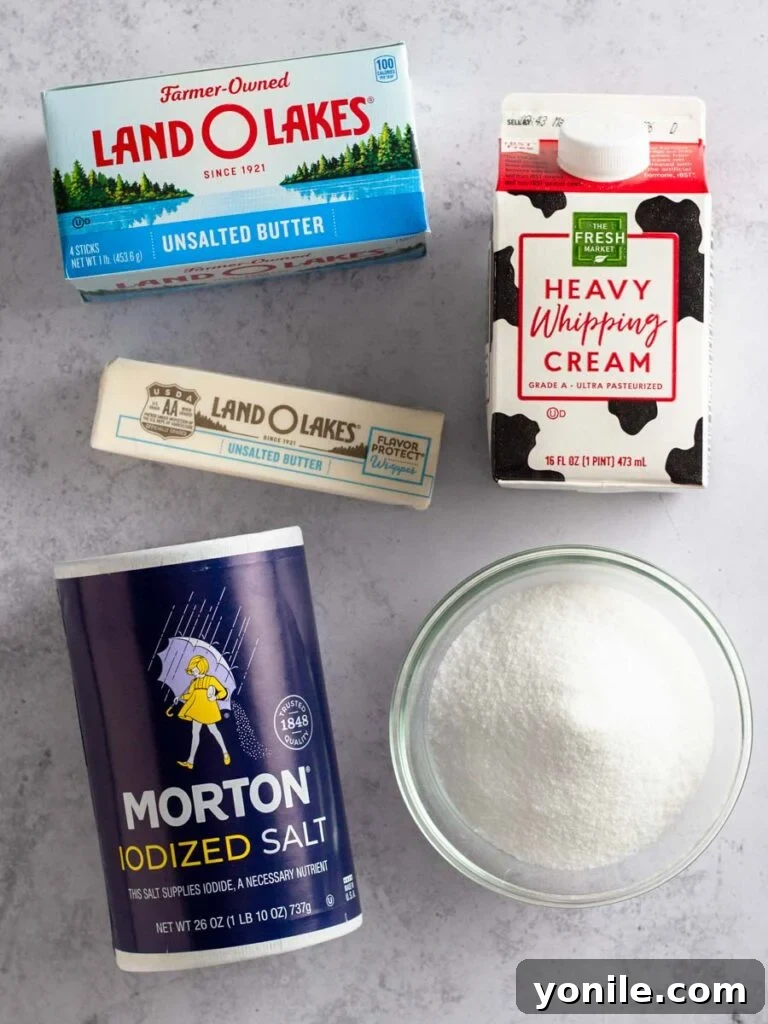
Creating a truly remarkable homemade caramel sauce starts with understanding the role of each key ingredient. Here’s what you’ll need, along with important considerations for each:
- Granulated Sugar: This is the foundation of our caramel. While other sugars can be used for different caramel variations, granulated sugar offers the cleanest caramelization process, resulting in that classic golden hue and rich flavor. Ensure it’s fresh and free of clumps.
- Unsalted Butter: The butter adds a luxurious richness and smooth texture to the caramel. It’s crucial to use unsalted butter because adding salt separately allows for precise control over the flavor. If you use salted butter, your caramel could end up being far too salty, overpowering the delicate sweet notes. Cut it into small pieces beforehand to help it melt more evenly and quickly when added to the hot sugar.
- Heavy Cream: This is the secret to a creamy, pourable caramel sauce. The high fat content of heavy cream (typically 36% or more) is essential for achieving the desired consistency and preventing the caramel from becoming grainy or seizing. Do not substitute with milk or half-and-half, as their lower fat content can lead to curdling or a thin, watery sauce that won’t hold its texture. For best results, have your heavy cream at room temperature or slightly warmed; adding cold cream to hot caramel can cause it to seize dramatically and make it harder to blend smoothly.
- Salt: Just a small amount of salt is vital. It doesn’t make the caramel taste salty but rather enhances and balances the sweetness of the sugar, adding complexity and depth of flavor. Think of it as a flavor enhancer that brings out the best in the caramel, preventing it from being one-dimensionally sweet.
Step-by-Step Guide: How to Make Smooth Homemade Caramel Sauce
Making caramel might seem intimidating, but with careful attention to detail and these step-by-step instructions, you’ll achieve a perfect, glossy sauce every time. Patience and preparation are your best friends here!
- Prepare Your Ingredients (Mise en Place): This is arguably the most crucial step for stress-free caramel making. Before you even think about turning on the stove, measure out all your ingredients: granulated sugar, unsalted butter (cut into small pieces), heavy cream (at room temperature or slightly warmed), and salt. Place them within easy reach. Caramelization happens quickly, and you won’t have time to measure as you go. Having everything prepped ensures a smooth, uninterrupted process and prevents panic.
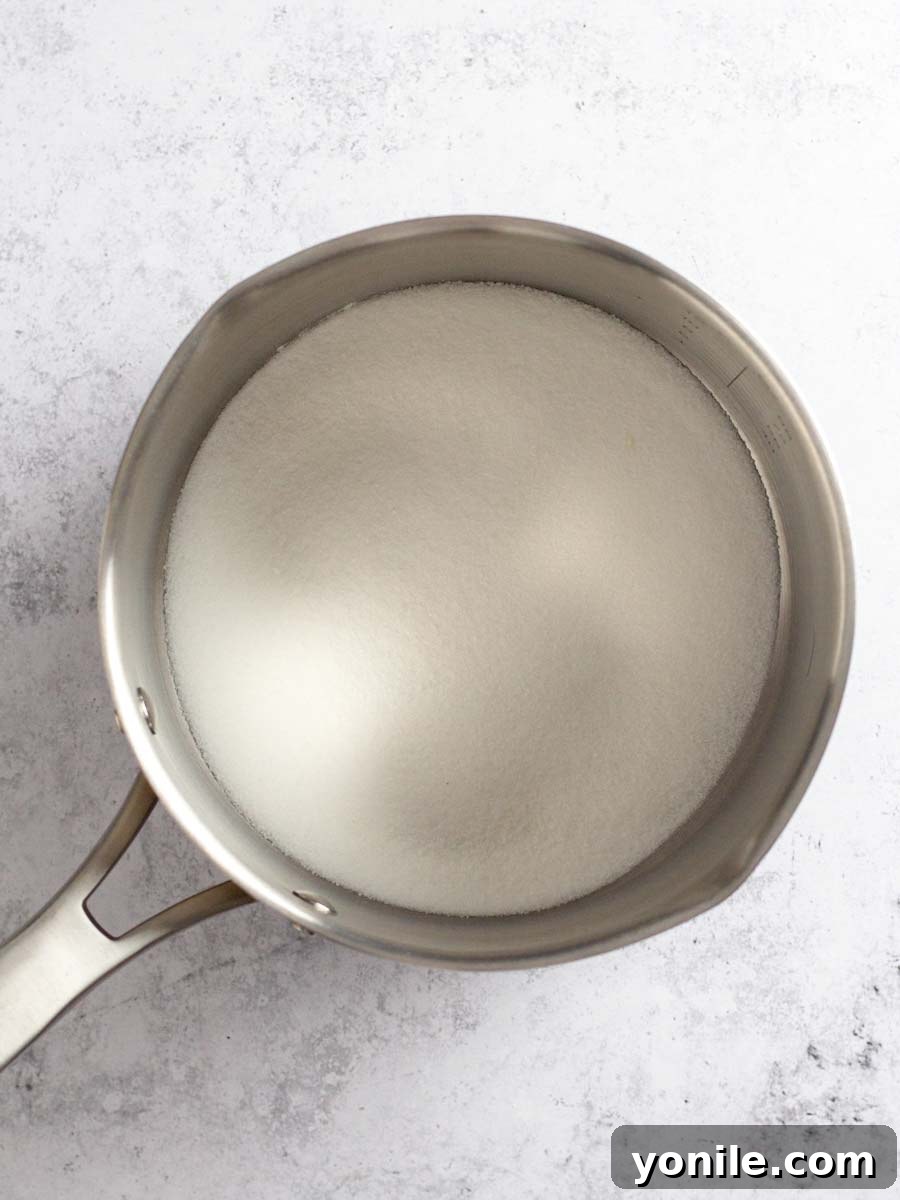
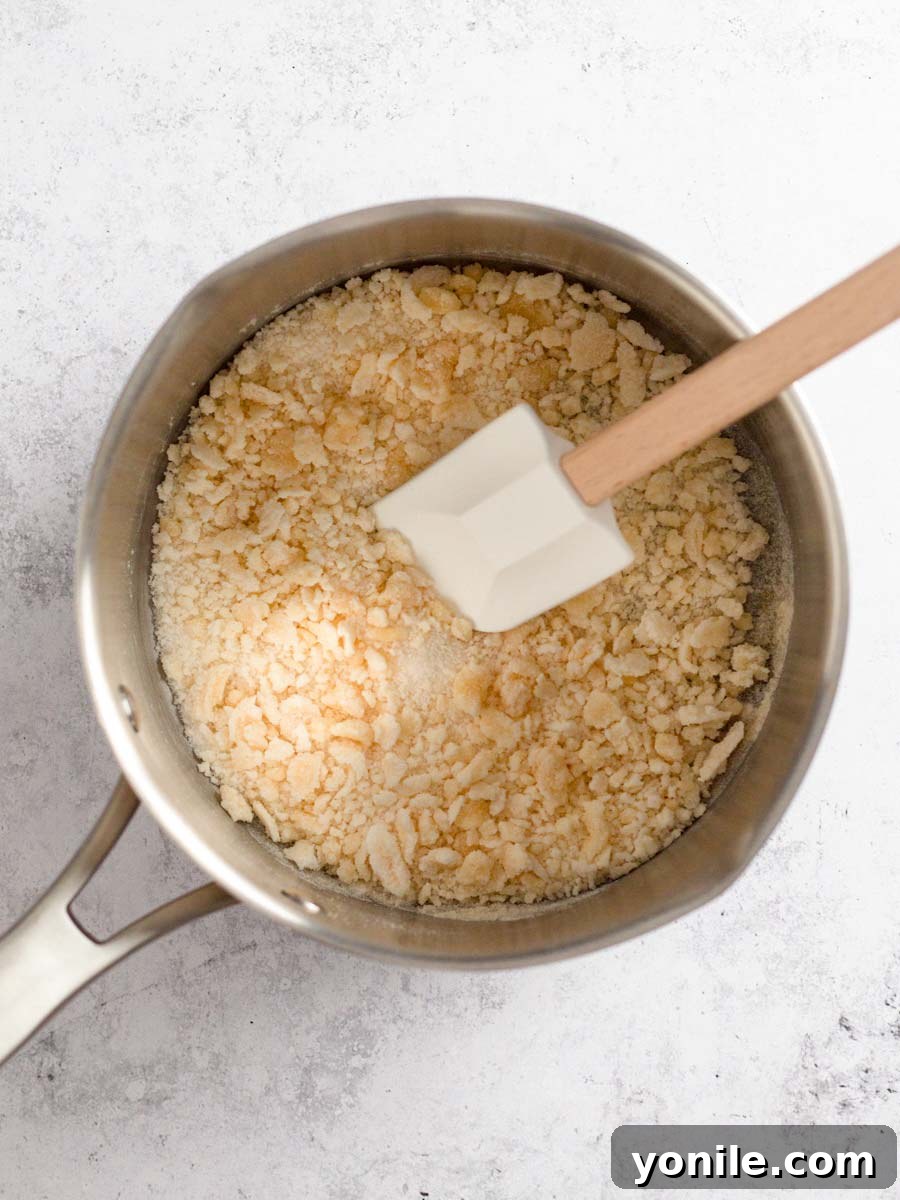
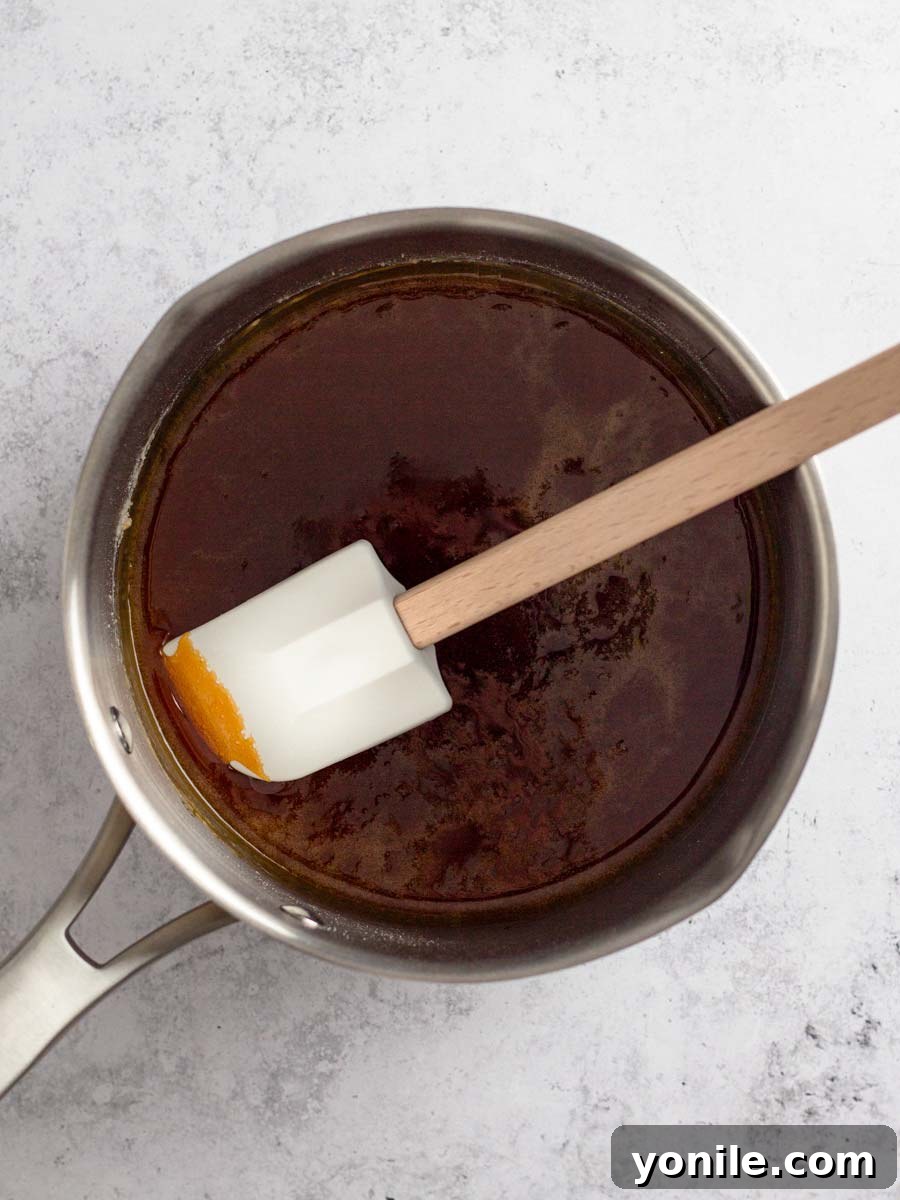
- Melt the Sugar to Perfection: Add the granulated sugar to a large, heavy-bottomed saucepan. Spread it in an even layer to ensure uniform heating. Begin to cook the sugar over medium heat. Resist the urge to stir immediately! For the first few minutes, simply lift the pan from the burner every 20-30 seconds and gently swirl it in a circular motion. This helps distribute the heat and prevents hot spots. As soon as you notice the sugar starting to stick or melt into clear liquid, you can begin to gently stir with a heat-safe silicone spatula. The sugar will form golden clumps, then eventually melt completely into a beautiful, amber-to-copper colored liquid. This transformation happens rapidly once it starts melting, so stay focused. As soon as it reaches a deep, rich copper color (think of a shiny new penny), immediately remove the saucepan from the heat. Overcooking at this stage will result in burnt, bitter caramel.
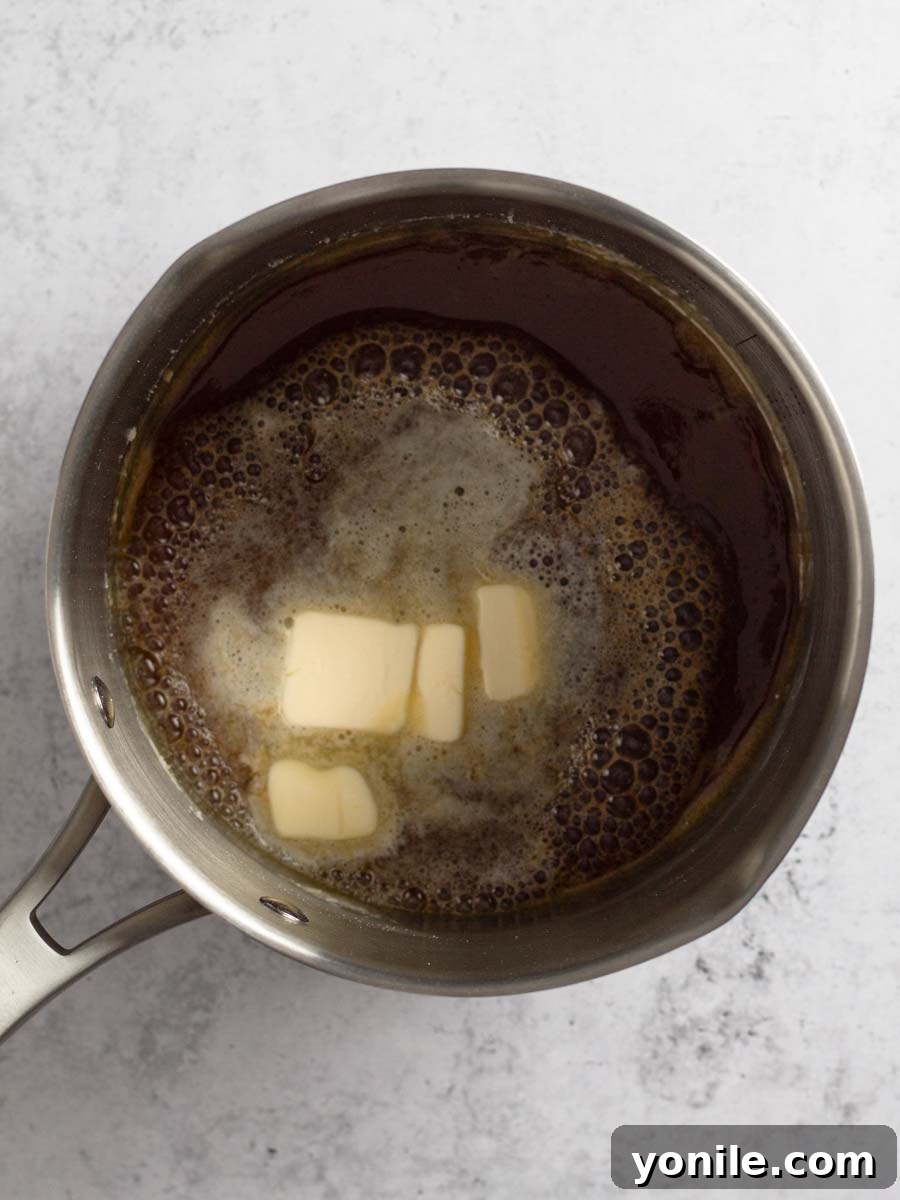
- Incorporating the Butter: With the saucepan off the heat, add half of your unsalted butter pieces to the melted sugar. Be cautious, as the mixture will bubble up and sputter significantly due to the temperature difference. Whisk vigorously and continuously until the butter is completely melted and smoothly combined with the caramelized sugar. It might take a minute or two for the butter to fully incorporate; don’t stop whisking until it’s homogenous. Once the first half is blended, repeat the process with the remaining butter, whisking until the entire mixture is glossy and smooth.
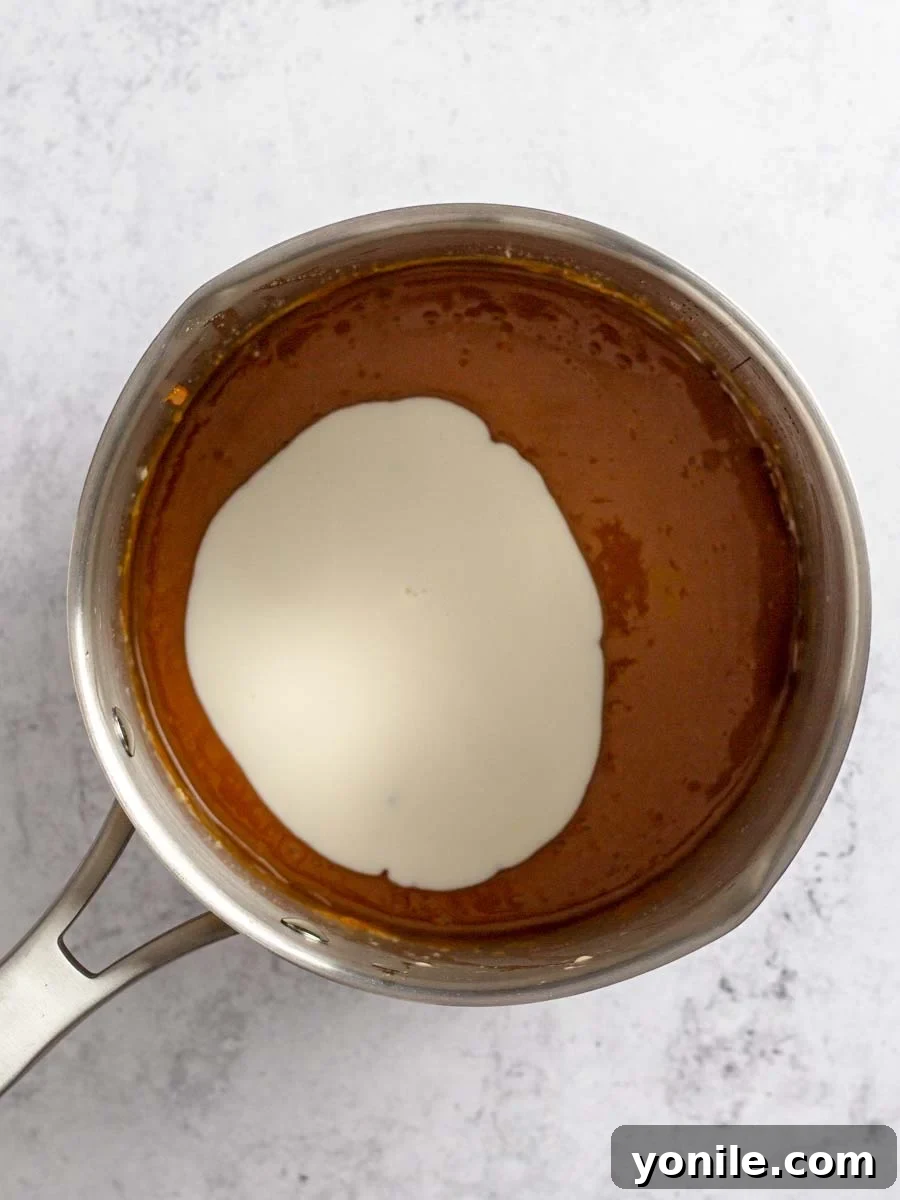
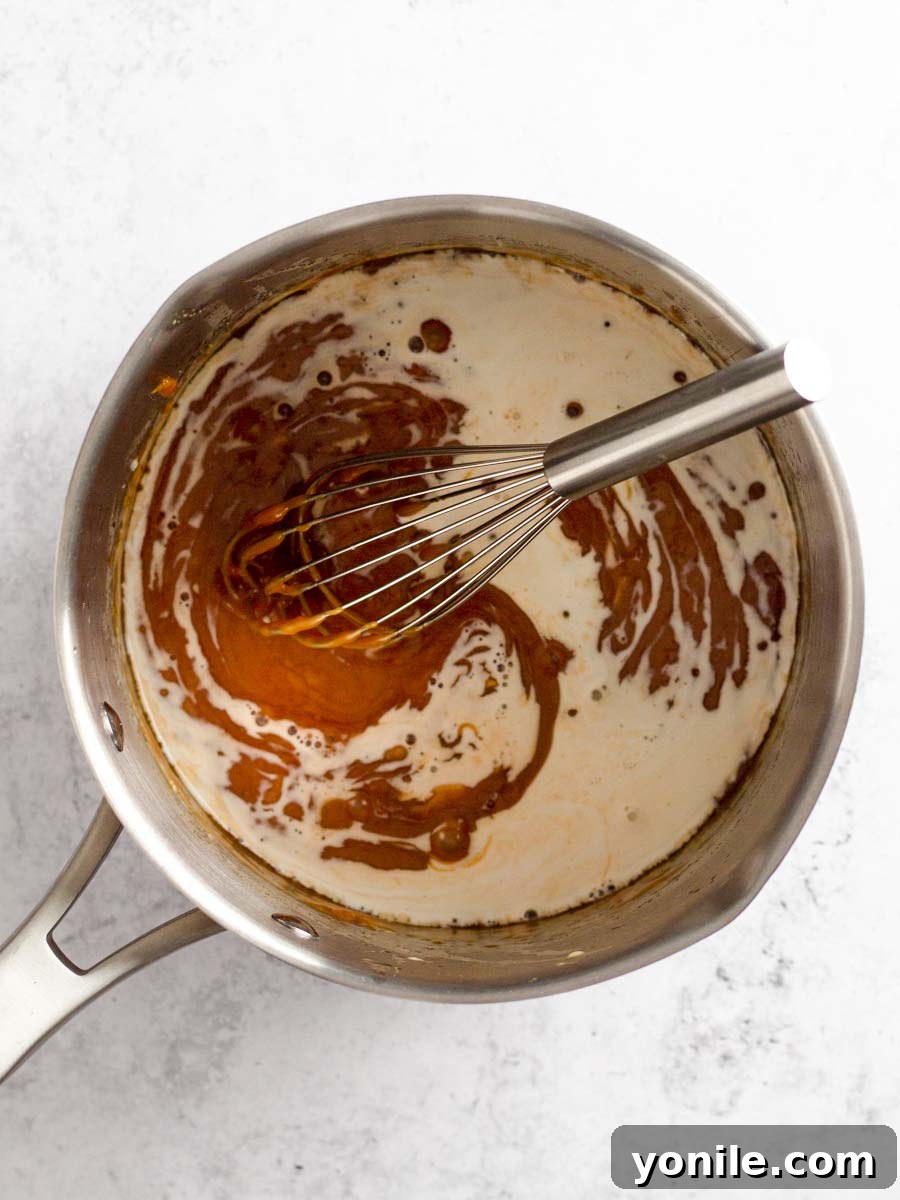
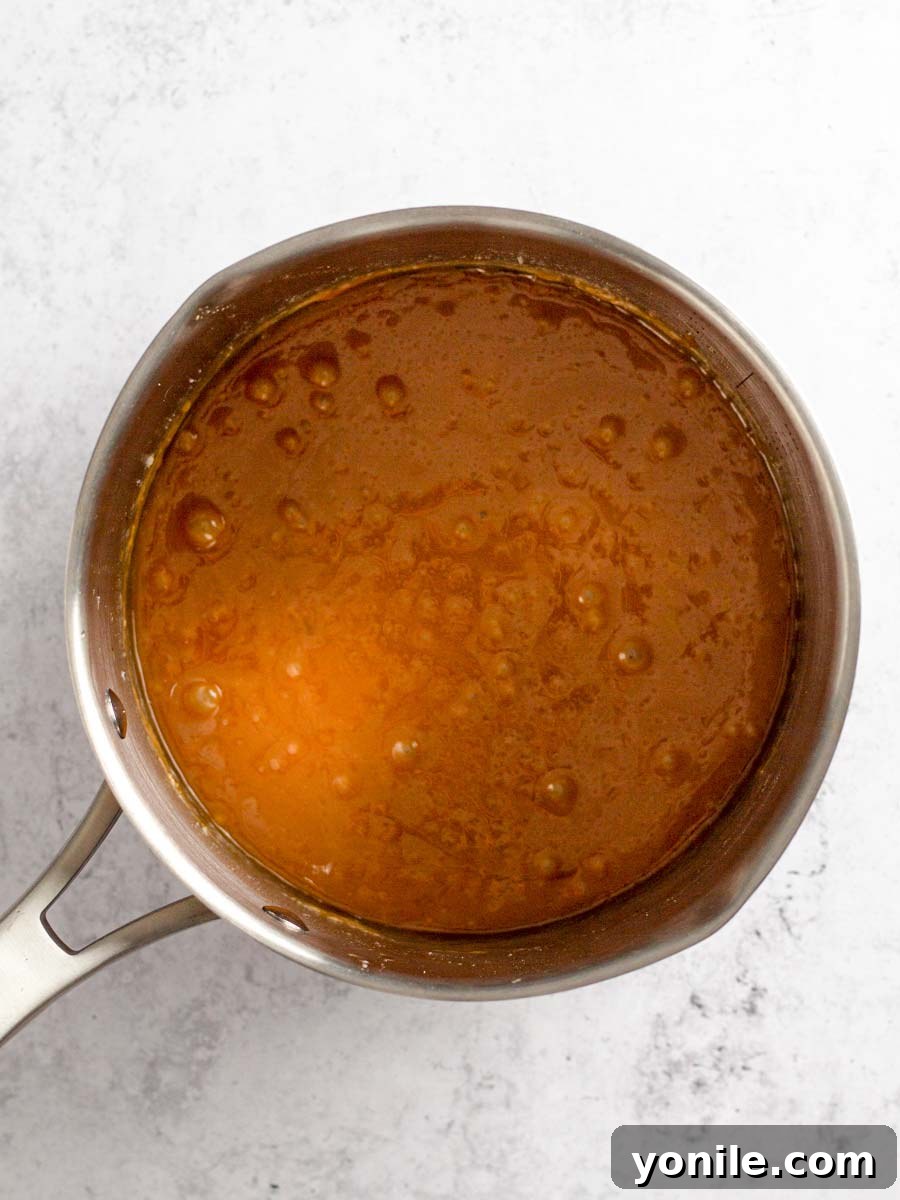
- Slowly Adding Heavy Cream: This step also requires caution and quick whisking. Gradually add the heavy cream, a small splash at a time, continuously whisking after each addition. The caramel mixture will again bubble up intensely and may stiffen or seize initially – this is normal! Keep whisking patiently. Adding the cream slowly helps the mixture emulsify properly and prevents it from separating. Continue to whisk until all of the cream is fully incorporated and the sauce is smooth and creamy.
- A Pinch of Salt for Balance: Once the cream is fully blended, add your measured salt. Whisk briefly to ensure it’s evenly distributed throughout the sauce. This final touch enhances all the flavors and provides that delightful sweet-and-salty caramel profile.
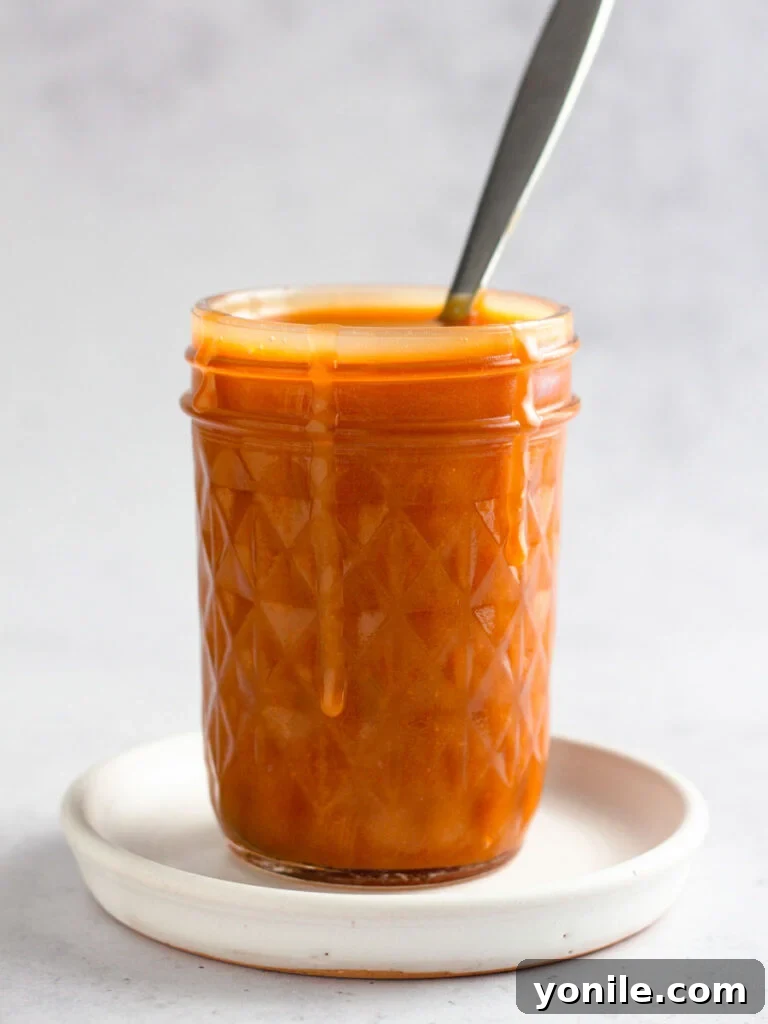
- Cooling and Storage: Immediately transfer the freshly made caramel sauce from the hot saucepan into a clean, heat-proof glass jar. This prevents the residual heat of the pan from continuing to cook and potentially burning your perfect caramel. Allow the sauce to cool for at least 10 to 15 minutes before serving warm over desserts. For storage, let it cool completely to room temperature before sealing the jar with a lid. This prevents condensation from forming and affecting the sauce’s consistency.
Expert Tips & Troubleshooting for Flawless Caramel Sauce
While making caramel is straightforward, a few expert tips can ensure your success and help you avoid common pitfalls, resulting in a perfectly smooth, rich, and delicious sauce every single time.
- Mise en Place is Non-Negotiable: As mentioned in the instructions, preparing all your ingredients before you start is paramount. Caramelization moves quickly, and there’s no pausing to measure. Have everything ready and within arm’s reach to avoid burning the sugar or creating a messy situation.
- The Right Pan Matters: Use a large, heavy-bottomed saucepan, preferably one with a light interior. A heavy bottom ensures even heat distribution, reducing the risk of scorching. A light-colored pan allows you to accurately monitor the sugar’s color change, which is crucial for achieving the perfect caramel flavor and preventing it from burning.
- Watch the Heat – and the Color: Keep the heat at medium. Too low, and it will take forever; too high, and the sugar will burn unevenly. The color is your best indicator. Aim for a deep, rich copper or amber color, similar to a brand new penny. If it turns dark orange or reddish-brown, it’s likely overcooked and will taste bitter. At that point, it’s best to discard it and start over.
- Safety First: Hot Caramel is Extremely Dangerous! Caramel sauce, especially when freshly made, is incredibly hot. Treat it with extreme caution. Avoid tasting it until it has cooled significantly. Be mindful of splatters when adding butter and cream, as they can cause severe burns. Long sleeves and oven mitts are recommended.
- Preventing Sugar Crystallization: Sometimes, sugar crystals can form on the sides of your saucepan during the melting process. These rogue crystals can cause the entire batch of caramel to become grainy. To prevent this, dip a pastry brush in water and gently brush down the sides of the pan once the sugar starts melting. This washes any stray crystals back into the melting sugar, allowing them to dissolve. Avoid stirring the sugar too early, as this can also promote crystallization.
- Easy Cleanup Hack: The thought of cleaning a sticky, hardened caramel mess can be daunting. Here’s a simple trick: as soon as you transfer the finished caramel sauce to your jar, immediately fill the hot saucepan with hot water and let it sit on the stove (even briefly on low heat). The residual heat and hot water will dissolve any leftover caramel, making cleanup incredibly easy. Just pour out the water, and your pan will be sparkling clean!
- Troubleshooting Grainy Caramel: If your caramel sauce still turns out grainy despite your best efforts, it’s usually due to sugar crystallization. Don’t despair! You can often salvage it. Return the grainy caramel to the saucepan, add 1-2 tablespoons of water (no more), and bring it to a gentle boil over low heat. Whisk continuously until the crystallized sugar re-dissolves and the mixture becomes smooth again.
- Adjusting Thickness: If your caramel is too thin, return it to the saucepan and gently simmer over low heat, stirring constantly, to reduce and thicken it further. If it’s too thick after cooling, gently reheat it over low heat or in the microwave for a few seconds, adding a teaspoon of heavy cream or water at a time until it reaches your desired consistency.
Delicious Ways to Enjoy Your Homemade Caramel Sauce
Once you’ve mastered this incredible homemade caramel sauce, you’ll find countless ways to incorporate its rich, buttery goodness into your culinary repertoire. Its versatility makes it a perfect companion for nearly any sweet indulgence:
- Classic Ice Cream & Sundaes: This is arguably the most beloved use! Drench scoops of vanilla, chocolate, or even coffee ice cream with warm caramel sauce. Add whipped cream, nuts, and a cherry for the ultimate sundae experience.
- Elevate Cheesecakes & Cakes: A generous pour over a slice of New York Style Cheesecake or a plain vanilla bundt cake instantly transforms it into a showstopper. It also pairs beautifully with apple cake, carrot cake, and chocolate lava cakes.
- Coffee & Hot Chocolates: Swirl a tablespoon or two into your morning latte, cappuccino, or a steaming cup of hot chocolate for a delightful caramel macchiato or caramel hot cocoa experience right at home. Top with whipped cream and an extra drizzle!
- Fruit Dipping Fun: Pair this luscious sauce with fresh fruit. Slices of crisp apples, pears, or even bananas become an irresistible treat when dipped into warm, gooey caramel. It’s perfect for parties or a healthy-ish snack.
- Popcorn & Pretzels Perfection: Drizzle over freshly popped popcorn for a homemade caramel corn sensation. For a sweet and salty crunch, dip pretzels (mini or large) into the sauce and let them set, or simply drizzle it over a bowl of crunchy pretzels.
- Pancakes & Waffles Upgrade: Forget maple syrup for a day! Pour warm homemade caramel sauce over stacks of fluffy pancakes or crispy waffles for a truly indulgent breakfast or brunch.
- Donuts & Pastries: Use it as a glaze for donuts, a filling for crepes, or a topping for warm apple fritters and cinnamon rolls. The possibilities are truly endless when you have a jar of this liquid gold on hand.
Frequently Asked Questions About Homemade Caramel Sauce
Have questions about making, storing, or troubleshooting your homemade caramel sauce? We’ve got you covered with answers to common queries.
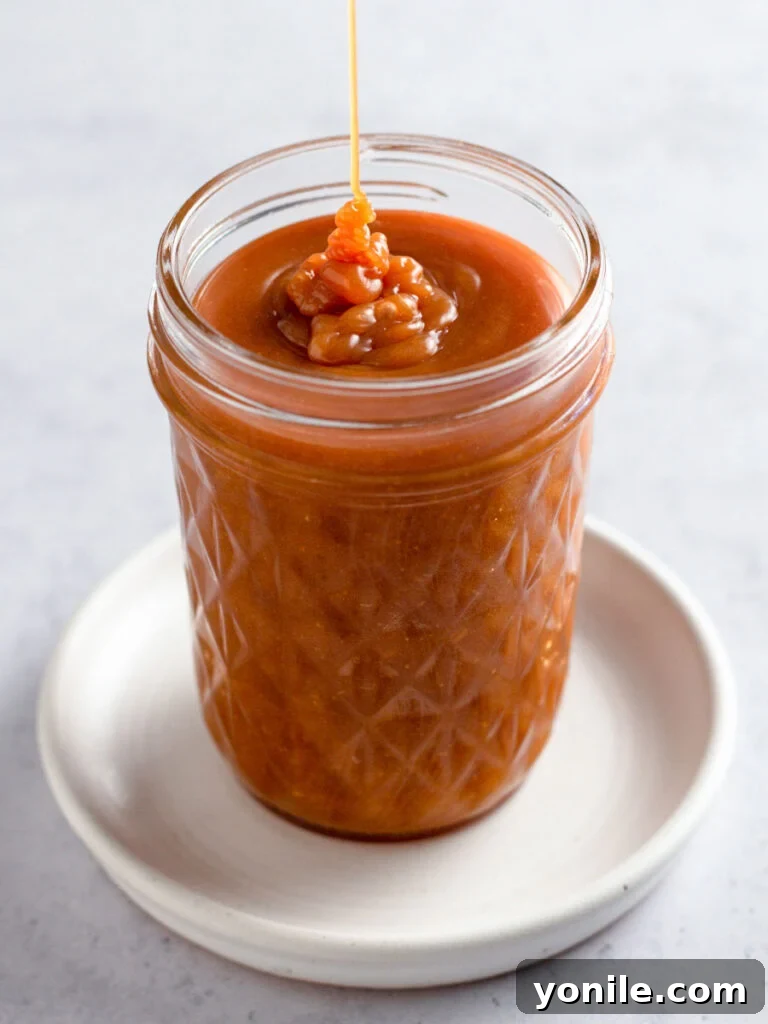
Once your homemade caramel sauce has completely cooled to room temperature, transfer it to an airtight glass jar, such as a mason jar. Ensure the lid is tightly sealed to maintain freshness. It can then be stored in the refrigerator for up to 1 month. Always check for any signs of spoilage, though it’s quite rare given the sugar content.
Caramel sauce will naturally solidify and thicken significantly in the refrigerator. To restore its pourable consistency, you’ll need to gently reheat it. You can do this in the microwave: simply scoop the desired amount into a microwave-safe bowl and heat in 15-second intervals, stirring well after each, until it’s smooth and warm. Alternatively, you can reheat it on the stovetop over very low heat, stirring constantly until it liquefies. Be careful not to overheat it, which can cause it to become too thin or even scorch.
Yes, homemade caramel sauce freezes beautifully! For best results, freeze it in a freezer-safe container, leaving about an inch of headspace as the sauce can expand slightly when frozen. While mason jars are common for storage, they can be tricky for freezing if not specifically designed for it, as glass can break. When you’re ready to use it, thaw the caramel sauce overnight in the refrigerator, then reheat gently either in the microwave or on the stovetop until it reaches your desired consistency.
Grainy caramel is typically caused by sugar crystallization. This happens when undissolved sugar crystals adhere to the sides of the pan and fall back into the mixture, triggering a chain reaction that turns the smooth caramel into a gritty texture. To prevent this, avoid stirring the sugar too early, and use a wet pastry brush to wash down any sugar crystals from the sides of the saucepan during the initial melting phase. If your caramel is already grainy, you can try to fix it by adding a splash of water (no more than 2 tablespoons) back into the saucepan, bringing it to a boil, and whisking continuously until the crystallized sugar re-dissolves and the sauce becomes smooth again.
When stored properly in an airtight container in the refrigerator, homemade caramel sauce can last for up to 3-4 weeks. If frozen, it can extend its shelf life to 2-3 months. Always rely on your senses – if it smells off or shows any signs of mold, it’s best to discard it.
While this specific recipe relies on dairy butter and heavy cream for its rich flavor and classic texture, you can experiment with dairy-free alternatives. Substitute unsalted butter with a high-quality dairy-free butter stick (not margarine). For heavy cream, full-fat canned coconut milk (the thick cream on top) or a high-fat dairy-free cream alternative can work, though the final flavor and consistency might vary slightly. Always use unsweetened alternatives to control the sweetness.
Explore More Culinary Guides & Sweet Treats
If you enjoyed making this simple yet spectacular caramel sauce, you’ll love exploring our other helpful cooking guides and delicious recipes designed to make your time in the kitchen more enjoyable and successful. Expand your culinary skills with these fantastic resources:
- How To Make Almond Milk: Learn how to craft fresh, creamy almond milk at home for a healthier, customizable alternative.
- How To Make Oat Milk: Discover the simple process of making your own delicious and cost-effective oat milk.
- How To Cut a Watermelon: Master the technique for safely and efficiently cutting a watermelon into perfect, ready-to-eat pieces.
- How To Cut Cauliflower: Get expert tips on how to properly cut and prepare cauliflower for any recipe.
We hope you find immense joy in all the recipes and guides we share, particularly this delightful Homemade Caramel Sauce recipe. There’s nothing quite like the satisfaction of creating something so delicious from scratch. We encourage you to try it out, savor every spoonful, rate your experience, and share this wonderful recipe with your friends and family!
If you try this recipe and love it, please use my hashtag to share it with me on INSTAGRAM for a chance to be featured in my story! Also, follow me at Cookin’ With Mima on FACEBOOK | INSTAGRAM | PINTEREST for all of my latest social posts and recipes.
Homemade Caramel Sauce
Mariam Ezzeddine
5 minutes
10 minutes
15 minutes
1.25 cup
Ingredients
- 1 cup granulated sugar
- 6 tablespoon unsalted butter, cut into small pieces
- ½ cup heavy cream
- ⅛ teaspoon table salt
Instructions
-
Measure and prep all ingredients before caramelizing the sugar.
-
Add the sugar to a large saucepan in an even layer and begin to cook the sugar over medium heat. About every 20 seconds, lift the pan from the burner and gently swirl the pan in a circular motion so that the sugar swirls around in the pan. As soon as you notice that sugar is beginning to stick to the pan, use a heat-safe spatula to stir the sugar while it continues to cook over medium heat. The sugar will form golden clumps before it melts completely and turns a copper color. Continue to stir gently until the sugar is completely melted, then remove the saucepan from the heat.
-
Add half of the butter and whisk until combined. The mixture will bubble up slightly when the butter is added, so use caution. It may take a minute for the butter to blend with the caramelized sugar, so keep whisking. Once combined, repeat with the remaining butter.
-
Add the cream slowly, a little bit at a time, whisking after each addition. Continue to whisk until all of the cream is combined.
-
Add the salt and whisk to blend.
-
Transfer the caramel sauce to a glass jar so that it doesn’t continue to cook in the hot pan. Allow the sauce to cool for 10 to 15 minutes before serving or let it cool to room temperature before putting the lid on the jar.
Notes
- Yields 1¼ cups of delicious caramel sauce.
- It’s important to not skip the first step of preparing your ingredients. The caramel sauce needs you to stir constantly so you won’t have the time to measure as you go. It moves quickly so have everything prepared beforehand to make the caramel with no hiccups!
- Be sure to remove the saucepan from the heat as soon as the sugar melts completely and becomes copper-colored. If you continue to cook the sugar after it has melted and it turns deep orange or red, you’ll know that the sugar has burned. If this happens, you’ll need to start over.
- Just like with browning butter, it’s helpful to use a light-colored saucepan for making caramel sauce so that you can more easily see the color change as the sugar caramelizes.
- For easy clean up, as soon as you pour the caramel sauce into a jar to cool, fill the saucepan with hot water and let it sit for a few minutes. When you pour the water out of the pan any caramel that was left in the pan will come right out and you won’t be stuck cleaning a sticky mess.
Nutrition
Carbohydrates: 162g |
Protein: 3g |
Fat: 89g |
Saturated Fat: 56g |
Polyunsaturated Fat: 4g |
Monounsaturated Fat: 23g |
Trans Fat: 2g |
Cholesterol: 252mg |
Sodium: 267mg |
Potassium: 110mg |
Sugar: 162g |
Vitamin A: 3079IU |
Vitamin C: 1mg |
Calcium: 81mg |
Iron: 0.2mg
Like this recipe? Rate and comment below!