
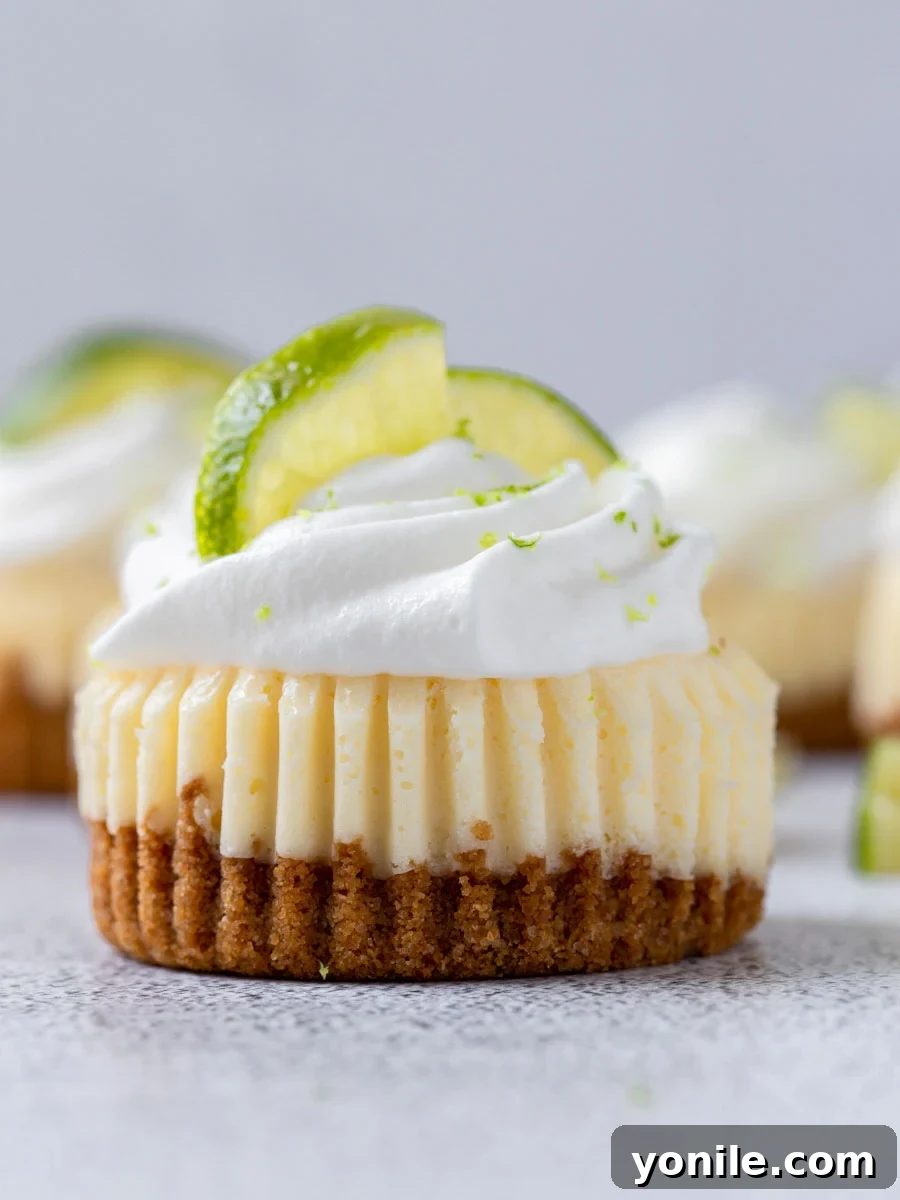
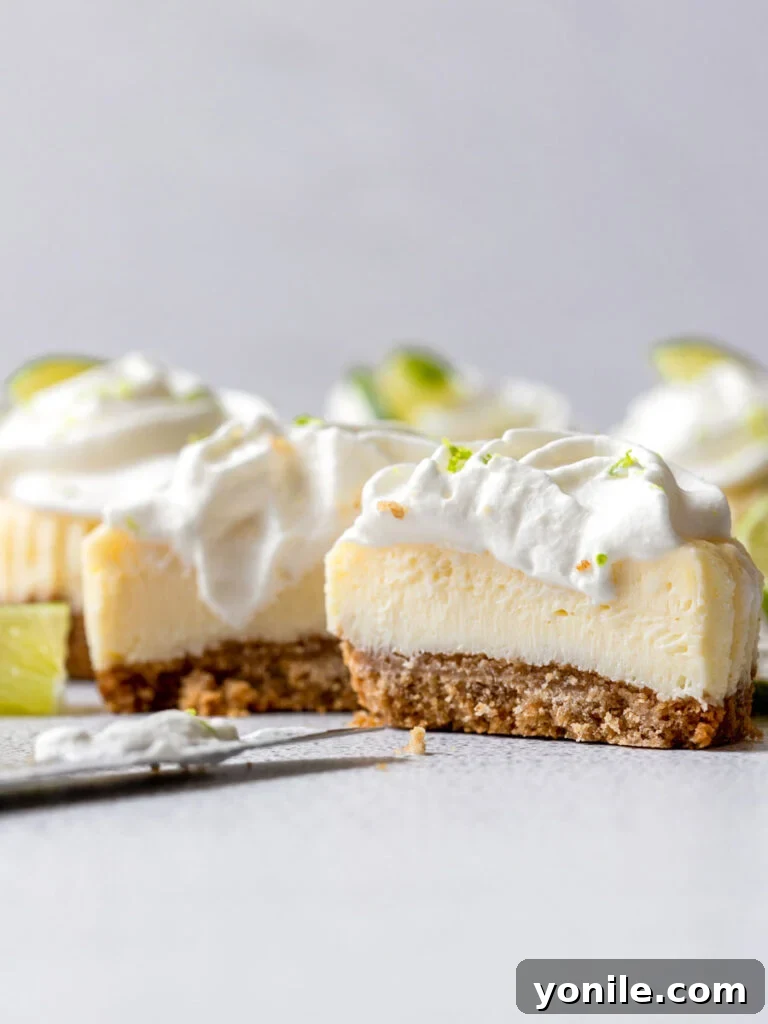
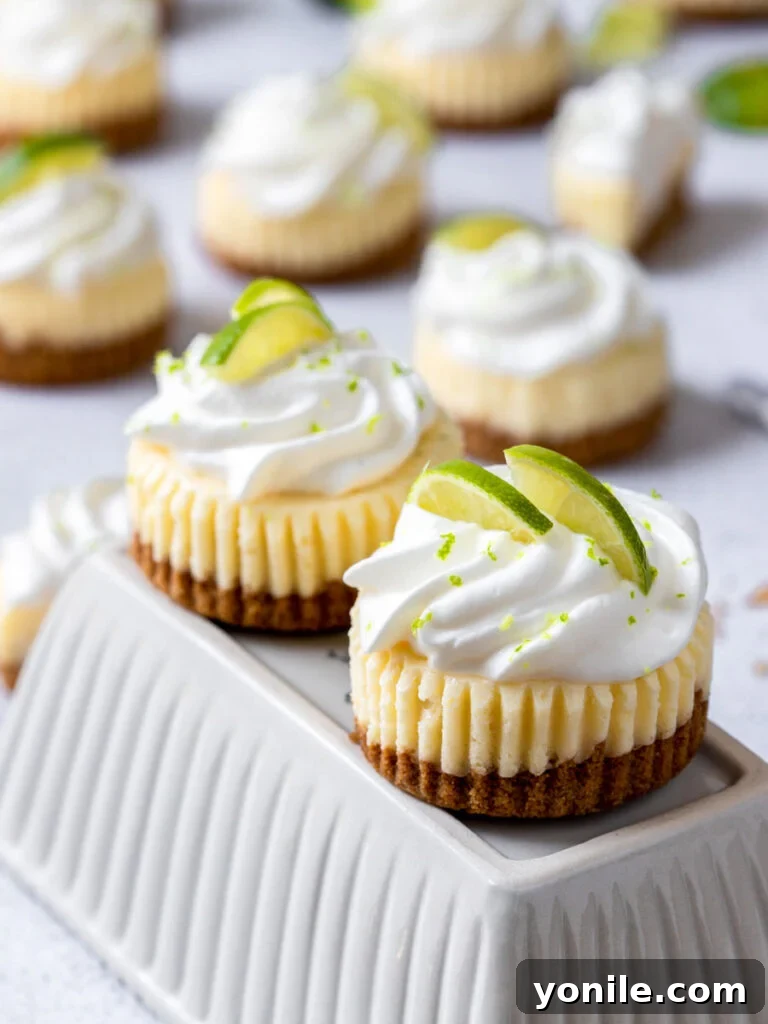
Sweet but tangy, these Mini Key Lime Cheesecakes are the perfect little desserts to end your meal with. Featuring a smooth, incredibly creamy key lime-flavored filling nestled over a buttery graham cracker crust, this recipe offers a delightful and refreshing twist on a classic cheesecake. If you’re a fan of the iconic key lime pie, prepare to fall in love with its adorable, portion-controlled cousin.
The bright, zesty essence of Key limes has always held a special place in our hearts. That unique tartness, coupled with a hint of floral sweetness, inspired us to reimagine the traditional cheesecake. Why settle for just one classic when you can combine the best of both worlds? This recipe marries the beloved rich texture of cheesecake with the vibrant, unmistakable flavor profile of Key lime pie, resulting in individual desserts that are both fun to make and a joy to devour. They’re not just cheesecakes; they’re tiny bursts of sunshine designed to brighten any occasion.
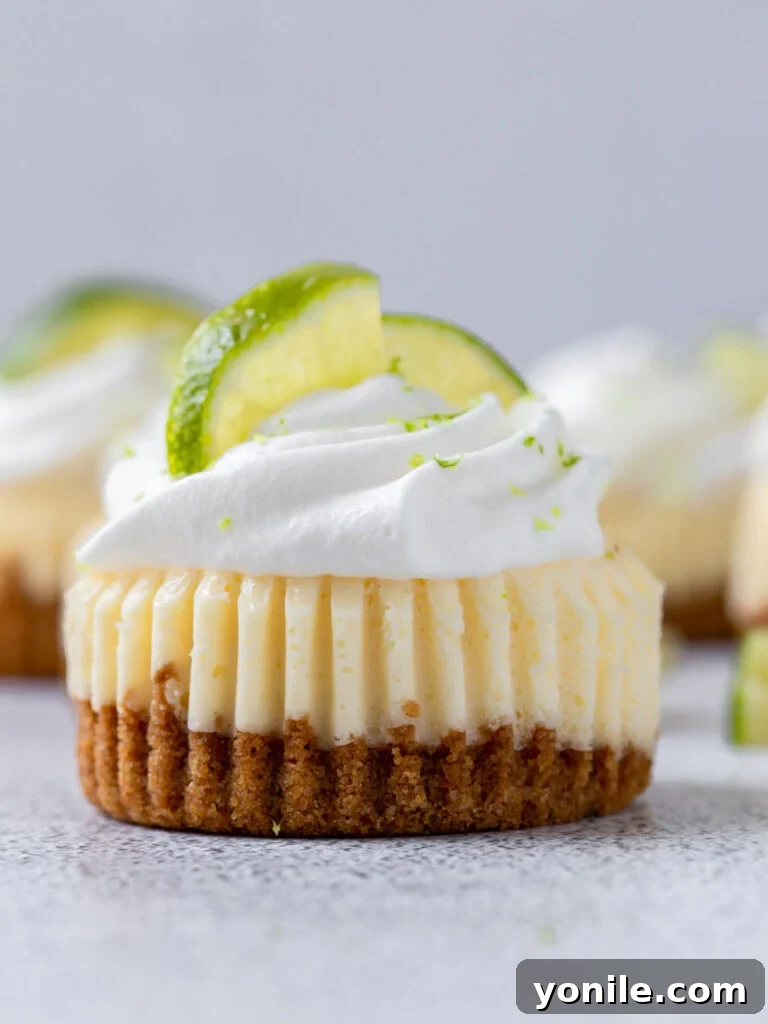
Looking for more exquisite dessert ideas to impress your guests or simply treat yourself? Don’t miss my Chocolate Covered Strawberries or my rustic Mixed Berry Galette. Each offers a unique flavor experience, perfect for satisfying any sweet craving.
Why You’ll Love This Mini Key Lime Cheesecake Recipe
These individual cheesecakes aren’t just a dessert; they’re an experience waiting to happen. Here’s why they’re sure to become a staple in your recipe collection:
- Exquisite Flavor Balance: Every bite delivers a harmonious blend of sweet and tangy, perfectly capturing the essence of Key lime pie within a lusciously creamy cheesecake. The refreshing tartness cuts through the richness, creating a dessert that is incredibly satisfying without being overly heavy.
- Effortless Baking (No Water Bath!): Unlike traditional large cheesecakes that often require a tricky water bath to prevent cracks, this mini cheesecake recipe simplifies the process significantly. Baked in a cupcake tin, these small wonders achieve a perfectly smooth texture without the extra hassle, making cheesecake baking accessible to everyone.
- Perfectly Portioned & Convenient: Say goodbye to messy slicing! These mini cheesecakes are individually portioned, making them incredibly easy to serve and enjoy. They’re ideal for parties, potlucks, or simply as a convenient treat to grab from the fridge. Plus, their small size means they bake faster and chill more quickly.
- Freezer-Friendly Delight: Prepare a batch ahead of time and keep them in your freezer for those spontaneous cravings or unexpected guests. Thaw them as needed for a gourmet dessert that tastes freshly made, providing ultimate convenience without compromising on flavor or texture.
- Visually Stunning: Dainty and elegant, these mini cheesecakes, especially when topped with whipped cream and a sprinkle of lime zest, make for a beautiful presentation. They’re guaranteed to catch the eye and elicit compliments at any gathering.
Key Ingredients for Your Mini Key Lime Cheesecakes
Crafting these delectable mini cheesecakes requires a few simple, high-quality ingredients. Paying attention to their preparation and state (like temperature) will ensure the best possible results.
For the Golden Graham Cracker Crust:
- Graham Crackers: These form the classic, buttery base. Finely crushed, they create a uniform texture that holds together well. You can crush them yourself using a food processor or a rolling pin, or opt for pre-crushed crumbs for convenience.
- Salt: A tiny pinch of salt in the crust helps balance the sweetness and enhances the overall flavor profile, preventing it from tasting flat.
- Granulated Sugar: Adds a touch of sweetness to the crust, complementing the graham crackers beautifully.
- Unsalted Butter: Melted unsalted butter binds the crumbs together, creating a rich, flavorful, and perfectly crisp crust. Using unsalted butter allows you to control the total salt content in the recipe.
For the Creamy Key Lime Filling:
- Cream Cheese: The heart of any cheesecake! Ensure it’s full-fat block cream cheese, brought to room temperature. This is crucial for achieving a smooth, lump-free filling with the perfect creamy consistency. Low-fat or spreadable varieties have too much water and will not set correctly.
- Granulated Sugar: Sweetens the tangy cream cheese and Key lime, striking that perfect sweet-tart balance.
- Eggs: Also at room temperature, eggs act as a binder, giving the cheesecake its structure and contributing to its smooth, custardy texture. Adding them one at a time and mixing gently prevents over-incorporating air.
- Fresh Key Lime Juice: This is where the magic happens! Freshly squeezed Key lime juice provides that distinctive, intensely tart, and aromatic flavor that sets this dessert apart. Avoid bottled juice if possible, as it often lacks the vibrant freshness.
- Vanilla Extract: A touch of vanilla complements the citrus notes, adding depth and warmth to the filling without overpowering the delicate Key lime flavor.
For the Airy Whipped Cream Topping:
- Heavy Cream: Must be very cold to whip properly into stiff peaks. This creates a light, fluffy topping that beautifully contrasts with the dense, creamy cheesecake.
- Powdered Sugar: Also known as confectioners’ sugar, it sweetens the whipped cream and helps stabilize it, giving it a smoother texture than granulated sugar.
- Fresh Lime Zest: The final flourish! A sprinkle of vibrant green lime zest provides an aromatic burst and visual appeal, enhancing the overall Key lime experience.
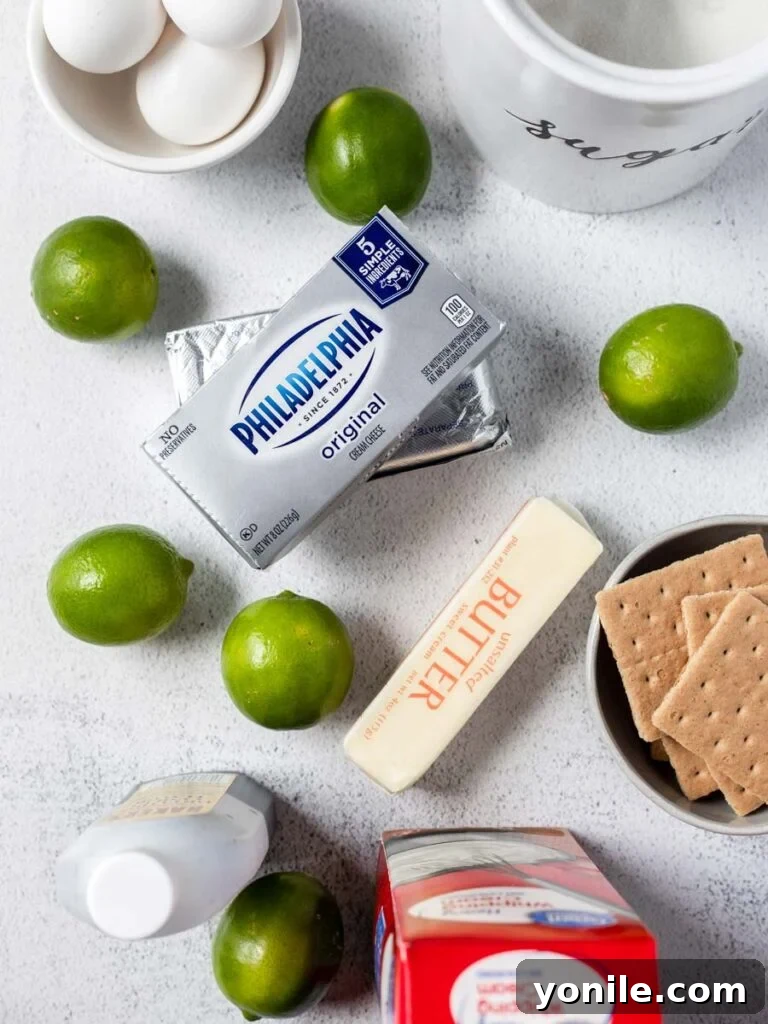
How to Make Mini Key Lime Cheesecakes: Step-by-Step
Follow these detailed steps to create perfectly baked, exquisitely flavored mini Key lime cheesecakes that will impress everyone.
Crafting the Perfect Graham Cracker Crust:
- Prepare Your Baking Setup: Begin by preheating your oven to 325°F (160°C). Then, line a standard 12-cavity cupcake or muffin tin with paper cupcake liners. These liners are essential for easy removal and serving. Set the prepared tin aside.
- Combine Crust Ingredients: In a medium-sized bowl, combine the finely crushed graham cracker crumbs, a pinch of salt, and granulated sugar. Mix these dry ingredients thoroughly with a spoon or whisk. Pour in the melted unsalted butter and stir until all the crumbs are evenly moistened. The mixture should resemble wet sand and hold together when pressed.
- Form the Crust: Scoop approximately 1 to 1½ tablespoons of the graham cracker mixture into the bottom of each prepared cupcake liner. Using the back of a spoon, the bottom of a small glass, or your fingertips, firmly press the mixture into an even, compact layer. A tightly packed crust will prevent crumbling after baking.
- Pre-Bake the Crust: Transfer the cupcake tin with the pressed crusts to the preheated oven. Bake for 8-10 minutes, or until the edges appear lightly golden brown and you can smell their sweet, buttery aroma. This step helps to set the crust and adds a deeper flavor. Remove the pan from the oven and allow the crusts to cool completely on a wire rack before adding the filling. This prevents the filling from becoming greasy.
Preparing the Luscious Key Lime Filling:
- Adjust Oven Temperature: Once the crusts are baked and cooling, reduce your oven temperature to 300°F (150°C). This lower temperature is crucial for the gentle baking of the cheesecake filling, preventing cracks.
- Whip Cream Cheese and Sugar: In the bowl of a stand mixer fitted with the paddle attachment (or using a large bowl and a hand mixer), place the softened, room temperature cream cheese and granulated sugar. Beat on low speed until the mixture is fully combined, smooth, and free of any lumps. It’s important to start on low speed and avoid over-mixing at this stage to prevent incorporating too much air.
- Incorporate Eggs Gently: Add the room temperature eggs one at a time. After each egg, mix on low speed only until it is just incorporated into the batter. Use a rubber spatula to scrape down the sides of the bowl between additions to ensure everything is evenly mixed. Gentle mixing is key here to maintain the cheesecake’s dense, creamy texture.
- Add Key Lime and Vanilla: Finally, pour in the fresh Key lime juice and vanilla extract. Mix on the lowest speed until just combined. Over-mixing after adding the liquids can lead to a runny batter or a cracked cheesecake, so stop as soon as it’s homogenous.
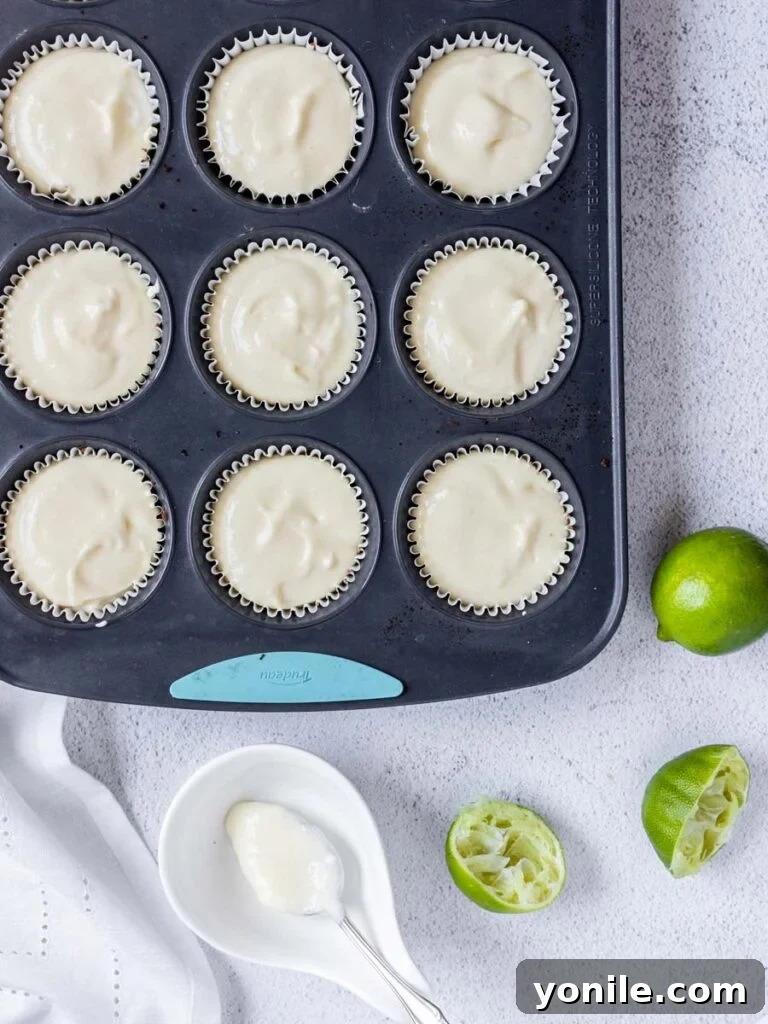
Baking and Chilling Your Mini Cheesecakes:
- Fill and Bake: Carefully spoon or pour the creamy Key lime cheesecake filling into each cooled, pre-baked graham cracker crust. Fill each liner almost to the top, ensuring even distribution. Place the cupcake tin back into the oven, preheated to 300°F (150°C), and bake for 15 minutes.
- Cool and Chill: After 15 minutes, turn the oven OFF. Crucially, leave the cheesecakes inside the oven with the door CLOSED for an additional 30 minutes. This slow, gradual cooling process is vital for preventing the cheesecakes from cracking. After 30 minutes, crack the oven door open slightly and allow the cheesecakes to cool completely to room temperature inside the oven. Once at room temperature, transfer the cupcake tin (with cheesecakes still in their liners) to the refrigerator and chill for a minimum of 2 hours, or ideally, overnight, until they are thoroughly set and firm.
Creating the Fluffy Whipped Cream Topping:
- Whip Cream and Sugar: In a clean, chilled medium bowl, using a hand mixer or a stand mixer with a whisk attachment, beat the very cold heavy cream and powdered sugar together. Start on low speed and gradually increase to medium-high until stiff peaks form. Be diligent not to overbeat, as heavy cream can quickly turn into butter.
- Decorate and Serve: Once your mini cheesecakes are perfectly chilled and firm, gently peel away the paper liners. Just before serving, pipe or spoon a generous dollop of the freshly made whipped cream on top of each cheesecake. Finish with a delicate sprinkle of fresh lime zest for an extra pop of citrus aroma and an elegant touch.
Expert Tips for Flawless Mini Key Lime Cheesecakes
Achieving bakery-quality mini cheesecakes is easier than you think with these expert tips:
- Graham Cracker Hacks: For perfectly fine crumbs, use a food processor. If you don’t have one, place graham crackers in a sturdy zip-top bag, seal it, and crush them with a rolling pin until uniformly fine. This ensures a consistent crust texture.
- Cream Cheese Quality Matters: Always opt for full-fat, block-style cream cheese. Low-fat or spreadable varieties have a higher water content and will not yield the same rich, dense, and creamy cheesecake texture that we’re aiming for.
- Room Temperature Ingredients are Key: This cannot be stressed enough! Ensure your cream cheese and eggs are at room temperature. Cold ingredients are harder to mix smoothly, leading to lumps and requiring more beating, which can incorporate too much air into the batter. Excess air causes cheesecakes to puff up and then crack or sink dramatically as they cool.
- Zest Before You Juice: It’s significantly easier and more efficient to zest your Key limes (or any citrus fruit) before you cut and juice them. Zesting a whole, firm lime provides better grip and more zest.
- Don’t Overmix the Batter: Once you add the eggs, mix only until just combined. Overmixing introduces too much air, which expands during baking and then collapses as the cheesecake cools, leading to unsightly cracks or a sunken center. A smooth, lump-free batter from room temperature cream cheese means minimal mixing is needed.
- Patience is a Virtue (Chilling): Resist the urge to dive into these delicious treats too soon. The chilling time is crucial for the cheesecake to firm up, allowing its flavors to meld and its texture to become perfectly dense and creamy. For the best results, chill overnight.
- Gentle Cooling Prevents Cracks: The method of baking for 15 minutes, then turning off the oven and letting them sit, is a secret weapon against cracks. It allows the cheesecakes to cool slowly and evenly, minimizing temperature shock.
Frequently Asked Questions About Mini Key Lime Cheesecakes
- What’s the difference between regular limes and Key limes?
- Key limes (also known as Mexican limes or West Indian limes) are smaller, more yellowish when ripe, and possess a more intense, aromatic, and distinctly tart flavor with a floral undertone compared to the common Persian lime. They also contain more seeds, so using a good juicer or strainer is recommended.
- Can I use bottled Key lime juice?
- While you technically *can*, I strongly recommend using fresh Key lime juice for these mini cheesecakes. Bottled lime juice, especially Key lime, often lacks the bright, fresh, and complex tart-tangy flavor that makes this dessert truly exceptional. The subtle floral notes are also largely absent in processed juices.
- How do I zest a lime without a zester?
- If you don’t have a microplane or zester, you can carefully use a vegetable peeler to remove only the outermost green part of the lime peel, avoiding the bitter white pith. Then, finely chop the peeled zest with a sharp knife until it’s very fine. A fine-grater side of a box grater can also work in a pinch, but be careful not to grate your fingers!
- How do I know that the cheesecakes are done?
- The “jiggle test” is your best indicator. When your mini Key lime cheesecakes are ready, the edges will appear set, but the very center of each cheesecake should still jiggle slightly when you gently shake the pan. They will continue to set as they cool and chill.
- Why did my cheesecake filling sink down?
- Cheesecake filling typically sinks if there’s too much air incorporated into the batter, which causes it to puff up during baking and then collapse. This often happens from over-mixing, especially after adding eggs. Using room temperature ingredients helps prevent over-mixing because they combine more easily and smoothly.
- How long do mini Key lime cheesecakes last?
- Stored in an airtight container in the refrigerator, these mini cheesecakes will maintain their freshness and delicious taste for up to 5 days. For best results with whipped cream topping, consider adding it just before serving, or store the whipped cream and lime zest separately until ready to use.
- How do I freeze these mini cheesecakes?
- To freeze, ensure the cheesecakes are completely cooled and set. Skip adding the whipped cream topping. Transfer the chilled cheesecakes (without liners if preferred, or in the liners) to a sheet pan and freeze, uncovered, until solid. Once frozen solid, transfer them to a freezer-safe bag or airtight container. They can be stored in the freezer for up to 3 months.
- How do I thaw frozen mini cheesecakes?
- The best way to thaw frozen cheesecakes is to transfer them from the freezer to the refrigerator overnight. If you’re in a rush, you can place them at room temperature for an hour or two until they are no longer frozen through, but refrigeration yields a better texture.
- How do I peel the liners off cleanly?
- Once your cheesecakes have been thoroughly chilled and are completely set, the paper liners should peel off cleanly and easily. If you encounter any sticking, try placing the cheesecakes in the freezer for about 15-20 minutes. This extra firming can often make removal much smoother.
- Can I make these mini cheesecakes gluten-free?
- Absolutely! Simply substitute regular graham crackers with gluten-free graham crackers for the crust. Ensure all other ingredients are naturally gluten-free.
- What are some variations for this recipe?
- You can experiment with different crusts, such as shortbread cookies or vanilla wafers. For an extra citrus punch, add a tablespoon of lime zest directly into the cheesecake filling. You could also try different toppings, like toasted coconut or a drizzle of white chocolate, though the classic whipped cream and zest remain a favorite!
Recipe Card: Mini Key Lime Cheesecakes
Mini Key Lime Cheesecake
Sweet but tangy, these Mini Key Lime Cheesecakes are the perfect little desserts to end your meal with. A smooth and creamy key lime flavored filling overtop of a graham cracker crust, you’ll love this twist on a classic cheesecake.
Key Details:
- Prep Time: 20 minutes
- Cook Time: 25 minutes
- Resting Time: 2 hours (minimum chilling)
- Total Time: Approximately 2 hours 45 minutes (includes minimum chilling)
- Servings: 12 servings
- Author: Mariam Ezzeddine
Ingredients for the Crust:
- 8 sheets graham crackers, finely crushed
- ¼ tsp. salt
- 2 tbsps. granulated sugar
- ¼ cup unsalted butter, melted
Ingredients for the Filling:
- 2 (8 oz) blocks cream cheese, room temperature
- ¾ cup granulated sugar
- 2 whole eggs, room temperature
- ⅓ cup fresh squeezed Key lime juice
- 2 tsps. vanilla extract
Ingredients for the Topping:
- 1 cup heavy cream, cold
- 1 tbsp. powdered sugar
- Lime zest, as needed
Instructions for the Crust:
- Preheat the oven to 325°F (160°C). Line a 12-cavity cupcake tin with paper liners and set aside.
- In a small bowl, combine the finely crushed graham cracker crumbs, salt, granulated sugar, and melted unsalted butter. Mix thoroughly until the mixture resembles wet sand.
- Firmly press 1 to 1½ tablespoons of the crumb mixture into the bottom of each prepared cupcake liner. Use the bottom of a glass or your fingers to compact it well.
- Bake the crusts for 8-10 minutes, or until they are lightly golden brown and fragrant. Remove the pan from the oven and allow the crusts to cool completely on a wire rack while you prepare the filling.
Instructions for the Filling:
- Reduce the oven temperature to 300°F (150°C).
- In the bowl of a stand mixer fitted with the paddle attachment (or using a large bowl and a hand mixer), beat the room temperature cream cheese and granulated sugar together on low speed. Mix until the mixture is fully combined, smooth, and free of lumps. Avoid over-mixing to prevent incorporating too much air.
- Add the room temperature eggs one at a time, mixing only until just combined after each addition. Make sure to scrape down the sides of the bowl with a rubber spatula as needed to ensure everything is evenly incorporated.
- Pour in the fresh Key lime juice and vanilla extract. Mix on low speed until just combined. Again, do not overmix.
- Carefully spoon or pour the cheesecake filling into each cooled, pre-baked graham cracker crust, filling each liner almost to the top.
- Bake the cheesecakes for 15 minutes. After 15 minutes, turn the oven OFF but leave the cheesecakes inside with the oven door closed for an additional 30 minutes. This gentle cooling helps prevent cracking. After 30 minutes, crack the oven door open slightly and allow the cheesecakes to cool completely to room temperature inside the oven.
- Once cooled, transfer the mini cheesecakes (still in their liners in the tin) to the refrigerator and chill for at least 2 hours, or until thoroughly set. For best results, chill overnight.
Instructions for the Topping:
- In a clean, chilled medium bowl, using a hand mixer or a stand mixer with a whisk attachment, beat the cold heavy cream and powdered sugar together on medium-high speed until stiff peaks form. Be careful not to overbeat, as it can quickly turn into butter.
- Just before serving, pipe or spoon the freshly made whipped cream on top of each chilled mini cheesecake.
- Garnish each cheesecake with a sprinkle of fresh lime zest for an extra pop of flavor and visual appeal.
Recipe Notes:
- For convenience, you can purchase pre-crushed graham cracker crumbs. If crushing your own, use a food processor or place crackers in a zip-top bag and crush with a rolling pin until fine crumbs are formed.
- Always use full-fat block cream cheese for cheesecake. Low-fat or spreadable cream cheese contains more water and will not yield the same rich, creamy texture.
- Ensure all cold ingredients (cream cheese, eggs) are at room temperature before mixing. This helps create a smooth, lump-free batter and prevents over-mixing, which can incorporate too much air and lead to cracks or sinking.
- It’s significantly easier to zest your Key limes before you juice them.
- Avoid overmixing the cheesecake batter once the eggs are added. Overmixing introduces excess air, which can cause the cheesecake to puff up in the oven and then crack or sink as it cools.
Nutrition Information (per serving, approximate):
- Calories: 207 kcal
- Carbohydrates: 24g
- Protein: 1g
- Fat: 12g
- Saturated Fat: 7g
- Trans Fat: 1g
- Cholesterol: 38mg
- Sodium: 111mg
- Potassium: 35mg
- Fiber: 1g
- Sugar: 18g
- Vitamin A: 411 IU
- Vitamin C: 1mg
- Calcium: 22mg
- Iron: 1mg
More Irresistible Dessert Recipes You’ll Love
If you’ve enjoyed these mini Key lime cheesecakes, be sure to explore more delightful dessert recipes from my kitchen:
- Chocolate Lazy Cake
- Strawberry French Tart
- Lemon French Madeleines Cakes
- Key Lime Pie Bars
- Coconut Basbousa
- Easy Chocolate Cupcake
I genuinely hope you cherish this delectable Mini Key Lime Cheesecakes recipe as much as I do. Give it a try, savor every bite, and don’t hesitate to share your experience with friends and family!
If you prepare this recipe and enjoy it, I’d love to see your creations! Share them with me on INSTAGRAM using my hashtag for a chance to be featured. You can also follow Cookin’ With Mima on FACEBOOK, INSTAGRAM, and PINTEREST for all my latest recipes and culinary adventures.