
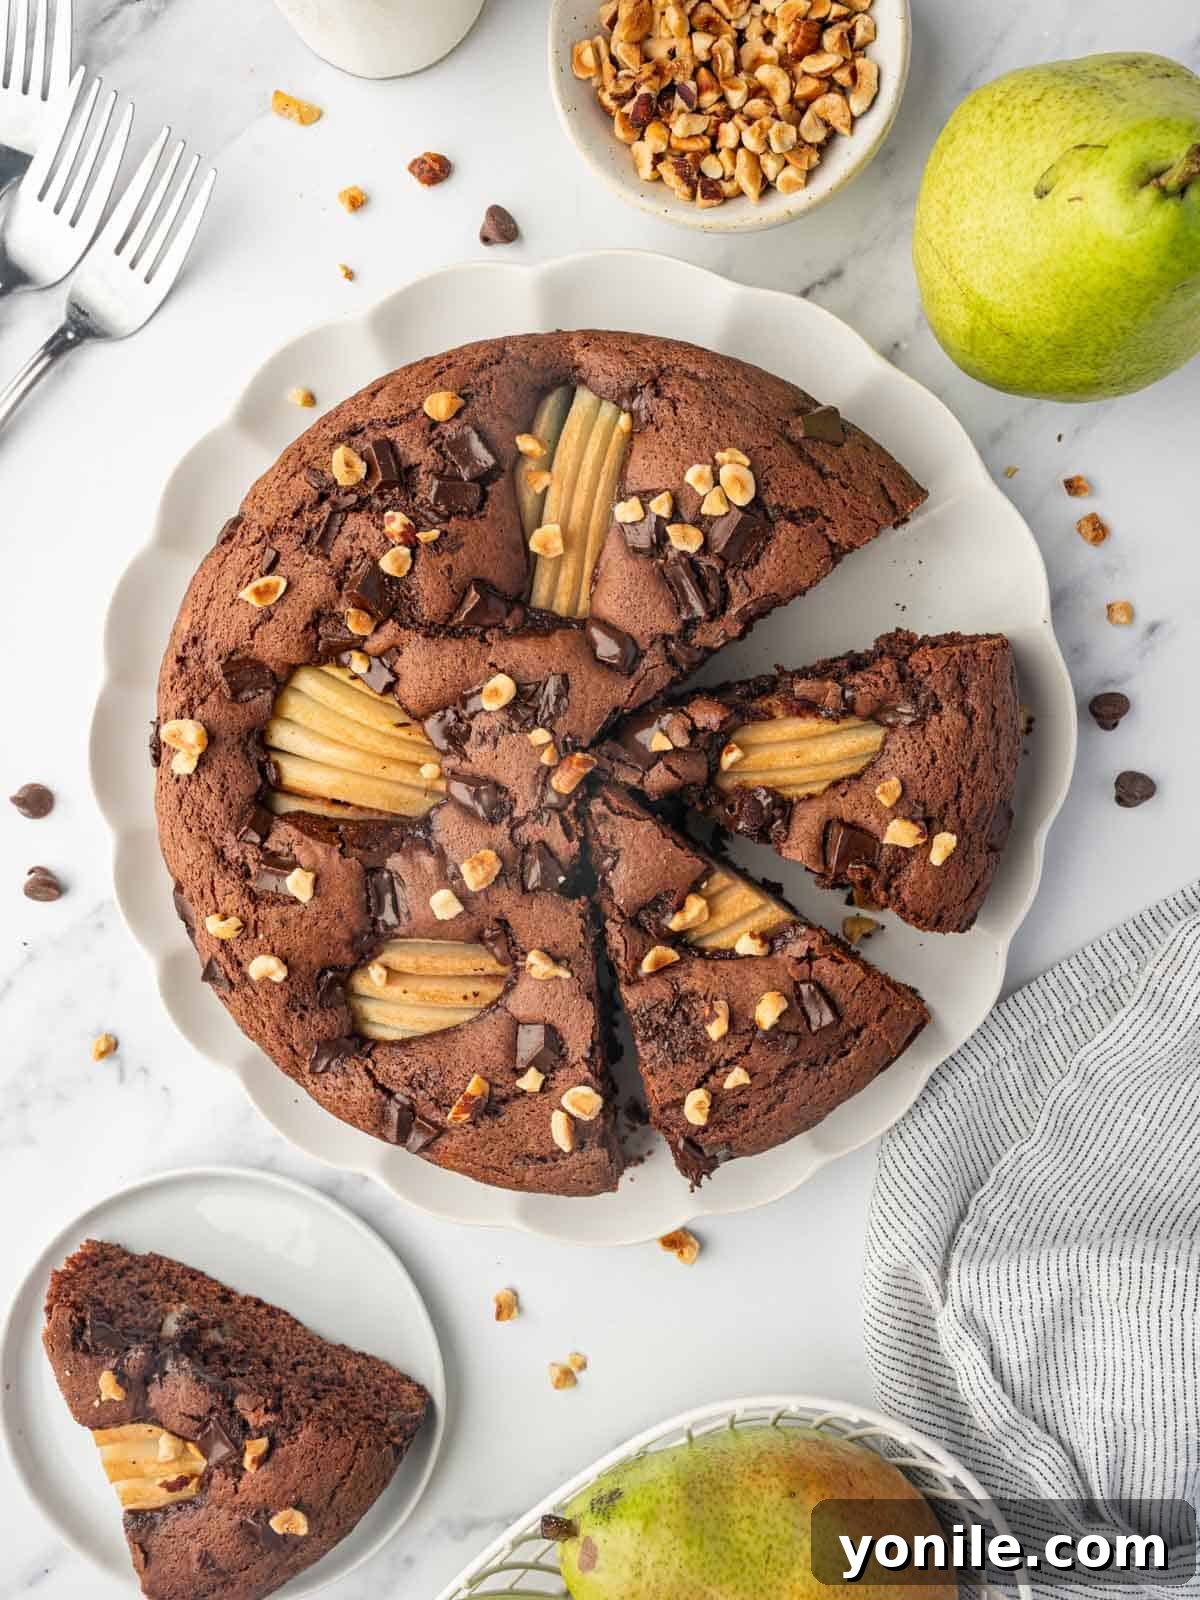
Delight your senses with the exquisite combination of rich chocolate and tender, juicy pears in this incredible Chocolate Pear Cake. This isn’t just any dessert; it’s a luxurious experience, offering a harmonious balance of deep cocoa flavors and the natural sweetness of perfectly ripe pears. Each forkful promises a moist, tender crumb studded with luscious chocolate chunks, creating a textural and taste sensation that will leave a lasting impression. Whether you’re seeking a comforting treat for a quiet evening or a show-stopping dessert for a special gathering, this cake rises to every occasion, earning rave reviews from everyone who tries it. Despite its sophisticated appearance and gourmet appeal, you’ll be pleasantly surprised by how simple it is to bring this masterpiece to life in your own kitchen.
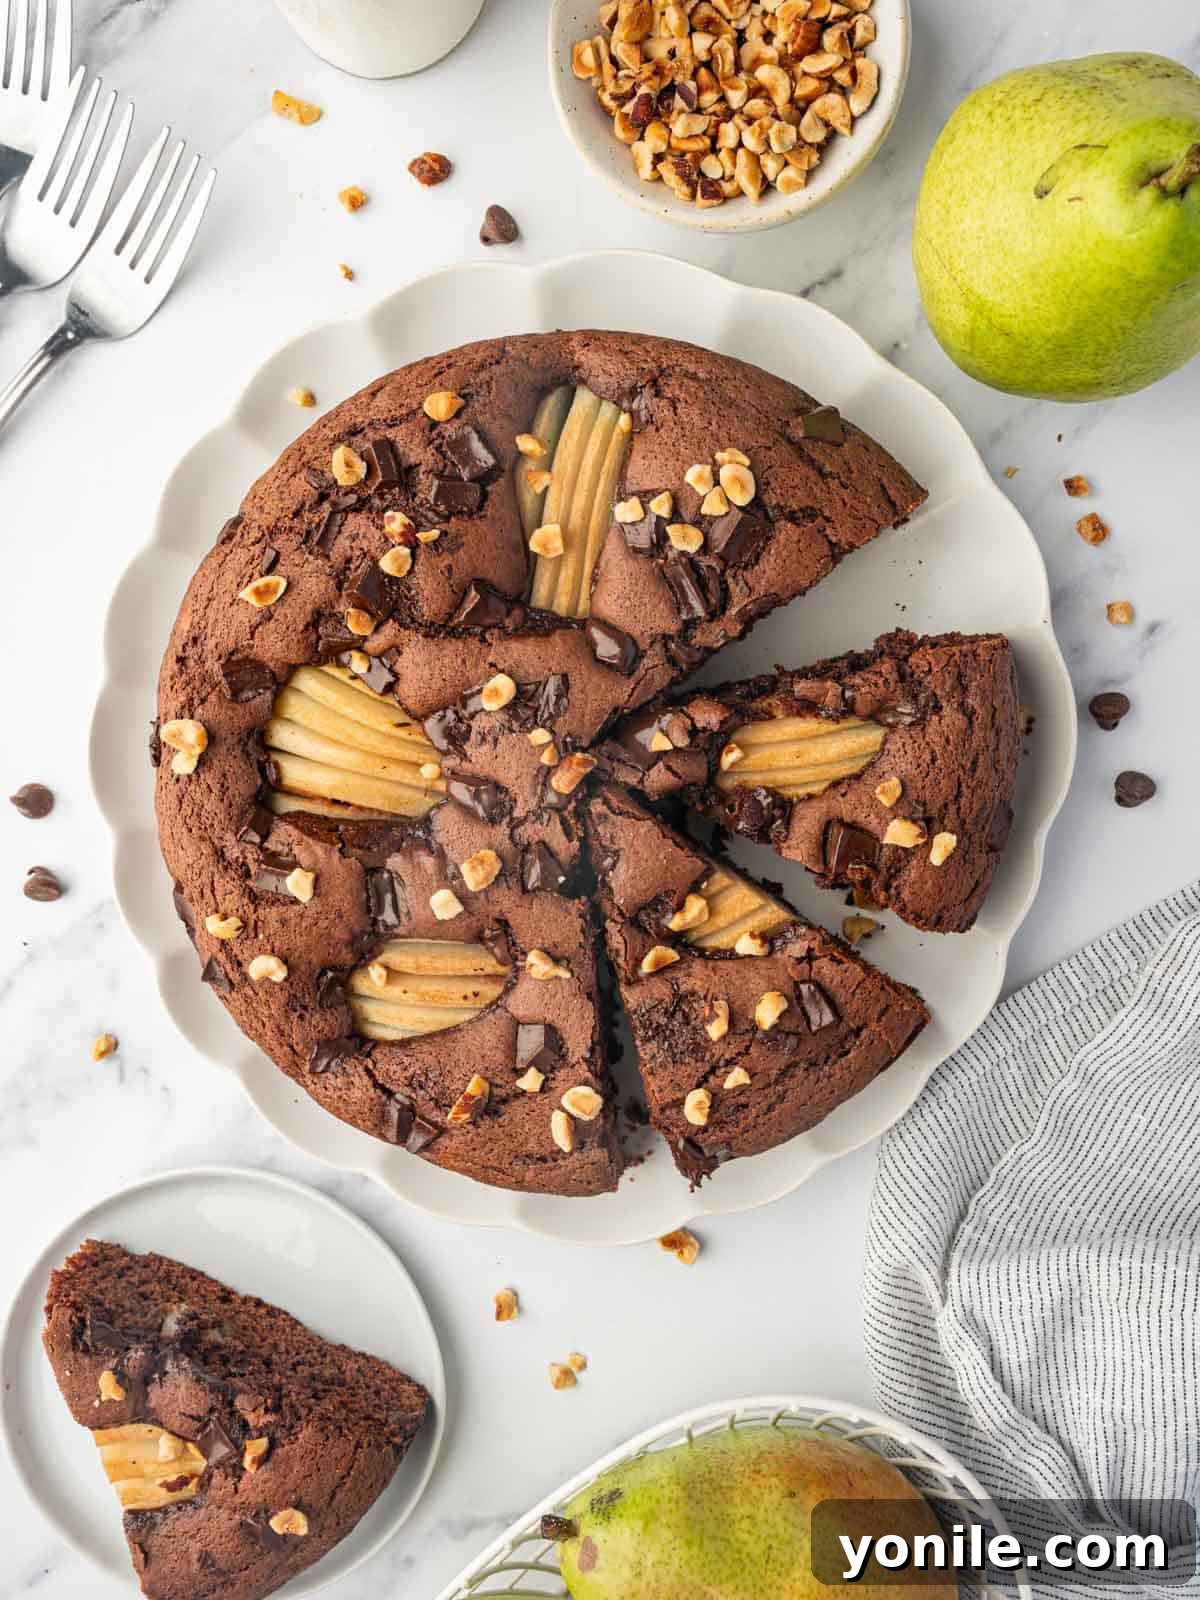
This Chocolate Pear Cake is the perfect recipe to share with loved ones. Once family and friends have savored its delectable flavors, they will undoubtedly request it again and again. Each bite is wonderfully soft and practically melts in your mouth, a true testament to its perfect balance and rich ingredients. The rich, indulgent chocolate component provides a beautiful contrast to the sweet, subtly tangy notes of the juicy pears, culminating in a dessert that is both delightful and truly memorable. Get ready to impress with this surprisingly easy-to-make, yet remarkably gourmet cake.
Looking for more delightful cake creations? Be sure to explore some of our other cherished recipes, including the light and airy Berry Pavlova Cake, the simple and satisfying Easy Blueberry Breakfast Cake, or the cozy and spiced Pumpkin Coffee Cake.
Why You’ll Fall in Love with This Chocolate Pear Cake Recipe
This Chocolate Pear Cake is destined to become a staple in your baking repertoire, and for good reason. Here’s what makes it an absolute favorite:
- An Unforgettable Flavor Symphony: The marriage of robust, slightly bitter chocolate and subtly sweet, aromatic pears is a match made in culinary heaven. This unique pairing elevates the cake beyond typical chocolate desserts, offering a sophisticated and incredibly comforting flavor profile that will surprise and delight your palate. The natural sugars in the pears caramelize slightly during baking, enhancing their sweetness and adding another layer of complexity to the overall taste.
- Unbelievably Moist and Tender Texture: Thanks to the thoughtful inclusion of both diced pears and a touch of vegetable oil and eggs in the batter, this cake boasts an extraordinarily moist and delicate crumb. Every bite practically melts in your mouth, a testament to its perfectly balanced moisture content. The generous chunks of chocolate add bursts of gooey richness, providing a wonderful contrast to the soft cake and succulent fruit.
- Effortlessly Versatile for Any Occasion: From a casual weeknight dessert to an elegant centerpiece for a holiday feast, this cake adapts beautifully. Serve it simply dusted with powdered sugar, or dress it up with a luxurious chocolate ganache or a dollop of freshly whipped cream. It’s equally delightful alongside a morning coffee or as a sweet ending to a celebratory dinner, making it a truly versatile treat for all seasons.
- Surprisingly Simple to Bake: Don’t let its gourmet appearance intimidate you. This recipe is designed with straightforward instructions and common ingredients, making it accessible for bakers of all skill levels. Even if you’re a novice in the kitchen, you can achieve impressive, bakery-quality results with minimal fuss, making it a rewarding baking project that you’ll want to repeat often.
Essential Ingredients for Your Chocolate Pear Masterpiece
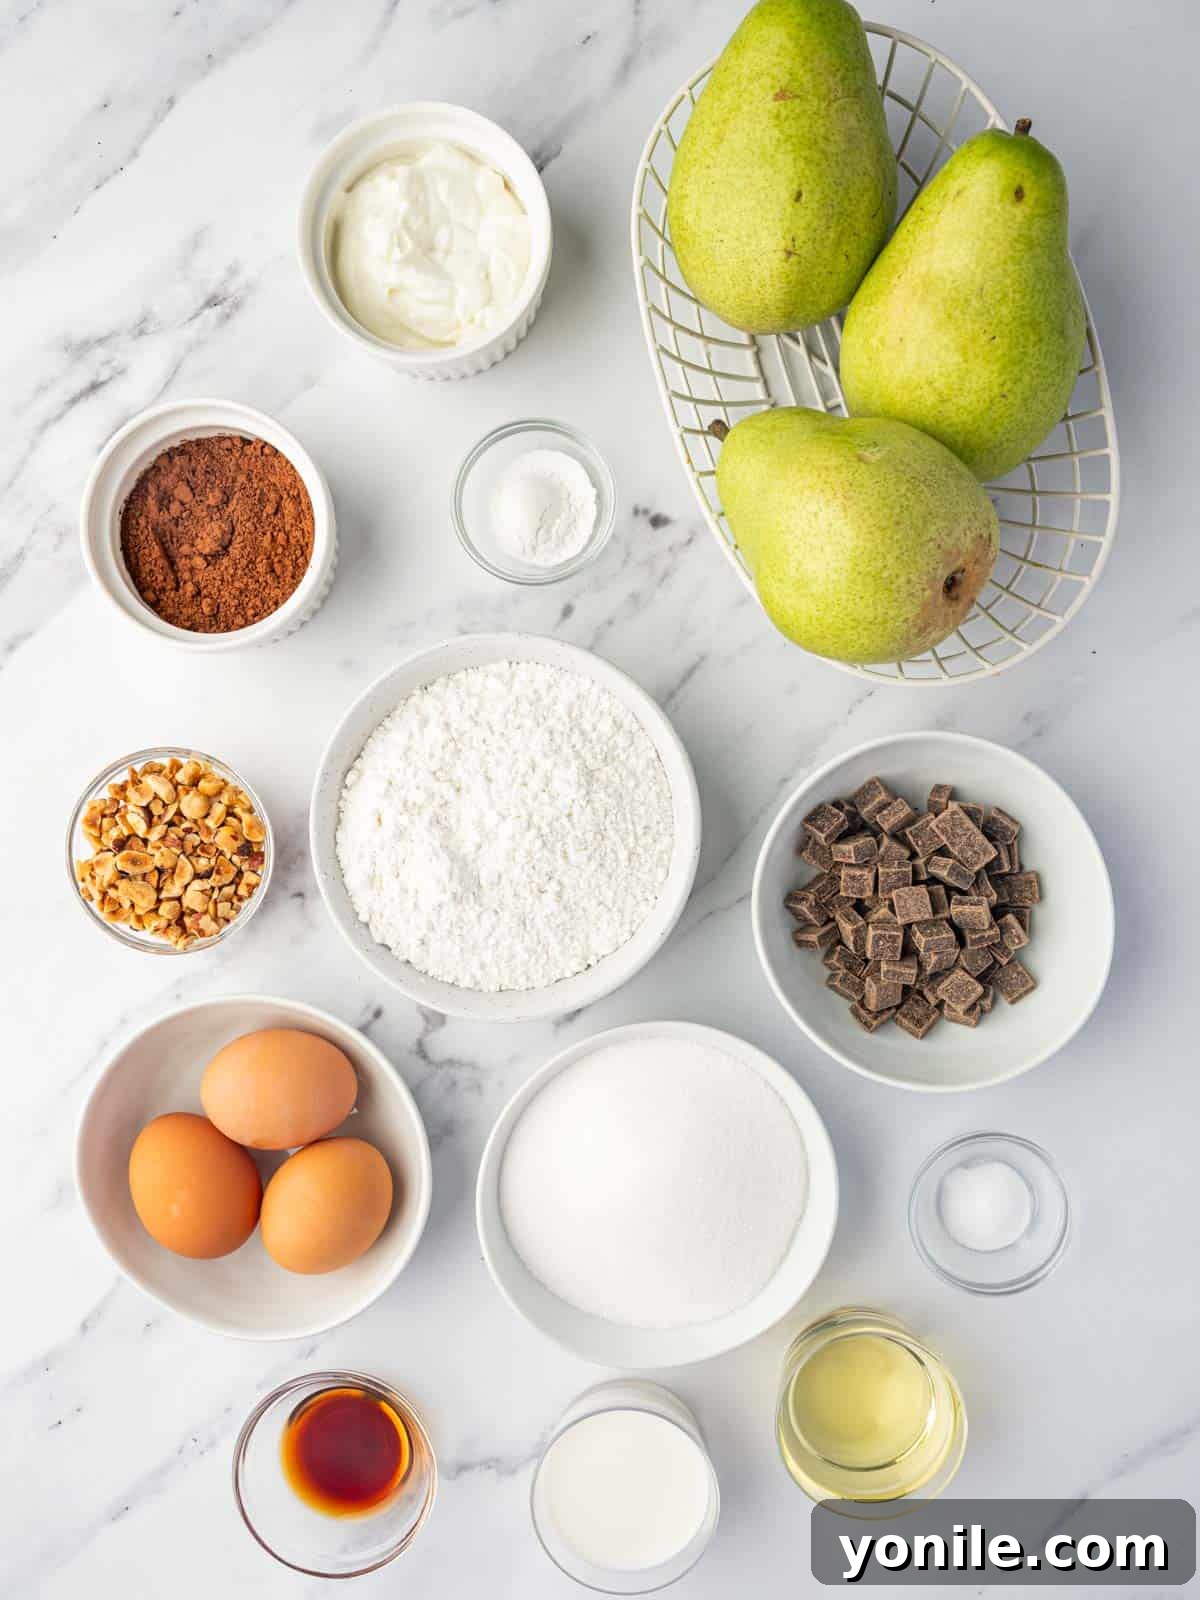
Crafting this phenomenal Chocolate Pear Cake begins with selecting the right ingredients. Each component plays a crucial role in achieving the perfect flavor and texture:
- Cake Flour: The secret to a light, airy, and finely crumbed cake. Cake flour has a lower protein content than all-purpose flour, which results in less gluten development and a wonderfully tender texture. If you don’t have cake flour on hand, you can easily create a substitute (see our FAQ section for details).
- Dutch Process Cocoa Powder: This cocoa powder is treated with an alkali to neutralize its acidity, resulting in a darker color and a smoother, milder, less bitter chocolate flavor compared to natural cocoa powder. It dissolves more readily and creates a truly decadent chocolate base for our cake. While natural cocoa can be used in a pinch, Dutch process cocoa is recommended for the signature depth of flavor and rich color.
- Leavening Agents (Baking Powder & Baking Soda): This recipe intelligently utilizes both baking powder and baking soda to achieve optimal lift and a fluffy texture. Baking powder reacts with liquid and heat, while baking soda requires an acidic ingredient (like the Greek yogurt) to activate. Together, they ensure your cake rises beautifully and is wonderfully light and tender.
- Eggs (Whole Eggs & Egg Yolks): A combination of whole eggs and extra egg yolks contributes significantly to the cake’s richness, moisture, and binding structure. Whole eggs provide protein for structure and some fat, while the additional yolks infuse the batter with extra fat, emulsifying properties, and a velvety texture, preventing the cake from becoming dry. Ensure they are at room temperature for better incorporation into the batter.
- Dairy (Whole Milk & Greek Yogurt): These dairy components are essential for adding moisture, tenderizing the crumb, and enhancing the flavor. Whole milk provides richness and helps create a smooth batter, while Greek yogurt, with its slight acidity and thicker consistency, contributes significantly to the cake’s moistness and adds a subtle tang that beautifully complements the chocolate. Using room temperature dairy also helps achieve a smoother, more uniform batter.
- Sweetness and Depth (Granulated Sugar & Vanilla Extract): Granulated white sugar not only sweetens the cake but also contributes to its tenderness by interfering with gluten formation and helps create a fine crumb. Pure vanilla extract is a fundamental flavor enhancer, deepening the chocolate notes and adding a warm, aromatic complexity that rounds out the cake’s profile, making every bite more inviting.
- Key Additions (Pears, Chocolate Chunks, Hazelnuts): These are the star elements that truly define this cake and elevate it to the next level.
- Pears: Choose ripe but firm pears (like Bartlett, Bosc, or Anjou) that hold their shape well during baking. Their natural sweetness and delicate texture become incredibly tender and flavorful when baked into the chocolate batter, releasing their aromatic juices.
- Chocolate Chunks: Unlike smaller chocolate chips, chocolate chunks tend to melt more smoothly and create substantial pockets of rich, gooey chocolate throughout the cake, enhancing the indulgent experience. Using a portion melted into the batter and the rest sprinkled on top ensures chocolate in every bite.
- Hazelnuts (Optional but Recommended): Chopped hazelnuts add a delightful crunch and a nutty depth of flavor that beautifully complements both the chocolate and the pears. They provide a wonderful textural contrast and an extra layer of gourmet appeal, making the cake even more special.
- Salt: A pinch of salt is crucial in baking. It doesn’t just add salinity; it brightens and balances all the other flavors, making the chocolate richer and the pears sweeter without making the cake taste salty. It subtly enhances the entire flavor profile.
- Vegetable Oil: Provides an infusion of moisture to the cake that is unmatched. Unlike butter, which contains water, vegetable oil is 100% fat, contributing unparalleled moisture and helping to keep the cake tender and moist for days, ensuring a soft crumb that doesn’t dry out quickly.
Step-by-Step Guide to Baking Your Chocolate Pear Cake
Follow these detailed instructions to create a flawless and delicious Chocolate Pear Cake that will impress everyone:
- Step 1: Prepare Your Baking Environment. Begin by preheating your oven to 350°F (175°C). This ensures the oven is at the correct temperature when the cake enters, promoting an even rise and consistent baking. Line the bottom of a 9-inch springform pan with parchment paper and generously grease the sides with butter or baking spray. This crucial step prevents the cake from sticking and makes for easy, clean release after baking. Set the prepared pan aside.
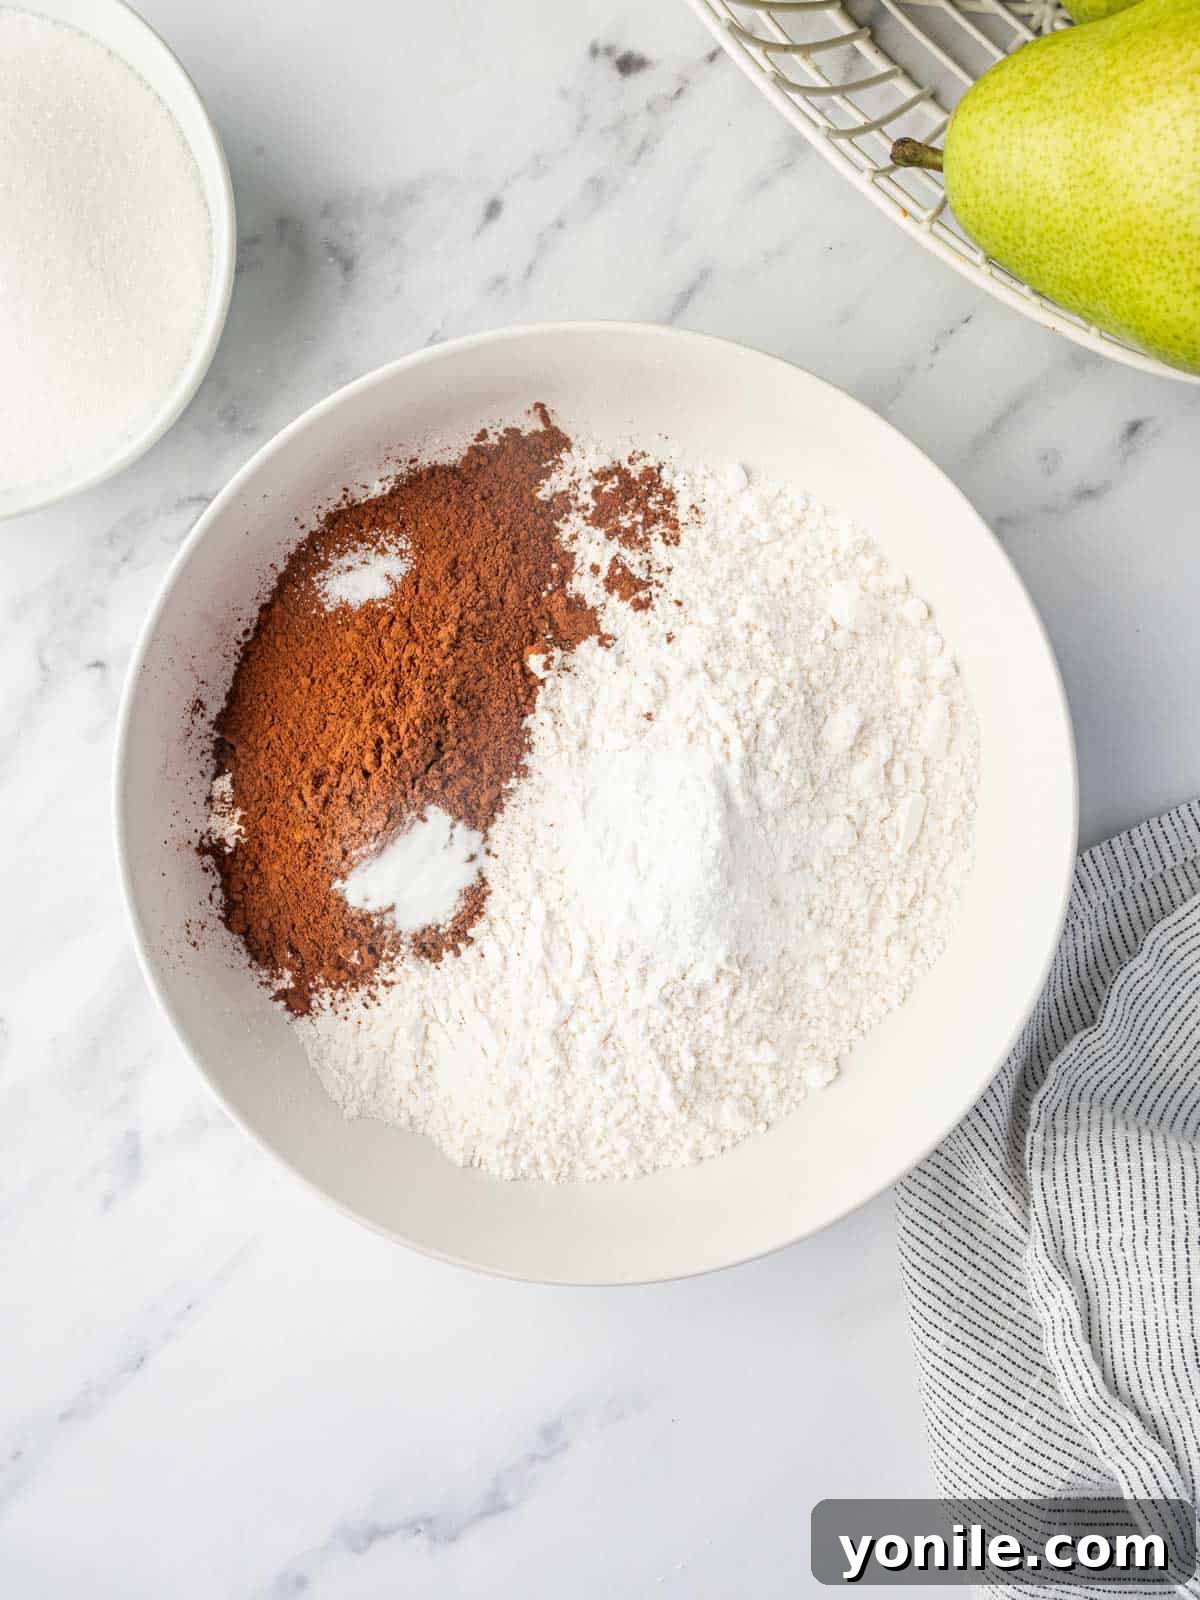
- Step 2: Whisk Together the Dry Ingredients. In a medium-sized bowl, combine the cake flour, Dutch process cocoa powder, baking powder, baking soda, and salt. Use a whisk to thoroughly combine these ingredients, ensuring the leavening agents and cocoa are evenly distributed throughout the flour. This prevents pockets of unmixed ingredients and contributes to a uniform cake texture and even rise. Set this bowl aside for later use.
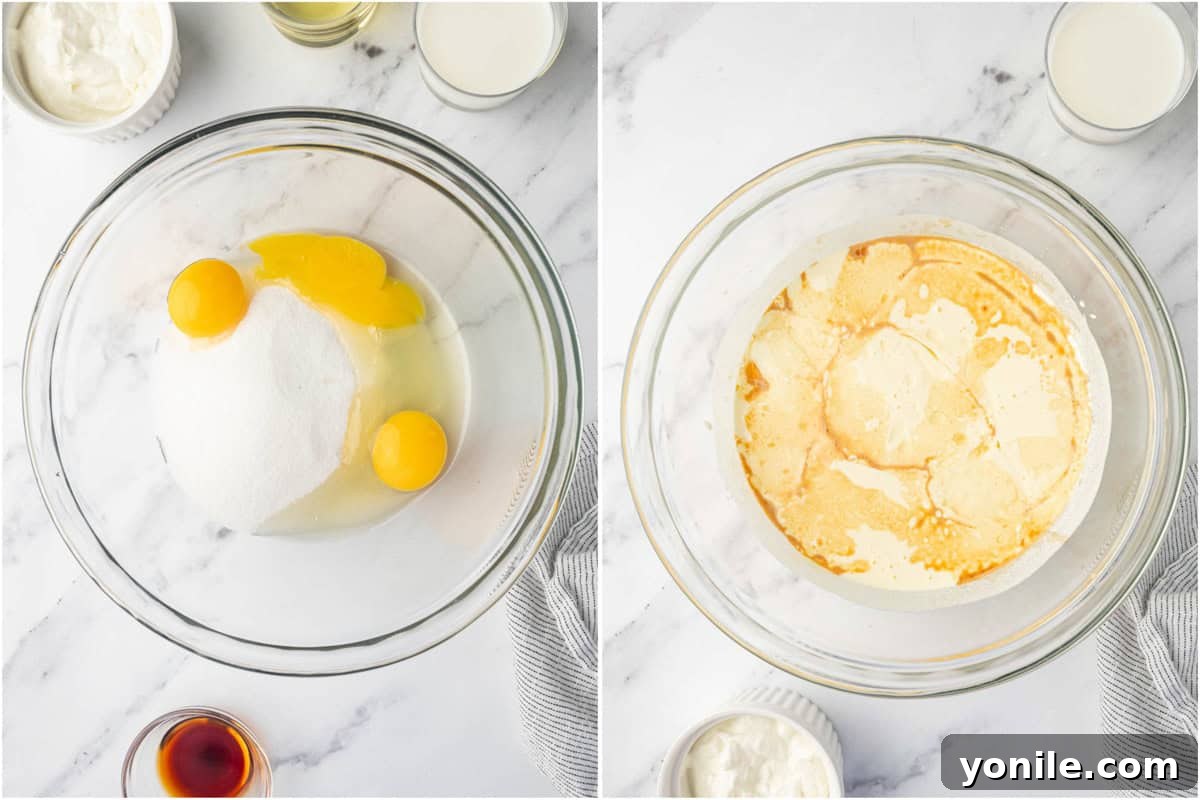
- Step 3: Cream Sugar and Eggs for a Fluffy Base. In a large mixing bowl, combine the granulated sugar, the whole egg, and the two egg yolks. Using a hand mixer (or a stand mixer fitted with a paddle attachment), beat the mixture on medium-high speed until it becomes light in color, thick, and creamy. This process, known as creaming, incorporates essential air into the mixture, which is vital for the cake’s light and tender texture. It should take approximately 3-5 minutes to reach the desired consistency.
- Step 4: Incorporate the Remaining Wet Ingredients. To the creamed sugar and egg mixture, add the Greek yogurt, whole milk, vanilla extract, and vegetable oil. Beat on low speed until all the ingredients are just combined and the mixture appears smooth. Be careful not to overmix at this stage; you want to maintain the air incorporated in the previous step to ensure a light cake.
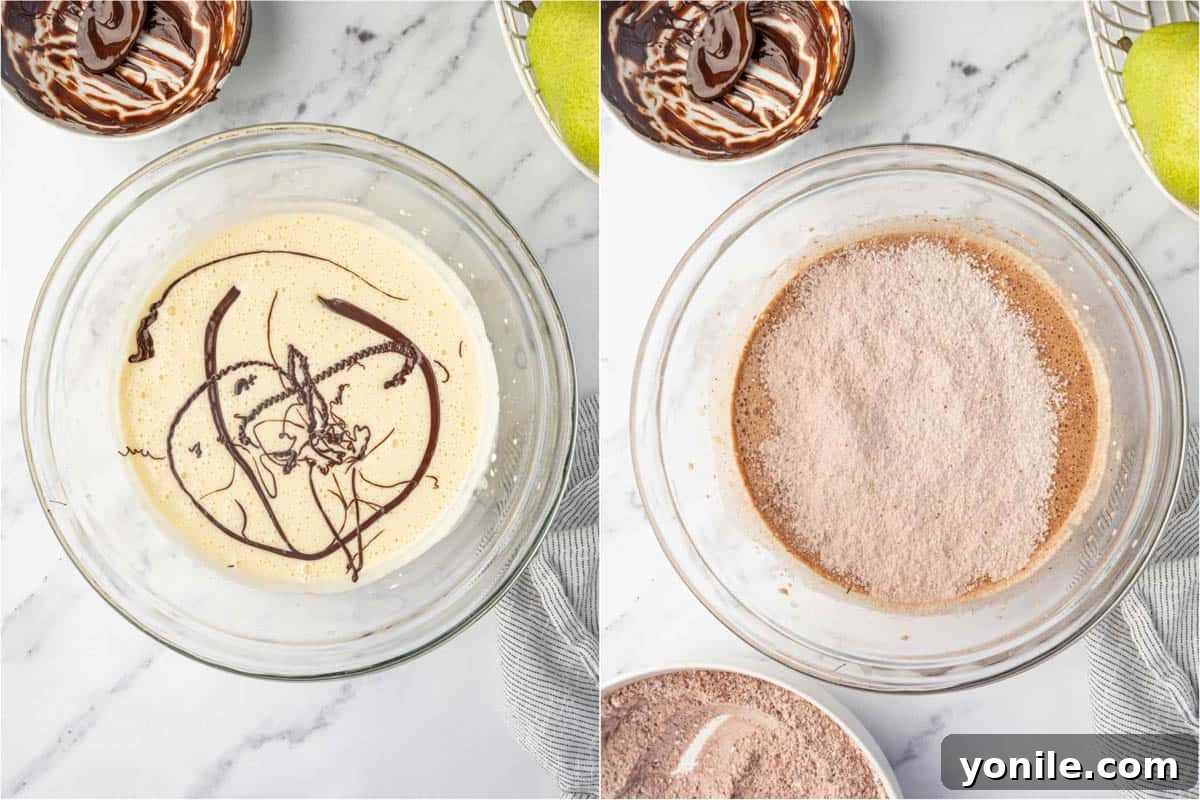
- Step 5: Introduce Melted Chocolate. In a separate microwave-safe bowl, melt ⅓ cup of your chocolate chunks. Heat in short bursts (15-20 seconds), stirring thoroughly after each interval, until smooth and fully melted. Allow the melted chocolate to cool slightly to lukewarm before adding it to the wet mixture. This prevents it from scrambling the eggs or affecting the batter’s temperature. Gently beat until the chocolate is just incorporated, adding a rich chocolate base to your batter.
- Step 6: Gradually Fold in the Dry Ingredients. With your mixer on the lowest speed, gradually add the dry flour mixture to the wet ingredients in 2-3 batches. Mix only until the flour streaks disappear and the batter is just combined and smooth. Overmixing at this stage can develop gluten, which will lead to a tough, dense cake, so mix minimally and gently.
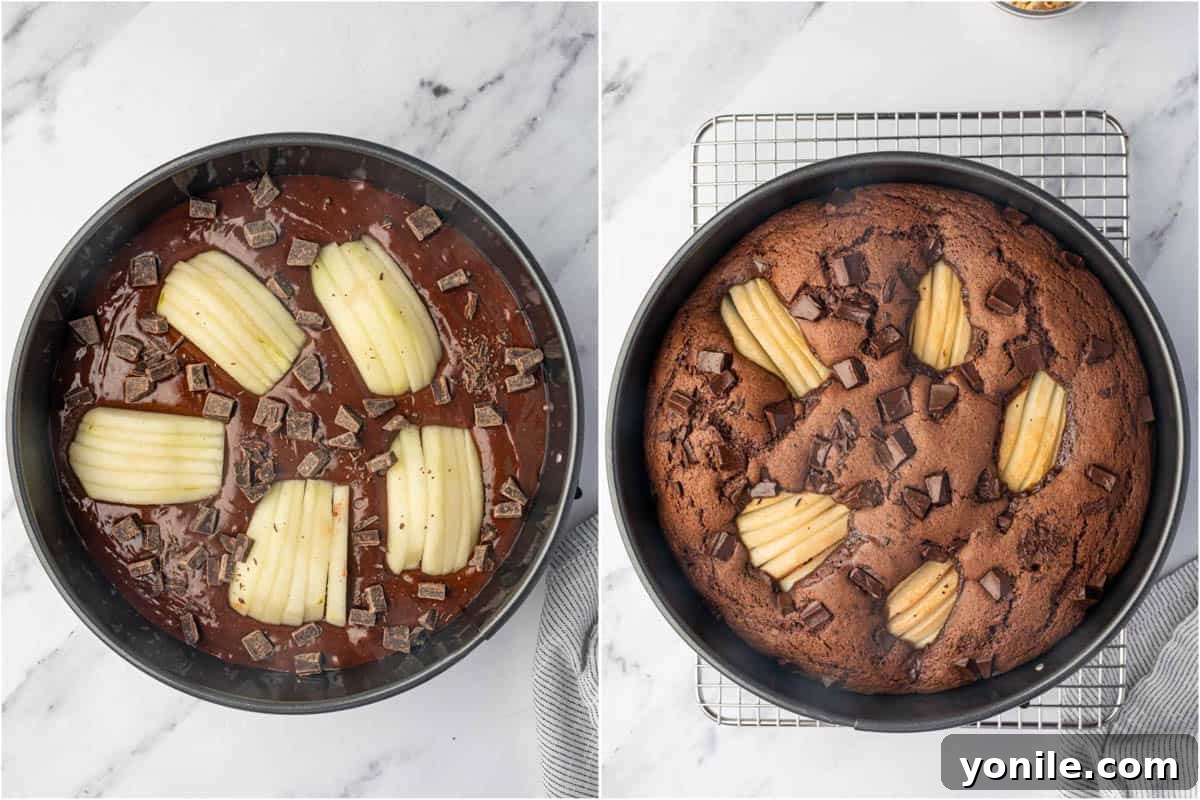
- Step 7: Prepare the Cake for Baking. Carefully pour the chocolate pear cake batter into your prepared 9-inch springform pan, spreading it evenly with a spatula to ensure a level surface for the pears.
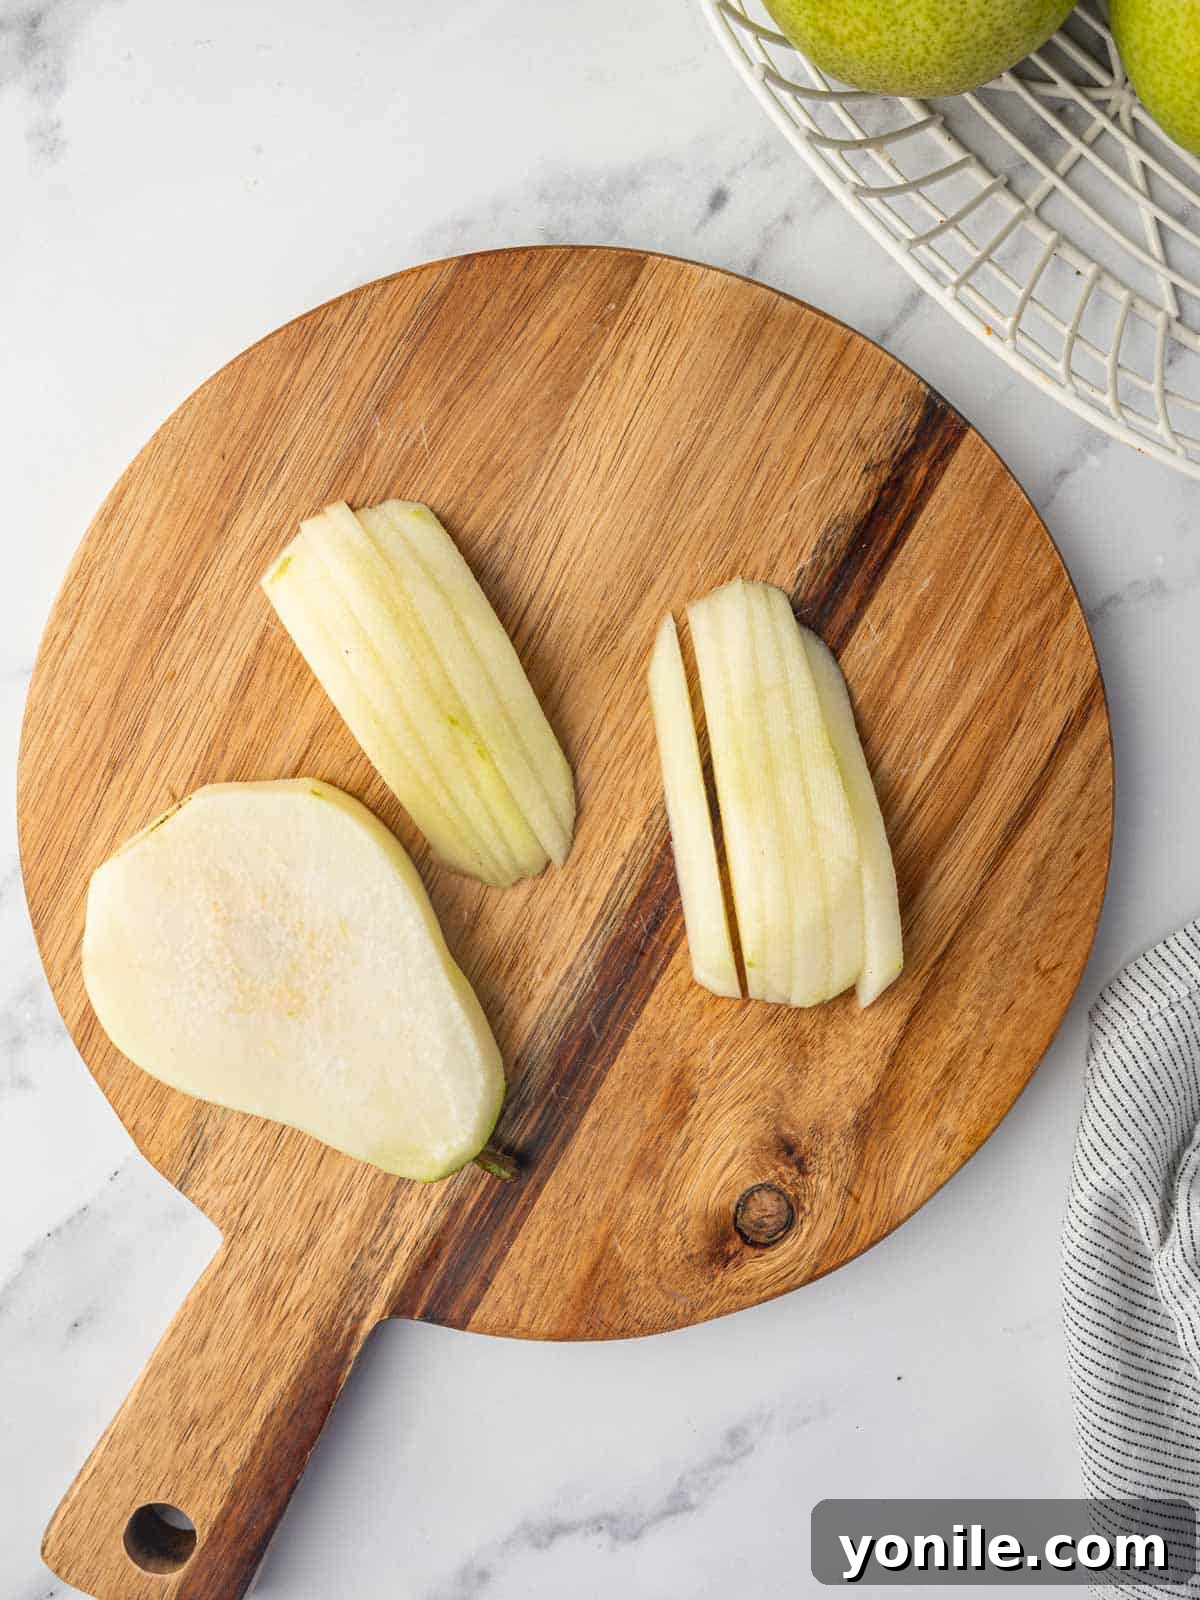
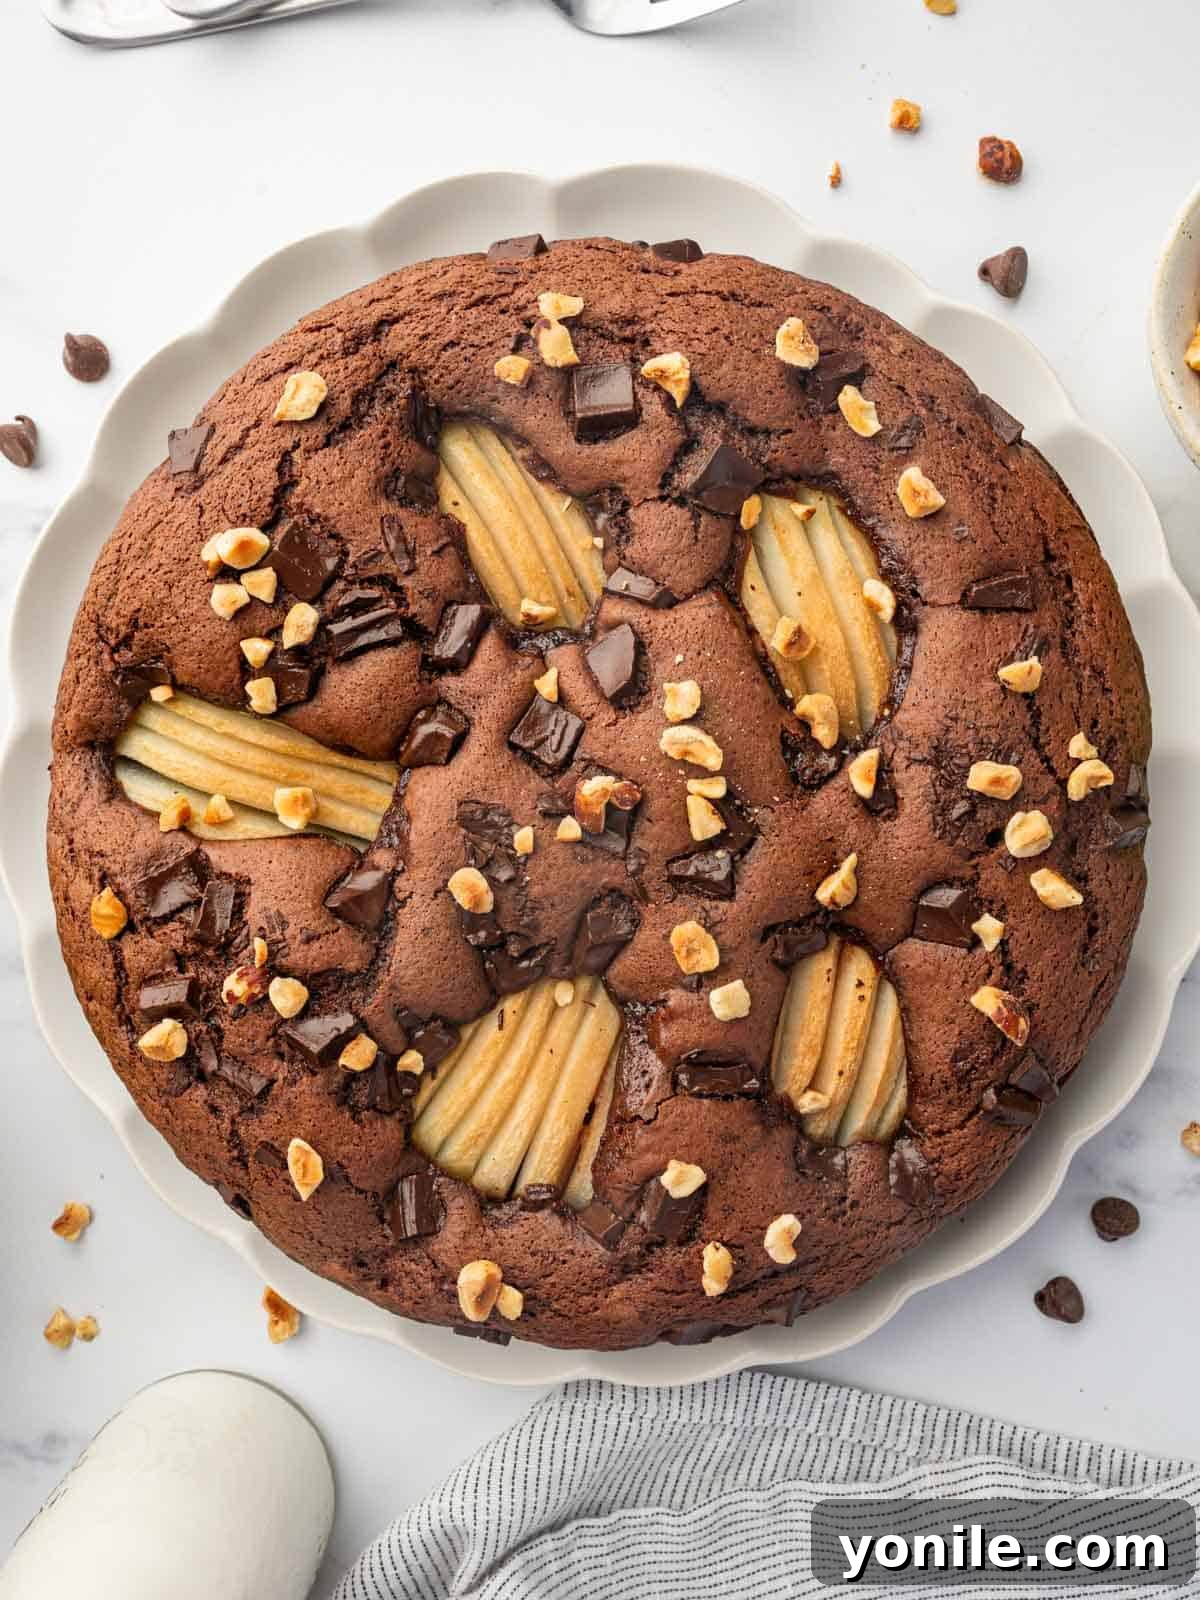
- Step 8: Prepare and Arrange the Pears. While the batter waits in the pan, peel the skin off your two medium pears, carefully remove the core using a melon baller or knife, and slice them into even, medium-thick pieces (approximately ¼-inch thick). You want them thin enough to cook through tenderly but thick enough to retain their shape and texture. Artfully arrange the pear slices over the top of the cake batter, creating a beautiful pattern or simply distributing them evenly.
- Step 9: Add Remaining Chocolate and Bake to Perfection. Sprinkle the remaining chocolate chunks evenly over the arranged pear slices. If using, now is also the ideal time to sprinkle the chopped hazelnuts over the top for added crunch and flavor. Carefully transfer the cake pan to the preheated oven and bake for 50-55 minutes. The cake is done when a wooden toothpick or skewer inserted into the very center comes out clean or with only a few moist crumbs attached, indicating no wet batter.
- Step 10: Allow to Cool Gracefully. Once baked, remove the cake from the oven and immediately place it on a wire rack. Let it cool in the pan for at least 15 minutes. This initial cooling period allows the cake to set and firm up, preventing it from collapsing or breaking when removed from the springform pan. After 15 minutes, slowly release the sides of the springform pan and gently remove it. Continue cooling the cake on the wire rack until it reaches room temperature.
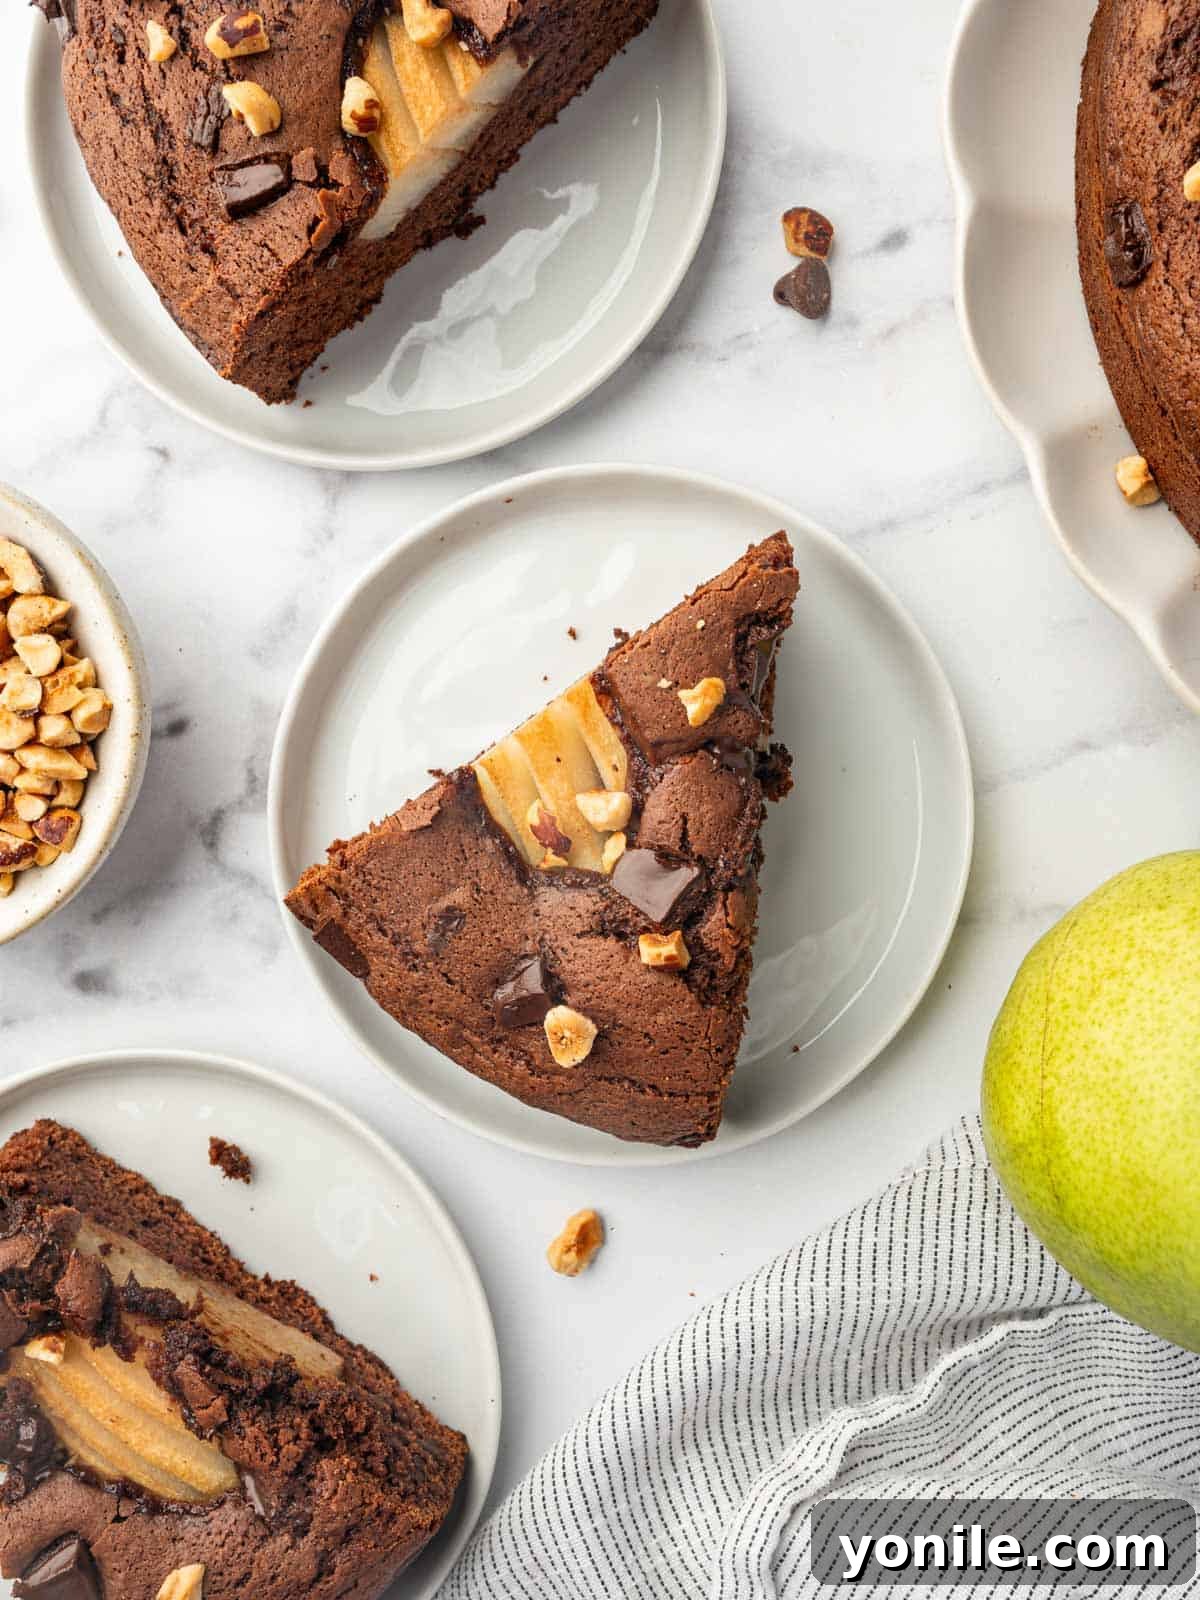
- Step 11: Slice, Serve, and Savor. Once the Chocolate Pear Cake has completely cooled, it’s ready to be sliced into generous portions and served. Enjoy every rich, moist, and fruity bite, perhaps with a dollop of whipped cream or a scoop of ice cream for an extra special treat!
Expert Tips for a Flawless Chocolate Pear Cake
Achieve bakery-quality results with these invaluable tips designed to ensure your Chocolate Pear Cake turns out perfectly every time:
- Selecting the Perfect Pears: For optimal flavor and texture, always choose ripe but firm pears. Varieties like Bosc, Anjou, or Bartlett are excellent choices as they possess a good balance of sweetness and acidity and hold their shape well during baking. Avoid overly soft or mushy pears, as they can break down too much in the cake and release excessive moisture.
- The Art of Not Overmixing: This is a golden rule in baking, especially for cakes. Once you add the dry ingredients to the wet, mix only until no streaks of flour remain and the batter is just combined. Overmixing develops gluten, which can lead to a tough, dense, and chewy cake rather than a tender one. A light hand and low mixer speed are your best friends here.
- Crucial Cooling Time: Patience is key to a perfectly set cake! Allow the cake to cool completely in its pan on a wire rack before attempting to remove it or slice it. Warm cakes are very delicate and prone to falling apart or crumbling. Cooling allows the cake’s structure to set, strengthens its crumb, and allows the flavors to fully develop and meld together.
- Proper Pan Preparation: To guarantee an easy release and a beautifully shaped cake, do not skip or skimp on pan preparation. Always line the bottom of your springform pan with parchment paper, and generously grease the sides with butter or a non-stick baking spray. This creates a non-stick barrier, ensuring your beautiful cake slides out effortlessly without sticking or tearing.
- Room Temperature Ingredients: For a smooth, well-emulsified batter and better rise, ensure your eggs and dairy products (milk, Greek yogurt) are at room temperature. Cold ingredients don’t blend as easily or emulsify as well with other ingredients, potentially leading to a lumpy batter, a less tender cake, or a compromised rise.
- Don’t Skimp on Quality Chocolate: Since chocolate is a prominent flavor in this cake, using high-quality chocolate chunks will make a noticeable difference in the final taste and texture. Choose a brand of chocolate that you enjoy eating on its own for the best results.
- Testing for Doneness Accurately: While the suggested baking time is a good guide, oven temperatures can vary significantly. Always rely on the toothpick test: insert a wooden toothpick or thin skewer into the very center of the cake. If it comes out clean or with only a few moist crumbs attached (no wet batter), your cake is perfectly baked. If it comes out with wet batter, continue baking for a few more minutes and test again.
Serving Suggestions: Elevate Your Chocolate Pear Cake Experience
While this Chocolate Pear Cake is utterly delicious and satisfying on its own, a few simple additions can transform it into an even more spectacular and memorable dessert. Here are some ideas to impress your guests and delight your taste buds:
- A Dusting of Elegance: For a classic, simple, and beautiful presentation, simply dust the cooled cake generously with a sprinkle of powdered sugar just before serving. It adds a touch of sweetness and a delicate visual appeal that enhances its gourmet look.
- Rich Chocolate Ganache: Drizzle a homemade or high-quality store-bought chocolate ganache over individual slices or even the entire cooled cake. The glossy, intensely rich chocolate layer further intensifies the cocoa flavor and adds a luxurious, decadent touch.
- Whipped Cream or Crème Fraîche: A generous dollop of freshly whipped cream or a spoonful of tangy crème fraîche provides a creamy, light contrast to the cake’s richness. The ethereal lightness of the cream perfectly balances the dense chocolate and sweet pears, creating a delightful interplay of textures and flavors.
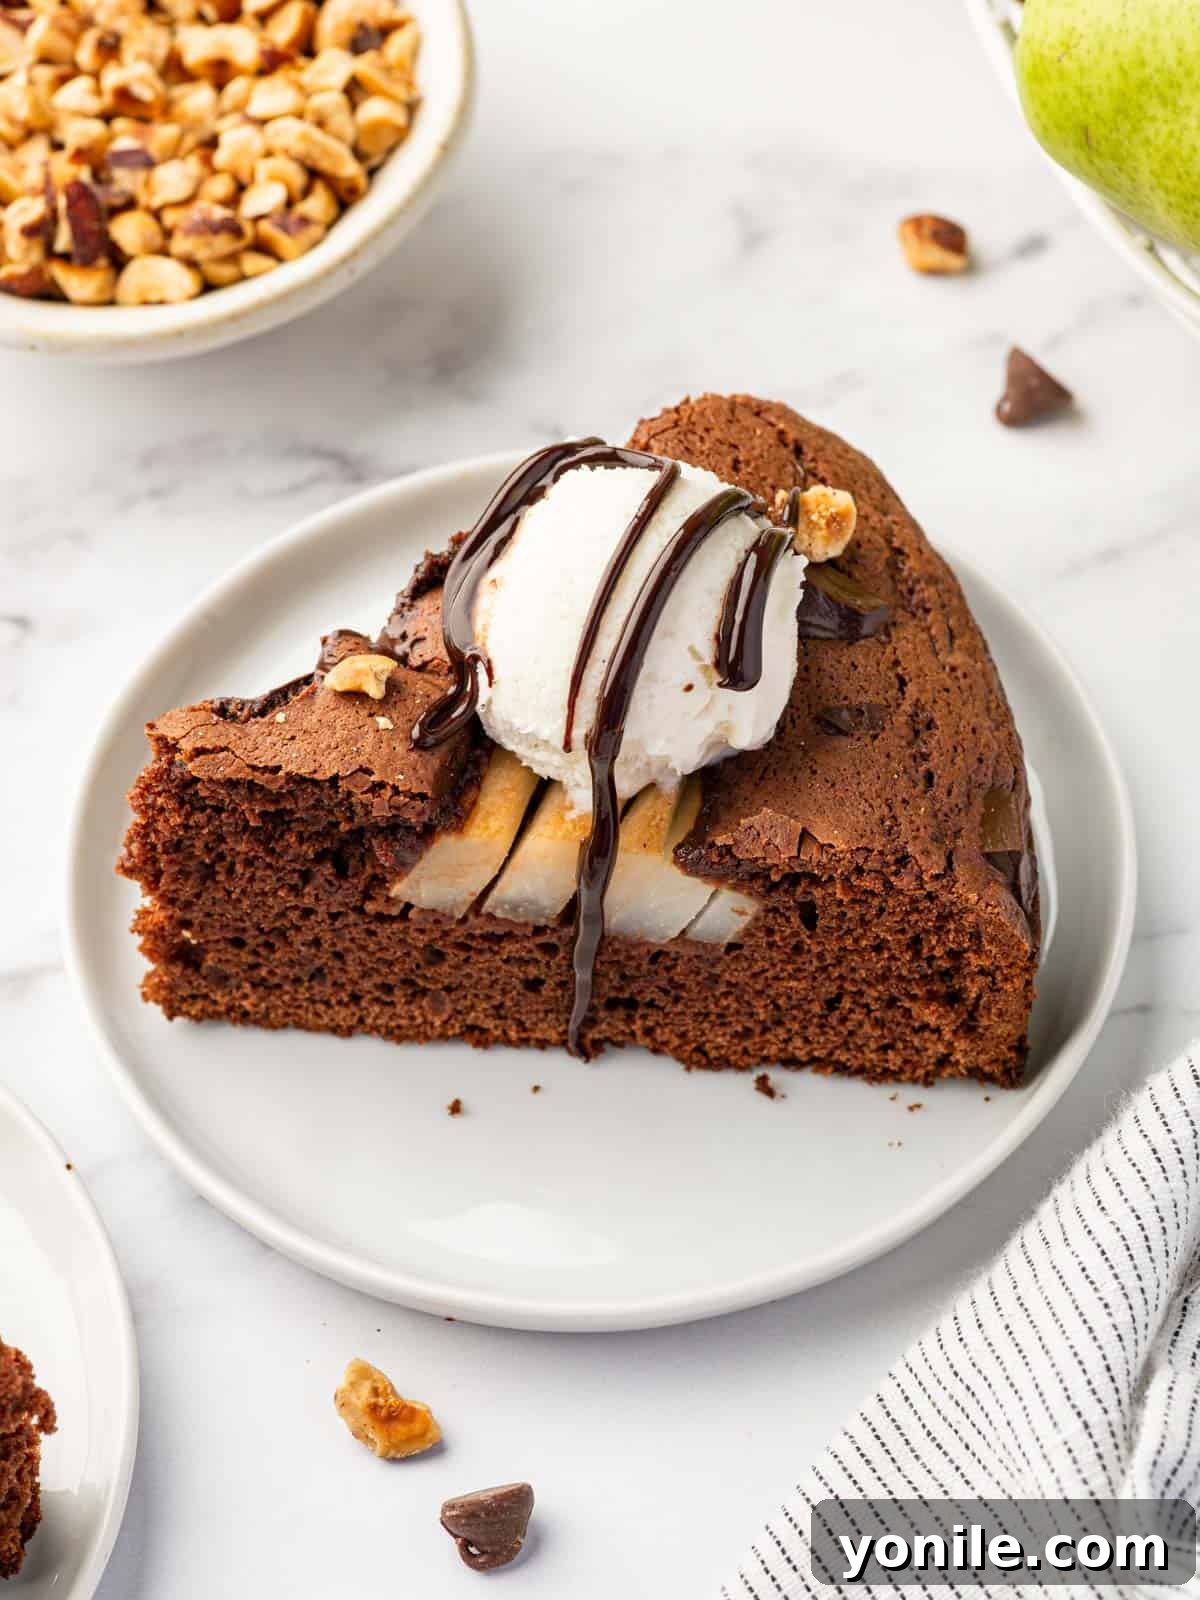
- Vanilla Ice Cream: Serve warm slices of Chocolate Pear Cake with a scoop of premium vanilla bean ice cream. The melting ice cream creates a delightful sauce around the cake, and the creamy, cold texture is a wonderful complement to the warm, moist cake, offering a comforting and indulgent experience.
- Fresh Berry Medley: A colorful side of fresh berries (such as raspberries, strawberries, or blueberries) adds vibrant color, a refreshing tartness, and a burst of juicy flavor that beautifully cuts through the richness of the cake. It brightens the dessert and adds a healthful element.
- Aromatic Coffee or Tea: For a comforting and sophisticated experience, pair a slice of this cake with a hot cup of freshly brewed coffee or a soothing herbal tea. It’s the perfect accompaniment for an afternoon treat, a delightful brunch addition, or a refined after-dinner indulgence. Consider a spiced chai, a rich espresso, or a delicate Earl Grey to complement the cake’s robust flavors.
- Caramel Sauce: A delicate drizzle of warm, homemade or store-bought caramel sauce can enhance the natural sweetness and slightly caramelized notes of the pears, adding another layer of indulgent flavor and a beautiful sheen, creating a truly irresistible dessert.
Storing and Reheating Your Chocolate Pear Cake
To ensure your Chocolate Pear Cake remains as fresh and delicious as the day it was baked, proper storage is essential. Here’s how to keep it at its best and enjoy it for longer:
- Room Temperature Storage: For immediate enjoyment within a day or two, store the cooled cake at room temperature. Ensure it is placed in an airtight container to prevent it from drying out. Make sure the cake is completely cooled before covering, as any residual warmth can create condensation and make the cake soggy.
- Refrigeration: If you need to store it for a longer period, transfer the cake to an airtight container and refrigerate for up to 7 days. The cooler temperature helps to preserve its freshness and slows down spoilage, especially beneficial in warmer climates or for extended storage.
- Reheating for a Warm Treat: If you prefer your cake warm, which enhances its flavors and gooey chocolate chunks, you have a couple of excellent options:
- Microwave: Place an individual slice on a microwave-safe plate. Heat it for short bursts of 15-30 seconds, or until it reaches your desired warmth. Be cautious not to overheat, as this can dry out the cake and toughen the chocolate.
- Oven: For a more even warmth and to potentially restore a slight crispness to the crust, preheat your oven to a low temperature, around 300°F (150°C). Place individual slices on a baking sheet and warm for 5-10 minutes, or until the desired temperature is reached.
- Freezing for Future Indulgence: This cake freezes beautifully, allowing you to prepare it in advance or save leftovers to enjoy weeks or even months later.
- Whole Cake: Once the cake is completely cooled, wrap it tightly in several layers of plastic wrap, then an additional layer of heavy-duty aluminum foil. This double-layer protection prevents freezer burn. Place it in an airtight freezer-safe container or a large freezer bag. It can be stored in the freezer for up to 3 months without significant loss of quality.
- Individual Servings: For ultimate convenience, slice the cake into individual portions before freezing. Wrap each slice separately in plastic wrap and then foil, or arrange them in a freezer-safe container with parchment paper between layers to prevent sticking. This allows you to thaw and enjoy a single serving whenever a craving strikes without defrosting the entire cake.
- Thawing Frozen Cake: To thaw, simply transfer the frozen cake (whether whole or slices) from the freezer to the refrigerator overnight. For quicker thawing of individual slices, you can place them at room temperature for an hour or two, or gently warm them in the microwave or oven as described above.
Frequently Asked Questions About Chocolate Pear Cake
Got questions about baking this delightful cake? We’ve got answers to help you achieve the perfect Chocolate Pear Cake every time!
- Can I substitute cake flour with all-purpose flour?
Yes, you absolutely can! If you don’t have cake flour, you can easily create your own cake flour blend at home. For every one cup of cake flour required in a recipe, measure out ¾ cup plus 2 tablespoons of all-purpose flour. Then, remove 2 tablespoons of that all-purpose flour and replace it with 2 tablespoons of cornstarch. Sift this mixture together thoroughly (preferably twice) to ensure the cornstarch is evenly distributed. This homemade blend will mimic the low-protein, tenderizing qualities of commercial cake flour, helping you achieve a similar delicate crumb.
- I don’t have Dutch process cocoa. Can I use regular cocoa powder instead?
Yes, you can substitute regular (natural) cocoa powder for Dutch-processed cocoa powder. However, be aware that there will be a slight difference in flavor and appearance. Dutch-processed cocoa is less acidic and typically has a darker color and a smoother, more mellow chocolate flavor. Regular cocoa powder is more acidic and has a slightly sharper, fruitier chocolate taste and a lighter brown color. Since this recipe uses both baking powder and baking soda, if you use natural cocoa (which is acidic), it might react more strongly with the baking soda, affecting the rise slightly. For a simple substitution, it will still yield a delicious cake, just with a slightly different flavor and color profile.
- Can I use low-fat yogurt instead of Greek yogurt?
You can use low-fat yogurt as a substitute for Greek yogurt, but anticipate a minor difference in the cake’s texture. Greek yogurt is notably thicker and creamier due to its straining process, which contributes significantly to the cake’s moistness and rich mouthfeel. Low-fat yogurt, being thinner, may result in a slightly less dense and moist cake. If using low-fat yogurt, consider reducing the amount of milk by a tablespoon or two to compensate for the thinner consistency, or simply proceed as is for a slightly lighter result.
- What kind of pears are best for baking?
Firm, ripe pear varieties like Bosc, Anjou, or Bartlett are ideal for baking. They possess a good balance of sweetness and acidity and hold their shape well during the baking process, preventing them from becoming mushy. Their subtle sweetness complements the chocolate beautifully. Avoid very soft or overly ripe pears, as they can break down too much. Pears should be ripe enough to be flavorful but still firm to the touch.
- Why did my pears sink to the bottom of the cake?
Pears (or any fruit) can sink if they are too heavy or if the batter is too thin. To prevent sinking, ensure your pear slices aren’t too thick. You can also lightly toss the pear slices in a tablespoon of the dry flour mixture before arranging them on top of the batter. The flour coating helps them adhere to the batter and prevents them from descending during baking. Additionally, make sure your batter is not too runny; proper measurement of ingredients and a thick batter are key.
Explore More Delightful Cake Recipes
If you loved this Chocolate Pear Cake, you’re in for a treat! Discover more amazing cake recipes that are perfect for any occasion:
- Super Moist Pear Cake: A classic pear cake recipe, incredibly tender and bursting with fresh fruity flavor.
- Pear Bundt Cake: An elegant and flavorful bundt cake featuring juicy pears, perfect for entertaining.
- Pear Upside-Down Cake: A stunning cake with caramelized pear slices beautifully arranged on top.
- Cinnamon Apple Cheesecake: A rich and creamy cheesecake infused with warm cinnamon apples.
- Blueberry Bundt Cake: A simple yet delightful bundt cake generously packed with fresh blueberries.
This Chocolate Pear Cake is more than just a dessert; it’s an experience. With its moist and tender texture, eye-catching presentation, and adaptable nature, it’s perfect for any event, from a casual coffee break to a festive celebration. The rich, indulgent chocolate harmonizes beautifully with the sweet, succulent pears, creating a flavor profile that is both comforting and sophisticated. We are confident that this irresistible cake will quickly become a cherished favorite in your culinary collection, earning you compliments every time.
We encourage you to try this delightful recipe yourself! If you do, please consider sharing your feedback by leaving a star rating in the comment section below. We love hearing from you and seeing your creations! For more delicious recipes, baking inspiration, and culinary tips, be sure to follow Cookin’ With Mima on Facebook, Instagram, and Pinterest. Happy baking!
Chocolate Cake with Pears
By: Mariam Ezzeddine
Chocolate Pear Cake is a delightful combination of rich, moist chocolate cake and the natural sweetness of ripe pears.
Print Recipe
Ingredients
- 1 ½ cups cake flour
- ¼ cup Dutch processed cocoa powder
- 1 teaspoon baking powder
- ¼ teaspoon baking soda
- ¼ teaspoon salt
- 1 cup granulated white sugar
- 1 whole egg, at room temperature
- 2 egg yolks, at room temperature
- ⅓ cup Greek yogurt
- ¼ cup whole milk
- 1 tablespoon vanilla extract
- ¼ cup vegetable oil
- ½ cup chocolate chunks, divided
- 2 medium pears
- 2 tablespoons chopped hazelnuts
Instructions
- Preheat the oven to 350 degrees F (175°C). Line a 9-inch springform pan with parchment paper and grease the sides. Set it aside.
- In a medium bowl, combine cake flour, cocoa powder, baking powder, baking soda, and salt. Set it aside.
- In a large bowl, combine sugar, egg, and egg yolks. Beat until light and creamy using a hand mixer.
- Add yogurt, milk, vanilla extract, and oil. Beat until just combined.
- In a microwave-safe bowl, melt ⅓ cup chocolate chunks and add it to the wet mixture once cooled down.
- Gradually add the flour mixture in batches, mixing on low speed until well combined.
- Pour the cake batter over the prepared cake pan.
- Meanwhile, peel the skin off the pears, remove the core, and slice them (not too thick or thin). Arrange them over the cake batter.
- Sprinkle the remaining chocolate chunks over the top. Place the cake pan in the oven and bake for 50-55 minutes until a toothpick inserted in the center comes out clean.
- Once done, allow the cake to cool for 15 minutes on a wire rack. Slowly release the springform pan sides and remove it.
- Slice and serve the chocolate pear cake to enjoy.
Notes
- Choose Ripe Pears: Use ripe but firm pears for the best flavor and texture in the cake.
- Don’t Overmix: Mix the cake batter just until the ingredients are combined to avoid overmixing, which can result in a tough cake.
- Cool Completely: Allow the cake to cool completely in the pan before removing and serving to prevent it from falling apart.
- Grease Pan: To prevent the cake from sticking, cover the springform pan with parchment paper and grease its sides for easy removal of the cake post-baking and cooling.
Nutrition
Calories: 309kcal | Carbohydrates: 46g | Protein: 6g | Fat: 12g | Saturated Fat: 4g | Polyunsaturated Fat: 4g | Monounsaturated Fat: 4g | Trans Fat: 0.05g | Cholesterol: 57mg | Sodium: 143mg | Potassium: 185mg | Fiber: 3g | Sugar: 27g | Vitamin A: 100IU | Vitamin C: 2mg | Calcium: 62mg | Iron: 1mg