
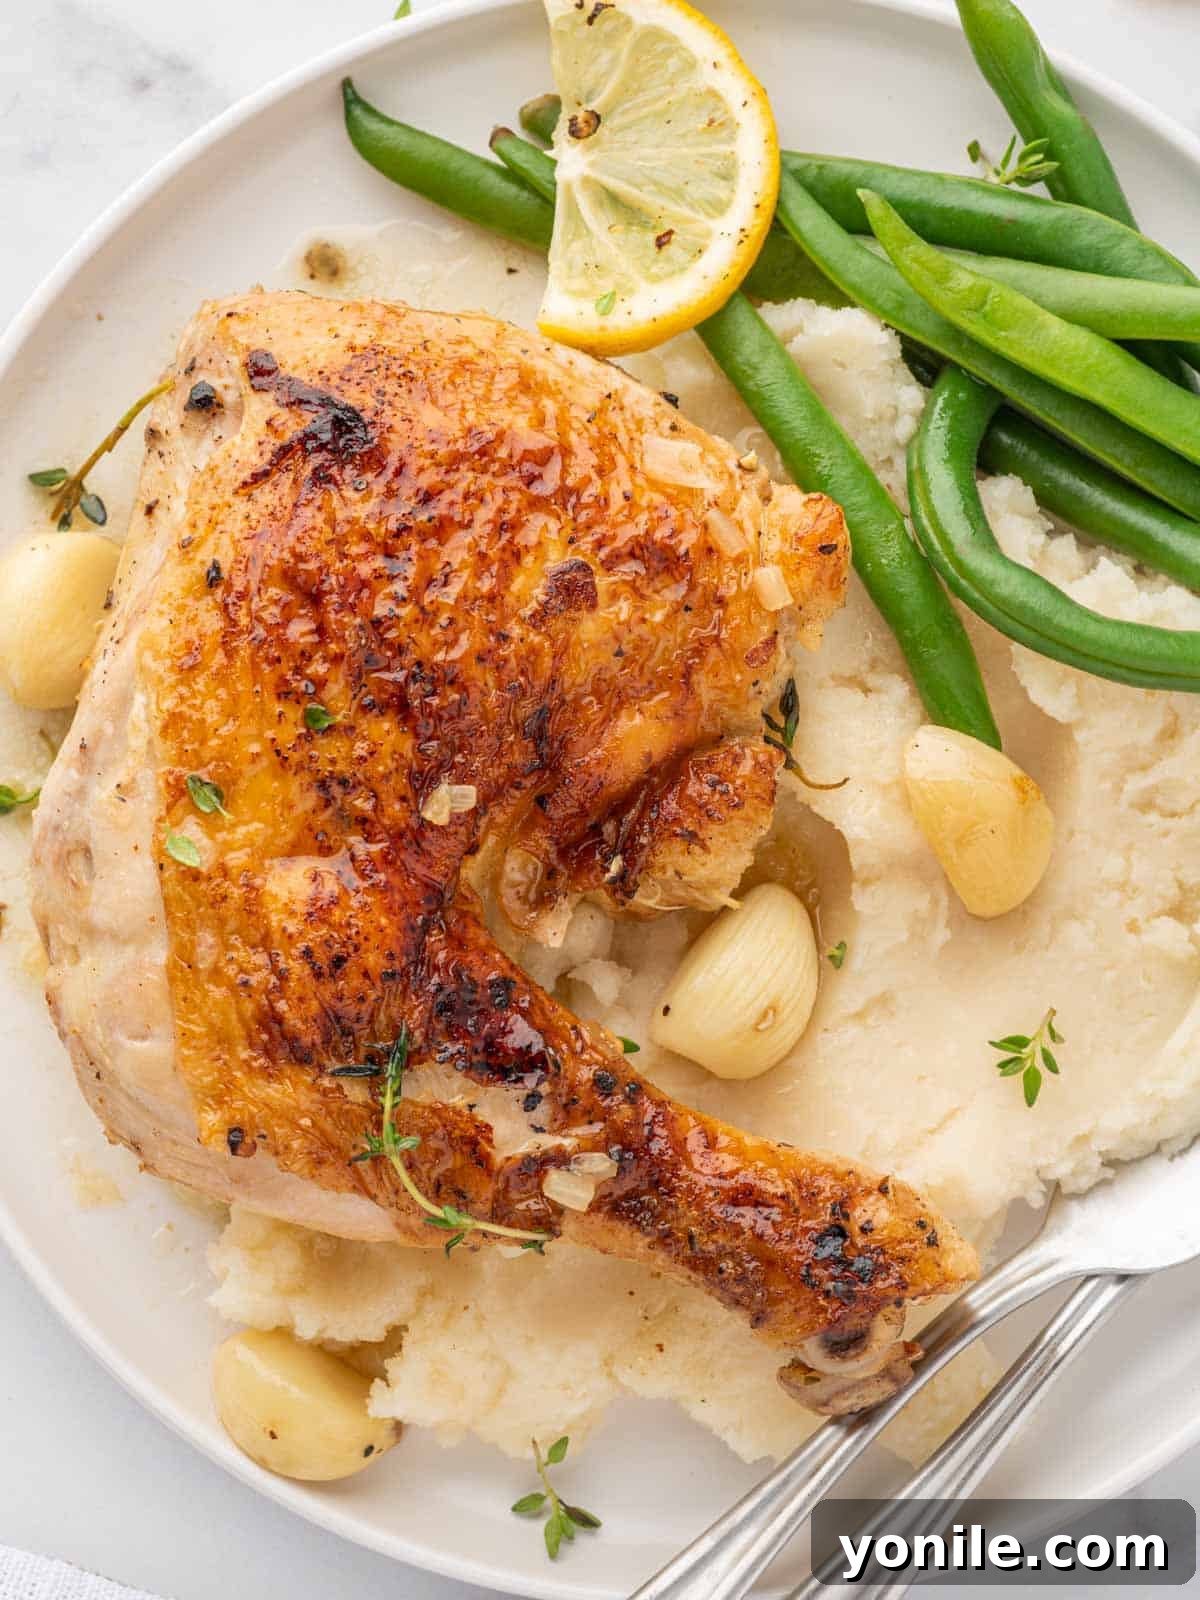
Delight your senses and impress your dinner guests with this truly exceptional Lemon-Garlic Braised Chicken Legs recipe. It’s a culinary masterpiece that marries the rustic charm of tender, fall-off-the-bone chicken with the bright, zesty notes of fresh lemon and the warm, aromatic allure of slow-cooked garlic. This comforting and hearty dish is wonderfully versatile, making it the perfect choice for a cozy weeknight meal with family or an elegant entrée for a special occasion. Each succulent bite promises an explosion of flavor, transforming humble chicken legs into an unforgettable dining experience.

The art of braising, a slow and gentle cooking process, is the secret behind the incredible texture of this dish. It ensures that every piece of chicken is infused with deep, complex flavors, resulting in meat so juicy and tender it practically melts in your mouth. As the chicken simmers in its flavorful liquid, the aromatics and citrus meld together, creating a rich sauce that is truly irresistible. If you’re a connoisseur of the harmonious pairing of lemon and garlic, you’ll also adore my other creations like Lemon Garlic Butter Shrimp and Lemon Garlic Chicken Skewers.
Why You’ll Adore This Lemon-Garlic Braised Chicken Recipe
This recipe isn’t just about cooking; it’s about creating a memorable meal with minimal fuss and maximum satisfaction. Here are the compelling reasons why this braised chicken will become a staple in your kitchen:
- Unrivaled Flavor and Tenderness: Braising chicken leg quarters is a game-changer. The slow, moist heat gently breaks down the connective tissues in the meat, leaving it incredibly juicy and fork-tender. This extended cooking time allows the vibrant flavors of lemon, potent garlic, and savory broth to thoroughly penetrate the chicken, resulting in a depth of taste that simply cannot be achieved with quicker cooking methods. The skin crisps beautifully during the initial sear and then becomes soft and rich as it braises, adding another layer of texture and flavor.
- Remarkably Budget-Friendly: Chicken leg quarters, which include both the thigh and drumstick, are often one of the most economical cuts of chicken available. This recipe elevates these humble cuts into a gourmet-tasting meal without requiring expensive ingredients, making it an ideal choice for feeding a family or entertaining guests on a budget. You get incredible flavor and a hearty meal without breaking the bank.
- Effortless Preparation for All Skill Levels: Don’t let the sophisticated taste intimidate you; this recipe is surprisingly straightforward. With clear, easy-to-follow steps, it’s a perfect go-to for both novice home cooks looking to expand their repertoire and seasoned chefs seeking a reliable, delicious dish. Most of the cooking time is hands-off, allowing you to focus on other tasks while your oven does the work.
- Incredible Versatility for Any Meal: One of the greatest strengths of this lemon-garlic braised chicken is its adaptability. It pairs beautifully with a wide array of side dishes, from creamy mashed potatoes that soak up the rich sauce to a crisp green salad that offers a refreshing contrast. It’s perfect for a Sunday dinner, a cozy weeknight, or even prepared ahead for meal prep. The flavors are universally appealing, ensuring everyone at the table will find something to love.
Essential Ingredients for Your Braised Chicken
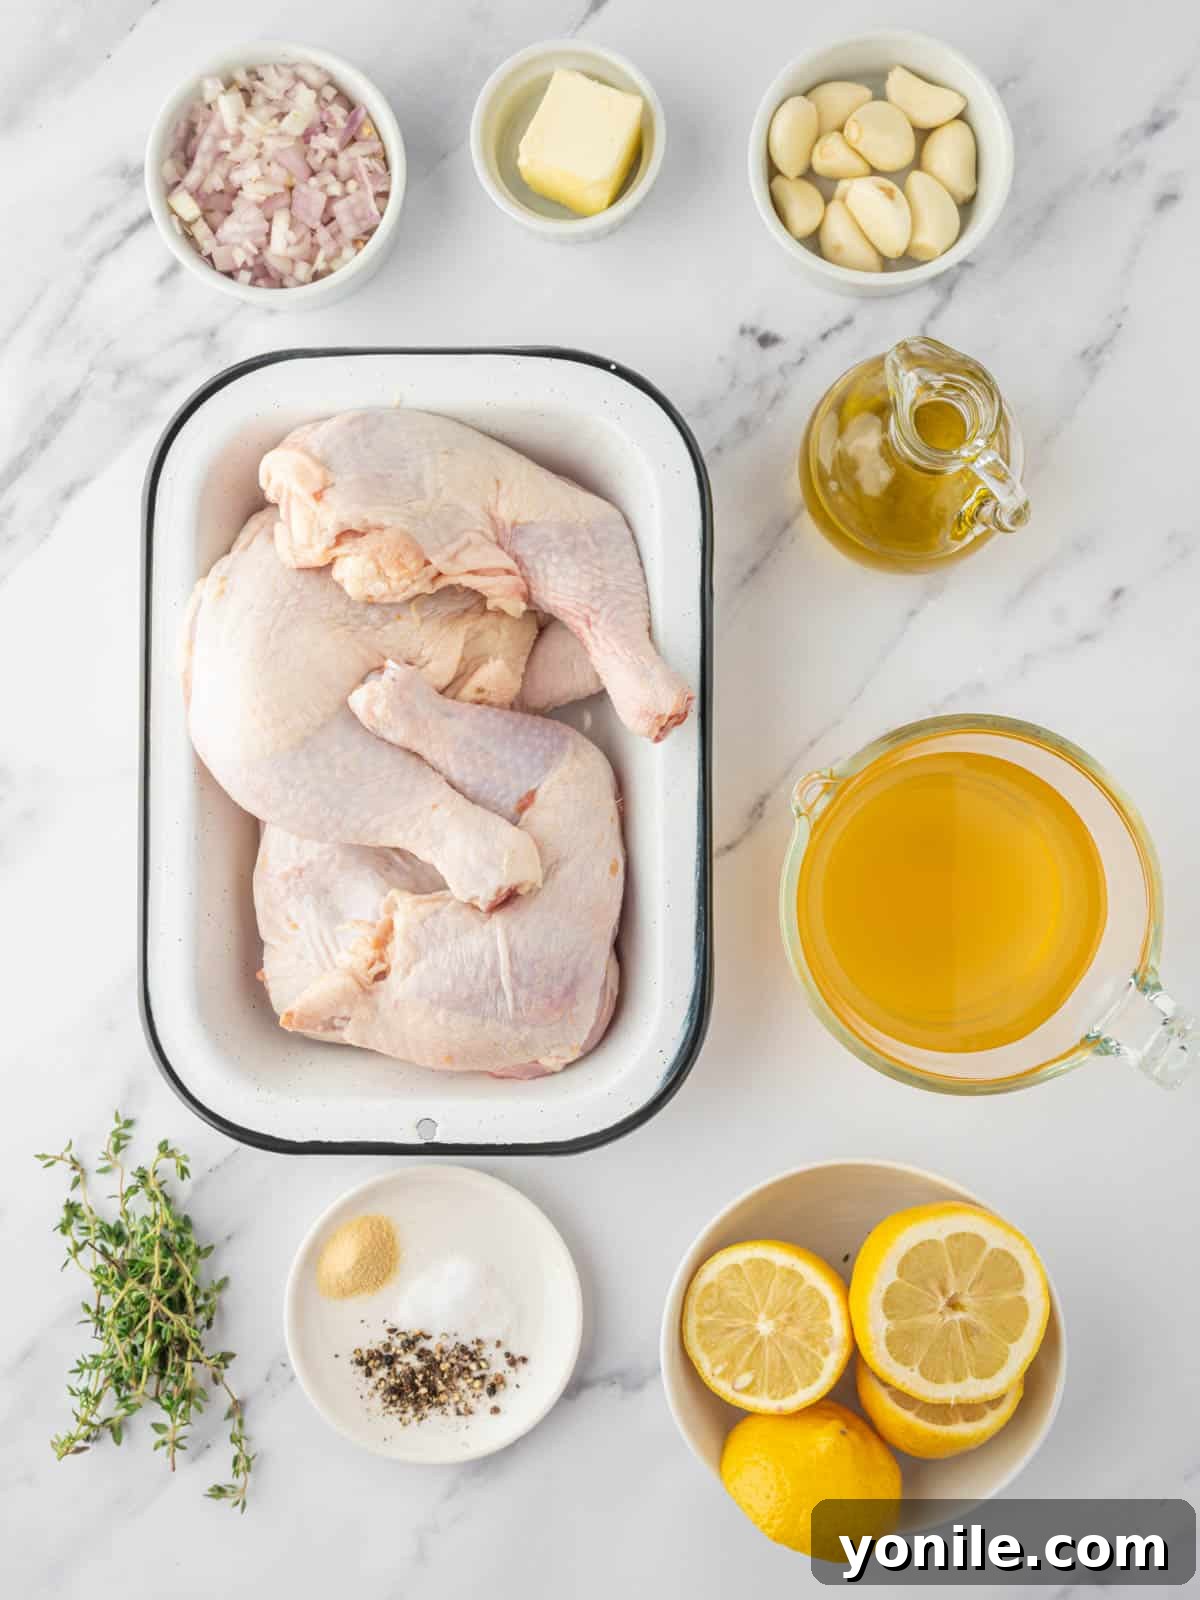
Crafting this flavorful dish begins with selecting quality ingredients. Each component plays a vital role in building the robust and aromatic profile of the braised chicken. Here’s a closer look at what you’ll need:
- Chicken: For the most flavorful and tender results, opt for bone-in, skin-on chicken leg quarters. These cuts impart more flavor to the braising liquid and stay incredibly moist. While you can substitute other chicken cuts like thighs or drumsticks, be prepared to adjust cooking times accordingly to ensure they cook through without drying out.
- Seasonings: A simple yet effective blend forms the flavor base. You’ll combine garlic powder for a foundational savory note, kosher salt to enhance all flavors, and freshly ground black pepper for a touch of mild spice. These seasonings perfectly complement the chicken and the braising liquid.
- Olive Oil: A good quality olive oil is essential for searing the chicken. Searing creates a beautiful golden-brown crust and locks in moisture, contributing significantly to the dish’s overall depth of flavor through the Maillard reaction. If olive oil is not preferred, any light, neutral-flavored oil will work.
- Butter: Unsalted butter is preferred as it allows you complete control over the dish’s saltiness. It adds a rich, creamy dimension to the braising liquid and helps to brown the aromatics beautifully.
- Shallot: Finely chopped shallots introduce a delicate, mild onion flavor that enhances the overall taste profile without overpowering the star ingredients – lemon and garlic. They soften and sweeten as they cook, providing a subtle aromatic foundation.
- Chicken Broth: Low-sodium chicken broth serves as the primary braising liquid. Using low-sodium ensures you can season the dish precisely to your liking without it becoming overly salty. As it simmers, the broth absorbs all the wonderful flavors from the chicken, garlic, lemon, and herbs, creating a delicious pan sauce.
- Lemon: Fresh lemon slices are key. Rather than just lemon juice, using slices allows the lemon’s oils and subtle bitterness from the peel to infuse the dish, yielding a more complex and bright citrus flavor that cuts through the richness of the chicken.
- Garlic: Don’t be shy with the garlic! Using 10-15 whole garlic cloves might seem like a lot, but the slow braising process mellows their pungent bite, transforming them into sweet, tender, and incredibly aromatic morsels that are a delight to eat.
- Fresh Thyme: A few sprigs of fresh thyme add an earthy, herbaceous aroma and flavor that perfectly complements the lemon and garlic. Fresh herbs make a significant difference in the final taste compared to dried alternatives.
How to Master Braised Lemon-Garlic Chicken Legs
Follow these detailed steps to create a show-stopping braised chicken dish that is rich in flavor and wonderfully tender.
Step 1: Prepare Your Equipment and Preheat. Begin by preheating your oven to 400 degrees F (200 degrees C). Ensure you have an oven-proof skillet or a Dutch oven large enough to comfortably hold your chicken leg quarters in a single layer. This will be your primary cooking vessel from stovetop to oven.
Step 2: Season the Chicken to Perfection. Take your chicken leg quarters and thoroughly clean them. Pat them meticulously dry with paper towels. This crucial step ensures a crispy skin when seared. Evenly season all sides of the chicken with garlic powder, kosher salt, and freshly ground black pepper. Don’t be afraid to rub the seasonings into the skin and meat for maximum flavor.
Step 3: Sear for Deep Flavor. Place your oven-proof skillet over a medium-high flame and add the olive oil. Allow the oil to heat until it shimmers but isn’t smoking. Carefully place the seasoned chicken leg quarters, skin-side down first, into the hot oil. Sear for 5-6 minutes per side, until the skin is beautifully golden brown and crispy. This browning step is essential for developing deep, rich flavors. Once seared, transfer the chicken to a clean plate and set aside.

Step 4: Build the Aromatic Base. Reduce the heat to medium. To the same skillet (don’t clean it, those browned bits are flavor!), add the unsalted butter. Once the butter is melted and slightly foaming, add the chopped shallots. Sauté the shallots for 2-3 minutes, stirring occasionally, until they soften and become translucent and fragrant. This forms the aromatic foundation for your braising liquid.
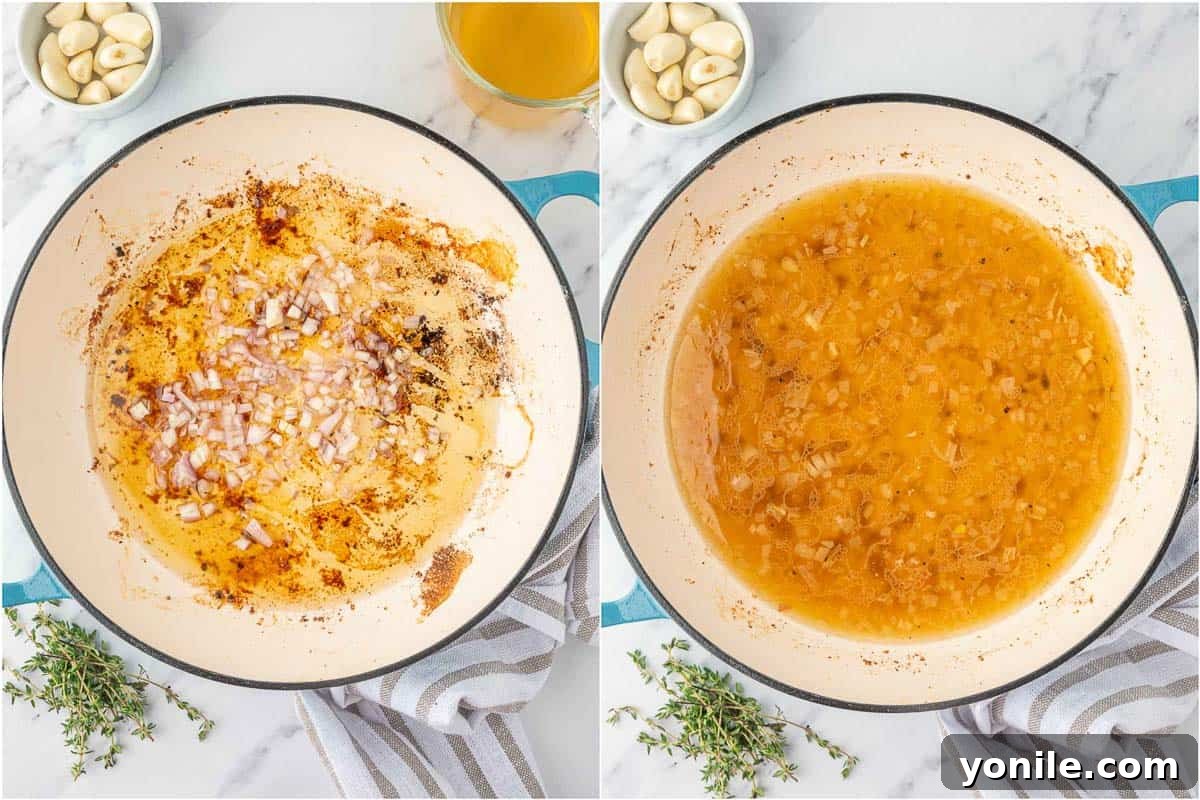
Step 5: Begin the Braising Process. Pour in the low-sodium chicken broth, scraping up any delicious browned bits from the bottom of the pan with a wooden spoon – this is called deglazing and adds immense flavor. Bring the broth to a gentle simmer and taste it, adjusting seasonings if needed. Carefully return the seared chicken quarters to the skillet, arranging them so they are partially submerged in the liquid. Scatter the whole garlic cloves, fresh lemon slices, and sprigs of fresh thyme over and around the chicken. Transfer the skillet to your preheated oven and bake for 20 – 30 minutes, or until the chicken is thoroughly cooked through and reaches an internal temperature of 165°F (75°C) at its thickest part.

Step 6: Rest and Serve. Once the chicken is cooked, carefully remove the skillet from the oven. For optimal juiciness, allow the chicken to rest in the skillet, covered loosely with foil, for 5-10 minutes before serving. This allows the juices to redistribute throughout the meat. Then, serve your tender lemon-garlic braised chicken over a bed of creamy mashed potatoes or alongside vibrant greens to soak up all that incredible sauce. Enjoy!

Expert Tips for Perfectly Braised Chicken
Achieving restaurant-quality braised chicken at home is simple with these invaluable tips:
- Choose the Right Cut: Always opt for bone-in, skin-on chicken pieces such as leg quarters, thighs, or drumsticks. The bones add flavor to the braising liquid, and the skin helps keep the meat moist and develops a beautiful crust when seared.
- Don’t Skip the Sear: Before braising, searing the chicken pieces in a hot skillet with a little oil is paramount. This step initiates the Maillard reaction, creating a deep, golden-brown crust and building layers of complex flavor that are essential to the dish’s richness.
- Pat Chicken Dry: Before seasoning and searing, ensure your chicken is thoroughly patted dry with paper towels. Excess moisture on the skin will steam rather than sear, preventing the desired crispy, golden-brown crust.
- Maintain a Gentle Simmer: Throughout the braising process, it’s crucial to maintain a gentle simmer, not a vigorous boil. A soft, steady heat allows the chicken to cook evenly and tenderly without becoming tough or stringy.
- Use Fresh Lemon Slices: While lemon juice offers acidity, fresh lemon slices contribute a more nuanced and complex citrus flavor. The essential oils from the peel, released during braising, add a bright, aromatic dimension that lemon juice alone cannot replicate.
- Cook Until Fork-Tender: Depending on the size and type of chicken pieces, braising can take around 40 minutes to 1 hour in the oven. The chicken is done when it is incredibly tender and easily pulls away from the bone. For precision, aim for an internal temperature of 165°F (75°C) using a meat thermometer.
- Rest Your Meat: After removing the chicken from the oven, allow it to rest in the skillet, loosely covered with foil, for 5-10 minutes. This allows the juices to redistribute throughout the meat, ensuring every bite is as moist and flavorful as possible.
- Don’t Overcrowd the Pan: When searing, cook the chicken in batches if necessary to avoid overcrowding the skillet. Overcrowding lowers the pan’s temperature, leading to steaming instead of proper searing.

Frequently Asked Questions (FAQ)
Braising is a classic cooking method that involves two main stages. First, meat or vegetables are seared at a high temperature to develop a rich, flavorful crust (the Maillard reaction). Second, they are then slowly simmered in a covered pot with a small amount of liquid, such as broth or wine. This gentle, moist-heat cooking method works wonders to tenderize tougher cuts of meat, infuse them with deep flavors, and create a delicious pan sauce.
Absolutely! Braised chicken legs are an excellent make-ahead meal. In fact, many braised dishes taste even better the next day as the flavors have more time to meld and deepen. You can prepare the entire dish, let it cool, and store it for later, making it incredibly convenient for meal prep or entertaining.
Yes, you can certainly use boneless, skinless chicken thighs. However, be aware that bone-in, skin-on chicken quarters generally provide more flavor and moisture to the dish due to the presence of bones and fat. If using boneless, skinless thighs, reduce the cooking time slightly to prevent them from drying out, as they cook faster.
While not strictly mandatory, browning the chicken before braising is highly recommended. This initial sear creates a beautiful, caramelized crust and adds significant depth of flavor to the meat and the overall dish. It contributes to a richer, more complex taste and an appealing visual presentation that elevates the final meal.
An oven-safe skillet, a Dutch oven, or a heavy-bottomed pot with a tight-fitting lid is ideal for braising. These types of cookware retain and distribute heat evenly, which is crucial for the slow, gentle cooking process, whether on the stovetop or in the oven.
Storing and Reheating Your Braised Chicken
Proper storage and reheating ensure your delicious braised chicken remains just as delightful as when it was first made.
Storing: Any leftover lemon-garlic braised chicken should be transferred to an airtight container and refrigerated. It will keep beautifully in the fridge for up to 3-4 days, making it perfect for enjoyable meal prep throughout the week.
Reheating: For the quickest reheat, gently warm the chicken and its sauce in a skillet on your stovetop over low heat until it is thoroughly warmed through. Alternatively, you can reheat it in a preheated 325°F (160°C) oven. Place the chicken and sauce in an oven-safe dish, cover it tightly with aluminum foil to retain moisture, and bake until warmed through, typically 15-20 minutes, depending on the amount.
Freezing: This braised chicken freezes exceptionally well. Once completely cooled, transfer the chicken and its accompanying sauce to an airtight, freezer-safe container or a heavy-duty freezer bag. It can be frozen for up to 2 months. To enjoy, defrost overnight in the refrigerator, then reheat using the stovetop or oven methods described above until piping hot.
Perfect Pairings: What to Serve with Braised Chicken Quarters?
The rich, savory, and zesty flavors of this braised chicken make it an incredibly versatile main course that complements a wide array of side dishes. Here are some fantastic suggestions to complete your meal:
- Creamy Mashed Potatoes: The ultimate comfort food pairing, mashed potatoes are perfect for soaking up every last drop of the luscious lemon-garlic sauce. Try my Roasted Garlic Mashed Potatoes for an extra layer of flavor.
- Fluffy Rice or Quinoa: For a lighter option, a bed of white rice, brown rice, or quinoa provides an excellent absorbent base for the flavorful pan juices, creating a satisfying and wholesome meal.
- Roasted Vegetables: Complement the rich chicken with vibrant, caramelized vegetables. Options like my Parmesan Roasted Glazed Carrots, roasted asparagus, or broccoli florets add color, texture, and nutrients.
- Sweet Potato Sides: The natural sweetness of sweet potatoes beautifully balances the savory and tangy notes of the chicken. Consider Easy Mashed Sweet Potatoes or roasted sweet potato wedges.
- Crisp Green Salad: A simple, fresh green salad with a light vinaigrette provides a refreshing contrast to the richness of the braised chicken, cleansing the palate with every bite. Explore options from my Salads category.
- Crusty Bread: Don’t forget a loaf of crusty bread to sop up all the delectable sauce – it’s too good to leave behind!
Alternative Cooking Methods for Braised Chicken Legs
While oven braising delivers excellent results, this versatile recipe can also be adapted for other cooking methods, offering flexibility based on your kitchen equipment and preferences.
Stovetop Braising: If you don’t have an oven-safe skillet or prefer not to use your oven, you can braise the chicken entirely on the stovetop. After searing the chicken and building the aromatic base as described in steps 1-4, add the chicken broth and return the chicken to the pot. Arrange the garlic, lemon, and thyme. Bring the liquid to a gentle simmer, then reduce the heat to very low, cover the pot tightly, and continue to simmer for 40-60 minutes. Check periodically to ensure the liquid isn’t evaporating too quickly and the chicken is cooking gently. The chicken is done when it’s tender and an internal thermometer reads 165°F (75°C).
Slow Cooker Method (for an even more hands-off approach): The slow cooker is perfect for achieving incredibly tender braised chicken with minimal effort. This method is ideal for busy days when you want to set it and forget it.
- Prepare the Chicken: Season the chicken legs generously with salt, pepper, and garlic powder, just as you would for oven braising.
- Brown the Chicken (Optional but Recommended): In a separate skillet over medium-high heat, warm the olive oil. Sear the chicken legs until each side is golden brown. This crucial step develops a deeper flavor and more appealing color. If you’re short on time, you can skip this, but the flavor won’t be as complex.
- Prepare the Slow Cooker Base: In the bottom of your slow cooker, place the chopped shallots and whole garlic cloves. You can also add other root vegetables like carrots or potatoes for a complete meal, if desired.
- Add Chicken to Slow Cooker: Carefully arrange the browned chicken legs on top of the vegetables in the slow cooker.
- Add Liquids and Herbs: Pour in the chicken broth. The liquid should come up about halfway to the chicken, not completely covering it. Scatter the fresh lemon slices and sprigs of fresh thyme over the chicken and broth.
- Cook: Cover the slow cooker with its lid. Cook on low for 6-8 hours or on high for 3-4 hours. The chicken is perfectly done when it is exceptionally tender and cooked through to an internal temperature of 165°F (75°C). Serve directly from the slow cooker with your favorite sides.
Explore More Delicious Chicken Recipes
If you’re looking for more ways to enjoy versatile chicken, explore these other fantastic recipes:
- Fried Keto Chicken
- Chicken Manchurian
- Chinese Salt and Pepper Chicken
- Chicken and Shrimp Alfredo
- Million Dollar Chicken Bake
- Mediterranean Chicken and Vegetable Bake
This Lemon-Garlic Braised Chicken Legs recipe truly offers a comforting, flavorful, and incredibly satisfying meal that is perfect for any occasion. Its adaptability and simple preparation steps make it a kitchen favorite that you’ll return to again and again. Serve it over rice, creamy mashed potatoes, or with your favorite side dishes to complete a wholesome and delicious meal.
We hope you love this recipe as much as we do! If you try this recipe and enjoy it, please consider leaving a star rating and a comment below to share your experience. Don’t forget to use my hashtag to share your delicious recreations with me on Instagram – I’d love to see your culinary masterpieces! Also, make sure to follow Cookin’ With Mima on FACEBOOK |INSTAGRAM |PINTEREST for all of my latest social posts and exciting new recipes.

Braised Chicken Legs
Ingredients
- 4 whole chicken leg quarters, with skin
- ½ teaspoon garlic powder
- ½ teaspoon salt
- ½ teaspoon ground black pepper
- 2 tablespoons olive oil
- 1 tablespoon unsalted butter
- 1 medium shallot, chopped
- 1 cup low-sodium chicken broth
- 1 medium lemon, sliced
- 10-15 whole garlic cloves
- 1 teaspoon fresh thyme
Instructions
-
Preheat the oven to 400 degrees F.
-
Clean and pat dry the chicken leg quarters with a kitchen towel and set them aside.
-
Season the chicken with garlic powder, salt, and pepper.
-
Heat an oven-proof skillet on a medium flame, add olive oil, and once the oil is heated sear the chicken leg quarters on both sides for 5-6 minutes. Transfer the chicken to a plate and set it aside.
-
To the same skillet add butter, once the butter is melted add the chopped shallots and cook for 2-3 minutes.
-
Stir in the chicken broth and check for seasonings and allow the chicken broth to simmer for a couple of minutes.
-
Transfer the chicken back to the skillet and arrange the garlic cloves, lemon slices, fresh thyme over and bake the chicken for 20 – 30 minutes until the chicken is cooked through.
-
Once done, serve the chicken over mashed potatoes and greens to enjoy.
Notes
- Opt for bone-in, skin-on chicken pieces such as leg quarters, thighs or drumsticks.
- Before braising, sear the chicken pieces in a hot skillet with a little oil. This step adds depth of flavor and enhances the overall taste of the dish.
- Simmer gently; do not let it boil vigorously to maintain tenderness.
- Use fresh lemon slices rather than adding lemon juice. The whole lemon imparts flavor.