

Indulge in the simple luxury of homemade Easy Chocolate Covered Strawberries! Why spend a fortune at gourmet shops when you can craft these exquisite treats in your own kitchen for a mere fraction of the cost? What might appear to be a challenging, fancy confection is, in reality, incredibly straightforward to prepare. All it takes is a handful of fresh, ripe strawberries, some high-quality melting chocolate, and your favorite delightful toppings to create a stunning dessert that rivals any professional confectionery.

Making chocolate-dipped strawberries is a culinary joy, not a complicated science experiment. The core concept is simple: strawberries immersed in melted chocolate. However, achieving that perfect, glossy, crack-free coating every time lies in a crucial detail – selecting the right type of chocolate. Not all chocolates are created equal when it comes to melting consistency and setting perfectly. This comprehensive guide will ensure you master the art of making flawless, delicious chocolate-covered strawberries that look and taste incredible, every single time.
If you’re eager to explore more delightful sweet treats, don’t miss out on my Oatmeal Cookie Ice Cream Sandwich and my refreshingly sweet Strawberry Crisp!
Why You’ll Adore This Easy Chocolate Covered Strawberry Recipe
These elegant and indulgent treats are more than just a dessert; they’re an experience waiting to be created. Here’s why this chocolate-covered strawberry recipe will become a staple in your culinary repertoire:
- Perfect for Any Special Occasion! Whether it’s the romantic allure of Valentine’s Day, a festive holiday gathering, an anniversary, or simply a spontaneous gesture of affection, these delightful chocolate strawberries look effortlessly gorgeous and feel wonderfully decadent. Their vibrant color and rich coating make them a stunning centerpiece or a thoughtful, personalized gift.
- Remarkably Easy to Prepare! Forget complicated techniques or extensive ingredient lists. This recipe is designed for simplicity, requiring only a handful of ingredients and straightforward steps. It’s an ideal project for beginners and a quick win for seasoned home cooks. You’ll be amazed at how easily you can transform simple ingredients into a luxurious dessert.
- Achieve a Velvety Smooth Chocolate Coating. The secret to truly exceptional chocolate-dipped strawberries lies in the texture of the chocolate. This recipe guides you to a perfectly melted, semi-sweet chocolate base that coats each strawberry beautifully, complemented by elegant drizzles of creamy white chocolate. The contrast in flavors and textures is simply divine, creating a truly satisfying bite every time.
- Customizable to Your Heart’s Content. Beyond the classic chocolate coating, these strawberries offer a blank canvas for creativity. With an endless array of topping options, you can personalize each berry to suit individual tastes, dietary preferences, or specific holiday themes. This versatility makes them a perennial favorite for all occasions.
- A Cost-Effective Gourmet Treat. Store-bought chocolate strawberries can be surprisingly expensive, especially for high-quality versions. Making them at home drastically cuts down on costs without compromising on taste or appearance. You get premium quality and flavor for a fraction of the price, allowing you to enjoy more of these delectable treats.
Essential Ingredients You’ll Need for Perfect Chocolate Strawberries
Crafting the perfect chocolate-covered strawberry starts with selecting quality ingredients. While the list is short, each component plays a vital role in the final taste and presentation of your treats.
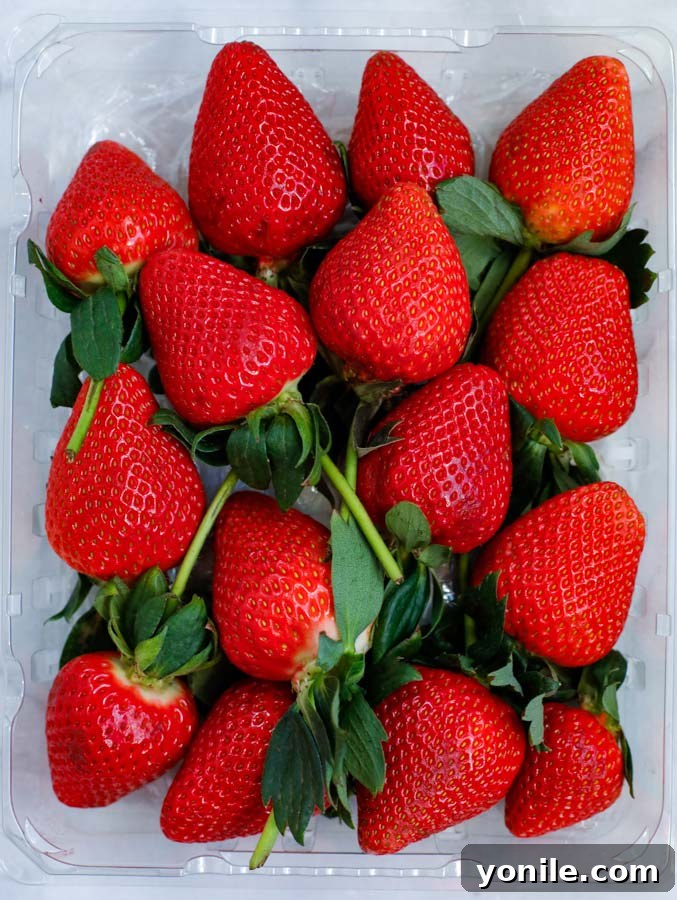
- Fresh Strawberries: The star of the show! Look for bright red, firm, and plump strawberries. Choose berries that are fully ripe with minimal white spots near the stem, as this indicates a sweeter, juicier fruit. Size also matters; larger strawberries make for a more substantial and visually appealing dessert.
- High-Quality Semi-Sweet Melting Chocolate: This is paramount for a smooth, glossy coating. We recommend using chocolate melting wafers or a premium baking bar specifically designed for melting. Semi-sweet chocolate provides a balanced flavor that beautifully complements the sweetness and slight tartness of the strawberries without being overly sugary. Brands like Ghirardelli or Callebaut are excellent choices.
- White Chocolate (Melting Wafers Recommended): For those elegant drizzles and decorative touches. White chocolate melting wafers are highly recommended over white chocolate chips, as chips often contain stabilizers that prevent them from melting into a perfectly smooth, pourable consistency. Using wafers ensures a flawless drizzle every time.
- Your Favorite Sprinkles or Toppings: While optional, toppings add a delightful crunch, extra flavor, and visual appeal. Sprinkles are a classic choice, but feel free to get creative with other options like crushed nuts, shredded coconut, mini chocolate chips, or even edible glitter.
Crafting Your Own Chocolate Covered Strawberries: A Step-by-Step Guide
Creating these beautiful chocolate-dipped delights is simpler than you think. Follow these easy steps to achieve professional-looking results right at home.
- Prepare Your Strawberries: Begin by gently rinsing your fresh strawberries under cool water. The most crucial step here is to ensure they are absolutely and completely dry before dipping. Any moisture will cause the chocolate to seize or not adhere properly. Pat them thoroughly with paper towels, or better yet, let them air dry on a clean kitchen towel for at least 30 minutes. If the stems are excessively long, you can trim them slightly to make dipping easier, but retaining a small stem provides a convenient handle.
- Melt Your Chocolate: You have a couple of reliable methods for melting chocolate.
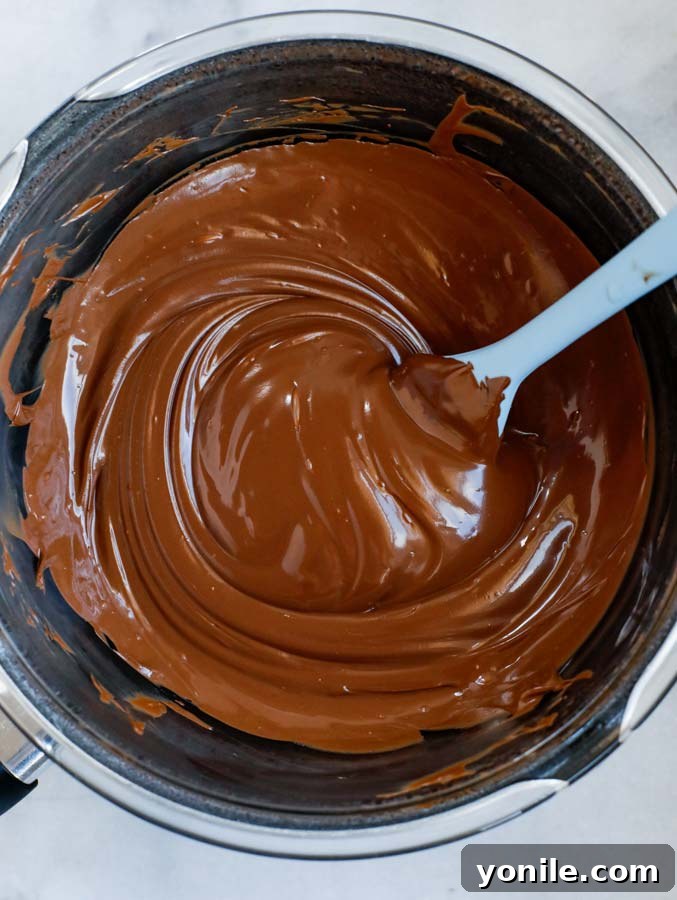
- Double Boiler Method (Recommended for best results): Set up a double boiler by placing a heat-proof bowl (like Pyrex or stainless steel) over a pot of simmering water, ensuring the bottom of the bowl does not touch the water. Add your semi-sweet melting chocolate to one bowl and your white chocolate to another. Stir gently and continuously until the chocolates are smooth and fully melted. The indirect heat prevents burning and ensures a silky consistency.
- Microwave Method: If using a microwave, place the semi-sweet chocolate in a microwave-safe bowl and heat in 30-second intervals. Stir thoroughly after each interval, even if the chocolate doesn’t appear fully melted, as residual heat will continue the melting process. Repeat until the chocolate is smooth and lump-free. Do the same for the white chocolate, but be extra cautious as white chocolate can scorch easily. For detailed guidance, refer to a comprehensive How to Melt Chocolate tutorial.
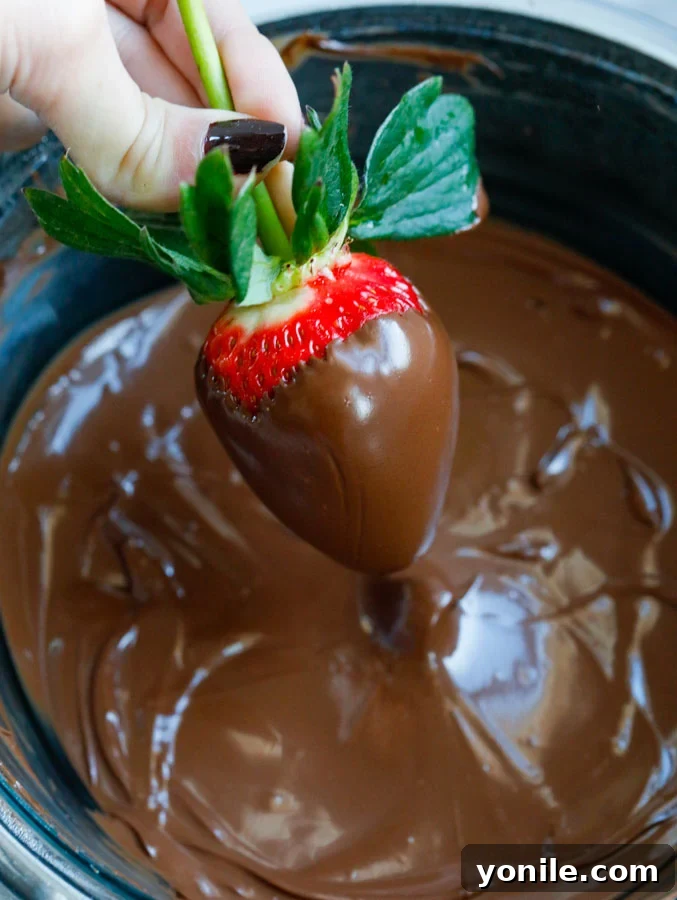
- Dip the Strawberries: Hold each strawberry by its stem (or insert a toothpick into the top if it’s stemless). Dip the strawberry completely into the melted semi-sweet chocolate, twirling it gently to ensure full coverage. Lift the strawberry and allow any excess chocolate to drip back into the bowl. A gentle shake can help remove drips. This step is crucial for preventing a pooled “foot” of chocolate at the base.
- Set on Parchment Paper: Immediately place the chocolate-dipped strawberries onto a baking sheet lined with parchment paper or wax paper. This prevents them from sticking and makes for easy removal once set.
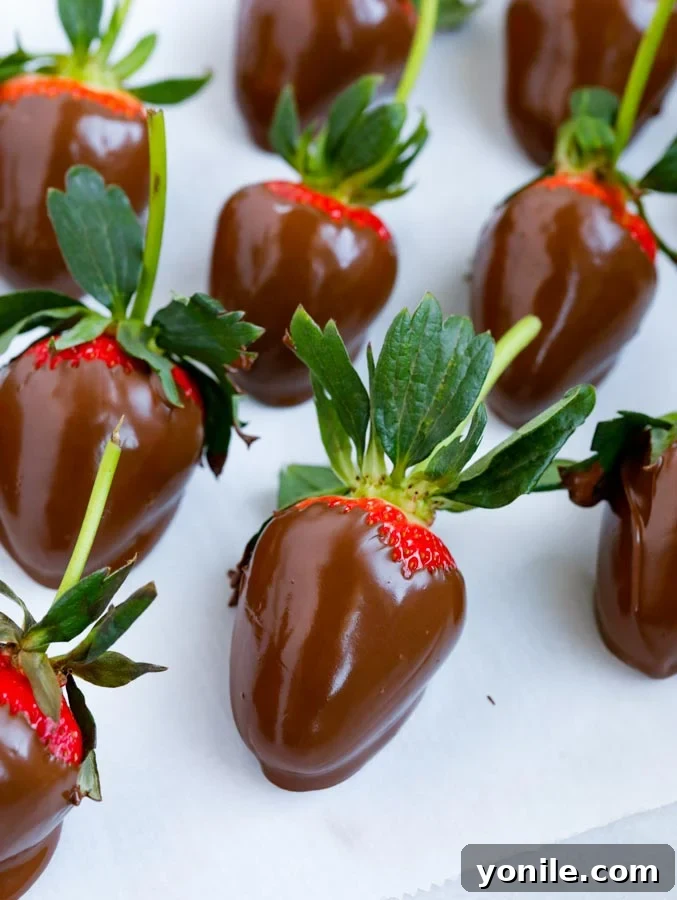

- Drizzle with White Chocolate (Optional): For an added touch of elegance, transfer the melted white chocolate into a piping bag with a very small tip, or even a ziplock bag with a tiny corner snipped off. Drizzle delicate lines back and forth over the chocolate-covered strawberries while the dark chocolate is still wet. This creates a beautiful contrast and helps the white chocolate adhere as it cools.
- Add Toppings: Immediately after drizzling (or after dipping if not drizzling), sprinkle your chosen toppings onto the strawberries. You can gently roll the dipped portion in a shallow dish of sprinkles, crushed nuts, or shredded coconut. The melted chocolate acts as a natural adhesive.
- Allow to Set: Once decorated, place the baking sheet of strawberries into the refrigerator to cool and set for at least 30 minutes to 1 hour, or until the chocolate is firm to the touch. For best results, allow them to cool for at least 2 hours to ensure the chocolate is fully hardened.

Expert Tips for Flawless Chocolate Covered Strawberries
Achieving perfectly coated, glossy chocolate-covered strawberries is all about attention to a few key details. Keep these expert tips in mind for consistently stunning results:
- Bone-Dry Strawberries are Non-Negotiable: This cannot be stressed enough. Any trace of moisture on your strawberries will cause the chocolate to seize, create lumps, or simply slide off. After washing, pat them thoroughly dry with paper towels and then let them air dry completely for at least 30 minutes before dipping.
- Mind the Stems: If your strawberries have very long stems, you can gently clip them shorter. A shorter stem provides a more stable handle for dipping and often looks neater. If your strawberries are stemless, a toothpick inserted into the top works perfectly as a temporary handle.
- Creative Drizzles and Colors: While classic white chocolate drizzles are elegant, don’t be afraid to experiment! Use food coloring (oil-based gel colors work best with chocolate) to tint white chocolate different shades for themed events. Create abstract patterns, zigzags, or even polka dots.
- Microwave with Caution: If opting for the microwave to melt your chocolate, always heat in short bursts (30-second intervals) and stir diligently between each. Chocolate can burn quickly in the microwave, and once burnt, it cannot be salvaged. Stirring helps distribute heat evenly and prevents scorching.
- The Semi-Sweet Advantage: When choosing dark or milk chocolate for dipping, opt for semi-sweet over milk chocolate. Milk chocolate tends to be much sweeter and can overwhelm the natural flavor of the strawberry. Semi-sweet provides a delightful balance, offering richness without excessive sweetness.
- White Chocolate Wafers Over Chips: For white chocolate drizzles or coatings, always choose white chocolate melting wafers or a high-quality white baking bar. White chocolate chips often contain stabilizers that make them resistant to smooth melting, resulting in a grainy or thick consistency that’s difficult to work with.
- Preventing the “Chocolate Foot”: To avoid a messy pool of chocolate at the base of your strawberries, allow excess chocolate to drip off thoroughly before placing them on parchment paper. Gently shake or tap the strawberry against the edge of the bowl until the chocolate flow slows to a trickle.
- Always Use Parchment or Wax Paper: Laying your dipped strawberries on parchment paper or wax paper is essential. It ensures they don’t stick to the baking sheet as the chocolate sets, making for easy and clean removal.
- Topping Options are Limitless: Get creative with your toppings! You can fully dip the chocolate-covered strawberry into a bowl of finely crushed nuts (like toasted hazelnuts, almonds, or pistachios), shredded coconut, or mini chocolate chips. Alternatively, simply sprinkle your chosen toppings over the wet chocolate for a more delicate touch.
- Temperature Control is Key: Ensure your melted chocolate isn’t too hot (which can cook the strawberries) or too cool (which makes it thick and clumpy). The ideal temperature is typically around 90-92°F (32-33°C) for dark/semi-sweet and slightly cooler for white chocolate.
Frequently Asked Questions About Chocolate Covered Strawberries
Here are answers to some common questions to help you perfect your homemade chocolate-covered strawberries.
What Kind of Chocolate is Best for Dipping Strawberries?
For the ultimate flavor and a perfectly smooth, glossy finish, these strawberries demand high-quality chocolate. While many cheaper “melting chocolates” exist, some can taste artificial or overly sugary. The key is to choose a good quality “melting chocolate” or high-grade baking chocolate specifically designed for tempering or melting easily.
Brands like Ghirardelli Chocolate Melting Wafers are highly recommended for their superior flavor and consistent melting properties. There are many other excellent brands of melting chocolate available, so personal preference plays a role. I personally love the balanced flavor of a semi-sweet variety. Some people prefer melting chocolate chips, which can work, but they often have a thicker consistency. If using chocolate chips, a trick is to add a small amount (about a teaspoon per cup) of neutral oil, like refined coconut oil (which is solid at room temp), to the melted chocolate. This will thin it out slightly, making it easier to dip and ensuring a thinner, more elegant coating. Regardless of your choice, a double boiler method for melting is generally preferred over a microwave, as it provides more controlled, gentle heat, reducing the risk of burning and ensuring a smoother melt. You simply place a heat-proof bowl over a pot of simmering water, allowing the steam to gently melt the chocolate.
What Kind of Strawberries Should I Choose?
The foundation of a great chocolate-covered strawberry is, of course, the strawberry itself! Prioritize fresh, ripe, and vibrant berries. Look for strawberries that are deep red all over, with minimal white flesh near the leafy green tip – this usually indicates a sweeter, fully ripened interior. Choose a pack that contains large, firm strawberries, as they are easier to dip and offer a more satisfying bite. Aim for berries that are relatively even in size for a uniform appearance.
You might notice some strawberries sold with their stems intact, while others are stemless. Strawberries with stems can sometimes run a bit higher in price. However, rest assured, both types work perfectly fine for this recipe! The stem simply provides a convenient handle for dipping. If your berries are stemless, you can easily insert a toothpick into the top to serve as a handle during the dipping process. Don’t let the presence or absence of a stem dictate your purchase; focus on freshness and ripeness.
Creative Topping Ideas for Your Chocolate Covered Strawberries
The beauty of homemade chocolate-covered strawberries is how easily they can be customized with various toppings. Here are some fantastic ideas to elevate your treats:
- Nuts: Add a delightful crunch and nutty flavor. My personal favorites include finely chopped toasted hazelnuts, slivered almonds, and crushed peanuts. However, feel free to use any of your preferred nuts. Just ensure they are finely crushed or chopped for better adherence and texture.
- Sprinkles: A timeless classic! Virtually any kind of sprinkle works wonderfully. I’m particularly fond of the smaller, fine sprinkles as they add color and texture without contributing excessive sweetness to the strawberries. You can choose colors that match specific holidays, celebrations, or simply your aesthetic preference.
- Crushed Candies: For a burst of flavor and a unique texture. Imagine finely crushed peppermint candies during Christmas for a festive twist on peppermint chocolate-covered strawberries. Other options include crushed toffee bits, mini M&M’s, or even sanding sugars of various colors for a sparkling finish. Confetti sprinkles also add a playful touch.
- Shredded Coconut: Toasted or untoasted, shredded coconut adds a tropical flavor and interesting texture.
- Mini Chocolate Chips: A simple yet effective topping for an extra layer of chocolatey goodness.
- Crushed Cookies: Think finely crushed Oreos, Graham crackers, or shortbread for a delicious crumb coating.
- Sea Salt Flakes: A sprinkle of flaky sea salt on dark chocolate-covered strawberries enhances the chocolate’s richness and provides a sophisticated sweet and salty contrast.
- Edible Glitter or Dust: For a truly glamorous and sparkly finish, especially for special events.
Alternatively, you can enjoy these exquisite berries plain, without any added sugars or nuts, allowing the pure, harmonious flavors of fresh strawberry and rich chocolate to shine through. The possibilities are truly endless!
How to Store Chocolate Dipped Strawberries
Proper storage is essential to maintain the freshness and quality of your homemade chocolate-covered strawberries. Once the chocolate has fully set, they should be stored in an airtight container in the refrigerator. To help absorb any excess moisture and prevent sogginess, line the bottom of the container with a paper towel. This helps to keep the strawberries fresh and the chocolate crisp for longer.
These delightful treats will typically last for 2-3 days when stored correctly in the fridge. However, it’s important to note that over time, the strawberries will naturally begin to release moisture, which can eventually soften the chocolate coating and cause them to lose their initial crispness. For the absolute best texture and flavor, it’s always ideal to consume them within 24-48 hours of making them.
If you plan on serving them on the same day they are made, and your ambient temperature is not excessively hot, you can leave them uncovered at room temperature for a couple of hours after they’ve fully set in the refrigerator. This allows the chocolate to come to a more palatable temperature, enhancing its flavor and texture just before serving. However, if your environment is warm or humid, it’s best to keep them refrigerated until just before serving.
Whether you’re meticulously preparing these Easy Chocolate Covered Strawberries for a romantic Valentine’s Day surprise, an intimate date night at home, or simply as a fun and delicious dessert for your family, you can never go wrong. Their inherent versatility allows them to be customized to suit everyone’s preferences, and their delightful simplicity makes them a joy to create. These charming treats can be savored and enjoyed throughout the entire year, bringing a touch of gourmet elegance to any moment.

Explore More Delicious Dessert Recipes
If you have a sweet tooth, you’ll love these other fantastic dessert recipes:
- Effortless Chocolate Lazy Cake
- Elegant Strawberry French Tart
- Rustic Mixed Berry Galette
- Delicate Strawberry Macarons
- Luxurious Red Velvet Macarons
I genuinely hope you enjoy exploring all the recipes I share with you, especially this delightful and Easy Chocolate Covered Strawberry recipe. I encourage you to try it, savor every bite, rate it, and share the joy with your friends and family!
If you try this recipe and love it, please use my hashtag to share your creations with me on INSTAGRAM for a chance to be featured in my story! Also, be sure to follow Cookin’ With Mima on FACEBOOK | INSTAGRAM | PINTEREST for all of my latest social posts and delicious recipes.

Print Recipe
Easy Chocolate Covered Strawberries
Mariam Ezzeddine
20
10
30
15 servings
Ingredients
- 15 whole Strawberries
- 8 oz. semi-sweet melting chocolate (e.g., Ghirardelli melting wafers)
- 2 oz. white melting chocolate
- 2 tbsps. sprinkles (or other desired toppings)
- Parchment or wax paper
Instructions
-
Rinse, thoroughly clean, and completely dry the strawberries. Ensure no moisture remains.
-
Using a double boiler, gently melt the semi-sweet chocolate in one bowl, and the white chocolate in another. If using a microwave, melt each chocolate in a glass or Pyrex bowl in 30-second intervals, stirring well after each, until smooth.
-
Dip each strawberry completely into the melted chocolate, holding it by the stem or a toothpick. Lift, shake gently for a few seconds to allow excess chocolate to drip off, then place onto a baking sheet lined with parchment paper.
-
For drizzling, fill a disposable piping bag with white chocolate (or a ziplock bag with a tiny corner snipped). Drizzle fine lines over the strawberries while the dark chocolate is still slightly wet.
-
Immediately sprinkle your favorite toppings onto the strawberries or dip them into a shallow dish of toppings.
-
Allow to cool and set in the refrigerator for at least 30 minutes to 1 hour, or until the chocolate is firm. For best results, allow at least 2 hours before serving.
Notes
- The strawberries must be completely dry so that the chocolate sticks to them. If the stems are too long, you can clip them to make them shorter.
- Create the stripes as you like, and you can also create different colors of strips using food coloring and white chocolate.
- If you decide to microwave the chocolate, be sure to microwave them in 30-second intervals until they melt completely, stirring after each.
- Always get semi-sweet chocolate instead of milk chocolate because milk chocolate may end up being too sweet.
- If you are using white chocolate, opt for white chocolate wafer melts rather than chocolate chips, as chips often do not melt smoothly.
- When dipping the strawberries, make sure you let most of the chocolate run down the strawberry well before placing it on parchment or wax paper. This reduces the chance of your strawberries having an overflowing bottom.
- Be sure to use parchment or wax paper to lay them on for easy removal.
- Topping options are endless. You can dip chocolate-covered strawberries into virtually anything, or just sprinkle them on top instead of dipping.
Nutrition Facts (per serving)
| Carbohydrates: 23g
| Protein: 2g
| Fat: 8g
| Saturated Fat: 4g
| Cholesterol: 1mg
| Sodium: 4mg
| Potassium: 317mg
| Fiber: 4g
| Sugar: 16g
| Vitamin A: 25 IU
| Vitamin C: 85mg
| Calcium: 33mg
| Iron: 2mg